Many visitors to this blog are interested in putting together survival or emergency kits. Regular readers will be aware that I don't regard a little tin full of gizmos an ideal start.
If you have such a kit, one of the first things you should add to it is a mylar space blanket. These can be carried on your person at all times and can provide you with warmth and protection from the rain. And they only cost a few bucks!
Recent discussions with friends have made me reflect that many of the items in a suggested list of equipment fall under the heading “nice to have/gadgets”. Your starting point in putting together a kit should be those items you might class as “really in trouble if your don't have”.
With this criteria firmly in mind, I would base any kit around three items. These would be:
-
A blanket.
-
A fire kit.
-
A good knife.
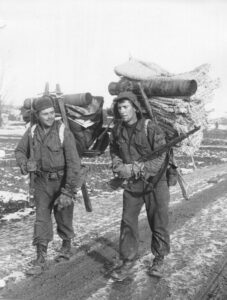
You can use a sleeping bag instead of a blanket, but ideally it should be one that can easily be adapted as clothing.
“Budget” rectangular bags may be more suitable than more expensive “mummies”, so keep an eye out for bargains and promotions at big stores.
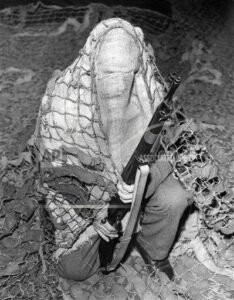
Poncho liners are an alternative to blankets and can often be found for a cheaper price. Both original style or versions with head openings or hoods are suitable.
A couple of blanket pins added to your kit can help in making or blanket or similar into a cloak. (Not sure if you can magnetize blanket pins)
If you have a spare space blanket, throw it into the kit as extra insulation.
A plastic or plastic and foil survival bag is worth having too.
Fire kit is the basic kit described elsewhere. A pair of disposable lighters and some cotton wool.
If you are female you might wish to replace the cotton wool with some tampons. As well as the intended use they can be used for tinder or as wound dressings.
If you want you can put your fire kit in a little Altoids or tobacco tin and seal it up. Throw in some matches and/or some birthday candles if you wish. Fire drills, fire pumps and ferro-rods are very nice but you can get dozens of disposable lighters for the same money. When you are cold and tired a lighter is simpler and quicker.
You may carry a ferro-rod as backup if you have one.
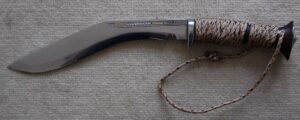
What is a “good knife”? There are a number of suggestions in my book “Survival Weapons”.
In short, a full-tang fixed blade, single-edged and not less than seven inches. My first choice is one of my kukris.
If on a budget look around the gardening section of local stores. A mass-produced billhook or machete is often more capable than more expensive smaller knives.
These three items constitute the foundation of any good emergency kit.
The cost is reasonable so you can probably put several together within a reasonable period of time.
The three items form a relatively compact package that can be placed in a daypack, the bottom of a wardrobe or the trunk of a car.
For a kit for a young child you may wish to replace the knife and fire kit with a flashlight and whistle. These are good additions to an adult's kit, but of a lower tier of priority.
Friends of mine said they would add sewing kits, fishing kits and/or an AM/FM radio.
Some of these are useful, some are nice to have but I do not regard them as essential, even though my sewing kit has seen considerable use over the years!
If expanding the kit the next items that I would recommend are:
The rain poncho can be worn or can be rigged up as a shelter or windbreak. It can be used as a waterproof wrap for your other garments when river crossing and if packed right can be even be a flotation aid. It can be combined with a poncho liner or blanket to form a sort of sleeping bag. You can even rig it to catch rainwater for drinking.
Shop around and you can find rain ponchos at a price you can tolerate.
How much water to put in your kit will depend on your local environment. In some places where water is plentiful you may need no more than a litre bottle in your kit.
Generally I would recommend at least two litres, perhaps four. Two-litre soda bottles are a very good choice for storing water in a kit. They come “free” with the soda. Wash them out. Boil some tap water, let it cool slightly and fill the bottles with it. Loosely cap and let the water in the bottles cool to about hand temperature. Add a couple of drops of bleach to each bottle and seal. If you wish you can seal the cap on with wax and/or tape. The bleach breaks down into salt and water, which is harmless at this concentration. In fact this constitutes a trace amount of electrolytes.
Truly sterile water, which the above process should have produced, will be good for years and will not “go off”. Wrap the bottles inside your blanket to keep them out of the light, just to be extra sure.
FEMA estimate a person needs a (US) gallon of water per day, but half of this is intended for hygiene. If it really is an emergency you may have to forgo your daily shampoo and shave and let the pits smell a little. Priority should be given to washing wounds and cleaning the hands before eating or medical procedures.
Used intelligently a gallon should last you a couple of days at least.
You can buy water bottles of about a gallon capacity for a kit if you want, but I think a pair of 2 litre soda bottles are easier to carry, as well as being cheaper.
See my free knot book for how cordage such as string or paracord can be rigged as a carrier for a bottle.
The roll of toilet paper is a useful but very cheap addition to the kit. In addition to the obvious use, it can be used for cleaning wounds and fire starting.
In one of my favourite movies a character stops a truck by running streamers of toilet paper across the road. The trucker is so surprised he hits the brakes. Appropriately coloured toilet paper can be used for signalling!
Toilet paper is of little use for most purposes if it gets soggy. Invest in a suitably sized ziplock bag that can be sealed against the entry of water.
The above six items form the basis of a fairly capable emergency kit. Even if within a modest budget it should be possible to construct a kit for every member of the family.
Relatively compact, a kit can be stored in the bottom of a wardrobe, form the foundation of a bug-out bag or be tucked away in the trunk of a car. A warm hat/headover, bandana and gloves are useful further additions. If we want to make the list a round seven, then a metal canteen cup or equivalent can be added.
Making a shelter and many other tasks will be easier with some cordage. A reel of tarred nylon bank line is more compact than paracord and does not stretch.
Disaster relief organisations should stockpile such kits.
I suspect certain governments have large surpluses of ponchos and liners that can no longer be issued since they are not in the latest camouflage pattern.
If not, manufacture ponchos and liners in high-viz colours. This is a good option for kits to be sent overseas. Makes them harder to be used for military purposes.
A fire-kit tin with lighters, tampons and matches can be put together for a couple of dollars.
Bags of toilet paper and sealed bottles of sterile water can be mass-produced.
Certain factions will doubtless squwit their britches at the idea of handing out knives, so I suggest these “agency kits” have a ferro-rod and striker of a design which still gives the survivor a useful cutting edge. Perhaps the striker could be the sort of credit card-sized tool that includes a can-opener and other tools.


 (However, it may be that many moral problems are not actually solved this way today, even by the devout. Perhaps some, or even most, everyday “moral” problems are in fact solved by recourse to the individual’s social or cultural environment. In other words, perhaps when a person wants to know the “right thing to do,” they [possibly quite subconsciously] might think along these lines; “now, what does society sanction?” Or, “what would my group expect of me?” They might even think, “what can I get away with?” Or, “how far can I go without being caught?” The last two examples might be a little extreme, but they serve to make a point: that in many situations today we may actually be obtaining our values, our standards, the criteria we use to judge which solutions are morally acceptable, from the social sub-set we inhabit, not from our religion. I suspect that, to the extent that this may be true, it is mostly so because our religions are failing to keep up with the changing times.)

