When you reach for your bug-out bag (BOB), there are two questions that you should be asking yourself.
The first is: “Do I really need to go?” Escaping to safety is a meme that Hollywood has drummed into us. It makes for great movies, but in reality, “stay put” is usually a more prudent survival strategy than “bug-out”.
That said, if the answer was genuinely “yes”, your second question should be: “What is the weather like?”
Clothes Maketh the Survivor
Your chances are going to be much better if you are dressed for the conditions that you are likely to encounter.
With your bug-out bag should be a selection of clothing items that you may possibly need.
Let us work on the assumption that the survivor must fend for themselves for 72 hours.
Sadly, there is no single outfit of clothing that can handle all possible conditions, hence the selection.
Underwear: Unmentionables for the Unthinkable
Let us start at the foundation, the underwear:
Hot Weather Undies
Shorts
If the weather or climate is hot, your underwear can simply be shorts and t-shirt.
Swimming shorts are a good choice. Those made from synthetics dry very fast, simplifying laundry.
I like the ones with a mesh-lining that keeps things in place and under control.
If it is really hot, the shorts also function as outerwear. Wearing them is also handy if you have to ford a stream.
A useful tip for underwear of all sorts is to have each set a different colour. This helps you keep track of which has been worn and which is clean. White tends to show the dirt, however. Neutral and natural shades are probably the best for underwear. Among other benefits, they are less likely to give your location away when hung up to dry.
Not a bug-out consideration, but have one set of white undergarments for when you wear something that the colour of your underwear will show through.
Two pairs of shorts are sufficient for 72 hours. A wear and a spare. A third pair is handy in case things go more than a couple of days.
Tee-Shirts
For the tee-shirts, it is worth acquiring them in coolmax, since it is fast-drying. Again, get two or three, and have them in different neutral or natural colours.
For a 72 hour scenario, laundry is not a high priority. Plain cotton or polycotton tee-shirts can be found at reasonable prices in multiple packs. These are a good source of undershirts for short trips or your bug-out bag.
A pair of t-shirts in string-vest material are useful additions. In hot weather, they stop cloth pasting to your sweating flesh. In cold weather, they add an extra layer of warmth for very little additional load.
String-vests will be most effective worn next to the skin.
A couple of string tee-shirts may prove to be one of your most cost-effective investments towards your comfort. Shop around and you will find them in useful colours such as “army green” (olive/khaki-drab).
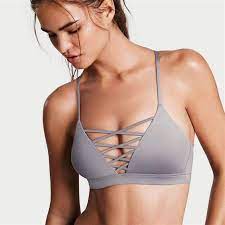
A bra will be needed for them that needs them. I would imagine a sports bra would be a good choice for a bug-out situation. I have no experience wearing bras, so will offer no further advice.
Temperate Climate Underwear
For temperate conditions, we will need more underwear. We need to keep comfortable at night and on the rainy days, so will need something more substantial than what we usually wear at home or working indoors.
Long-Johns
You will need two pairs of long-johns. Polycotton are probably fine for mild weather. You do not want underwear that is too hot in temperate conditions.
Polycotton is relatively easy to launder in long-term scenarios.
Long-Sleeve Undershirts
You will need a pair of undershirts, preferably long-sleeved.
Since your torso sweats more than your legs, have these in coolmax if you can. If you cannot get these, the same place that sold you the long-johns probably has long-sleeved tops in polycotton.
Have each set of your long underwear a different natural or neutral colour.
A string-shirt may be worn under these.
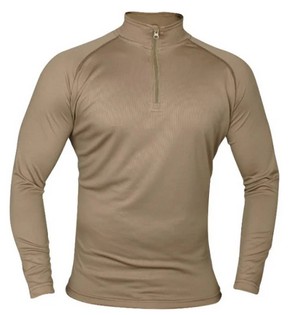
You can wear your temperate underwear with, or instead of, your hot weather items.
If it gets colder than expected, wear both sets of long undies.
Underwear for Cold Conditions
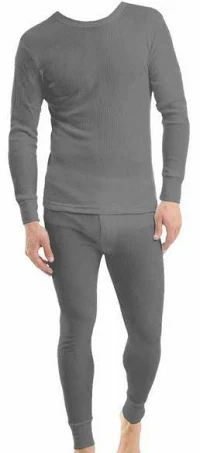
If the mercury has dropped, you will need “proper” thermal underwear.
In previous eras this meant wool. This is not so easy to find these days and may be beyond your budget.
Modern synthetics are much easier to wash.
My personal choice is a set of Brynje long-johns and a matching long-sleeve top. These have a mesh construction, and seem more tolerant of extended (multi-day) wear than my merkalon set of more conventional construction.
If you are on a budget, you may be able to get along with a single set of thermals.
If you live where winters can be expected to be cold, two sets are a good investment.
On the other hand, if you live near the equator, thermal long-johns may be low on your list of priorities.
Your thermals can be combined with one or more sets of your temperate and hot-weather underwear.
Not strictly “underwear”, a wool or fleece shirt or a thin jumper may be worn over the underwear.
During the Second World War and Korean War, American soldiers would wear their woollen uniform trousers under their cotton field trousers.
The modern equivalent are quilted trouser liners. A variety of these can be found on army surplus sites.
Organizing Your Undies
The underwear items suggested above are fairly low bulk, so a set of each of the hot and temperate kit should be packed in your bag. Bagged up, this probably makes a comfortable pillow at night.
The set(s) of thermals, and the second set of hot and temperate underwear should be stored close to your BOB rucksac. Put on what is suitable for the day. Decide if you want to take the rest or leave some behind.
Trouser-liners are bulky, so only pack or wear them if you think they are really needed.
Outerwear
Ok, now you are in your undies. What else to put on?
This will depend on whether you expect the weather to be hot, temperate or cold.
Expect an unexpected dunking or downpour. Have a drier change of clothing you can change into while your other dries.
Wear one set of clothes during the day, then change into the other set for sleeping, letting the day set dry..
Hot Weather Outerwear
For hot weather, your outer layer should be something like a medium-weight shirt. Lighter shades handle strong sunlight better.
The shirt should be of a generous cut, for air circulation. This also allows warmer clothing to be worn beneath it.
It should be of a tight weave to resist mosquitoes and the wind.
It should have long-sleeves that can be rolled down for protection from insects.
Cotton or poly-cotton are acceptable for hot weather. Some of the newish synthetic microfibres may be sufficiently comfortable too.
A combat jacket can be worn instead of a shirt, but you do not want something that is too heavy or too hot. Probably best to avoid lined garments.
Have a spare shirt in your bag. The two may be worn together, as described previously.
For the legs, cargo trousers are good. They should be roomy enough to fit over trouser-liners and long underwear. Cargo pockets take your skin-level EDC kit.
If these trousers are always with your BOB, your SHTF survival knife/knives may already be threaded onto the belt.
Whether to pack spare trousers for hot-weather is up to you. If the trousers you are wearing get damaged, there are not many other garments that can substitute for them.
If you have a pair of cargo trousers that are past their prime, I suggest your ranger-roll them and retire them to your BOB as a permanent back-up pair.
If the weather is likely to be variable, it may be prudent to pack a thin jumper and possibly a light jacket or field coat.
Temperate Outerwear
For temperate conditions, outerwear is the same as for hot weather with the addition that something like a field jacket is more likely to be being worn.
The jacket should be large enough to fit over a fleece jacket and any additional layers of insulation you might don.
Field jackets such as the M65 can be fitted with a detachable liner, which is worth having.
A spare pair of trousers lets you double up if it is unexpectedly cold.
Fleeces are often seen worn as the outermost layer. They work much better if they are under something more windproof, such as a field jacket, waterproof or even just under a shirt.
Items such as tracksuit tops, hoodies and bomber jackets may be worn under or instead of the field jacket. The order of these may be varied to vary your appearance, which may be useful in certain conditions.
Several thin layers of insulation are more versatile than a lesser number of thick ones.
Cold Weather Outerwear
If it is cold out, ensure that you have the liner for your field jacket. If a bomber jacket or similar has a liner too, so much the better.
If it is cold, your field jacket will probably not be your outermost layer. Have a parka, and buy it big so that it will fit over your field jacket and anything else likely to be under it.
Insulation
I have talked about insulation. A common mistake is to use too much.
A good rule of thumb is that what you are wearing should leave you feeling slightly chilly when you are stationary. You will warm up once you are under way.
The suggestions above constitute a layer system. A layer system is a useful way to customize your insulation level before you set out.
Adding or removing items when under way may not be as practical as some writers make out. Try it halfway up an Icelandic mountain in a 60mph wind! (Been there, done that!)
When on the move, frequently vent your clothing to remove humid air.
When you stop, you can put on additional clothing or wrap yourself in a blanket, sleeping bag or poncho-liner.
Colours and Camouflage
In general, your bug-out clothing should be in natural or neutral shades.
Camouflage-patterned gear may attract unwelcome attention in some parts of the world. Choose greys, browns, tans and dull greens.
Do not buy underwear items in white. Darker or more natural or neutral shades tend to show the dirt less. Why worry about underwear colour? Torn clothing may expose it to view, compromising your camouflage. Easily seen colours of underwear (or other garments) hung out to dry may attract unwelcome attention.
Avoid black items for outerwear, it tends to stand-out and gets hot in the sun.
Of course, in an emergency you may want to attract attention.
Your BOB should include a hi-viz tabard or jerkin, preferably the type with reflectors. One of your shemaghs, and possibly one of your warm hats, should be brightly coloured.
On the subject of reflectors, a reflective device that can be fitted to the back of your rucksac is useful if you find yourself hiking down a dark road. Bicycle stores are a good place to look for suitable items.

If I do need camouflage, I have a German desert parka. Being designed for desert use, it is comfortable in fairly hot weather. It is uninsulated and has ventilation zips under the arms.
I brought the biggest I could find so there is room for both air circulation and insulation. It is in Tropentarn, which is one of the better modern off-the-shelf camouflage patterns.
The garment is long enough to cover most things I might wear under it.
IThe parka is also a valid alternative to a field jacket. Jackets like the M65 can be too warm for milder conditions. (Officially the M65 was a “Cold Weather Field Coat”)
The desert parka can use the same liner as the German flectarn cold-weather parka, so the garment serves as camouflage cover, field jacket and/or CW parka.

I can wear the desert parka when I need camouflage. It is easily exchanged for another jacket and stowed in a pack when I do not.
And When It Rains
That covers hot, cold and temperate. What about wet?
Every bug-out-bag should include a rain poncho.
These have numerous uses. They are reasonably priced and will often keep both you and your pack dry. They are easily vented. They are quick to put on, although this can become interesting if there is a bit of a wind!
A rain-poncho can also be used to construct a shelter for sleeping.
If your rain-ponch came in a little stuff sack for carrying, add two three-metre lengths of cord to this. The cord may be used for shelter construction or as a belt to stop the parka flapping in a strong wind.
There are some situations where a raincoat is preferable. A raincoat is in addition to the poncho, rather than an alternative.
A good raincoat packs up small when not in use, yet is large enough to cover and keep dry all the clothing that is serving as insulation. For me, this means it should be large enough to fit over my desert parka in winter mode with its liner fitted.
I would strongly advise against a waterproof that is also a warm coat. You will be tempted to wear it all the time. It is more likely to get damaged, and it won't be waterproof anymore..
In a tactical scenario, a raincoat would fit under the camouflage layer but over the insulation. This is quieter, and also protects the rainproof from damage.
On the subject of insulation, remember a rainproof garment traps air so acts as both a windproof and an insulator.
If you put a rainproof on you may have to take something else off if you are to avoid overheating.
It is a good idea to periodically vent clothing, even if using breathable waterproofs.
Simple, small-packing waterproofs became difficult to find for a while. Outdoor shops much preferred to sell more substantial and expensive breathable items. “Pac-a-macs” seem to be making a comeback on the internet, although many are in garish colours!
I have never had a problem with non-breathable waterproofs, since I understood about venting.
I also discovered that even expensive breathable fabrics have a finite life. The way you discover that is up is you get wet!
Boots
It is possible you own more than one pair of walking boots.
The pair you have with your bug-out bag should be suited to all-weathers and all-seasons.
You may have to traverse rubble and debris. Save the lightweight walkers for summer trips.
Boots for bugging out should be already broken in.
Personally, I like gaiters if I will be going cross-country.
Socks
You will need at least two pairs of socks, with three pairs or more preferable. Your feet are important. It is worth investing in good quality woollen socks for your BOB. Four pairs of quality woollen socks let you alternate between pairs and double-up if it is really cold.
In certain conditions you may need to change socks several times during a day.
Sew a loop of ribbon to each so you can hang them on the outside of your bag to dry.
Choose socks in neutral and natural colours. You could use different coloured loops for each pair, although your nose will often tell you which set needs washing.
Spare socks can be used as mittens or carrying pouches.
Gloves
You will want several pairs of gloves.
You will need gloves for warmth, and gloves for protection.
Fingerless leather gloves provide protection with reduced loss of dexterity when in the brush or scrambling over rubble. These can be used with merkalon or silk glove liners.
On a hike in Iceland, an unexpected strongly gusting wind combines with relatively mild sub-sero conditions to create a -30 to -40 windchill. The hand holding my hiking pole was particularly exposed. Wearing fingerless leather gloves over glove liners avoided possibly serious injury.
Knitted gloves, woollen or acrylic, are not very stylish, but work well at keeping your hands warm and preserve some dexterity.
Good colours for gloves are mid-grey, khaki-drab and olive-drab.
Unlined leather work gloves can provide additional protection or another layer of insulation.
Leather work gloves may be used to protect you from thorns and rope burns. They may also be used as an oven glove to handle hot billy handles. They should be sized so they may be worn over woollen gloves and/or glove liners.
If desired, cuff-ribbing may be added to work gloves, or the top of old socks repurposed as such.
In cold weather, better insulated gloves and/or mittens may be required.
Add ribbon or cord loops to each glove so you can stash them on your snaplink when you remove them.
In bad weather, run a cord down your sleeves and tie the ends to your gloves. You may feel like a toddler, but this is better than a gust of wind taking a glove and the risk of frostbite!
The pockets of my outdoor jackets usually carry at least one pair of gloves. Keep your other gloves where they can be easily accessed, such as in an external pocket of your pack. It is not a bad idea to have all of these gloves in their own “glove bag”.
Hats and Scarves
You will need a hat to keep the sun off. I like a boonie hat, myself.
When the weather demands you wear your hood up, a suitably coloured baseball hat will be convenient.
Whatever your personal choice, add a cord so the wind does not steal it from you.
For cold weather, I tend to favour a watch-cap or folded headover. It is worth carrying more than one of these. If it is really cold, you can double up on hats. A headover or watch-cap may be combined with a boonie or ball-caps, as needed.
A tennis-headband may be useful in hot weather. A bandanna worn across the forehead is a possible substitute.
“You are not fully dressed without a scarf!” Bandannas, shemagh, neck-gaiters and a long woollen scarf also have a place in your BOB or coat pockets.
Protection
A bug-out bag is there for emergencies and disasters.
A dust mask may prove useful, as may goggles. As well as dust and sandstorms, explosions and collapsing building produce lots of dust. This can have immediate and long-term health effects. Sunglasses also protect against snowglare.
Kneepads should fit under the trousers. This is better for camouflage and air circulation.
A headnet against biting insects is well worth the (negligible) weight. It may be uses as an improvised fishing net or carrier bag.
In certain situations, head protection may be prudent. Volcanic activity may make it literally rain rocks. High winds turn roof tiles and other everyfay objects into deadly missiles. Head protection may be a lightweight hockey or skateboard helmet, or a construction hard-hat.
Checklist
Have a checklist. When you are under stress or in a hurry you are unlikely to remember everything you need.
Some of the items for your bug-out outfit will be permanently packed in your bug-out bag. Items you intend to wear while carrying the bag may be stored near the bag.
For many of us, however, it is not practical to have a full, dedicated bug-out bag and outfit. Some items we need will be in general use. Other items may have been fished out of the BOB for a camping trip or for use during a cold-spell.
Hence, have a checklist of the items you want in your bug-out outfit so you can grab those that may not be there.
