Camouflage is about “not being seen”, which is one of the most fundamental of survival strategies.
If you cannot become “invisible”, you may be able to appear insignificant, uninteresting or become easily “lost in a crowd”.
You may have spent good money on the latest designer camouflage, but it is of no use to you hanging up at home.
The most likely source of threat is other human-beings, and you are most at risk when other people are around.
Miyamoto Musashi tells us in the “Book of Five Rings”:
“In all forms of strategy, it is necessary to maintain the combat stance in everyday life and to make your everyday stance your combat stance. You must research this well.”
In clothing terms, what Musashi tells us means your everyday wear should be selected with a mind to decreasing your “visibility”.
Camouflage-patterned clothing does have a place in a prepper's wardrobe.
There are, however, times when using camouflage-patterned clothing may be counter-productive.
In cosmopolitan cities, clothing in camouflage or camouflage-like patterns may attract little attention. In other parts of the world, its use may attract unwelcome attention, or get you wrongly identified as military, paramilitary or a poacher.
Even if restricted to unpatterned clothing, there are strategies that we can adopt that will still decrease our visibility.
In previous blogs, I have touched upon a concept that might be called “camouflage without camouflage”. One can make oneself less observable by using a mix of non-camo-pattern clothing.
By using a variety of shades and hues, the basic identifiable human-shape can be broken up and become harder to distinguish. I have advised that you select clothing items in neutral and natural shades and colours.
While this remains good advice, a little more thought needs to be given to the system and some additional explanation may be warranted.
What is a Neutral Colour?
“Neutral colors are muted shades that appear to lack color but often have underlying hues that change with different lighting. Examples of neutral colors include beige, taupe, gray, cream, brown, black, and white. While neutral colors are not on the color wheel, they complement primary and secondary colors.”
On this blog I have stressed “neutral and natural”. Not all colours classed as neutrals are suitable for concealment.
Black
Regular readers should already know that “black is NOT a camouflage colour”.
In the movies, the bad guys, and often the hero will be dressed in black. It looks great on screen, and makes the actors stand out. This is exactly the opposite of the effect we want our clothes to have!
Even at night, black is to be avoided. In many partially lit conditions, black can be too dark, and stand out. Seldom is it dark enough for black clothing.
The special forces in Vietnam who dyed their gear black knew the colour would soon fade to a more useful dark grey.
Pure black clothing also tends to show the dirt, so you might like to rethink its usefulness as general wear.
If you want a dark suit for weddings and funerals, buy charcoal-grey rather than true black.
White
White is another colour that stands out and should be avoided. Like black, white really shows up any dirt.
The only time to wear white is when there is snow on the ground.
White garments used as snow camouflage should be uninsulated. If they are warm, you will be tempted to wear them all the time, they will quickly become dirty and will no longer be effective as snow camouflage.
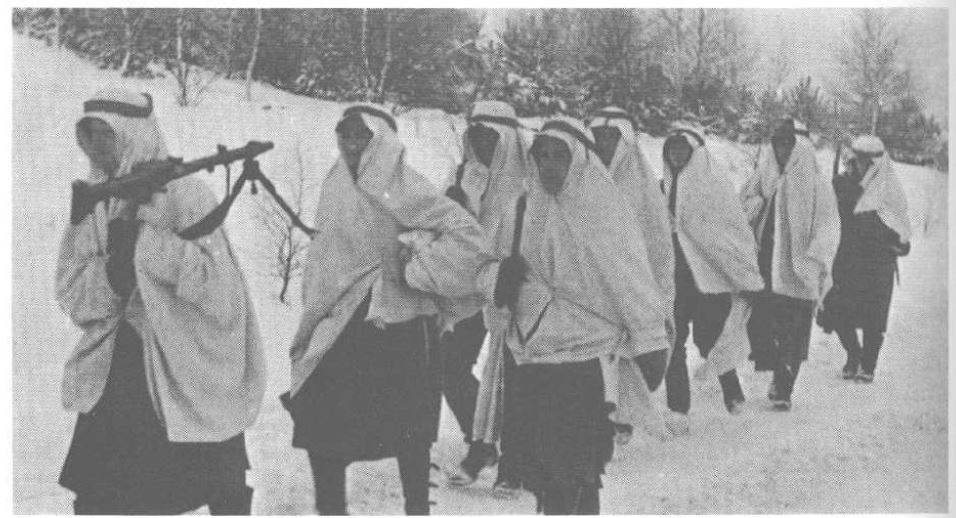
Obviously snow-camo should be unlined and of a material that is easily laundered.
Avoid white underwear if you can. Outer clothing can get damaged, and being exposed may expose you. Select underwear in neutral and natural tones.
If you have to wear a white shirt at a formal occasion, you may need a white undershirt to avoid the colour of the undergarment showing through.
If you have to wear a white shirt for work, carry a neutral colour scarf or keffiyah you can cover it with when outdoors.
Blue
Not all shades of blue are neutral. Some that are neutral are not that natural. Neutral shades of blue or blue-grey can work in a winter or urban environment.
Light blue is generally a “cold” colour and can be used in the snow. Some snow-camouflage patterns use light blue and white to break up the shape.
Watch some nature footage of polar bears in the snow and ice and note how much the terrain appears blue, grey or blue-grey. Interestingly, the bears often appear yellow-white.
In an urban environment, light blue is often encountered as faded or mid-blue denim. Light blue is a good colour for a button-up shirt.
Darker blues are probably less useful for concealment.
A blue blazer is supposedly an essential in a gentleman's wardrobe (I don't have one!). If you want one, select a neutral shade of navy. If nothing else, it will at least go better with whatever other colours you may wear with it.
Undershadow
Many animals have lighter colouration on their undersides. This makes the shadow that their bodies cast less distinctive and is an example of counter-shading. The animal appears less three-dimensional and blends in better with the surface that it is upon. Behaviours such as crouching low further reduce the shadow, and the animal will often remain immobile while it thinks it is observed.
Interestingly, many aquatic or amphibious animals show an abrupt change from light underside to darker upper. When swimming near the surface the dark upper makes the animal very difficult to spot. A predator looking up from beneath will find the light underside difficult to see against the sky seen through the water surface.
A light underbelly, or clothing to simulate it, is of little use to a human, since we spend a significant portion of our time upright and bipedal.
Keeping close to the ground and remaining still is good tactics, however. If you are concerned with being observed you should never be reluctant to crawl if necessary.
An interesting example of trying to apply counter-shading can be found in the book “Second World War British Military Camouflage”, p.27-8 by Isla Forsyth.
Solomon J. Solomon was one of the early pioneers of modern camouflage. During the First World War he proposed “alterations to [British] soldiers’ uniforms to reduce their visibility, such as the darkening of the soldier’s cap and the lightening of his trousers.”
Upper surfaces catch more light, and correspondingly, need to be darker. Body areas that are commonly thrown into shadow need to be lighter.
Watch some videos of soldiers in action, and you will see they often appear as man-shaped blobs, darker than their surroundings.
Modern combat gear often uses exactly the same pattern for headgear, torso and legs. The chest area is often shaded by the position of the arms, yet often the equipment worn here is actually darker! Even in desert environments, soldiers wearing black or woodland-pattern body armour or load-bearing gear are still seen.
Illumination
When considering camouflage, a lot of attention is paid to colours and patterns. More attention should be paid to shade, light and contrast.
I have advised you to select items in natural and neutral shades, but how dark should they be?
If you have to hide in a dense wood, particularly at night, a mix of clothing items in medium or dark shades of natural and neutral colours may serve you. There will be lots of shadows, so use them. Camouflage is about behaviour as well as colouration.
Suppose you leave the wood to move across a neighbouring field. How well will your dark and medium-coloured clothes serve you then?
Even at night, the surfaces you move over may be relatively light. Grass and hay may reflect any available light, even that from the moon and stars. If you go prone, you may appear as a dark blob that attracts investigation. During the day you may be even more conspicuous.
Most of us spend a significant proportion of our time in urban areas. Even at night, this is an environment with many light or medium-shaded surfaces, and many areas are illuminated by artificial lighting. Dark outfits may make you stand out.
Discussions of camouflage often mention shade and shadow. Level of illumination in the surroundings is often not given that much attention. Clearly, if you are in a shadow, you are illuminated less, but it should be clear by now that light level has a much wider significance to camouflage and concealment.
In really deep shadow, what you wear probably matters little. There is no light, or more correctly, there is none escaping. Not all shadows or unlit areas will be this dark, however.
Stronger light can have interesting effects on concealment. Suppose someone is wearing a sand-colour outfit and lays down in a grass field on a sunny day.
You might think that someone in yellow would be easy to spot in a green field. One thing that would prevent this is that shade is more significant than hue. If the sand-coloured clothing appears a similar shade to the grass at the viewing distance, the figure can be over-looked. Another factor is that light materials reflect. Sunlight hitting the grass causes them to reflect green light. This green light may in turn be reflected from the light-coloured cloth, causing it to appear to have a green tint.
Effectively, your world should be viewed one of light and shadows.
Some areas are “shadow-dominant”. These include deep forests and jungles, and poorly-lit building interiors.
“Illuminated” areas include desert, open fields and many urban exterior areas.
This status may be changed by time of day, weather or season. At night, a wood may become even more shadow-dominant, yet in winter it may become better illuminated.
In shadow-dominant areas, clothing of medium-shade, with some dark items may be most effective. In better lit areas, lighter clothing may be less conspicuous.
Your movements may take you from light to dark areas or the reverse, so what should you wear? Having to deal with both light-dominant and shadow-dominant areas may explain why most attempts at a universal camouflage pattern have only ever proved partially effective.
In the early days of camouflage experimentation, a number of double-sided items were fielded or tested. Some had a spring-summer pattern on one side and a autumn/snow pattern on the other. Jungle/desert and green-dominant/brown-dominant were also tried.
The needs for the different patterns were thus either separated by season or by geography. As far as I know, no double-sided garments based on patterns for differing illumination levels have been tried, which is a shame.
Camouflage Patterns
For camouflage patterns for illuminated areas there are a number of options. Some of the patterns designed for desert use may prove useful in a wider range of environments. Make sure the pattern has sufficient element-size and contrast to disrupt shape and outline. Off the shelf, “tropentarn” seems to work well, although I would wish for a grey rather than green in the pattern.

Some urban patterns are good, although some use too much white or are too greyscale and could use some browns and tans.
Some newer patterns such as multicam use lots of colours and small elements, resulting in garments that appear a single colour beyond a few metres. This very much depends on the material and print. I have seen some camouflaged gaiters in these patterns that look like they might work. Polycotton trousers and shirts in the same pattern tend to blob-out at a relatively short distance. Generally I would avoid these patterns. They may be no more effective than cheaper single-colour items. Many of these patterns are also too green-dominant for a multi-terrain pattern.

For shadow-dominant terrain, you should probably consider “older” patterns such as US m81 woodland, flecktarn and British DPM. Canadian Cadpat is presumably intended for deep woods, although the green looks a little bright in some examples I have seen. Unfortunately, these patterns vary considerably. Browns can range from natural-looking shades to chocolate. Greens also vary and the lightest shade may be either light-green or a more useful tan. Contrast between elements and overall darkness may also vary.
Many of these patterns have too much green. While green is good for summer woodland and lush jungle, a pattern with more browns and greys would be better for other dark environments and seasons.
You may also encounter fashion/police patterns consisting of blacks and dark greys. These are too dark and lack sufficient contrast between the shades to disrupt the shape.
Camouflage without Camouflage
As was stated earlier, you cannot always wear a camouflage pattern. You may not have a garment such as camouflage parka (see below) with you.
How can you become less distinct wearing monotone clothing or “civvies gear”?
The first step is to mix it up! Different items should be different colours or shades. Obviously, what you select should be in neutral and natural colours suitable for your surroundings. Select medium and light shades unless the illumination level requires different.
Whilst you may not be able to wear a camouflage pattern, other patterns may have a disruptive effect, providing they do not use bright or primary colours. Some garments have pockets, collars or panels in contrasting colours, which may break up the shape.
Below is an example of the Russian Gorka wind-proof outfit. Some of these use camouflage, but they are also used in unpatterned cloth. Note how the two different shades and hues of neutral coloured panels break up the basic human shape.


You probably know that several thin layers of clothing will keep you warmer than a single thick garment. You can also regulate your insulation more easily by removing layers. What many people do not appreciate is that a layered clothing system can be used to change your appearance and for camouflage.
For example, on the street you may be wearing a light-tan hoodie over a dark-grey bomber jacket. If you move into a darker area, you may move the bomber jacket to being your outer layer.
More layers often means more pockets. Thus you can carry a spare scarf or more than one hat, letting you further change your appearance.
Some hoodies or jackets are reversible. Generally I think you are better off with several thin non-reversible garments. They will cost you less and offer you more options.
If your garment is lined, ensure the lining is a neutral and natural colour too.
There is another advantage of having a wardrobe that is mainly neutral colours. Neutral colours go with just about anything. Most suggestions for a capsule wardrobe are based on having a versatile selection of garments in neutral colours.
Face and Hands
When James Bond wants to skulk around at night, he wears a black polo-neck. He never bothers to cover his face nor hands. He must leave a lot of fingerprints!
There is little point using camouflage if you do not cover your face and hands. Irrespective of your skin-shade, human skin can reflect. Hidden troops are often detected from the air since someone always has to look up at the spotter aircraft. Even at several thousand feet, an uncovered human face pops out and cries “Here we are!”.
Skin can be darkened and matted down by various means. Do not overlook local resources such as dirt, soot and soil. These do nothing to conceal your hair. Face-paint or dirt are also difficult to remove easily if you want to later appear innocuous.
You should carry suitable head and face coverings. A full-face balaclava/ski mask in a medium to dark shade of grey or brown would seem a good choice. However, some cops have been know to label these “ninja masks” and treat their possession as intent if they feel inclined.
Various face and head coverings can be constructed by combinations of suitably coloured and patterned bandannas, neck gaiters, scarves and knit-caps.
Gloves will be needed, and of a suitable shade and colour. Olive meraklon glove liners are a good start. Fingerless leather gloves (aka “recondo gloves”) are worth considering in milder climates. They provide some protection to the hands when climbing or crawling, so you may be more inclined to “go low” when needed. They can be found in tan-brown, or you can cut down old gloves that are surplus to requirements.
The Lower Body
There is no reason why your lower body has to wear a camouflage pattern that matches that of the upper body. The legs are a different shape to the torso and larger than the arms, so may need a different pattern to disrupt their identifiable shape. Using a different pattern for the legs may help break-up your overall recognisable human shape.
How well the concept of countershading can be applied to the human form probably warrants further investigation. Having your trousers lighter than your upper body is worth considering.
Desert patterns are suitable for trousers. UCP/ACU might also be worth trying for leg camouflage.
If we are considering monotone garments, our choices are probably various neutral tones of light-blues, greens, tans and greys.
Many style guides for capsule wardrobes recommend trousers that are lighter than the jacket.
Personally, I am wary of light-blue outside urban or winter environments. I actually don't own any jeans, wearing cargo trousers instead. Much of my EDC is in the pockets,
Greens are good for many rural settings, but may stand-out a little more than some other colours in urban areas. Some shades of green will stand-out in rural areas. Even neutral shades of green are less common in certain rural areas or seasons that one might expect.
Tans and greys are your most versatile choices for monotones. Tans and browns have the advantage that mud does not show up so much on them. On the other hand, the contrast of mud on grey trousers probably has a disruptive effect that breaks up the leg's shape.
Gaiters should be of a suitable camouflage pattern or neutral and natural colour. Since these are seldom worn in town, bows of textilage can be added to break up the shape. Ensure any materials used for textilage will not soak-up water.
Langdon-Davis had a lot to say about the distinctive appearance of black army boots. Footwear should be natural and neutral colours and matt finish when possible.
Black socks are supposed to make your legs look longer. I am not sure that works without black shoes and dark trousers. I generally wear boots so the socks are not visible.
Update: Recently I attended a funeral and noticed my boot tops were visible when seated, at least when wearing my suit trousers. Own at least one long pair of black socks for formal occasions.
In town I often wear white cotton sport socks since they are cheaply available in quantity. In the field, spare socks may be used as extra carrying pouches tied to the outside of a pack. These should be neutral and natural colours.
Camouflaging Gear
The institutional military mind likes uniform, regular and symmetrical.
Good camouflage is variable, irregular and asymmetrical.
This may be part of the reason why personal camouflage has waxed and waned as a priority for soldiers.
Improving the camouflage of an item becomes unpopular when the additions must be stripped off for every parade or inspection. If you are outside of the military, then such restrictions will not limit you.
Previous blogs have discussed methods to improve the camouflage of your backpack. Similar methods can be applied to a chest-rig, contributing to the camouflage of your torso. Base colour for a chest-rig should be light or a desert pattern, since this area will often be shaded.
Camouflage Smock
A useful technique is to have a “camo-smock”. You put it on when you need a camouflage pattern. Roll it up and carry it when you want to appear non-military. You can carry more than one, and wear the most appropriate for the conditions.
Your bug-out outfit should include an item that can be used as a camo-smock.
My main camouflage item is a German Tropentarn desert-parka. Get this as big as possible so that it can form a camouflaged outermost layer over anything you may be wearing. There is a nice liner for it that makes it into a nice cold weather coat.
Without the liner, it is unlined so can be worn for camouflage in relatively hot weather. There are vent zips under the arms.
Being a parka, it comes down to mid-thigh so will fit over anything I might wear under it and partially conceals my legs and body shape.
Sleeves are long enough to conceal my hands and keep the wind and rain off them.
If this is a “field only” item, add some bows of textilage to the sleeves and shoulders.

The pockets of the smock/parka include items that can be used camouflage my hands, neck, face and head. Little point in camouflaging yourself without covering your extremities!
For darker conditions, I have a several metres of camouflaged scrimm that can be worn over the parka like a poncho. Bows of suitably covered material or scraps of camouflage cloth have been tied to the scrimm.