Categories
Phillosoph

Learning from Honey Badgers. Using Your Environment.


I once saw a film clip of a baby elephant that had become trapped in the mud. It was impossible for the elephants to lift its weight. Instead, several elephants worked together to construct a ramp out of mud and the baby was able to escape.
 
I came across this video today about a honey badger. Some useful ideas about using what is in your local surroundings to your advantage.

Categories
Phillosoph

Birrus Britannicus : More on Cloaks

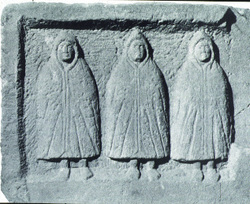
After yesterday’s blog on cloaks I came across mentions of a foul weather cloak called the Birrus Britannicus. It seems the Romans associated Britain with cold and wet weather, hence the name. Such cloaks were widely used in Britain by both the locals and Roman visitors.  

This website has some information on making one with a “bindweed leaf” shaped hood that was often associated with these cloaks. (Note that the page uses the spelling “byrrus” rather than the more commonly used “birrus”. The site has a number of other basic grammatical mistakes so this is probably an error).
The hood is made out of two pieces described as “diamonds”: actually kite-shapes with two sides of 55cm and two of 68cm. No information is given on the angle between these sides so you will probably have to construct a mock-up to get the volume right. The two 55cm sides are sewn together to make the top and back of the hood and one of the 68cm sides sewn to the cloak. You may like to make the hood part double thickness or line it. The article mounts this hood on a semi-circular cloak but it seems Birrus Britanicus could also be oval or circular designs, as described in my last post. The “triangle piece at the throat” is not clear in the photographs but is evidently a fly or baffle type piece to prevent drafts at the neck area. I suggest you reserve some material, join the cloak and hood and then work out the shape and form of this piece.
The most practical fastening for such a cloak is probably one or more hook and loops, with another to secure the throat bit.  
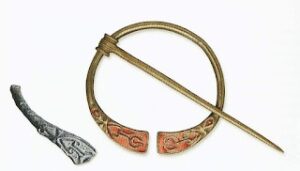
On the subject of fastenings, I mentioned cloak pins in the last post. I have seen scores of these in museums with no indication on how they were actually used to fasten a cloak. The answer is both simple and ingenious! A functional example could easily be made with some pliers and heavy wire!

Categories
Phillosoph

Cloaks for Modern Survival

Last night I was once again discussing something that is somewhat an oddity in the history of clothing.
For thousands of years soldiers, outdoorsmen and many other prudent humans have used and valued cloaks as useful items of clothing. A cloak traps lots of air to keep you warm and yet is easily vented to keep you dry. A cloak can shed the rain and snow, protect from the wind and is large enough to act as a useful blanket should you need to sleep out. Then, sometime during the 19th or early 20th century cloaks became rarer and I have never encountered as sufficiently convincing explanation as to why this was.
A cloak still has much to recommend it to a survivalist or outdoorsman. Currently in Afghanistan insurgents are shielding themselves from expensive high-tech thermal imagers and infrared systems using woollen blankets.

One of the simplest of practical cloaks is what the Roman legionary called a sagum. The sagum was a suitably folded square or rectangular piece of material fastened to itself at the shoulder with a brooch or pin. Easily constructed (if you had a fastener) and a useful blanket too. Many cloaks are just blankets with a bit of tailoring. The Scottish word “plaid” is derived from the term for blanket and the great plaid was big enough to sleep out in. I will discuss the plaid in more depth some other time.

A step up from the sagum was the hooded cloak that the roman soldier called a paenula. This page has a rather nice, simple method for making a semi-circular one. Take a bit of wool, 60 x 120" (1.5 x 3m) and cut out a semicircle using a length of string as a compass. Cut an 8" slit widthwise from the middle of the straight edge and sew the two rectangular hood halves to this. Hem and finish as necessary. If we are considering our cloak as a practical field garment then 60" may be on the long side. Ideally you want the bottom at about calf height. Two quarter circles can be cut from a smaller piece of cloth and sewn together.

The same page shows how to make a circular paenula. Essentially you make a semi-circular paenula then sew a second semicircle to the front edge. The illustration shows a poncho style but one could extend the neck slit down to the edge to make a circular cloak that opens up the front. The circular paenula has more folds of cloth to trap more air. On the other hand it uses about twice as much cloth and may be difficult to roll into a handy bundle.

A compromise is the oval paenula. Take a cloth of about 60"width and of a length twice the length that you want the final thing to be. I am a little above average height and the distance from my shoulder to below the knee is about 50". A piece of cloth between eight and nine feet will probably be about right. Interestingly making an oval cloak and a semi-circular needs about the same amount of working material. There will be less wastage with the oval cloak and it will of course be a little heavier. You may need an extra piece of material to make the hood.
Lining the hood part of the cloak can be a good idea. Loops and toggles or other fastenings were often fitted to keep the cloak closed without the need for a brooch. If your cloak is going to be “modern” then a few press-stud poppers might be worth considering.

A cloak of a dull, neutral shade with a few bits of scrim or frayed cloth added for camouflage might be a very handy thing for a hunter that needs to spend some time stationary, waiting for his shot.

Categories
Phillosoph

Sword Bayonets Part Two: Techniques

My interest in sword bayonets is largely academic. They are no longer issued by any army and any that you encounter will either be reproductions or date back to the 1940s if not earlier. That said, I thought I heard an odd noise in my flat the other night. Moving to investigate, the nearest weapon to hand was a M1917 sword bayonet. Even though a philistine of a previous owner had ground the edge off, it was still a handy thrusting weapon, its dull blade virtually invisible in the darkness. Ironically the noise proved to be nothing, and was probably the settling of some sword bayonets I had been examining as research for this series of blogs.
Very little has been written about the use of sword bayonets as hand weapons. The most well-known that springs to mind is Drexel-Biddle’s “Do or Die”. In this book, he relates an account of two marine aviators who took to wearing sword bayonets after training with Biddle. These two aviators were to later successfully defend themselves with these weapons against a mob of blade-armed foes.
Drexel-Biddle only describes a couple of techniques in his book. As some readers will know, Biddle was influenced by the school of thought that knife-fighting resembles sword-fighting. While this is open to dispute, it must be observed that 17" sword bayonets do have more in common with swords than most knives.

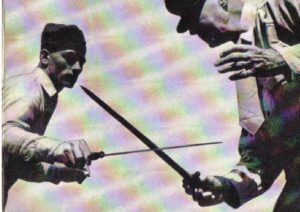
First photo shows an inward parry. Second photo shows the weak hand taking over the defence and grabbing the parried arm. The same technique can be applied as an outward parry. The unarmed hand takes over control of the foe’s knife hand and at the same time the bayonet counter-attacks. With an outward parry, one would probably thrust over the top of the arm towards the throat or face. Alternately, one could follow the wrist grab with a cut downwards at the attacker’s knife hand.
The next sequence shows a number of counter attacks. As the names may suggest, these are inspired by renaissance sword fighting techniques.

The Inquartata involves stepping back with your left foot to follow a quarter circle or further. This swings the body out of the path of an attack and positions your right side to deliver a counter thrust. Drexel-Biddle is aiming at the chest but the throat or face may be more prudent.

The Stoccata also involves the left foot, but this time you use it to step to your left, or forward to your left, to evade the attack. Biddle is thrusting under the attacker’s arm. Ideally drive this attack into the armpit where the artery is. A deep hit will also affect the shoulder joint.

The Passata Soto is a step to the left combined with a duck under the attack. Ideally, use the Capoeira footwork I describe in my book to move past the attacker’s right side when executing this counter attack.
These techniques can, of course, be used if you do not have a sword bayonet. A friend of mine was asking me about knife crime and I pointed out to him a rolled up magazine can be a very useful defensive tool in such a situation. View the photos and text above again and imagine executing them with a rolled up magazine. A strike to the throat or under the arm may not be as deadly as a bayonet, but can still be very effective.
For information on how to build on the above defensive techniques, please buy my book.
Categories
Phillosoph

A Decent Meal in Less Than Ten Minutes

Cooking for myself recently has been very efficient.
The other night my cooking proceeded thus:
I place a bowl of frozen sweetcorn in the microwave. This will cooked in under three minutes.
At the same time, I boiled a cupful of water in the electric kettle. This will be used to make instant gravy.
A good selection of ready-made sauces and instant stuff can really add variety to your diet.
A frying-pan heated up on the hob with a squirt of oil added. I keep the oil in a squirt bottle since it makes it easier to add less to a pan. Chopped fresh mushrooms went into the frying pan to brown for a few minutes.
While this was going on I heated up my new George Foreman grill.
I have seen some rubbish written on the internet about these grills drying food out. The George Foreman is basically a culinary trouser press. It cooks food from both sides at once, so it will take approximately half the time to cook something. Adjust you cooking plan accordingly!
On another hob, I boiled a pot of salted water. Following the previous blog post, I decided to experiment with pre-soaking dried pasta. It worked even better than I expected, so it was obvious I could now cook it like fresh pasta. A couple of minutes of cooking instead of twelve to twenty minutes.
Pork chop, mushrooms, sweetcorn and pasta in gravy, cooked in under ten minutes. Big saving on fuel, time and hassle.
Categories
Phillosoph

Cooking Rice in Under Ten Minutes. Save Fuel and Money

My gas bill this previous quarter was much higher than I expected. Made even more frightening by the fact that it was a mild winter and I had barely used the heating. This got me thinking again about ways to save energy when cooking. 
A friend of mine once told me that during the rationing of World War Two his mother saved fuel by soaking rice overnight. By doing this she only needed to cook it five minutes. Time to experiment with this method again.
Here is the method that I have ironed out over the last few days:
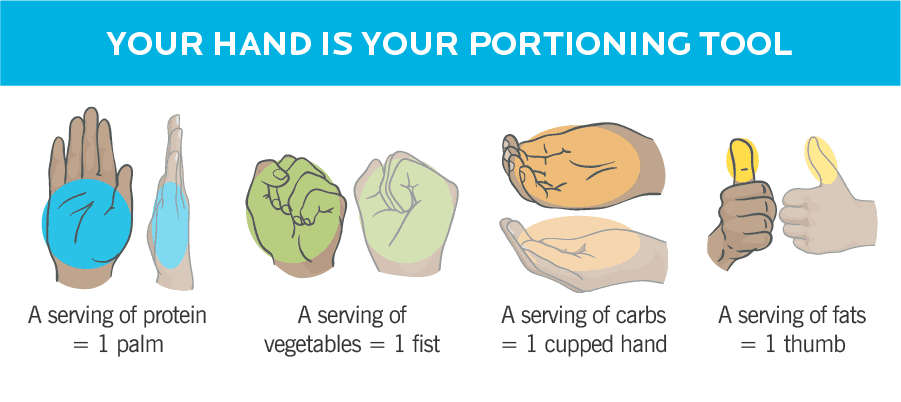
Measure out your rice. 100 g is a generous portion and comes up to the 100 ml mark in one of my measuring jugs. Rather than bothering to weight the rice, I just fill the jug to the mark.
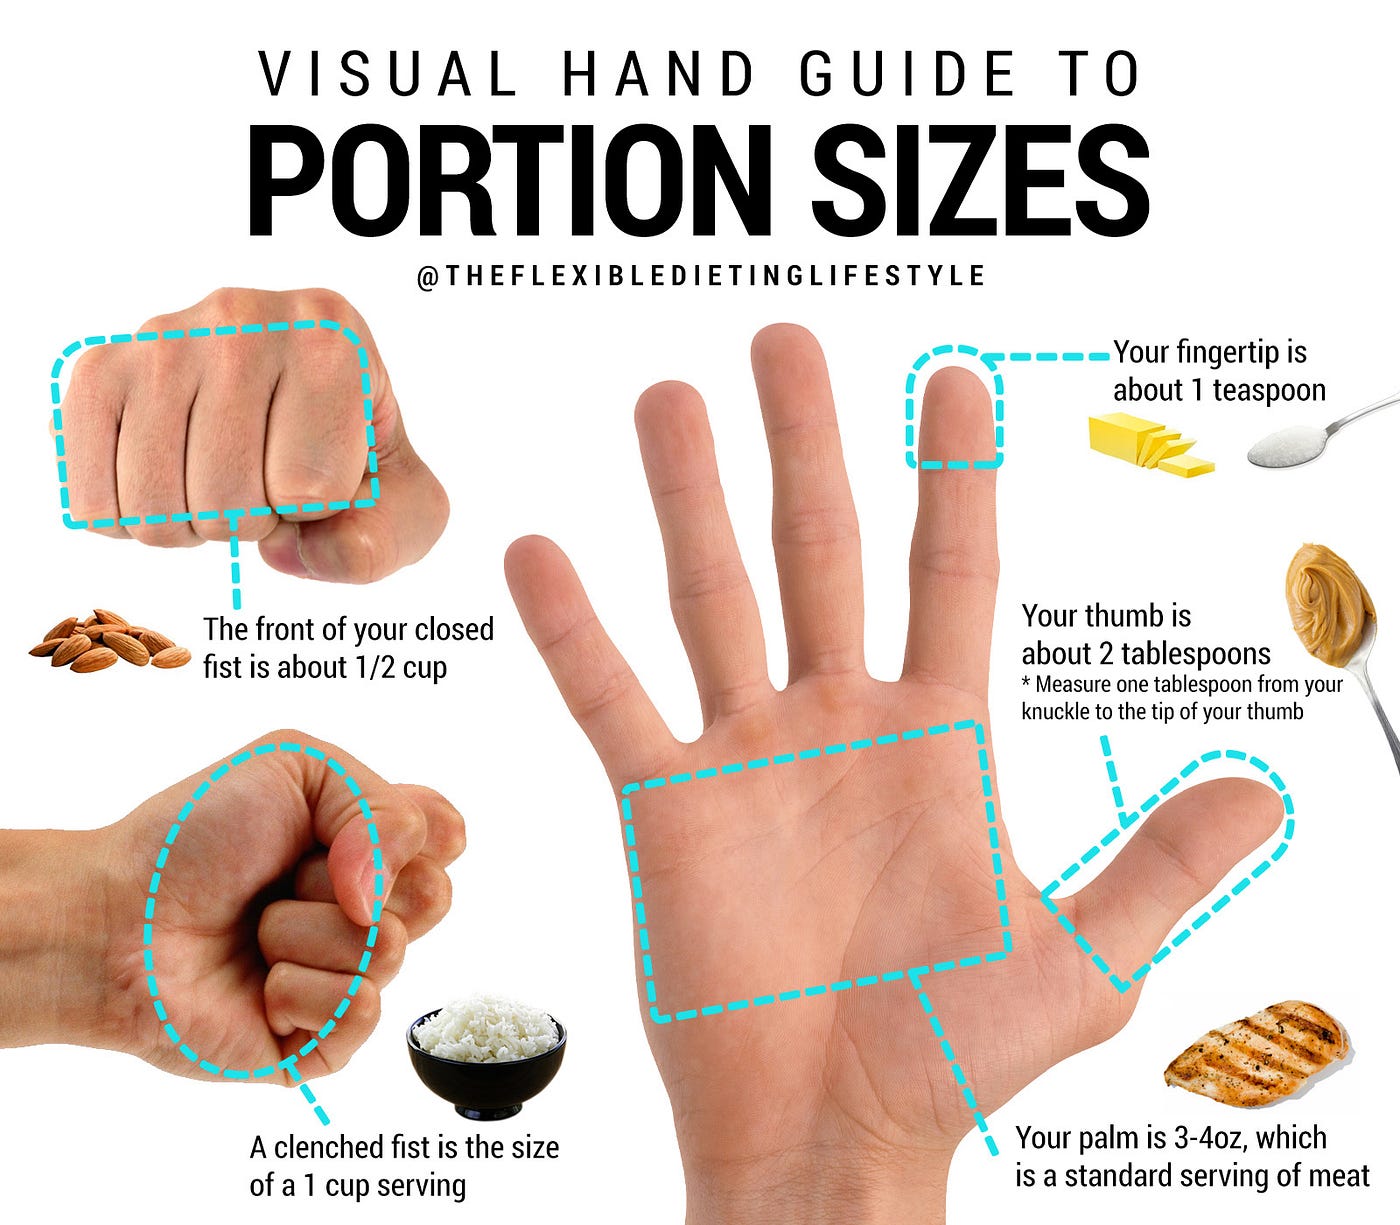
Cooked rice is about three times the volume of dried. A quarter to half a cup of dried rice is good for a side dish. If you are hiking in the snow, a full cup may be warranted.
Measure food portion with handHand measures of food
For this pre-soak method, I generally fill a coffee mug half to two-thirds and top up with water.
Study the apparent depth and volume of the rice so you can estimate a similar amount by eye if necessary.
Place your cup of rice and water in the fridge. The first time I tried pre-soaking rice I ended up leaving it longer than I intended since I spent the next couple of nights down the pub and eating out. The rice sort of started fermenting, so I suggest you keep the soaking rice in the fridge just in case you are delayed. If it is winter, the kitchen is generally cold enough.
Leave the rice to soak a few hours, or better still, overnight.
When it is time to cook, pour the rice and water into a pot.
A broader pot heats up quicker and is less likely to boil over. You may need to add a bit more water to the rice so it is covered by at least a centimetre of water. Add a little salt too. Use a hob of suitable size for your pot.
Cooking instructions on packets of rice generally overestimate the cooking time or quantity of water needed.
If you add too much water, you are going to waste fuel heating it up. Too little and your pot may boil dry before you are done. You will have to experiment on getting the optimum for the pot you use. As in so many things, balance is the key.
Rice needs about twice its volume in water. As a general rule of thumb, ensure the rice is under 25 mm of water. For this method using presoaked rice you will actually need less water since there will be less cooking time.
Cover your pot, bring to the boil and then turn down the heat to simmer.
Give the rice about five to seven minutes.
If you are new to this cooking method, taste a little of the rice to see if it is soft or still a little gritty. 
Turn off the heat and let the pot stand, preferably over the still hot hob. The residual heat will continue to cook the rice without expending fuel. This gives you time to finish cooking the other components of your meal.
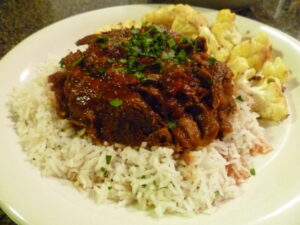
Drain your rice. Turn out onto a plate and serve with a variety of vegetables and a sensibly-sized portion of meat.
This method will prove pretty useful if you are hiking or camping and have to carry your own fuel.
In this case, I suggest that in the morning you place your rice and water in a wide-mouthed screw-top container and let it sit in your rucksack while you are walking. Such a container is a useful addition to your hiking kit since it can be used to prepare other backpacking foods that need a long soak.
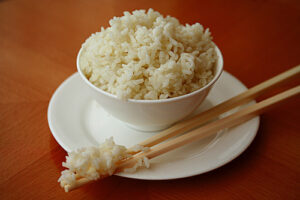
I have not yet tried this method with brown rice. Is it possible to reduce the cooking time of dried pasta by pre-soaking?
I will have to experiment. Have a go yourselves.
Categories
Phillosoph

Cutlasses


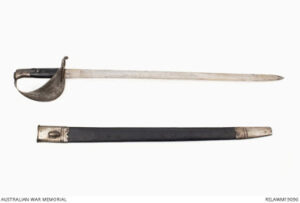
I got diverted reading about cutlasses the other day. According to the book I picked up it is not until the start of the nineteenth century that Royal Navy cutlasses were standardised, or at least records of the standard date to. In 1858 a new model of cutlass based on the 1853 cavalry sword was adopted and the blade length as standardized at 27" (right). I get the impression that most of the earlier patterns of cutlass were of this size. In 1871 weapons with a slightly shorter blade of 25½" were adopted. ’71 saw the adoption of both a new cutlass and a cutlass bayonet for the Martini-Henry rifle (below). Cutlass bayonets had been issued before, such as the 1859 model for the Enfield (above). The two ’71 pattern weapons seem to have been intended to share many common components between the bayonet and sword and the slight shortening of the blade may have been a concession to the bayonet role. In 1889 a cutlass with a blade of 28" was adopted.
What interested me about this passage was that the navy considered a blade of about 27" to be ideal for a cutlass. Most British army swords of this period are 32" or more in length. Cavalry swords tend to be longer and in the 33 to 36" range. I have a 1898 Officer’s sword with a 32" blade. It is a very nice weapon but I cannot handle it without feeling it would be handier and more agile with a few inches removed.
27-28" is also the “Perfect Length” for a sword that I pondered on in a previous post.

Categories
Phillosoph

Sword Bayonets Part One

For no particular reason I have found myself thinking about sword bayonets recently. Perhaps it was because in a recent re-run of “Wonder Woman” a soldier was wearing one, which struck me as odd since he was an MP in white equipment and you would have expected a baton rather than a bayonet. (for that matter, the episode was set in the 1970s so a sword bayonet would have been an unlikely piece of equipment for any GI!)
My interest in sword bayonets goes back many years. One reason is in the opening passages of the Modesty Blaise adventure “Operation Sabre Tooth” there is a trial by combat and a soldier requests a bayonet to defend himself. Another character reveals he keeps as sword bayonet under the seat of his jeep and enthuses over its merits other a knife. Another source of my interest is the following passage in the Gun Digest Book of Knives, Fourth Edition. Page 106.
“The Yataghan is more of a machete-length short sword with a kukri’s chopping forward curve, but with the point brought back for thrusting. These can have considerable advantages over a machete. The Yataghan was widely used for so-called “Sabre Bayonets” at the time of the War Between the States. The Remington Zouave Rifle carried it, as did many European guns of the period. Perhaps its short sword length and association with the bayonet prevented its other capabilities from being appreciated. At any rate, this splendid weapon didn’t catch on in the West except in bayonet form. It still offers much to the user and should not be overlooked when making your choice. It has the length and reach of the machete in a stiffer blade. It is a powerful forward-curved chopper like a kukri, yet retains a fine thrusting point. Well balanced and lively in the hand it will perform hard work with ease.It is light and easy to carry as well.”
Careful readers will note that it is often uncertain if the author of the above is discussing yataghans in general or specifically yataghan-style bayonets. The poor quality photo in the article seems to suggest a bayonet blade that has been fitted with a new grip (possibly stag antler).
The story of sword bayonets begins with the hanger. Hangers were a short sword that was carried by infantry and other troops. The hanger itself was derived from a civilian tool favoured by outdoorsmen. Hangers, “short hunting swords”  or “couteau de chasse” were useful for chopping firewood, clearing brush and butchering game. They were carried by noble and commoner alike. There are exciting accounts of them being used to hunt game and they were a useful defence against both beast and man. Decorated versions might be worn out court to display one’s affection for hunting. They might also be worn in town as a handy defence against robbers, in many cases being more effective and convenient than rapiers or small swords. Understandably the common foot soldier found the hanger to be a useful implement. In addition to the sword bayonet the hanger is probably the ancestor of both the naval cutlass and the machete, and is why you occasionally come across machetes referred to as cutlasses. Sword bayonets were created to produce a bayonet that also served as an infantryman’s hanger. The yataghan configuration blade provided better clearance for the hand when reloading a muzzle-loading weapon. The blade shape is not without other merits so a number of breech loaders also used sabre bayonets.
Despite the claims of the passage quoted above, most sword bayonets I have handled would not be particularly good general survival knives. Most hangers resemble shortened sabres with slightly curved blades. They can fight with both point and edge but their application as brush knives means they have to be effective choppers. Most bayonets, on the other hand, then to have their weight well towards the hilt. Many of the older examples have solid brass hilts. Those that do not still have a considerable weight of metal in the grip designed to facilitate attachment to a rifle or musket. I have a number of wakizashi, barongs, machetes and kurkis of comparable weight and/or length to my sword bayonets. Just handling them makes it clear that for medium to heavy chopping the sword bayonets are inferior.
The sword bayonet may have been intended to replace the soldier’s hanger but it was a poor substitute when it came to use as a general utility tool. As a bayonet if may be argued that they certainly looked impressive and provided a long reach. On the other hand their weight when fitted affected the mean point of impact when shooting. Several nations came to the conclusion that lighter, handier bayonets were more practical.
It is the sword bayonet as a hand weapon that I intend to look into over the next few posts. Sword bayonets, as you might expect, are well suited to thrusting attacks. Their blades are long, narrowish, rigid and often provided with fullers or strengthening ribs. While chopping power is limited the length of the blades can be used to apply a draw cut against thinly protected flesh. We will look into these aspects in later posts.