For me, it was an easy leap for me to get from penknives to fire‑lighting.
In a serious situation, gram for gram, you should be carrying at least one butane lighter. Simple, reasonably priced and good for hundreds of fires. Can still be used to light fires once the fuel is exhausted.
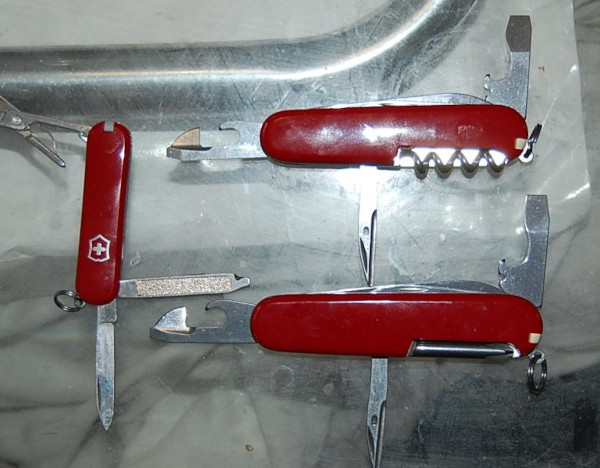
I was investigating which penknife tools are best for striking sparks with.
The back of the saw blades is the answer.
I also discovered that a better technique than that you usually see is to keep the saw blade or “steel” stationary on the tinder and pull the ferro‑rod backwards towards yourself.
Uses the whole length of the ferro‑rod and does not flick your tinder all over the place.
I looked in wonder at some of the exotic tinder materials available on sale, and their lofty price tags!
I will stick with cottonwool and Vaseline, which works wonderfully with a ferro‑rod, as well as naked flames.
Gunpowder as Tinder
I began to think about other tinder materials, specifically, gunpowder.
Some may argue that modern firearm propellants are not strictly gunpowder, but for convenience this is the term I will use, although much of the following may also be applicable to black powder and other low‑explosives.
In general, ammunition is precious, and should be reserved for its primary application.
One exception to this is when the immediate need for a quick fire far outweighs the remote possibility of you managing to shoot a hare or large bird sometime in the future.
Cold and wet may kill you in hours, while you can last several days without a meat dinner.
It is quite possible that you have not seen any likely targets. Some hikers manage to blunder through the wilderness never seeing a four‑footted beast or large bird.
The second exception is on a location such as a war‑zone where there may be quite a lot of ammunition available.
The enemy’s ammunition may not be usable in your weapons. One of the practical applications enemy ammunition may be put to is fire‑lighting, assuming a fire is tactically permissible, of course.
If you have pliers or a similar tool, the bullet may be pulled from the case. Most small‑arms cartridges are relatively thin, so may be cut in two with a stout blade, bayonet edge or hatchet.
Firearm propellant is a low‑explosive, so will not explode unless it is confined. It will, however, burn fast.
For this reason, propellant is best used to “season” other forms of slower burning tinder and kindling.
An interesting idea is to lay a powder-train leading to the centre of tinder and kindling.
Propellant not used should be stored in a water‑tight container for later use. You may mix it in with your container of “found” tinder and/or carry a separate supply.
That is all fairly straightforward and makes good use of enemy ammunition as a resource.
Many of these techniques could also be used with blank ammunition, or by utilising other sources of powder such as fireworks.
Firing with Primers
Some of you will doubtless be wondering: Can you light your fire using the cartridge primer?
The primary answer to this is not to try it unless you really, really have to!
Dry powder is easily ignited by a lighter, matches, magnifying glass or sparks. I may have once seen references to combining powder with friction methods such as the fire‑drill or fire thong too!
Lighters, matches, magnifiers and ferro‑rods are relatively safe and reliable mechanisms. You should always use the safer option whenever you have a choice.
A couple of well known survival publications do give a method for lighting a fire with a cartridge.
“Little powder mixed with tinder may prove effective. To try for flame, cut cartridge or bullet leaving a very few grains of powder in shell. Insert a little dry cotton (coat lining) with torn and fuzzy edge. Pack loosely.
“Fire into air. Cloth may float down‑ burning. Grab and light tinder with it.”
I have not tried the above, but it sounds like the burning material will have a fairly wide area to come down in, and will need to be found before it goes out, or starts an unintended fire!
“Break open the round and pour the gunpowder on to your tinder before using your flint, or remove only half the powder and stuff a piece of cloth into the cartridge case.
“Chamber the round and fire as usual, into the ground.
“The cloth will be ejected smouldering. Place it on tinder with the remaining propellant and you will soon have a fire going.”
Shooting into the ground at least seems a little more practical.
Then there is “Survival” by Len Calcutt:
“The powder contents of the cartridge can be used to help fire your tinder. You can also wedge a cloth in the cartridge once the ball or projectiles have been removed and chamber the round into your weapon. Aim at the tinder and fire. The cloth will be shot out smouldering.”
And, I suspect, your carefully gathered tinder and fire materials will be scattered over a large area by the muzzle blast!
The same article insists that aluminium foil and shavings may be used as tinder. Good luck with that!
If you have a moment, go to your kitchen, take a strip of aluminium cooking foil and try to light it on the stove.
I would be very cautious about attempting to use these methods unless you really have to.
I have to wonder just how old this technique of firing a cloth from a firearm is? Is it an old idea that has been passed on without consideration on how weapons have changed?
If you have a large bore muzzle‑loading weapon, it seems feasible. It is just the normal round, without the lead ball. If the weapon is earlier than a percussion lock, it is simpler to place the lock right next to the tinder.
Firing a bit of cloth from a bottlenecked case down a 5.56mm calibre barrel sounds like a good way to block your barrel.
I would not, personally be inclined to try this with anything smaller than a 20‑bore shotgun.
Cutting the cartridge open and lighting the powder by some other means seems simpler and safer!
No Other Choice?
But what if the only means to light a fire you have is a cartridge?
Full disclosure: I have not personally done this, and have no intention of trying.
If the situation did arrive, here is how I would consider going about it.
Use at your own risk, and preferably don’t use at all and use safer methods instead.
Handgun Method
If you have a handgun:
Pull or cut off the bullet. Empty as much powder as possible on your tinder. Insert the rear half of the cartridge directly into the chamber.
Place the muzzle near the tinder and fire. Only the primer and a few remaining grains of powder will ignite, but this should create enough of a flame to light the powder in the tinder.
Probably will not work with long‑guns and may not work with longer barrelled pistols.
Without a Gun
If you do not have a suitable gun:
Make a sturdy tripod of sticks over your tinder, with your other fire materials nearby.
Cut the cartridge and empty out all the propellant. Add some to the tinder and save any you do not use.
Split the bottom section of one of the tripod legs and place the rear of the cartridge case between, mouth towards the tinder. Ideally you would bore a hole, but you are unlikely to have the means to bore a large enough hole with you.
Take a stick about a foot or more long. Carve one end into a blunt point smaller than the primer.
Hold the stick as far from the point as practical.
If you have gloves, wear them. If you do not have gloves, wrap your nearer hand with a bandana, keffiyeh etc.
Wear any eye‑protection (sunglasses, goggles etc) and face covering that you may have.
Ideally, look downward to the ground when hitting the primer, rather than at the cartridge.
A helmet or brimmed hat will provide added protection as you look down.
Place the stick point on the primer and hit the other end. This may ignite the emptied cartridge and light the tinder.
The same methods should work for rimfire cartridges, but you will need an implement that crushes the brass rim of the cartridge rather than hitting a central primer.
You can try carving the point of the stick as a wedge. You may need to add a stone or similar to the tip.
The above techniques are theoretical, untested and should not be attempted unless in a genuine dire situation.
I know someone on Youtube will be trying this.
Some of this information has been out there for decades. SAS and other special forces will have been taught some of the above methods. We cannot know if they ever have had cause to use them.
About a week ago, I posted the second part of “Knives You Need”, discussing Swiss Army Knives.
Since the first version went up, I have added more links and more content.
The pocket clip for my Swiss Army Ranger arrived, so I have posted an additional image of the new scales with the clip installed.
I have also put a few additional modifications on the page.
For today’s chapter of Survival Library, it seems appropriate that I look at two books that look specifically at the use of Swiss Army Knives.
Whittling in the Wild
If you are interested in Swiss Army Knives, you will have encountered videos posted by Felix Immler. Most of the links from my previous blog are to videos by Herr Immler, and for good reason.
There is a lot of rubbish on Youtube, but people like Felix Immler are a welcome breath of fresh air!
Immler has written several books on the Swiss Army Knife, but I have only been able to find a copy of “Whittling in the Wild”. It may be found under variations of this title such as “Victorinox Swiss Army Knife Whittling in the Wild”.
Felix Immler has apparently done a lot of work encouraging young people to experience whittling and create objects for themselves.
Most of the projects in this book are toys, fun‑stuff or curios. This is not the book to teach shelter construction or how to make a better rabbit trap. However, within these projects are many construction techniques that might be put to other uses, so they are worth a browse.
The book is worth reading just for the sections on safely using your Swiss Army Knife and basic handling techniques.
If you have young people you want to teach to use a knife safely and creatively, this is an ideal book. Many of us longer in the tooth and barer in the pate may learn a thing or two too!
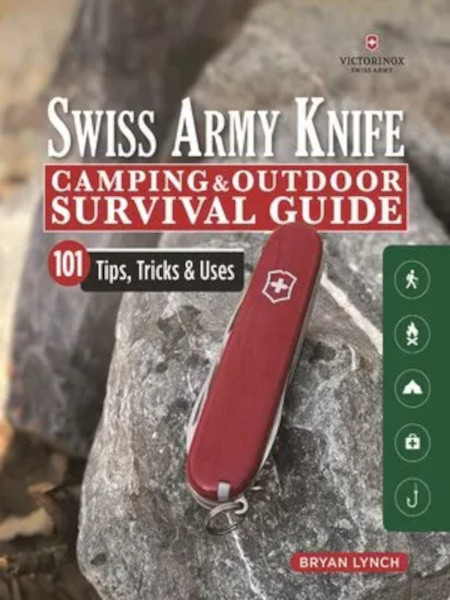
Swiss Army Knife Camping & Outdoor Survival Guide
The second book is “Swiss Army Knife Camping & Outdoor Survival Guide, 101 Tips, Tricks & Uses” by Bryan Lynch.
Part One of the book mainly looks at a variety of knife models from Victorinox, ranging from the 58mm Midnight Manager to the SwissChamps and several of the locking blade models.There is a nice chart comparing the models included in the book.
Part Two is a nice section on safely using and maintaining your knife, including sharpening tools such as the wood saw and the chisel.
Part Three is on using your Swiss Army Knife in the wilds.
One oddity of this section is the author states that the distance of an arm‑span, fingertips to fingertips, is “roughly 5 feet (152cm)”.
Generally, the arm‑span is taken to approximate an individual’s height. For me this is bang‑on: distance from the centre of my chest to finger tips is exactly half my height.
The author later mentions that he is “a little on the short side”. The quick measuring scale he illustrates will not apply to the majority of readers. As he himself states “Obviously everybody is different, so premeasure your own limbs”.
Most of this part are presented as “projects” with an estimated time. Most of the projects are survival ideas that will be familiar from other sources.
Many are nicely described, and include the occasional less‑well known idea, such as the fire‑plow. Wilder has a nice story about someone using a fire‑plow, but I have seldom seen mention of this device in other publications, although it is included in some versions of FM 21-76/3.05.70 and the SAS Survival Handbook.
There is a suggestion about carrying wire wool under the corkscrew. I wonder if contact with the corkscrew will encourage the wire wool to rust, which makes it even less useful for firelighting. It is not a particularly good tinder for non‑electric sources of ignition. Some Swiss Army Knives have an LED. Can steel wool be ignited with the batteries for these?
There are far more useful things to carry than steel wool.
When using the back of the saw or some other tool with a ferro‑rod, it is more effective to draw back the ferro‑rod while placing the “steel” on the tinder.
I liked the section on carving wooden fish hooks from branched twigs.
The author talks about “catch and release” sport fishing.
Some mention might have been made that the paracord net described (or any net made with knots) will damage fish and should only be used for emergency or sustenance fishing. Similarly, wooden gorges as hooks are very cruel, often illegal, and should only be used in genuine emergencies.
While fish trapping with a bottle is mentioned, there is no mention of trot‑lines, which are likely to be more efficient than active fishing in an emergency.
There is a useful section on how a Swiss Army Knife may be useful for firearm maintenance and cleaning.
I also liked the tip on making a squirt bottle for cleaning out wounds. Yet another use for the sometimes maligned reamer! A bottle with a drinking nipple can probably be used the same way.
“There is a lot of wasted space in a vehicle, and I urge people to use it.” Good advice, although I would stress having something like a rain poncho, duct tape, vehicle tools and a sleeping bag or poncho‑liner.
Imagine attempting to repair your vehicle in very bad weather. It will help to have a means to keep the rain or snow off what you are working on.
In the “Urban” section, the author describes getting locked in a washroom cubicle. Similar happened to me in the toilets of a very famous museum. Like the author, I used my Swiss Army Knife to dismantle the lock and free myself.
Summary
In summary, I liked both of these books. Each is worth a read. I was lucky in that I was able to read both of them together.
There is a good possibility that when you really need a tool, your EDC Swiss Army Knife may be the only tool available. These books provide a nice reminder that you are better equipped than you might fear.
I had originally planned to make “Knives You Need” a two‑part series.
I have now had second thoughts.
The second part was going to address the topic of field knives. Much of it would have repeated ground already covered in other previous articles.
Instead, I have decided to take a slightly different angle and have decided to break this topic into smaller, bite‑sized pieces.
Many of you reading this may have spent good money getting yourself a survival knife. Good tools are important, you will get no argument from me on this point.
However, unless you spend all of your time in the great outdoors, the odds are that when you really need a tool, that survival knife will be back at home or in your car rather than on your person.
What is more, the tool you actually may need may not actually be a knife.
If you are willing to spend hundreds of dollars on a survival knife, is it not sensible to invest a little in the tools you are most likely to carry with you every day?
It is no secret I am a big Swiss Army Knife (SAK) fan.
Multi-pliers and lock knives will be covered at a later date.
Critics of the Swiss Army Knife point out that the blades lack a locking mechanism and potentially may close on the fingers of the user.
In practice, I have seldom had this happen. Perhaps penknife users are more cautious due to the lack of locking mechanism?
Mechanisms fail, so a lockknife that is mistakenly used like a fixed blade may be a greater potential risk.
There are several websites that give advice on safely handling and using penknives. Many of these are written for scouts, but many older users would probably benefit from putting these ideas into practice.
I recently read of someone who did have a blade close on them. They accidentally hit the back of the blade against a nearby wall.
This might have been avoided if the user had taken the precaution of extending an arm and checking for clearance around themselves before starting at task.
This is a prudent procedure for any tool use.
If using a long tool like an axe, hold it at full extension and check all around you. Do not forget to check for obstructions above and below you too.
The Penknife Grip
When using a folding knife, use what I call “the penknife grip”.
Your four fingertips are pressed against one scale. The opposite scale is held by your thumb and themar eminence. This keeps your precious digits out of the way of the main blades. This is the way to hold your penknife when opening tools.
When you need to close a tool, hold the knife in the same way and place the palm of your other hand on the back of the open tool. Calmly and smoothly fold your hands together to close the tool.
Many actions can be performed with your knife held in the penknife grip, keeping you safe should a tool unexpectedly close.
Some tasks will require a grip with your fingers around the knife body. Ensure a solid object, such as what you are working on, obstructs the tool from closing and that any pressure is applied in the correct direction.
Never use force to compensate for a blunt tool!
Never cut towards a body part, including your own. This simple and sensible precaution is often neglected in Youtube videos!
Right Tool for the Job
The risk of injury may be reduced by using the right tool for a job.
The long knife blade and saw-blades probably have the greatest potential for causing injury.
If you need to cut something, the short blade or the scissors are usually more appropriate.
If you need to bore a hole, use the shorter blade or the reamer.
If you need to pry, use the can- or bottle-openers, or better still use a more appropriate tool that is not your penknife.
In the pouch I carry my penknife in, I also carry an eight centimetre-long flat pocket pry bar. On my keyring, the P38 may be used to pry or open paint tins.
It is handy for trimming my nails or other minor jobs that it is not worth getting the main Swiss Army Knife out for. It actually sees a lot of use since it is the first tool I usually reach for.
The Classic was donated by the lost property box. It originally had green cracked scales and was missing its tweezers.
A few years back, I treated myself to a new toothpick and tweezers, which had recently become available in green.
Recently, it occurred to me how shabby the cracked scales looked. I would need something that matched the green of the toothpick and tweezers.
I found a set of replacements at a tolerable price. What was more, the new scales were in luminous green.
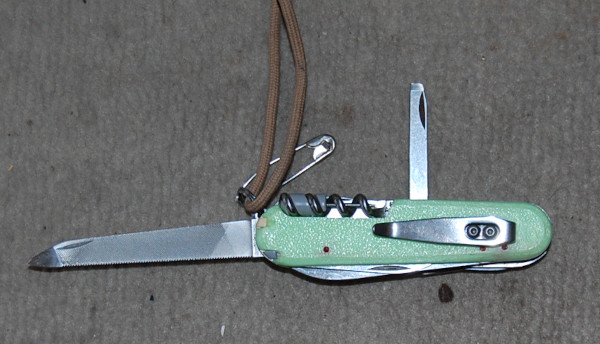
Classic SD with luminous scales. Note whistle, P51 baby can-opener and Photon-light also on keyring. The safety pin is attached directly to the Classic SD. I have now removed the safety pin since it had a tendency to open while the keys were in my pocket.
The Classic is a single-layer SAK with a small blade, a pair of scissors and a nail file. The tip of the nail file of the SD model is designed to act as a screwdriver. Some users grind the end to create a wider slot screwdriver. Some reviewers complain that the file no longer ends in a pointed nail cleaner. The screwdriver tip is still good for cleaning nails.
The Classic SD is one of Victorinox's most popular best sellers.
A friend showed me the 58mm Rambler, which is a two-layer SAK with all the blades of the Classic SD plus an interesting combination tool with a cap‑lifter, magnetic #00/#0 Phillips screwdriver and wire‑stripper/bender as well. I will likely buy a Rambler if I ever need to replace my Classic SD.
(Update: I have no willpower! I brought a Rambler and transferred the luminous scales on to it. This now rides on my keyring.)
The Manager is apparently a Rambler that replaces the toothpick with a retractable pen. The Midnight Manager is a Manager that replaces the tweezers with an LED. I have heard this light is not waterproof.
There are other 58mm models, but I feel the Classic SD or the Rambler are most useful.
I do not see much point in a 58mm model without scissors.
One oddity in the 58mm models are the bladeless Jetsetters. Supposedly airliner “cabin-safe”, this ignores that the scissors are probably a more practical weapon than the blades of 58mm models. The wirestripper on the combo-tool will not work without a blade.
If you intend to have a 58mm as your primary EDC knife, the MiniChamp may appeal. The extra tool that most appeals to me is the cut and picker.
Some may find the MiniChamp may be a bit bulky or heavy for keyring carry. A friend of mine has an alox version and considers it a little heavy for his keyring. Pocket clips for 58mm models may be found, but I do not use one myself.
Incidentally, SAK with Alox scales generally do not have tweezers and toothpick slots. I would recommend only considering models that have these useful tools.
When it comes to “full-sized” (91mm) Swiss Army Knives, Victorinox currently offers 28 different models.
For general use, survival, emergencies or EDC (Everyday Carry), I would suggest one of the following models:
Spartan
As one might expect from the name, the Spartan is the most basic model of the 91mm Swiss Army Knives. Apparently it remains one of their best sellers.
It is a two‑layer knife, so you get a large and small knife blade, plus the can‑opener and the bottle‑opener. On the back is the reamer and the corkscrew.
Knife blades are quoted as 58 mm and 36 mm in length, with a hardness of RC 56. My own measurement gives a cutting edge of around 60 mm, with the distance from tip to knife body being greater. A 91mm Swiss Army Knife complies with the 3 inch/76 mm blade length restrictions some areas impose. This figure was probably chosen so that SAKs were exempt!
While on the topic of smaller knives, this video suggests a 74mm Executive for EDC, but they have been discontinued.
The applications for the knife blades are fairly obvious. Quite large pieces of wood may be split or removed by using techniques such as batoning.
The knife blades are sharpened at an angle of 20 degrees.
The X-notch is an alternative to the square or log-cabin notch. It may be created by saw cuts or batoning a knife blade
The bottle-opener and can-opener are collectively referred to as the “opening layer”. Both the can-opener and the bottle-opener have applications that may not be immediately obvious.
The 58mm Rambler has a tool with a magnetic Phillips screwdriver. Oddly, the screwdrivers on 91mm knives are not magnetised. My bottle opener is weakly magnetic and the can opener more magnetic, but that may be due to the magnet I keep in them.
Bottle‑Opener
The notch on the bottle‑opener/cap‑lifter works together with the cutting blade to serve as a wire-stripper. The notch may also be used as a wire‑bender or nail‑puller. It may be used as a striker for small diameter ferro-rods.
Various other parts of the bottle‑ and can‑opener or the keyring eyelet may be utilized bending wires or similar materials.
The tip of the bottle‑opener is a large (6 mm) slot screwdriver. This will fit in a socket heads adapter should you need another type of screw head. The screwdriver tip may also be used as a light prying tool.
Can‑Opener
The tip of the can‑opener is a small (3 mm) slot screwdriver. What is not often appreciated is that this part is also intended to work with Phillips and Pozidriv screws too. The tip may also be used for light prying, such as opening stubborn pistachio nuts.
I sometimes use the screwdriver tips as measuring gauges to estimate if something is 3 or 6 mm .
The hook part of the can opener may also be used to cut tape on boxes. Felix Immler has a video on how to turn this part into a more efficient hooked cutting tool. Some alternate examples of sharpened the unsharpened edge to improve string and box-cutting capability.
This can-opener may also be used as an orange peeler or a billy lifter.
One of my favourite uses for this tool is that it can be used to carry a 5.7 mm magnet. The magnet is useful for picking up or holding secure small screws, or magnetizing a pin, tweezers, safety pin or needle for navigation.
The can-opener on its own is now magnetic. Interestingly, the bottle-opener on the same layer is also weakly magnetic.
I have taken to alternating storing the magnet between the bottle-opener and can-opener to increase the effect. The main blade and scissors are now also magnetic, and the hook weakly magnetic.
Check to see if the pin in your penknife scales is actually magnetic.
Corkscrew
My main use for the corkscrew is to carry the 1.5 mm mini‑screwdriver.
The mini‑screwdriver is an essential for anyone who wears spectacles or even sunglasses. Not all SAK come with the mini‑screwdriver. I very much recommend acquiring one.
Not surprisingly, all the SAKs I recommend for EDC have corkscrews so you can carry a mini‑screwdriver.
The mini‑screwdriver may be used as a tiny prying tool to pop the back off a watch and to remove the battery. It may be used to drive out small pins, and may be used this way when replacing the spring of the SAK scissors.
If you want to use the corkscrew, the tool holding the magnet may be used to park the mini-screwdriver.
Cotton wool may be wrapped around the corkscrew to serve as a source of tinder, or it may be used to carry a supply of fishing line.
There are other alternate tools designed to fit in the corkscrew, including the Fireant, a tiny ferro‑rod. Larger diameter ferro‑rods may be cut down to fit within the corkscrew.
Alox handled variants may lack the corkscrew and other back-tools.
I have glasses, so carry the mini‑screwdriver.
Note that the Spartan, Climber, Camper and Huntsman have an equivalent that replaces the corkscrew with a #2 Phillips screwdriver. These the Tinker, Super Tinker, Hiker and Fieldmaster.
Trivia: MacGyver did not drink, and many of the penknife models he used in the series lacked a corkscrew.
Reamer
The reamer is another very versatile tool. It acts as an awl, a scraper, a punch, a seam‑ripper, wire‑stripper, wire‑bender and a threading tool.
The reamer is very useful for creating pilot holes for a drill bit or gimlet. It may be used to clean up or bevel a hole you have bored.
A bit of trivia: when your reamer needs resharpening, it should be sharpened at 48 degrees.
84mm and 91mm Swiss Army knives share the same component for their reamer.
Scale Tools
Scale tools usually refers to the tweezers and toothpick. Some models have additional items such as the ballpoint pen or pin.
Some tools you will not use often, but will be very pleased you have them when you really need them. This may include the tweezers or toothpick.
Some models, such as those with Alox handles, lack the tweezers and toothpick. The tweezers in particular are worth having, and the toothpick has also proved useful to myself.
Even if you do not own a Swiss Army Knife, the tweezers are a useful thing to have in your medical or emergency kit. They are hard to beat for compactness and functionality.
Trivia: Tweezers for the 58mm and 91mm models are of similar size, but differ in the shape of the head.
A friend of mine likes his Compact Swiss Army Knife. Unlike many Swiss Army Knives with only a few layers, the Compact includes the pen and mini‑screwdriver.
The Compact is a two‑layer knife like the Spartan but replaces the small blade with the scissors, and the reamer with the multi‑purpose hook. Instead of the cap‑lifter and can‑opener, there is a single “combo‑tool” that serves as a 6 mm screwdriver, can‑opener, cap‑lifter, wire‑stripper, emergency Phillips screwdriver and wire‑bender.
Personally, I think the reamer is a “must‑have”.
The Compact apparently evolved from the 84mm Golfer. An 84mm version of the Compact would be nice, especially if they replaced the long nail file of the Golfer with a reamer.
The Companion is a three-layer SAK that replaces the can opener with a box-opener. Oddly, the box-opener was not paired with the combo-tool to keep can-opening capability. Lots of other SAK tools serve as box-openers, including the small blade, scissors, reamer and can opener.
The Climber is a three‑layer version of the Spartan, adding the hook and scissors and retaining the reamer and small blade. The same tool selection was available in an 84mm Climber Small model/Alumnus, but it is sadly no longer in production.
The 74mm Executive is comparable to the 84mm Climber, but also out of production.
For a minimal bulk, “city carry” EDC knife, the Climber is a good choice and very good value for the tools and capability it offers.
The Camper is a Climber replacing the scissors and hook with a wood saw.
If I had to make a choice, I would choose the scissors over the wood saw.
The Explorer is a Climber that adds a magnifying glass and in-line #1/#2 Phillips screwdriver. If you now find it difficult to read labels in the shops, the Explorer may be a good alternative to the Climber.
Scissors
Keeping your toenails trimmed is an important part of looking after your feet (and socks). The Swiss Army scissors are excellent for such applications. Better than many purpose‑designed items!
The SAK scissors are widely regarded as being the best available on any multi-tool. You probably own dedicated scissors that are not as good.
The scissors are also surprisingly robust, being quite capable of cutting through soda cans and tin can walls to construct various items.
The scissors are probably the Swiss Army tool I have used the most, and I suspect I am not alone in that.
I regard the scissors as a must‑have feature on a Swiss Army Knife.
Multi‑Purpose Hook
If I recall correctly, the multi‑purpose hook was once called the “parcel hook”, being intended to hook though the string of a heavy parcel or bundle of firewood and let you use your penknife as a handle.
The hook is rated for 90 kilos/200 lbs of load!
The hook is often underappreciated, since there are many other applications for this item. These include being used to untie a stubborn knot, twisting materials to make natural cordage or an eyelet in wire, lifting hot billies or their lids, pulling stuck zippers, as a pen holder, retrieving tent pegs, and tightening lacings.
Some hooks have a nail-filing surface on the back.
Check out some of the videos on‑line for more applications.
There is even a modification to turn the hook into a groove carving tool. Worth considering if your penknife is a dedicated whittling tool. Putting a cutting edge on your hook may make it less effective at some of its other applications.
Trivia: The hook and scissors will be mounted on the same layer. If your 91mm knife has one tool, it will have the other too.
Huntsman
The Huntsman is another of Victorinox’s best sellers.
Effectively, it is the Climber with a woodsaw blade to create a four‑layer model.
A Huntsman will cost approximately twice what you might pay for a Spartan. Prices vary a lot, however, so shop around!
For “bushcraft” and “woodcraft” use, the Huntsman is a really good choice, having both the scissors and a wood saw. A saw is a handy thing in the garden too!
Wood Saw
Many traps and other items you may wish to construct may require accurately cut parts.
The wood saw is also useful for scraping bark off, creating sawdust or shavings for tinder, descaling fish, and may be used as a striker for a ferro‑rod.
Take a look at this video on using the wood saw and a tip on waxing it.
Trivia: The wood saw is one of the few commonly used SAK tools that lacks a nail‑nick
Oddly, the original scales of my Ranger have “Camping” and a tent logo. Several models of SAK other than the Camper have this decoration.
The Ranger is the Huntsman with the addition of the metal saw/file. It also has a chisel blade and a 2 mm fine screwdriver on the back, so three additional tools than the Hunstman. Unlike some larger Swiss Army knives, there is a back layer tool on every layer.
I have found the metal saw useful, so will choose a Ranger over a Huntsman.
The chisel is useful when forming notches in wood, and may be used as a plane/scraper.
A Ranger will cost approximately two and a half times what you might pay for a Spartan. As I have already said, prices vary a lot, so shop around!
I once had to cut down the bolts on a rucksack frame since they were digging into my back and damaging my shirt. Not surprisingly, I like having the metal saw/file available.
The metal saw is better than the wood saw for cutting some plastics and for some wood‑cutting tasks.
It is also a good striker for a ferro-rod. Keep the saw still and pull the rod across the back.
The file may be used sharpening improvised fishing hooks.
The tip of the metal saw may be used as a Phillips screwdriver or nail-cleaner. It may also be used with a socket.
Trivia: 91mm Swiss Army knives with the metal file will also have the chisel.
Since the seven‑layer Champion was discontinued, the Ranger is as big a Swiss Army Knife as I care to consider carrying. I don't really want something over three centimetres thick!
A sewing needle, wrapped in invisible thread, has been placed under the metal saw.
The tweezers have been modified to be pointed. The tweezers with my Classic SD/Rambler are unmodified, so between the two knives I have both a pointed and a standard configuration set of tweezers.
A small hole has been melted in the toothpick so that it may serve as a blunt needle to thread cordage such as dental floss.
Using the small blade of the Ranger, I made a tick removal tool by cutting a slit in the end of the toothpick. I am most likely to use the toothpick in my keyring SAK if something is stuck in my teeth.
Both the toothpick and the pointed tweezers with the Ranger may be used against ticks.
A second hole was drilled in the new scales to hold an unthreaded additional sewing needle. The pin proved to be poorly magnetic, so I replaced it with a bead-headed pin that was more magnetic and easier to remove.
Old Ranger with new luminous scales. Note magnet carried in can-opener.
New Scales!
I liked the new scales on my Classic SD so much, I went ahead and brought a matching set for my Ranger. I kid myself this will make it less likely to lose in Autumn.
Check out the video on how to use warm water to remove the old scales without damage.
Generally, I like my kit “low-key”. The SAK is an exception, since it is not really a tactical nor defensive item. It is, however, valuable in both replacement cost and in utility as a resource. Thus I like that the new scales make it easier to see and hopefully less likely to lose.
Check out this modification, however, since it may be applicable to other knives and tools. So might this idea!
The new scales are “plus” scales, so have additional carrying places for a pin and an SAK pen. I drilled another well for a second pin. I later discovered the pins I have are not magnetic, so I replaced the first pin with a small, unthreaded needle that is magnetic.
As well as being luminous, the scales have some nice texturing for improved grip.
The larger 91mm scales were a bit harder to fit snugly compared to the 58mm for the Classic SD/Rambler. I had to use a vice.
Do not forget to pad the jaws of the vice so you do not damage your new scales!
Slots for the scale tools were very snug for both sizes of scale, making the tools difficult to remove. I used a circular needle file to create a small scallop underneath which solved the problem. Overdid it a little on the toothpick for the Ranger , but adding some “White Tack” to the slot solved that problem.
The Ranger has been fitted with a loop of beige bootlace about 14 cm long. So too has my mini‑Leatherman Squirt P4.
Both tools ride in a mobile phone belt case with cut‑out bottom corners.
The loop of cord is passed down through a corner and then the tool passes through the loop to form a lark’s head knot. Even if the top of the pouch pops open, the two tools cannot be lost.
The loop is also large enough to pass around my wrist or hook my thumb through for added security when using the tool. The safety pin may be used as a pin or clip to secure the tool to clothing or D‑rings.
This loop now has a ferro-rod toggle.
I have also to fitted a pocket clip to the Ranger, giving me another option when I need my hands free.
The pouch mentioned above is on my trouser belt. If I am wearing trousers, I have my Swiss Army Knife and mini‑Leatherman with me. I will also have my keys, so will have my Classic SD/Rambler available too.
The belt pouch also holds the aforementioned pocket pry bar and a diamond‑impregnated metal sharpening card.
The few jobs the Ranger is not suited for, the mini‑Leatherman or pry bar can usually handle.
If this collection of tools cannot handle a job, they may often be capable of making something that can.
The tools form a component of the EDC kit I have distributed across my keyring, trouser pockets and compact pouches on my trouser belt.
Summary
For EDC, I prefer a Swiss Army Knife to include scissors, a reamer and corkscrew/mini-screwdriver.
My personal choice is the Ranger and Rambler. I carry my Ranger in a belt pouch. Previous knives have worn through a few pockets over the years.
If you want something more pocket-friendly and more compact, there is the Compact, Companion and Climber. All have similar capabilities, with the Climber possibly being best value.
For an even lighter option, Sportsman, Waiter or Bantam.
The Swiss Army Knife is the tool you are most likely to have with you when you need a tool. It is worth spending a bit of money to get one you are happy with.
That said, the web currently lists the Victorinox Ranger as $75, with the lesser bladed models at correspondingly lower prices.
Given the very high quality of Victorinox knives, that is a pretty reasonable price compared to the prices of some other folding and fixed blade knives.
Roll back to the start of this century, and you would have found me practising cookery in a mountain hut in the middle of Iceland.
I had found myself part of an impromptu group hiking over the mountains.
While most of my companions tucked into their freeze‑dried rations, I busied myself cooking my dinner in my Kephart‑inspired cook kit.
I do not remember exactly what I was cooking, but it was based around some rice. Among the foodstuffs I carried was included rice, flour and “Alpen” (a brand of muesli).
Cooking a meal from base ingredients was considered to be somewhat eccentric by my fellow hikers. It was, however, admitted that my meal looked far more appetising than theirs! I was probably carrying less weight of food too.
The following day, a beautiful German girl scrutinized by every move with great interest as I improvised an Alpen bannock, cooked in my home‑made folding handled frying pan.
Carrying flour and knowing how to make use of it on the trail I can attribute directly to my acquisition of “Jack‑Knife Cookery” by James Austin Wilder.
Not to be confused with an inferior book of similar title by the “Woodsman’s Thong” (!)
The real Jack‑Knife Cookery book was first published in 1929, but has undergone several reprints. My copy dates from the twelfth printing from 1965.
Written for boy scouts, this book begins by proposing a scenario where you have only flour, raw meat and a jack-knife. How would you go about feeding yourself?
The reader is then introduced on how to cook “twister” and “kabobs”, both of which may be cooked on green sticks over a “plug‑hat hole” fire.
From here, Wilder introduces the reader to cooking dampers and other foods, cooking on or in coals, “Imu” cooking, how to cook vegetables without a pot, mixing without a bowl, how to cook in a billy, making stews and many other useful subjects.
All of this is illustrated with Wilder’s own drawings and anecdotes/“yarns”, so is clear and highly readable.
Having fed the inner (young) man and grabbed the attention of the reader, Wilder moves on to discuss camping and related topics.
This is 1920s’ style, of course, so of interest to anyone who understands that they may have to survive outdoors without Goretex, GPS and freeze‑dried rations.
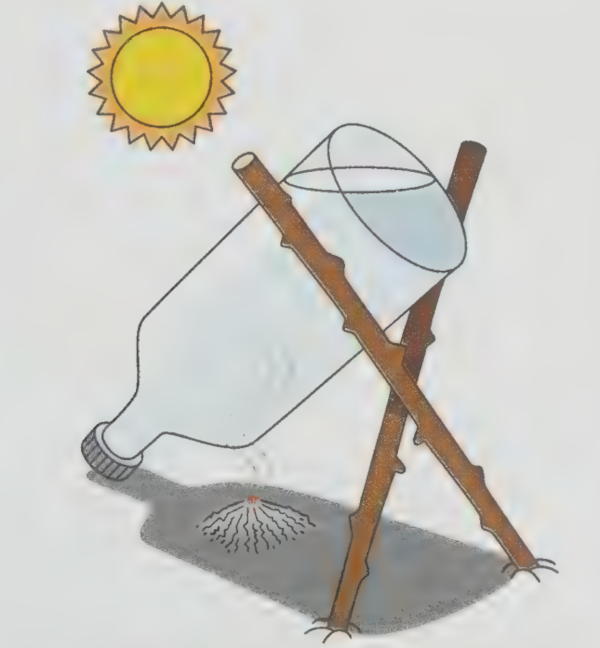
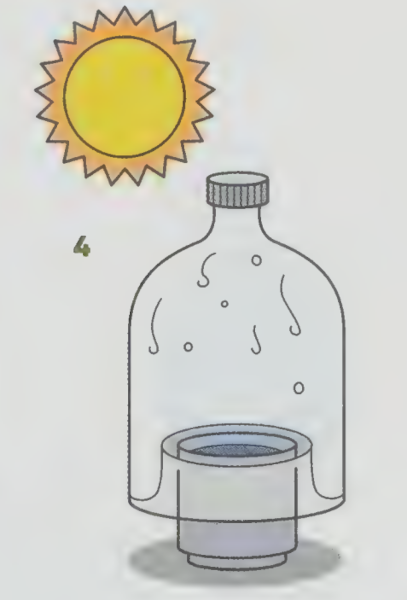
The third part of the book logically drifts into survival and emergency advice, peppering it with additional recipes and cooking techniques, including fun stuff such as boiling water in a glass bottle.
The section on friction methods for starting fires is entertaining, if not as technical as that in “Northern Bushcraft”. This section includes a story about using a fire‑plow/fire‑plough, a technique many survival manuals do not bother to include. There is also a “sawing” friction method using sections of bamboo which I do not recall often seeing in other works.
This book has been a great influence on many young outdoorsmen, myself included.
To this day, I may sometimes be found in the kitchen mixing flour and sultanas together when I feel peckish.
Jack‑Knife Cookery is a great book. I treasure my copy, which sits in pride of place on my shelves next to “Camping and Woodcraft”. I thoroughly recommend adding a copy to your survival library.
Now the bad news. I have been unable to locate an on‑line or Kindle copy of this book. The only search engine hits I get are dodgy sites with bad English that want your credit card details first, so steer well clear of those.
Printed copies may be found, although on‑line prices tend to be high. I have seen copies offered for as little as $30, so shop around before you part with hard‑earned cash.
If ever a book should be preserved on Internet Archive, it should be this one! If anyone reading can make that happen, make it so.
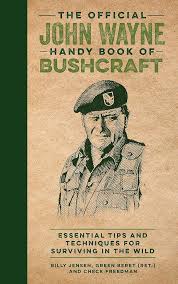
As mentioned in my previous review, the section on fish traps was one of the more deficient sections of “The Official John Wayne Handy Book of Bushcraft”. There is a mention that one of the means you can make a fish trap from is from a water bottle. It is also stated that traps will only catch very small fish.
A friend of mine recently mentioned using soda bottles as fish traps.
The way this is usually shown, a cut is made just below the conical section of the bottle. This part is inverted and inserted into the rest of the bottle.
Obviously, only fish small enough to swim through the nozzle can enter the trap.
Not much of a meal!
I began to think about ways to improve on this. The obvious one was to cut off the nozzle and provide the trap with a bigger entrance.
Before I could think too long on this, I was reminded of one of my favourite youtube channels.
This features a very ingenious lady in Cambodia.
Check out some of her other videos, which feature PVC fishing bows, recipes and many other varieties of traps.
◦ Note that the screw‑threaded part is removed and the area around the new opening cut into “petals”. In this video the petals are clearly shown being cut into points.
◦ Holes have been made in the base of the trap so water flows through. This lets the smell of the bait out to attract fish. This also allows them to drain as they are removed from the water.
◦ Each trap has a closed smaller bottle attached to it to act as a float and suspend the trap clear of the bottom.
If aiming for bottom dwelling fish, you may need to weight the trap.
◦ The funnel part of the bottle is secured to the larger part. This is a good precaution if aiming for larger fish.
When I first started watching this I thought she was cutting “V” shaped tabs in the outer part to hold the funnel in. That should work.
What she is actually doing is making holes and securing the two parts with cord [or you could use grass or plant stems].
Reaming matching holes and using wooden pegs carved from a stick would make the trap easier to take apart to remove the fish.
This site shows the innovation of a flap cut in the funnel for easy removal of fish.
Such a trap can easily be made with just a penknife with a reamer.
Four good‑sized fish from three traps is pretty good going!
Trivia: I share my birthday with John Wayne. Some years, a TV channel will schedule a day of his films. Good, unpretentious entertainment! That is me sorted for the day!
I once watched something where a character declares “I try not to have high expectations. I am, therefore, seldom disappointed. Occasionally, however, I am pleasantly surprised!”
That is not a bad philosophy, and I was reminded of this when I began to read “The Official John Wayne Handy Book of Bushcraft”.
This could be really bad, have hidden pearls, or just be a bit of a giggle.
Firstly, I will answer a question I usually save until the end of these reviews. This book should NOT be used as a primary survival guide. Some fields are omitted, others lack adequate detail.
Some of the content was useful. There is a section on dealing with a riptide, which is not a topic I have seen in many manuals,
Each section is only a few pages long, so I expect much of this content was originally an article in “The Official John Wayne Collector's Edition” magazine.
Many of the sections only deal with a single topic or subject, such as a single type of knot or a particular type of campfire. That works well for certain topics and is a presentation style I may experiment with.
In other places, the treatment of the topic is rather brief, and in a few places additional illustrations would have been useful. The latter is odd, since in general the book is quite well illustrated, both with drawings supporting the text and photos from Wayne’s films.
Tools
The book starts with a section on how to make a variety of tools using primitive means. No mention is made of the risk of silicosis from stone knapping. Improvise a nose and mouth covering when making stone tools. Eye protection, if you have it, is also prudent unless you are a big Rooster Cogburn fan.
Several places in the text you are told to hit the back of an axe or knife blade with a stick or stone. Do not use a stone! The technique is called “batoning” for a good reason.
If you made yourself a stone knife as suggested at the start of the book, hitting it with another stone will waste hours of your careful work!
The section on making a whistle was disappointing. Acorn cups may be quite hard to find in certain seasons and regions.
The section on making a bow shows the first finger hooked over the top of the arrow, which must result in considerable friction.
Correctly, the book advises that hunting with a sling requires a vast quantity of practice. Incorrectly, it says the weapon is also called a “slingshot”. [Wikipedia also gets this wrong!] Sling and slingshot are quite different weapons using quite different principles.
Knots
The chapter on knots deals with one knot per section.
In some of these sections more information on the application of such knots might have been useful.
For example, the Alpine Butterfly knot is covered, but no mention of the quick and handy way this may be tied.
The section on the half hitch actually shows two half hitches in the illustration.
Food and Water
The chapter on food and water mentions water tapping from trees, which some survival manuals neglect.
The edibility test is described in detail, but no mention is made of prioritising the test for foods that are most abundant in the area.
There are sections on line and rod fishing and fish trapping, but no mention of night/trot lines. The latter section could have used some illustrations of various fish traps.
There is a section on “knife hunting” with a caution on how dangerous it will be and the high likelihood of injury.
Use the knife to cut a stick and make a spear. If in terrain where there are no sticks, you are unlikely to get close enough to use a knife, anyway.
Fire
The chapter on fire I thought was quite good. Some fire‑lighting techniques not often covered, with some useful illustrations.
Some discussion of various types of campfire. Uses for charcoal, and emphasis on properly extinguishing your fire.
Wet rocks in a fire may explode into fragments, not “shrapnel”, which is a different thing.
There is a section on using a Mylar space blanket as a reflector for your fire. This is a legitimate application, but perhaps some mention should have been made that a higher priority use for such an item is waterproofing your shelter roof or wrapping yourself.
Shelter
The chapter on shelters was much less satisfactory. It starts with a description on how to cut down a tree because it may be where you want to make a camp! Camp somewhere else, yahoo!
You are told to hang a hammock using a figure eight knot, but no real explanation nor illustration.
Building a raised bed suggests using logs for the short side. Two long logs with shorter sticks between them seems far more practical.
There is a description on how to make a five foot diameter teepee. Not sure what for. I could not lay down in such a space, let alone someone John Wayne’s height!
One of the illustrations incorporates ideas such as using natural windbreaks such as rocks, but seems to show the bed laid perpendicular to the fire.
There is a lot about this chapter I feel could be improved.
One error that really has me scratching my head is that in several sections the authors describe shelters made with “poncho liners” when they clearly mean ponchos.
You would think a retired Green Beret and a SERE course graduate would know the difference.
You would think that the editorial staff of the magazine might have picked this error up.
You would think some of the readers of the magazine might have written in about this obvious error the first time it appeared.
To confuse a liner with a more external layer is itself a really bizarre mistake for native English speakers to make!
“Make a map” could have mentioned that birch bark or similar and charcoal could be used to make a portable map.
Another objectionable section is the recommendation to shoot any snakes on sight!
You should not kill anything unless you have a legitimate reason. This saves ammunition, if nothing else.
As a later section notes, most snakes will not bother you if you leave them alone. If there is a danger of stepping on a snake, carry and use a walking staff.
At the end of the book is an advert for a survival training school where both authors work. The various points raised above do not really form a recommendation.
After finishing this book, I started browsing “The Official John Wayne Handy Book for Men”. This begins with some bushcraft information. I found this description of making a bow and arrows better written. Some of the other articles on the same topics are also superior.
It mucks up the illustration of how to identify the North Star, however.