Categories
Phillosoph

Emergency Kit for Action Heroes

As is the custom on Friday, today’s blog will be a little more diverse and light-hearted than usual. Regular readers will be familiar with my tendency to conduct “thought experiments”, often inspired by books or television that I am viewing. (Well, I like to think they are “thought experiments”. My girlfriend just considers them another of my eccentricities.) 

The following occurred to me while watching an episode of “Supernatural”, but it applies to many other examples of the action or horror genre. The scenario is the protagonists end up having to explore somewhere at short notice. Would it not be useful if they had beforehand assembled a small kit that contained useful items they might need?  In effect, a modern day “possibles bag”? We will assume that this kit is intended to fit is a small bag such as a messenger bag, but it could just as readily be distributed in an equipment vest or in a daysac. It would be the sort of thing you can quickly grab from the car before you go to rescue this week’s female guest star. What might the contents be?

    • Flashlight. Nearly everywhere in these movies seems to be dark and often underground, so a flashlight would certainly be useful. Larger, more robust models can be used as clubs. Your flashlight will flicker and lose power when danger is near.
    • Pistol. Danger is usually implied so better to have one and not use it that be without one and need it. A compact high-capacity .45 with several loaded spare magazines would be desirable. If we are in an episode of Supernatural silver or other specialist ammunition will be needed!
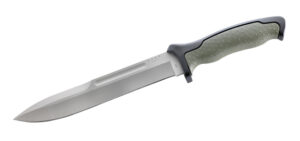
    • Knife. A good, robust fixed-blade knife. My choice would be a kukri for its versatility and considerable chopping ability. A MOD survival knife is also a good choice. The shorter bladed varieties of machete or the British Army Golok are other possibilities, although might be a bit long to fit in some of the suggested bags.

    • Prybar. A small crowbar has various uses and can perform many of the jobs that a knife is not recommended for. As well as opening doors and breaking locks it can also be used as a digging implement, a piton or a weapon. Cold iron is of course potent against certain supernatural creatures and a good lump of it works well on most natural creatures!
    • Cordage. People always seem to be falling into holes or quicksand so a rope to throw to them will be handy. A hank of paracord bundled hojo-jitsu style. A hank of string or braided fishing is useful for more mundane uses, as communication cord or setting a tripwire to topple a sentry. A roll of duct tape serves to silence and bind captives. A handful of cable ties have a number of potential uses too.
    • Shell dressings, plasters. If there are guns about it is only prudent to pack a few battle dressings. A handful of smaller plasters for the inevitable cuts and scrapes. Major characters always seem to get these on their foreheads!
    • Fire. One or two disposable butane lighters to light fuses and torches. Of course, in action movies Zippo lighters are disposable! Characters light them and throw them away, particularly if there is a big volume of gasoline.
    • Compass. Having a spare compass is never a bad thing and they are rather useful for orientating your treasure map.
    • Water bottle. Heroes are often immune to many physical needs, sometimes setting off on arduous journeys with neither a packhorse nor pack. A small bottle of water is useful, however. You can use it to wash wounds or pour it on the floor to find the hidden trapdoor!
This is just a bit of whimsy, of course, but the resulting list is not a bag nucleus to base an emergency kit around. I would certainly add foil emergency blanket to such a kit. Use a planning system such as Uncle-Phil’s List to judge what other components could be added depending on available capacity and situation.

Categories
Phillosoph

A Kephart Inspired Cooking Kit

As has become the tradition this week, today’s blog will start with a quote from Kephart:

Cooking Kit.—It is easy to make up a good lightweight set of utensils for two or more men (see Vol. I. pp. 1 18-123), but a satisfactory one-man kit is another matter. The Boy Scout sets do fairly well for a short outing when baked bread is carried, but are inadequate for baking on the journey. A reflector is too cumbersome for a lone woods-cruiser. Let him bake his bread and cakes in a frying-pan (see Vol. I, pp. 344-345). This, calls for an 8 or 9-inch pan. Get one with folding handle (detachable ones are easily lost), or take a common one, cut off all of the handle but about 1½  inches, and rivet on this stub a semi-circular socket into which you fit your stick for a handle when you go to cooking. For general use I do not like aluminum frying pans, but when traveling afoot they are satisfactory. A deep aluminum plate fits inside the pan in my kit, along with an aluminum fork, whitemetal dessert spoon, and a dish towel. When tied up tightly in a light bag they do not rattle around.
You want two little kettles for cereals, dried fruit, tea or coffee, to mix dough in, and the like. A pot that is broad and shallow boils water much sooner than one that is deep and narrow, and it is easier to clean. The kettles must not be too big to stow in the knapsack. Anyway, when one is going afoot he does not want to bother with food that takes long boiling, and so has no use for a large kettle, 1 choose two 1-quart aluminum buckets, which can be bought through any dealer in kitchen ware, fill them with part of my foodstuffs, set them bottom to bottom, and tie them tightly in a bag so that the covers will not come off. So there is no waste space, for the food must go somewhere, anyway. The kettles are good protection for perishables. Thus no sooty vessel goes inside another, and you have a package of small diameter.
A seamless tin cup is carried wherever convenient, generally outside the pack, where it can be got at when one is thirsty. Aluminum is much too hot for cup and spoon. The complete kit weighs just 2 lbs, 2 oz. including bags. No table knife is carried, as I wear a sheath knife.”

Camping and Woodcraft. Horace Kephart 1921 (Vol.2 p102)

Elsewhere Kephart shows a frying pan with a folding handle with rings through which a stick extension can be inserted. The same feature was seen on the Swedish mess kit described a few days ago.
specifications are very logical, and based on decades of experience and experimentation. Producing a similar kit for my own use proved to be more problematic than one might expected!
Billies are the main problem. Most items now sold by suppliers as “Billies” are nothing of the sort. They are saucepans with side handles. A true billy has a pail or bail handle like a bucket. This lets it be hung above a fire and then raised higher when you want the contents to simmer. You can use it as a bucket to carry water from a water source. It carries much more easily than a saucepan. You can even swing a billy back and forth by its handle, build up speed and then take it around in a full circle. This is the traditional Australian outback way to settle coffee grounds or tea leaves. You centrifuge them down!
You can buy true billies as cooking vessels but the majority on offer are far too big. They are for feeding hungry scout troops, not solitary travellers. 
Suitable frying pans often have the opposite problem. They are often too small. Some are designed to serve as lids for pots, but obviously they can only do one job at a time. Many have detachable handles, or to be more realistic, “losable” handles.
So, twenty or more years ago the younger me put down his treasured and much read copy of “Camping and Woodcraft” and attempted to solve the conundrum of the camping cooking kit. 
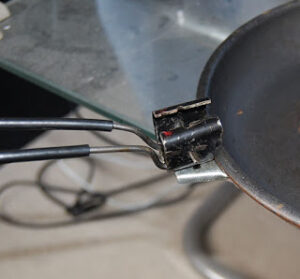
The frying pan was the easier problem to solve. I brought a lightweight frying pan from a local budget store. I cut off the handle, leaving a short stub. To this I attached a piece of aluminium bent into a not quite complete square section piece of tube. Attachment was by cold riveting with aluminium rivets (the only time since school I have used a technique learnt in metalwork class!) Holes were drilled in the sides of the fitting for the attachment of a wire handle. The handle folds by squeezing it slightly to pass through the channel in the top of the handle fitting. It can also be removed if desired. The square section tube also acts as a socket for the insertion of a suitable stick to act as a longer handle if needed. 
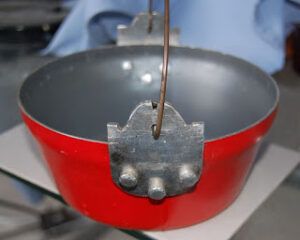
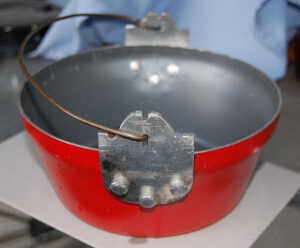
To create the billies I brought two “milk pans” from a budget store. The handles were sawn off and the rivets where they had been attached were drilled out. Using these holes I attached a piece of aluminium plate, cut and filed to shape. Opposite this plate more holes were drilled and a similar plate fitted. These are the “bail ears”. I think these look rather crude but an engineer friend of mine was quite impressed by them. I used my cold riveting skills to attach these but pop-rivets would probably work just as well. Pop-rivets are sometimes hollow but this will allow a little bit of steam to escape when the lid is on, so this should not be a problem. 

Word of warning here. Aluminium is a very reactive metal so don’t, for example, use copper rivets with aluminium plate. They will react together and corrode. Read up on this topic and when in doubt ensure you use “like with like”.
Using aluminium rod a bail handle was made and fitted to the bail ears. Note how the handle and bail ears are shaped so that the handle locks in an upright position when desired. This was the suggestion of the friend I was scrounging the plate and rod from and is rather neat!

A good camping billy needs a lid. The lids for mine were made from the bottoms of catering-size food tins. Yes, I had mates in the kitchens as well as the workshops! You will come across articles where cooking vessels are entirely made from tin cans. This is not actually recommended since modern tins tend to have a plastic coating inside. This is not designed for prolonged use as a cooking vessel. The tins I used are only used as lids, so don’t get the heat a cooking vessel does. As you can see, each lid has a tab with a folding ring riveted in its centre. I can use this to lift the lid with a stick or similar implement.

Since they have tapered sides the two billies can be nested even though they have the same capacity. In practice, I do as Kephart suggests: I fill them with foods, put the lids on and place them in a bag, base to base. 

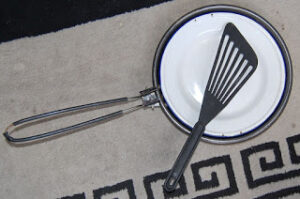
The final part of the kit is the plate. I wanted the plate to also serve as a cover for the frying pan when needed, which eliminated plastics. The plate is an enamelled tin plate. Using a ceramic cutting bit and a fine drill bit I drilled small paired holes in the rim of the plate and used paperclips to create two loops that could be used to lift the plate when it is used as a cover. When travelling the plate fits inside the frying pan and both are carried in a stuff sac I had that was just the right size. This may be accompanied by a spatula, nylon, pan scourer, plastic spork and plastic tubes of washing up liquid and cooking oil. I had planned to add a lightweight plastic cutting board to fit over the plate but never got around to it.

I used this simple but versatile cooking kit when I hiked in Iceland. Some of my travelling companions regarded it as unusual, but unarguably effective. I was obviously eating better meals than them while carrying less weight.
Having cooked with a few alternate cooking kits over the years I find my homemade kit still holds its own. While it is quite light for a kitchen item the frying pan is a much heavier duty item than is found in many camping kits. It has the advantage of a cheap non-stick coating too. The milk pans also had a non-stick coating which is still in a very nice state, even though I scratched some measuring marks into it.

It has been a while since I have had a chance to use these, so they do look a little dusty in the photos. My modifications were never going to win any beauty contests but they have certainly proved themselves up to the tasks asked of them!

Categories
Phillosoph

US Mess Kit (Updated)

In yesterday’s post I quoted Horace Kephart’s comments on the suitability of the Boy Scout cook kit for short duration trips. The more observant of you will have noted that I stressed that this quote was taken from the 1921 edition of this book. This reason for this is that in some of the earlier editions of this book Kephart gives a different recommendation.
On page 27 of both the 1910 and 1912 editions :
Individual Cooking kits…This is not formidable. A frying-pan and a large tin cup, with the sheath-knife, are sufficient; though a quart pail is a useful addition. Instead of a frying-pan, for such trips, I like a U. S. Army mess kit, procured from a dealer in second-hand military equipments for twenty cents. It consists of two oval dishes of tinned steel which fit together and form a meat can 8 inches long, 6½ inches wide, and 1½ inches deep, weighing ¾ of a pound. In this a ration of meat is carried on the march. When the dishes are separated the lower one serves as a plate, and is deep enough for soup. The upper dish has a folding handle which locks the two together, and it makes a fair frying-pan.”
The US Army mess tin is another designs that has changed little since Kephart’s day, the same basic design being widely used for the better part of a century. Those of us of a certain age and background will recognise it as the design of mess kit provided in Action Man’s kitbag!

The above passage does a pretty good job of describing the basic kit. The frying pan is quite deep, allowing it to be used for cooking duties other than frying. It will probably take at least a pint of liquid (actually 600 mls!). The oval shape makes it long enough to take a reasonable volume of food without becoming excessively bulky. This is not really a kit for a pocket or belt pouch but it will fit easily in the majority of rucksack pouches.

 
The dish part, as already noted, has two compartments, each about 20mm deep. The one on my kit seems to be of slightly thicker material than the pan. It is possible that the two parts are from different issue kits. Some people dislike metal eating plates for being hot to hold and for allowing food to cool more quickly. On the other hand, this dish can also serve as a lid for the pan, conserving fuel, keeping dirt and insects out or just preventing moisture and heat loss when boiling, baking or poaching. The ring on the end of the dish allows you to raise or remove the dish when used as a cooking lid, although this is not the best arrangement and sometimes dips the other end in the pan. 
The ring on the dish has other functions. Slipped over the handle it allows both parts to be dunked in hot water as a single unit. The accompanying issue knife, fork and spoon set also had cut outs that could be slipped over the frying pan handle so all five parts could be dunked with one action. Cleaning of the mess kits in this fashion is described on this webpage and in this video
In the above site you will also see that the ring and the division down the centre of the dish allowed it to be placed on the handle so that the whole kit can be held as a single item when queuing in a chow line. We have seen this feature used in other mess kit designs.
Assembled properly the two components of the kit fit together snuggly and do not rattle. As Kephart notes, the interior of the kit can be used to pack foodstuffs. Placing the knife, fork and spoon inside was an obvious temptation but these had a tendency to rattle if not packed sufficiently. The two photos below also show what I believe to be the Army Arctic Canteen Cup. This appears to be a potentially useful cooking vessel.

There were several different models of these mess kits, the main difference being in their material of construction. Kephart’s was tinned steel while others were galvanized steel. Models of a later vintage and modern reproductions/ copies are claimed to be of stainless steel. The example I brought was supposed to have been stainless steel but seems to be of aluminium. Certainly it is much lighter than I expected, which was a pleasant surprise! The dish seems to be of a thicker material and it is possible that this is stainless steel. Both parts are non-magnetic, which eliminates tinned or galvanized steel. The handle is marked “US. WYOTT” which suggests this part is Vietnam Era. (Correction: An engineer friend of mine tells me mine is indeed thin stainless steel!)
The metal of the pan is rather thin, which can catch you out if you are used to cooking with heavier pans. Make sure the bottom is completely covered with oil and do not give the pan too long to warm up. If you like your pans to remain nice and blemish free you probably are going to be disappointed.
In conclusion, if you want a camping frying pan that has a good capacity but it easy to pack this is a design worth looking at.

Categories
Phillosoph

Scout Mess Kit and Aluminium.

Continuing the discussion of cookware. In the 1921 edition of Horace Kephart’s book he makes the following statement in the second volume:
“It is easy to make up a good lightweight set of utensils for two or more men (see Vol. I. pp. 118-123), but a satisfactory one-man kit is another matter. The Boy Scout sets do fairly well for a short outing when baked bread is carried, but are inadequate for baking on the journey. A reflector is too cumbersome for a lone woods-cruiser. Let him bake his bread and cakes in a frying-pan (see Vol. I, pp. 344-345). This calls for an 8 or 9-inch pan.”
 Camping and Woodcraft Vol.2, p.102
I do not know for sure the exact form of the Boy Scout set to which Kephart was referring. I suspect it was not that different to the kits in use in the 1950s. Over two million of these were produced so they were in production for a long time. Quite a few of these kits are offered from sources such as ebay. A tip is to try searching for “BSA” (Boy Scouts of America). Also try GSA or “Guide cook/mess kit”. I’ve also come across “non-official” mess kits that are clearly based on or inspired by these kits.
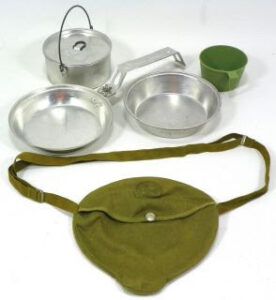
The kit includes a frying pan and a metal plate which fit together to form a unit that looks rather like the water bottles you see in Westerns. The folding frying pan handle secures the two together and this fits in a canvas bag. More modern versions often have a mesh bag. Inside the package fits a billy, and inside the billy is a drinking cup. In older versions the cup is metal, in more modern renditions it may be plastic. 

The best feature of this kit is that it has a real billy. It has a handle by which it can be suspended above a fire and a lid to keep the dirt and insects out. On the original versions the lid has a folding ring, allowing the lid to be lifted with a stick while the billy is over a blazing fire. More modern examples have a more conventional (and less desirable) plastic knob. Fitting a ring or loop is recommended. The capacity of the pot is apparently 1¾ quarts, which is a fairly good size for a pot if you only have one. Shape is low and broad, suggesting a more efficient use of heat sources and easy cleaning.
The billy fits between the plate and frying pan, which means you can potentially contaminate the insides of these vessels with the pot bottom. Keeping the billy in its own bag would be prudent although one would have to ensure the bulk of this does not prevent the parts fitting together. Having the billy in contact with the inside of the pan may also explain why no non-stick version of the frying pan has been offered.
The plate is metal and I have heard criticisms that this allows the food to cool too quickly. Personally I have found that an outdoors appetite seldom allows food time to get cold! I can see that the metal plate might be uncomfortable to hold if hot, however. Some clever bunny should offer a plastic replacement for these kits! The frying pan is a little on the small side, hence Kephart’s comment that this is a good kit if you do not have to bake. There are criticisms that the bolt that holds the handle on works loose. Adopt the habit of routinely checking and tightening it whenever you handle it. 

The scout cook kit is made of aluminium so this might be an opportune moment to discuss this material for cooking purposes. This Canadian Health site gives a nice account of the pros and cons of different materials. The key to cooking safely with aluminium vessels lies in understanding the acidity of the foods you cook. “Naked” aluminium is actually coated with a layer of aluminium oxide. As long as this is intact you should have no worries. Acidic foods or sauces will dissolve this protective coating. So too will rough scrubbing if the vessel is not left long enough for a new protective layer to form. Aluminium will react to form oxide with the oxygen in the air or water. I suspect boiling some water in a vessel will speed this reaction up. Acid foodstuffs to be cautious of include tomatoes, fruit juices and vinegar. Reserve these until your food is cooked or in an non-aluminium vessel. The above refers to “naked aluminium”. Anodised or non-stick coated vessels are not a problem unless the coating is damaged.
Many more modern versions of camping cookware or mess kits have moved towards the use of stainless steel. This is heavier but more “soldier proof” and needs less care to use safely.
Categories
Phillosoph

Buck Pigsticker Model 651.

I plan to make a few more posts on cooking and messware but today we will have a change of subject as an interlude.
As those of you who have invested in my second book will know, one of my favourite knives is the Buck Special model 119. This is just a really nice knife, and very reasonably priced too! My appreciation of this got me interested in another of Buck’s products, the model 650 Nighthawk.
Finding an example at a price that I could live with proved more problematic. Examples in the UK had an exorbitant mark-up. Reasonably priced knives in the US came with exorbitantly hiked up shipping costs. Eventually I found a retailer on ebay that was offering the knife at a reasonable price and postage.
When the knife arrived I unpacked it and was quite surprised. It was much bigger than I had expected! The blade was grey rather than the black it appeared in photos. Photos on the internet had given the impression that it was a Bowie-shaped blade when in fact it was more symmetrical, a spearpoint design rather like an M3 trench knife.
It was actually several minutes before the penny dropped and I noticed that the little label on the sheath said “Model 651”. I searched the web but there was no mention of a Buck Model 651! I contacted the vendor, a lady in Liverpool. I told her she had sent me the wrong model knife, but I rather liked it so was going to keep it. Could I buy the 650 I had ordered originally? More money changed hands and a few days later another package arrives. It contains another 651! All of the knives she had acquired were 651s and not being particularly familiar with the field she had identified them as Nighthawk 650s.
I contacted a friend of mine in the US who put me in touch with his step-father. We came to an arrangement whereby he would buy a 650 locally and ship it to me and I would trade him one of my 651s. By this time I had done some further research. Intrigued by the lack of web footprint for the 651 I contacted Buck directly and the mystery of the 651 was revealed.

The 651 “Pigsticker” was a very limited run of knives intended for the Australian and New Zealand hunting markets. Nearly all of the run went south of the equator, much to the ire of many American collectors.
As this post on Bladeforums puts it:
“The info we have is that this is Buck Knives largest ever-regular production military knife! Period. With a full 13 inches over all length this is one massive to quote Crocodile Dundee “Now that’s a knife” Tactical knife by Buck!Very fitting as this knife was made and Named the Intruder “Pig Sticker”, these were contracted from Buck by an Australian company. The amount ordered I think 300 or so was sent to them and a few over run were left for replacements. Also it was stated that a New Zealand company has since then bought every last one that was left and they are now ALL down under! ..During the few months between the two delivers it seems that some members of the Buck (knife) Collectors Club {BCCI} got wind of a Huge Military Tactical Knife made for a foreign market and NOT for retail sale in the USA Some few of these Buck Knife Collectors and Buck employees were able to order one or two of these rare ‘extra’ knives for themselves during the short time between the two deliveries! As word spread many of the Buck and military knife collectors are upset at not hearing of this knife sooner as they are now all gone! Rare? Well HECK Yes!!! These huge Pig Stickers are known to be in the hands of less then 40 or so lucky USA collectors! YES – it is estimated there are LESS then three dozen of these knives, snatched by collectors, remaining in the Country at this time. And here are ONE of them for sale. You now have a chance to own one of these rare knives. We do say that YOU will most likely not have another chance for a long time to own one. Most of the collectors we know are hording the extra ones they now have. This knife has one of the the thickest blades we have ever seen on a Buck Knife. It fits our hands very well and has a fantastic tactical grip non slip OD green and black grip. The large Buck 120 black handle knife, Buckmaster 184 all metal knives are not part of this sale, they are for comparison only. The sheath has a built in upper leg tie down adjustable strap for worry free movement during carry … yet it releases and draws from the sheath with ease for use. It is hair popping razor edge sharp.”
Obviously, on their journey south some of these knives passed through Liverpool docks. As is rather commonplace, some of them happened to fall out of their shipping container and were sold, ending up on ebay.
I am probably one of the few people in this country who owns a 651 and knows how rare it is. Likewise, my friend’s step-father is one of the few Americans to possess one! I have seen offers of more than $300 for these.
The 651 is actually a very nice knife. It was designed as a working knife that would be used against dangerous game and it seems to be well up to the job. The blade is thick and sturdy and has a good edge. My only criticism of the design would be the Nighthawk style handle, which would be improved by a full guard, given its intended use. That is my general criticism of all Nighthawk models, incidentally.
Buck should consider offering a similar knife for general sale. It would find many happy users.

Categories
Phillosoph

Army Mess Kits

In a recent post I mentioned "Camping and Woodcraft" by Horace Kephart. This is a book that has a lot to teach the modern outdoorsman.
In one chapter, Kephart reflects on the difficulty in designing an acceptable, effective cooking kit for just a single traveller.
The billies are carried in a bag, bottom to bottom so that no soot and fuel contaminated vessel nests within another. The interior of the billies are filled with bags of food such as flour and rice so effectively they occupy very little space.
Each billy has a lid to keep dirt and insects out and to retain heat. Each lid has a folding ring allowing the lid to be lifted with a stick, knife or other implement when they are hung over a fire.
The frying pan is a full sized utensil of 8 or 9" diameter. Kephart expects the traveller to bake his own breadstuff and one of the ways to do this is in the frying pan.
The pan also needs to be big enough to cook any game or fish that are caught.
The handle is either folding or detachable, and there is provision to attach an extension piece when cooking over a large bed of coals.
A tin cup and a deep plate or bowl for eating from complete the outfit.
If you choose wisely, the plate can fit in the stowed frying pan and even act as a lid when inverted.
 Kephart’s suggestions seem logical but actually meeting these specifications proved to be more involved than I expected.
Most “camping billies” available on sale are nothing of the sort.
A true billy has a bail handle so it can be suspended above a heat source. This also allows it to be used as a bucket to fetch water.
The billies that you can find are generally much bigger than the one quart/two pint/one litre size suggested.
Camping frying pans, on the other hand, tend to be too small.
My own efforts to create a similar kit to Kephart's will be the subject of a later post.

 Many people interested in survival or bushcraft tend to take their cues from the military.

When it comes to field cooking, the circumstances of the solitary traveller are rather different from those of a soldier.

For many armies the mess kit has cooking as only a secondary function. Meals are prepared by a field kitchen or catering unit, and the mess kit is mainly used to receive the finished product.

Since World War Two, the use of ration packs has become widespread and mess tins are mainly used for warming up the precooked items.

Modern soldiers make much less use of mess kits than previous generations.

Nowadays MREs are supplied with flameless cooking pouches, so many troops in the field do not carry any cooking equipment other than a canteen cup.

Larger field catering units often use disposable tableware instead.

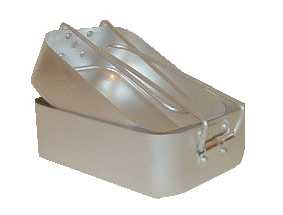
The most basic military mess kit is probably the rectangular British Army “1937 pattern”. This has two rectangular cooking vessels, one slightly smaller than the other so they can nest. Capacity is approximately 1 litre and 1.3 litres (or 2 and 2 ½ pints).
On the plus side, the 37 pattern mess tins fit nicely in a pouch or side pocket of a pack. The SAS Survival Guide shows one used as a container for a variety of useful items in a “survival pouch”.
On the downside, the basic set has no lid. You can use the larger one as a lid for the smaller.
A number of companies make lids/plates for the larger pot. Some versions of lid have a sliding or folding handle, allowing the lid to be used as a small rectangular frying pan. They even offered a variant with a non-stick coating.
The 37 mess tins are not by any stretch of the imagination billies. They work well enough on many stoves but if you are cooking using natural fuels you will have to have a good bed of coals or get creative improvising a pot support.
The smaller one fits inside the larger so you will need to get the smaller very clean if you want to avoid contaminating your next meal with soot or fuel residue. That is not always possible out in the field. Placing the smaller in a bag to keep the larger clean is prudent.
For receiving a dollop of whatever from the field kitchen or heating water to warm ration tins, “boil in the bag” items, or make tea the 37 are adequate enough.
The British Army mess tins have been around a long time and are widely used. This has spawned useful accessories and variants such as lids and non-stick coated tins.
On the downside, there are sub-standard knock-off copies out there. Running out of clean cooking pots, I once used a mess tin to brown some flour on my kitchen stove. Liquid metal resembling solder appeared!
I have been told a genuine tin should have a bit of spring to it. If you push on the side with your thumb it should pop-back.
Other armies have taken different approaches to the same requirements.

The Germans, Russians and a number of other armies have issued a mess kit that looks a little like a binoculars case. In fact, as a boy I thought these items on my toy soldiers were packed field glasses!

The basic item has an oval or kidney-shaped cross section.

The bottom part is a deep pot, often provided with a bail handle. The lid is deep enough to also serve as a cooking vessel and provided with a folding side handle. It is neither pot nor frying pan really but makes a reasonable (if unconventionally shaped) cup.

Such mess kits formed a compact package that could be carried in a pack or pouch or attached directly to a belt or the outside of a knapsack.

Some versions have other components such as dishes or  bowls that fit inside.

The German water canteen fitted inside a pair of aluminium cups of similar design to the mess kit.

To put these kits in context, they were often used in conjunction with field kitchens, and some soldiers of previous generations had more modest expectations when it came to food. If they got hot soup, coffee and fresh bread they considered themselves well off!

A small field kitchen such as the German horse-drawn models widely used in both wars had an oven and two big boiling vessels. One for coffee and the other for a hearty soup, stew or pasta dish.

A mess tin bottom full of soup and the lid filled with hot coffee was just what a fighting man wanted.

 Two variants of this basic pattern are deserve a special mention.

The first is the Swedish Army Mess Kit.

This has an oval section billy for the bottom and a lid that also serves as a pan.

Lid capacity is about 550 mls, the lower section holds 1.3 litres.

The handle of the lid has two folding rings of an arch-shape. A stick can be inserted through these if you need a longer handle or one that will not conduct heat.

The Swedish Mess Kit comes with its own stove. This is a sturdy windshield that fits over the outside of the packed mess kit. Inside it at two folding pot supports and the kit also includes a spirit burner of similar design to that used on Trangia stoves.

The stove could also be used with other heat sources such as hexamine blocks,  alcohol gel or natural fuel such as woodchips and pinecones.

The kit is completed by a plastic bottle marked with the Swedish triple crowns and the legend “RÖDSPRIT ELDFARLIG GIFTIG” (Methylated Spirit Inflammable Toxic). The bottle is of a size that it conveniently fits inside the mess kit but this practice is not recommended since leaks will contaminate your cooking vessels.

Keep your fuel bottle elsewhere and fill the interior of the mess kit with a brick of Supernoodles, some Oxo cubes, teabags etc.

I have used my Swedish Mess Kit several times. It is of a size and shape convenient to carry in a daysac.

If anything, it could be a little smaller. When you are hiking and the snow is on the ground it is been nice to stop and quickly heat up a quick hot snack of instant noodles.

The third kit I will discuss today is usually marketed as a Yugoslavian mess kit or “Eight piece” mess kit.

This differs from those of other armies in that the lower metal pot has a side handle rather than a bail.

The upper part is made from plastic so is more of a rectangular section bowl than a cooking vessel. The bowl is designed so that it slots onto a hook on the end of the handle, allowing both containers to be held in one hand.

Such arrangements are seen in a number of other mess kits and are intended to make handling the kit easier when queuing in a mess line.

The interior of the Yugoslav mess kit is used to store a plastic water bottle, which comes with its own rectangular beaker that fits over the top.

The final components are a carrying pouch and a metal knife, fork and spoon(KFS) set. The spoon and fork store in the handle of the knife. The knife also has a bottle opener cutout.

These Yugoslavian kits can be found at very reasonable prices. You only get one cooking vessel, but it is generously sized.

A detachable billy handle could probably be made by drilling holes near the rim at the point of balance.

I intend to acquire one of these kits soon so expect a more in depth review.

If nothing else the kits seems a good source of components that can be incorporated into a larger kit. Some camping KFS sets or water bottles cost more than this entire kit!
Categories
Phillosoph

Digging the Hoes

If you ask most people to name a digging tool they will probably say “spade” or “shovel”. A couple of them may have said “Entrenching tool” but they were probably thinking of a spade or shovel based implement.
Some time back I was watching a nature program that was discussing how well designed badgers were for digging. They have powerful chest muscles and their claws rake the earth and throw the spoil between their legs. Many other animals use the same method. The program also discussed the mole. The mole uses a swimming motion to move through the earth that pushes the earth to the sides. The mole uses a breaststroke rather than a doggy-paddle action, but the basic mechanism is the same: pull down the earth and scoop it away.
If we once again consider the shovel, it will become apparent that it generally does not use these actions.
Shovels are mainly used to lift and move materials rather than pulling them and letting gravity assist.
Many experienced gardeners and labourers will tell you that the shovel is not their digging implement of choice and that their preference is the pick, hoe, adze or mattock.
I have been told that the most efficient way to dig a foxhole is with a three-man team. One man breaks the soil with a pick, the other two use spades to remove the loose soil. The fourth member of the fire team stands watch and these duties are rotated to minimise fatigue and get the job done in the shortest time.
The entrenching tools issued to most armies have generally been some form of spade.
A notable exception was that of the British Army in the Second World War. This was the '37 Pattern tool, a evolution of the Sirhind 1908 pattern.
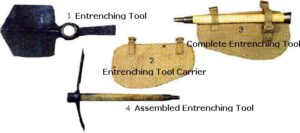
While this is not as elegant as some one-piece or folding tools it is very cleverly designed. When assembled the head of the tool is at right angles to the shaft, forming a pick and a very wide-bladed hoe.
The head on its own could be used as a shovel to move loose soil, the pick part sometimes wrapped in a sandbag as a grip.
The end of the wooden handle had a fitting so that a spike bayonet could be fitted to form a serviceable mine probe. The handle itself could be used as a truncheon.
For completeness I will point out that this wasn’t the only entrenching tool issued to British infantry. If the 37 Pattern has one flaw it is that it is a somewhat bulky and unwieldy shape to carry assembled so was not the best choice as close combat weapon.

The modern infantryman typically has a spade-type entrenching tool. It may be folding and capable of using the head in a mattock/hoe configuration and it may or may not have a pick fitting to break up hard soil.
Alternately a fire team may carry a selection of tools such as a pair of shovels, a pick-mattock and a hand axe.
Most outdoorsmen do not need such extensive earth-moving capability unless they are in certain climates or environments. Most of the time an outdoorsman’s digging requirements are simpler: cat holes and Indian wells.
What tools most effectively meet these needs?
The simple hand-trowel is the first solution that springs to mind. You can get these at the local garden centre or hardware store, or certain outdoor suppliers will sell you a lightweight polymer/plastic example. While these are an option they are somewhat limited if the ground is hard or you need to dig a bigger hole than you anticipated.
Personal security is always something you should consider, so I’d like a tool that can also provide me with some defensive capability if needed.

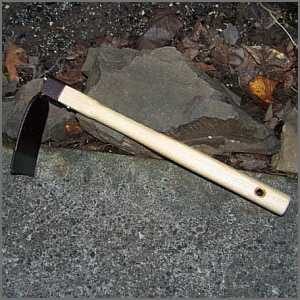
A web-search for “hand-hoe” or “hand-mattock” turns up a number of interesting tools, many of them under a pound in weight and small enough to be carried in a daysac. Some of these are small varieties of pick-mattock while others, intended for gardening combine a hoe with fork tines.
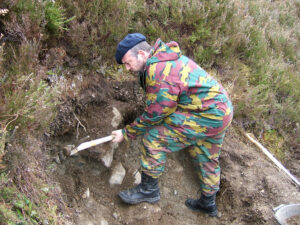
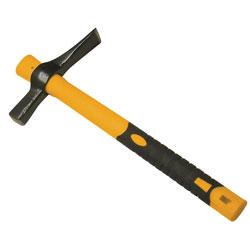
For general camping (as opposed to military needs) my preference is more towards an example that combines a hoe blade with a flat hammer face that can be used for knocking in pegs and stakes. Such a tool can also be used as a useful prying-device, lever or hook for extracting stubborn pegs too.
My preference would also be for a hoe blade with a point, like a trowel but I have yet to see any examples that have this combined with a hammer surface. The “camping hoe” is a possible niche in the market I suspect.

Categories
Phillosoph

Are You Ready to Go?

Here is a question to ponder over this weekend : Are you ready to go?
Suppose, you are told at short notice that you need to go camping, leave the country or evacuate before the zombie swarm reaches you. How organised are you? How effectively can you lay your hands on things you might need?
Regular readers will know that recently I had to prepare for a trip abroad on very short notice. This was relatively painless since most of the things I needed were already packed in my big black rucksac. I didn’t take that rucksac on this trip, but it was useful that I just had to reach into one pocket for my wash kit, another for the medical kit and so forth. Even some of my “holiday clothing” was stored in this pack. (We will, of course, ignore the fact that at first I could not find this rucksac because I had forgotten I had stored it in my flatmate’s room!)
 My girlfriend wanted to borrow a tent for a girls-only camping trip the other weekend. All my tents and sleeping bags are on top of a wardrobe and easily accessed. My preferred “SHTF” kukri is already mounted on a belt along with a Puukko utility knife.
On the other hand, last night I was looking for a mess kit and stove I wanted to show someone and this involved digging at the bottom of a cupboard for ten minutes. All the bits of the kit were together and I had a supply of fuel readily to hand to fill the fuel bottle, but was this kit truly “ready to go?” Not really! The interior should have had a brew kit, some Oxo cubes and a couple of blocks of instant noodles. The kitchen cupboard was also deficient of these items. I really should keep more food in the home for emergencies!
This weekend I want readers to think about their level of preparedness and how easily they can gather necessities together at short notice. The useful tool of “Uncle Phil’s List” can be used to give us some guidelines here.
Uncle Phil’s List, with Comments:
1) Shelter.
If you own more than one tent, store them together and ensure each packed tent has sufficient pegs, poles and lines, with spares as necessary. When you buy a tent is often comes in just one bag. It is often prudent to place the inner and outer in separate bags and/or carry the poles separately. Place all the components in a larger storage bag or devise some other means that ensures components of different tents do not get mixed up.
Other shelter items such as basha sheets, bivibags and such are probably best stored with the tents. You can thus choose the shelter best suited to expected conditions.
Emergency shelter items such as survival bags may already be packed in rucksacs or emergency kits. Similarly you might choose to keep one tent in your car or with your bike.
2) Sleeping.
Sleeping bags, sleeping bag liners, kipmats, blankets and related items should probably be stored with your tents. When not travelling sleeping bags should not be stored in their stuffsacs. Keep the stuffsacs close to the bags so they can be quickly packed when needed. Some of my stuffsacs are tied to loops on the appropriate sleeping bag. My tents live on top of a wardrobe along with several of my larger rucksacs. The sleeping bags are laid over the top of these.
3) Clothing.
I will admit that my clothing needs to be better organised. My summer and winter hiking boots are at the bottom of the wardrobe. Easily located but may take some digging out. Not being a total idiot I have tied the laces together so if I find one I can soon find its sibling.
To prepare for a quick bug-out you should probably have a set of clothes suitable for rough travelling stored with your boots. Don’t forget warm items, waterproofs, gloves and hats. You will need a hat suitable for sun and one for colder weather. A boonie hat, headover and some bandanas or keffiyeh are ideal. Some of my wet weather items live permanently in various rucksacs or daysacs.
4) Fire.
My emergency kit/ pouch contains several ways to make fire, including a source of tinder (Vaseline-soaked cotton wool). Many of my packs or daysacs have a disposable lighter tucked into a pocket. A lighter should also be in a pocket of your bug-out clothing.
5) Water.
My larger Platypus bottle with the drinking tube either lives in my black daysac or the big black holiday rucksac. Various plastic bottles (ex-soda bottles) live in other packs. My emergency kit/pouch holds water purification tablets and a plastic bag that can be used to carry and sterilize water. There is room for improvement here. My canteen cup was hibernating in a bag of miscellaneous outdoor items! I need to organise something where my cooking utensils are all gathered together and more readily accessible.
Activities such as camping may require items such as a folding bowl or larger volume water storage.
6) Food.
I should really keep more food in the house! I injured my back recently and could not leave the house for several days. I need to stock up on dry goods. I don’t generally eat tinned food but I should really have some in the cupboard for emergencies.
7) Hunting and Fishing.
Means for hunting, trapping and fishing are included in the emergency kit/ pouch. Actually having some food I can carry out with me would be more practical!
8) Cooking Equipment.
Over the years I have acquired a variety of mess kits, camping cookware and stoves. I need to gather these together in one place so that I can easily choose the items most suited to the anticipated journey.
9) Medical and First Aid items.
My main travel medical kit sits ready in a pocket of the big black rucksac so is easily located. I should probably make sure that my suncream and insect repellant are in the same pocket. They currently ride in another pocket of that pack. My personal medications are in my bedroom so an appropriate supply can be gathered at short notice. The emergency kit/pouch contains some additional medical supplies. Some of my other rucksacs contain more basic medical kits (ie, plasters, alcohol wipes and painkillers).
10) Tools.
I have lots of these, and I really need to separate the genuine working items from the various curios and collectables. As mentioned already, my field kukri and a companion knife are already on a belt in the same cupboard that stores a big chunk of my other gear. The machete, golok and entrenching tools should probably join these. Blades should be sharp and ready for use. Other tools such as my telescopic walking poles should also be here. Some items such as the penknife and mini-leatherman are always on my person.
11) Navigation.
My best compass is with my emergency kit/ pouch. It actually has its own pouch attached to the belt of the main pouch. A small Suunto Clipper compass is always with my penknife and mini-leatherman. If you have any other compasses distribute them to useful locations such as the pocket of your bug-out clothing or in the pack you usually use for hiking. A map or street atlas of the local area is not a bad idea.
12) Signalling.
A compact whistle rides on my keyring. The emergency kit compass mentioned above has a plastic whistle on its lanyard. One of my daysacs includes a little gizmo that combines a whistle, magnifier, compass, LED light, mirror and thermometer. Got it from a 99p store and it mainly serves as the tag of a zipper, but it has the potential to be a useful spare. Any spare whistles can be added to other packs or attached to your bug-out clothing.
I guess the category of signalling these days also includes mobile phones. Most of you will count this as an item you always have with you. Hopefully you are not one of the people that seems incapable of going more than two minutes without it in your hand! Your travelling kit may need provision to keep your phone charged. I have one of those handcrank gizmos but the lead does not fit modern phones. There may be more up to date versions available. Your phone charger may be an item in everyday use. Make a note on your travel checklist so you do not forget to pack it.
In some parts of the world signal gear may mean CD radios, satellite phones or pyrotechnics. The first two will require charged batteries or means to charge them.
13) Light.
No matter how civilized the location of your trip may be take a light source. It is amazing how readily useful items such as room keys find nice dark places to hide! My keyring always has a Photon II LED on it. Several of my packs have torches in them. My mini-maglight got lost in the tent fire at Leeds Festival. I now have a couple of the Chinese-made hand crank LED flashlights. While not as robust as “survival flashlights” their ability to hold a charge is impressive and I don’t need to worry about dead batteries. If you do opt of a battery powered design either store it with the batteries separate or block one contact with folded paper. Even with this precaution, check occasionally for signs of corrosion.
Larger or more specialised light sources should be stored with your tools so you can readily select them. This includes candles and nightlights, useful for camping in the darker months.
14) Toiletries/ Wash kit.
I will describe the contents and rationale of my wash kit and related items in a future post. These occupy a pocket in the big black rucksac so are easily located when needed. Deodorant is usually an everyday item so it is easy to overlook packing this in the rush to get going. Make a note on your checklist or buy a stick to ride in your kit permanently.
A roll of toilet roll has its own plastic bag to keep it dry. This item is duplicated in some of my daysacs. Numerous uses including blowing your nose and as tinder.
15) Documentation: Passport, Visa, Books, Tickets, Money and Writing material.
Some trips will need visas, passports, healthcare entitlement forms, tickets, boarding passes and foreign currency. You may want something to read too and I like to travel with a notebook. As always, make sure this items are organised so they can be readily located.
Some of these items will need to be checked or prepared in advance, which brings me to another point. Make yourself a checklist and use it! It is easy to overlook something or take something for granted. Use your checklist and refine it with experience.
16) Rope and Cordage.
The emergency kit/ pouch has a hank of paracord created as described here. I usually put a hank of string or even a whole ball into a pack for more mundane tasks.
17) Repairs : sewing kit, tape, glue, spares.
The sewing kit is a component of the emergency kit/pouch. On my recent trip space considerations prevented me taking the full emergency kit so I added the sewing kit to my medical kit. A small plastic bag contains more general spares such as rucksac buckles, electrical tape and superglue.
18) Specialist Items.
What these will be will depend on your intended trip. It includes defensive weapons, climbing gear, cameras, gift for hosts etc.
19) Packs.
Now that you have decided what to take, you need to decide how to carry it. As you will have already gathered, most of my packs are all in the same place so I can choose which is most appropriate.

Categories
Phillosoph

Backpacks : Is Less, More?

Several decades ago I was visiting a friend in Tennessee.
While I was there I brought myself a daysac. It was black and made by North Face. Simple in design, it had a zipped main compartment and a zipped front pocket. The shoulder straps were nicely curved for a more ergonomic fit and the back section was well padded. There was a small snap-link inside the pocket that proved to be a handy place to attach a pouch with a mini-maglight. Another permanent occupant of the daysac was my all-weather blanket, purchased at the Kennedy Space centre on a previous holiday.
I used that daysac extensively at home and abroad for more than 20 years and on three continents (possibly four, I don’t recall if I had it in Brazil).
This faithful travelling companion was to have an ignominious end.
My girlfriend borrowed the pack to camp out at the Leeds festival. A bunch of lads were allowed to run riot and set fire to a number of tents, including my girlfriend’s. When she complained they threatened to throw her in the fire!
The worst part about this incident was that the local police force sat by and let this happen. When my lady complained, a police officer told her “Everyone knows it gets a bit wild on the last night” and “You are from Brazil, worse things happen there”. A sterling piece of public service! I don’t know how those officers can look at themselves in the mirror.
My much loved daysac was to perish in that fire, along with some money that my girlfriend had worked very hard to save.
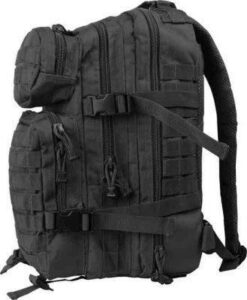
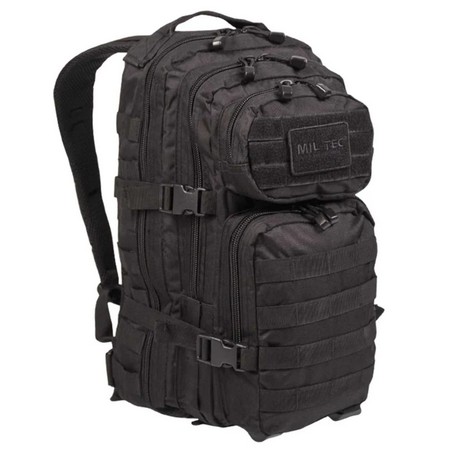
I needed to find a new daysac, and money was now in shorter supply than my single days. Looking online I found a pack that looked promising, similar to the one shown below. This had heavy duty zips, PALS straps and numerous compartments including one ideal for my Platypus water bottle.
I spent a weekend or so gathering a few small items to add to the pack, such as a small medical kit, a hand-powered torch, a keffiyeh and some emergency gloves.

As fate would have it, for the next couple of years I had no need to use this daysac.
Fast forwarding. we come to this year and a combination of situations mean that it is necessary for my girlfriend’s son to leave the country for a week. On short notice, we book a week in Kos.
My girlfriend makes all the arrangements and books us on a flight where we can only take hand luggage. This proves to be an interesting challenge when it comes to packing and it becomes apparent that my new daysac is far too small! It looks about the same size as the old pack but too much of its interior space is taken up by padded dividers and such.
My pack is made by “Mil-Tec”, and I later discovered they offer the same design in two different capacities. I think mine is the 20 litre size rather than the 36. The 36 litre version may be worth a look.
I suspect that many of the similar looking packs that claim to be 30 litres are not, judging by the given external dimensions. Caveat emptor! 
Mil-Tec 20 litre MOLLE backpack
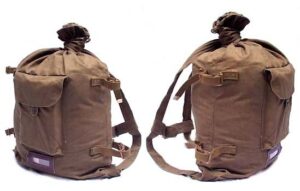
My flatmate comes to the rescue with a canvas bag he had purchased at the local army surplus shop. This had three external pockets, a drawcord top and a flap that buckles down with vintage style ladder buckles. He thinks this bag is an ALICE pack  or a copy and it certainly looks similar. This bag takes enough clothing for a week, my washkit, medical kit, notebook and most of the other things I will want. The weather on Kos played to our favour here since there was no need to pack jackets or jumpers.
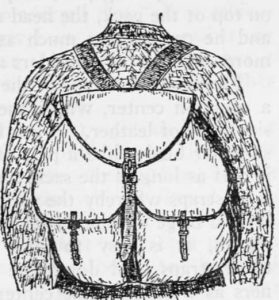
My friend's bag gave good service over the following week but the experience did get me thinking. When it comes to packs, is less sometimes more? In a previous blog I mentioned the Russian Veshmeshok, possibly one of the simplest packs to ever see widespread service. My friend’s bag reminded me of the very simple packs that Horace Kephart advocates in his classic book, such as the Whelen, Nessmuk and Duluth (pg.129). I’ve seen a few Austrian rucksacs of similar design on my travels. Rather than having an internal frame and padding the packsacs of Kephart’s day were padded with a folded sleeping blanket against the back. A sleeping bag might be used in the same manner and this might prove a more space efficient method of carry than bundling it up in a stuff-sack.
All this has given me food for thought and I will share any ideas that arise from my experimentation along these lines. First order of business will be to scrape together some money to buy a pack like my friend’s.
Categories
Phillosoph

Spears and The Hidden Fortress.

Last night I had the treat of watching Akira Kurosawa's “The Hidden Fortress”. This movie is probably best known as one of the influences on Star Wars.
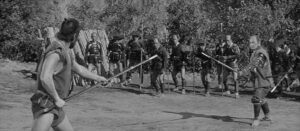
One thing that struck me about this movie was that it was a samurai film where swords played very little part in the action. The two major close combat sequences feature spears. The spearplay in this movie is well worth watching. Toshiro Mifune’s character (Makabe Rokurōta) makes frequent use of the hanging guard with his spear. There are a number of incidences when spears are swung to strike or deflect rather than just thrust and even swinging motions using just one hand. The movie is well worth a look if you want to refine you staff fighting and improvised weapons skills.

Here is a link to the duel sequence.More on the use of the staff and other weapons in my books.