Many years ago, I read an observation that a shorter blade offered more control. I thought about the possibilities of a short, fixed blade on a full-sized handle.
There are, of course, a number of knife designs that use this strategy. Many wood-carving knives have blades much shorter than their grips. The familiar “Stanley”‑type knife might be included here, although the replaceable blades do sacrifice some potential strength.
And there are, of course, many tasks where a long blade is more suitable. If I want to quickly build a shelter, or turn wood into kindling, bigger is generally better.
Regular readers are well aware I am a big Mora knife fan. I own a couple of Mora 860 Companions, a 511 and a Pro Robust.
Recently, I came across the Mora Eldris. A similar, short bladed knife had featured in an episode of the Netflix production of “Ronja, The Robber’s Daughter”.
Time for an early birthday present!
This is not going to be a full review of the Eldris.
There are a number of those on-line already and I have not had this knife very long. I will record some of my initial impressions and related thoughts.
I chose the green model. The colour is actually a yellowish-green and possibly a little vivid to be considered a camouflage shade. Rather resembles grass in the summer sun.
Some gear you want low-profile, other items you want highly visible so you are unlikely to lose them. I think my Eldris is more the latter.
Mora call this their “pocket knife” and I have even seen it ironically referred to as “the Mora pocket folder”.
It doesn’t fold, but it is small enough for many pockets, and does weigh a lot less than many pen knives and multi-tools. Certain legislations will prohibit carrying a fixed blade knife without good reason, no matter how short the blade.
The Blade
As one might expect from Mora, The knife is very well designed and very good quality.
Some reviews have listed the blade as 63 mm, while the box description claims 59 mm. Several different measuring instruments I used make it closer to 54 mm.
The blade is actually shorter than the main blade on many penknives.
The blade is short but broad. The blade is 2 mm thick, but one gets an impression of a very sturdy item.
Blade material is stainless steel, which is my personal preference for knives that may be used for messy jobs a long way from home.
At time of writing, I am not aware of any carbon steel variants of the Eldris, an option that Mora have offered for some other models.
In addition to the Eldris, an Eldris Light Duty is available. The main difference, other than the colour choice and price tag, is that the Eldris has its backspine ground to act as a ferro‑rod striker.
The forward part has a wider bevel and thinner edge than that nearer the grip. This is a feature also seen on the Mora Kansbol knife. The blade has a Scandi-grind.
Out of the box, the knife felt very sharp. Many reviews talk about it seeming razor sharp straight out of the box. I used it to cut some cordage I was using, and the ends appeared very feathered.
I ran it down some crocksticks I had set up at 20 degrees. The knife did not feel so sharp to the fingertips, but cut a lot better.
I suspect a wire edge may have been the culprit, which is to be expected on a blade straight from the factory.
I suggest that new owners at least strop the Eldris before serious use.
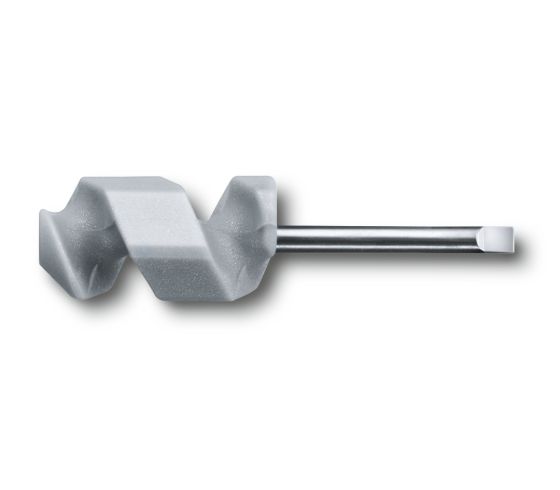
The Grip
The grip is oval in both cross-section and shape. For some reason it reminds me of a Russian Doll!
Brand new, the grip surface has a slight tackiness. There are textured sections for increased grip retention.
I have relatively slender, skinny hands. The pommel of the grip sits within my palm. I suppose if you have really big hands this may or may not not be a good fit, so try before you buy.
It is possible to insert the knife into the sheath butt first if you really need a longer grip.
For most of us, however, the grip is quite frankly, excellent,
I am pleased to see the design includes a generously designed lanyard hole.
If Mora offered the companion blade on this grip, I would be very happy!
One of the reasons for the grip shape is that the sheath is intended to be ambidextrous. You may insert the blade with the edge either to the left or the right. Like other plastic Mora sheaths, the knife clicks securely into place and won’t be coming out until you want it.
The only thing the knife lacks is a belt hanger. This is a separate component, if you want one.
The belt hanger does not have a retention strap, but in genuine Scandinavian fashion, may be hung from a button instead of a belt (or a belt with a button?)
Accessory Kit
I brought my Eldris with the “Fire Starter, Secondary Lock and Paracord” kit. This came as a separate box stuck on to the bottom of the knife box.
I will call this the “accessory kit”.
The accessory kit, as Herny Ford famously said, is “any colour you want as long as it is black”.
This makes the discussion of the camouflage characteristics of the handle and sheath colour somewhat moot, since black is not a camouflage colour.
The accessory kit is mainly designed to make the Eldris a neck knife.
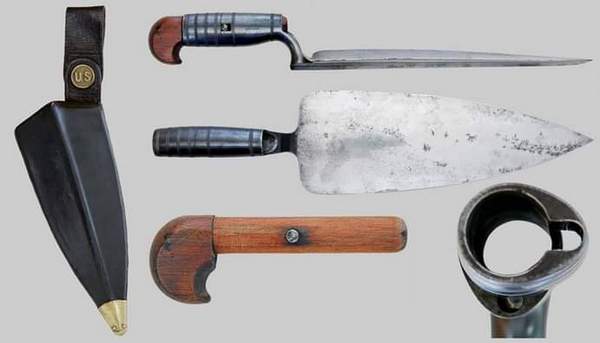
I have a couple of neck knives. One was once in production by CRKT and may be seen at the top of a photo in this article. Another was made and sent to me by a generous friend. A link I posted in another recent article shows 58mm Swiss Army Knives such as the Classic SD used as neck knives.
In my recent review, I noted that Mors L. Kochanski became well known for carrying a Mora knife on a neck cord.
The Eldris differs from most neck knives, in that it is a full-sized knife, be it one with a short blade.
It is probably a shade lighter than the knives Kochanski carried, but possibly not by that much, since a Companion or 511 are hardly heavyweights!
Secondary Lock
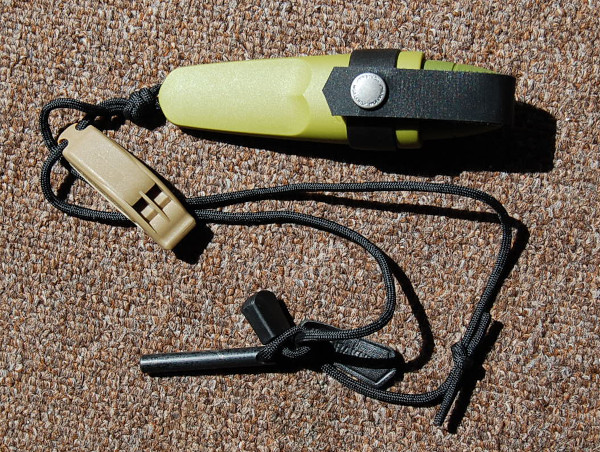
The “secondary lock” is a sort of frog/collar that fits around the sheath and mounts a strap across the butt to keep the knife in place.
The back of the sheath has two dimples which engage with bumps inside the collar section to lock it in place.
The instructions show that it should be pulled up the sheath until it clicks.
Presumably, the belt hanger fitting utilizes the same features.
As I already noted, the knife fits very securely into the sheath already. The secondary lock adds extra security since the knife is intended to be hung handle downwards when in neck knife mode.
When you first go to use it, the retention strap seems to be a little too short. You need to give it a bit of a pull for it to stretch and reach the popper. Whether this will change with use, I do not yet know.
Fire-Starter
The accessory kit also contains a “fire starter”. This is a fairly substantial ferro‑rod mounted on a short loop of cord.
The back of the blade of the Eldris (but not the Eldris Light Duty) is intended to be used as a striker for the fire starter. The user is cautioned not to use parts of the blade other than the back.
There is a little leather tab that according to the instructions is supposed to be folded over and braced against the end of the rod when the fire starter is being used. This is a feature I do not think I have ever seen with ferro‑rod systems.
I prefer to keep the knife blade still and pull the ferro‑rod backwards, and in this mode the tab seems to have no function.
The instructions show two ways to carry your fire starter with your knife.
The first appears to be passing the rod through its loop and securing it to the neck cord with a lark’s head knot. The rod on mine is too long to pass through the loop (or the loop is too short). Either way, I cannot do this with my example.
I later realized that the cord could be so knotted by passing the plastic fob through the loop. This needs to be pulled tight with the fob section as long as possible to prevent the fire starter sliding around. I positioned it so that it is unlikely to create noise by hitting the sheath, but am not confident it will stay there.
That leaves the second mode. The loop is dropped down over the bottom of the inverted sheath and finds a location just above the secondary lock, around the fat section of the sheath. To do this, the loop also needs to pass over the neck cord.
You therefore, cannot remove or stow your fire‑starter without removing the knife from its neck carry.
Like most similar devices, the ferro‑rod comes with a thick protective coating. Your first few strikes will be unimpressive until the coating is worn away.
Potentially, the second mode could cause rattling. Keeping the leather tab between the sheath and the rod seems to reduce this, and the rod mainly hits the compliant material of the secondary lock.
If you are hunting, it may be prudent to remove the fire starter from the knife. Having a neck knife swinging around may not be ideal anyway. Some animals have very acute hearing and what are relatively small noises to us may alert them.
The Cord
Last, but by no means least, the cord.
Mora call it paracord, but when is paracord paracord?
I ask this because I recently saw a “credit-card” survival tool that was wrapped with what was claimed to be “paracord”. Since it was about 2 mm in diameter, possibly less,
I am confident to bet this “paracord” is not 550 lb-rated, and very unlikely to be Mil-Spec 550. The cord was, however, perfectly good for the uses that it was intended for.
Worth remembering that real paracord can be too stretchy for many survival applications. That may be why your basha roof always sags!
550 lb paracord is 4 mm in diameter. Admittedly, paracord is made in other sizes. I have a 100 metre roll of 3 mm 425 lb-rated paracord that is more than adequate for the purposes I use it for.
Technically, I suppose it may be claimed to be paracord if it has been used to make parachutes. There is cord of under 2 mm diameter and only 95 lbs that is claimed to be paracord. Several friends will doubtless remind me that cats and beavers have been parachuted!
Mora chose to call the cord in this kit “paracord”. It seems more compressible than other paracord I have to hand. It is 4mm diameter, but does not feel like there are multiple internal cords within. The ends are heat sealed, and evidently there is a white core material. I don’t intend to cut into it to find out if it is “real” paracord or not.
It is, however, perfectly good cordage for the use it was provided for.
Fit the cord to the sheath exactly as shown in the instruction sheet. Feed one end of the cord into one drainage hole. When it emerges, feed that end back down into the sheath until it sprouts out of the other drainage hole. Pull on the cords until they are roughly equal in length.
Tie the two sections of cord in an overhand knot. The overhand knot near the sheath is supposed to reduce the tendency of the sheath to twist.
I tried a figure-eight knot, but it used up too much of the cord’s length. If you have a thick neck, large head (or big hat!), you may find the length of cord provided insufficient.
The knot suggested to join the ends of the cord is not one I have ever seen before. The instruction sheet calls it a “slipknot”, and no argument can be made that it is not a slipping knot. It is not the knot usually encountered as a slip knot, nor any of the other knots that sometimes use this name. It is not even the jam knot, a slip knot that pretends not to be one!
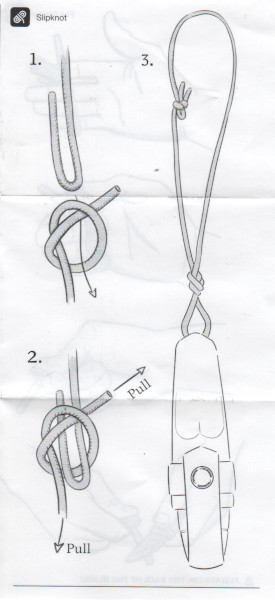
This knot, which I will call a safety knot, is simple. Tie a loose overhand knot in one end of the cord. Take the other end, fold it into a bight and place the bight in the eye of the overhand. Pull the overhand tight.
The utility of this knot for a neck knife or similar object is obvious. If the cord catches on something or the knife gets caught in machinery or similar, the knot will undo even when the force is not enough to snap the cord or break the sheath.
During wear, the end bight worked free, resulting in a single cord held firm by the overhand knot. This is an interesting alternative, which seems less likely to come undone when not desired.
You may need more security if climbing or working near water. The safety knot may be quickly modified into a fisherman’s knot.
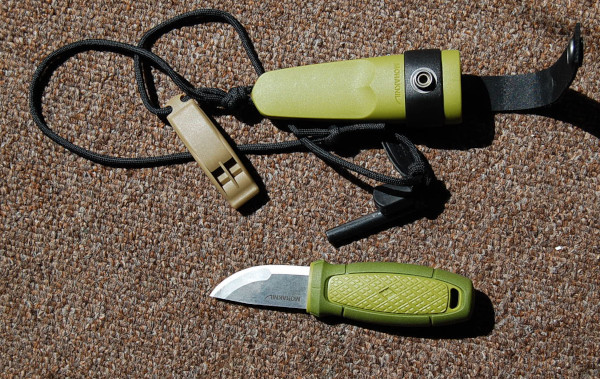
When I assembled this, the first thing I thought was that the neck cord cries out for a whistle.
Unfortunately, all the whistles I have to hand were orange! The sheath colour really wanted something that complemented it more.
One thing I did find was that attempting to open the popper of the secondary lock pulled the safety knot undone, or loosened it. You will need to hold the sheath in one hand when opening the lock. You will also need to use both hands to draw the knife.
Conclusions
The Eldris poses several questions.
The first is, perhaps, is the accessory kit worth the money? It is a little pricey for what it is, even if a little cheaper if bought with the knife.
Paracord is pretty easy to acquire, and may be found in colours and patterns that better suit the sheath and grip colour than black.
The fire starter is of good quality, and more robust than some examples. Similar items may be acquired from other sources for a little less, however.
The main feature of this fire starter is that the loop is exactly the right size to fit around the sheath. I find the fob at the end of the cords a little ungainly and obstructive when the fire starter is carried in this mode.
Is this the best position to carry a fire‑starter? Would a butane lighter attached to the sheath with a rubber band (cut from a bicycle inner tube) be more practical? Said band could hold both a lighter and a ferro‑rod.
If you intend to carry the Eldris as an inverted neck knife, the secondary lock has an obvious appeal.
Something similar, however, could easily be constructed from some appropriately coloured webbing strap and a button. popper or Velcro.
The secondary lock may be “belt and braces” since I expect the lock in the sheath will prove to be very effective.
An interesting idea would be to use the lanyard hole to connect the knife to the sheath. Then in the unlikely event the two do part company, your knife will be lost. This precaution may be useful for other modes of carrying the Eldris.
It is a wonderful knife, but what are you going to actually use it for?
For some jobs, a longer blade is better. If gutting a fish or skinning a rabbit, I would be inclined to reach for a Mora Companion rather than an Eldris. The Companion is probably a more versatile knife, which is why one sits in my bug-out kit beside a kukri.
The Eldris has been touted as “the perfect knife for any outdoor activities” but that is clearly clickbait nonsense. Perfect if you also have a machete, saw, axe and Swiss Army Knife handy too, perhaps.
Perhaps it is unfair to compare the Eldris to other sheath knives.
The Eldris has been described as a pocket knife, or as having the virtues of a fixed blade with the convenience of a pocket knife.
It does offer an interesting alternative to many folding knives. It is stronger, simpler, and better suited to messy jobs. Lighter than many folders too.
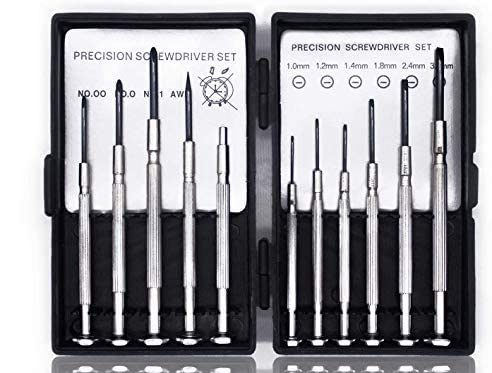
On the other hand, in daily use, the tools on a pocket knife that tend to get used the most are scissors, screwdrivers and implements other than the knife blade(s).
The Eldris is a supplement to a good penknife, rather than a replacement.
I can see myself carrying an Eldris if heading into the wilds, but it would not be replacing the Companion or any of my other primary tools.
Mora’s main competitor for the Eldris is Mora themselves.
While the Eldris is very reasonably priced compared to many other outdoor knives from other companies, it is about three times the price of many other Mora models.
The Eldris has an obvious superiority in materials and design, but the cheapest Moras are still first class quality and outstanding value for money. Companions or 511 may be more versatile choices than the Eldris.
Within camp or when working, the Eldris might be handy for numerous minor cutting jobs, being handier than fishing out a folding knife.
It is a good choice for the sort of jobs an average belt knife may be a little big and clumsy for.
Personally, I have never really been one for neck knife carry. I may get more used to the idea with time. The cord may be wrapped around the sheath and the whole thing carried in a pocket until the neck knife mode was wanted, of course.
If you are not sure whether to invest in an Eldris, it may be prudent to buy a Eldris Light Duty first and try it for fit.