Disclaimer: “As an Amazon Associate I may earn from qualifying purchases.” Adsense and Infolinks were no help at all.

If you have enjoyed this article or it has been helpful to you please feel free to show your appreciation. Thank you.

Read The Third Wave by Alvin Toffler!
Categories
Phillosoph

Horseshoe Rolls, Blankets and Gum-blankets

While researching the “Soldier’s Load”, a conflict that was often mentioned was the American Civil War (ACW).
Sherman’s “March to the Sea” was a frequent topic. From the Confederate side, we have “Stonewall” Jackson’s Shenandoah Campaign where infantry covered 670 miles in about a month and a half.

A distinctive element of these campaigns was the use of the “horseshoe roll”, occasionally called a “croissant”.
During the blogs on the WW2 Soviet infantryman, I mentioned that what was often described as a blanket roll was in fact a rolled greatcoat, which was also used as bedding.
The horseshoe rolls used by ACW soldiers were blankets, but they were not just blankets.
It is a matter of record that many ACW soldiers on both sides discarded their issue knapsacks and carried most of their gear in a blanket roll.
Rations and related items were carried in a haversack, typically a sort of shoulder bag.
There are a number of videos on-line showing you how to construct a horseshoe roll. Key point is that they are rolled LENGHTWISE.
A very good article on how the ACW soldier carried his gear can be found here and is worth reading.
The horseshoe roll was generally not just blankets. Spare clothes and other suitable items were carried wrapped within it.
Often the blanket itself would be protected from damage and weather by wrapping it either in a shelter-half or a gum-blanket.
The shelter-half of this conflict was a simple square of cloth. Two could be buttoned together and rigged up in various ways to make a very compact two-man shelter. Rifle-muskets or local materials provided support.

The gum-blanket was a relatively new invention.
It was a 60 by 70 inch cloth coated on one side with a waterproof coating such as vulcanized rubber.
The gum-blanket served as a ground cloth. Materials such as hay, cut long grass, bracken or similar can be piled under the gum-blanket to serve as a mattress.
If a shelter-cloth had been lost or been discarded, a pair of soldiers might sleep on one gum-blanket and rig another up as cover.
A single sleeper might wrap himself in his blanket(s) and sleep within a folded gum-blanket.
The gum-blanket also served as a rain cape. Rain ponchos were constructed in the same way as gum-blankets but many soldiers used a single gum-blanket for everything. The shelter-half might be discarded in favour of just the gum-blanket. (Note that some books clearly confuse gum-blankets with rain-ponchos).

Some comments on sleeping in blankets in the field are relevant here. I cannot do better than quote Horace Kephart:
“To roll up in a blanket in such a way that you will stay snugly wrapped, lie down and draw the blanket over you like a coverlet, lift the legs without bending at the knee, and tuck first one edge smoothly under your legs then the other. Lift your hips and do the same there. Fold the far end under your feet. Then wrap the free edges similarly around your shoulders one under the other. You will learn to do this without bunching, and will find yourself in a sort of cocoon.”
It will be noted that this arrangement tends to place a double thickness of material between the sleeper and the ground, reducing ground chill.
The horseshoe roll was supposed to be carried from the weak-side shoulder, allowing the rifle-musket to be more easily fired from the strong-side.
If your activities are less bellicose, the roll can be alternated from one side to the other to rest one shoulder. The end parts of the roll needn’t be at the lowest point. Such a configuration apparently hindered access to the cartridge box when worn from the left shoulder so the ends were often shunted back.
After the civil war, the American Army issued a set of leather straps designed for constructing a blanket roll. This seems excessive both in weight and complication of maintenance.
Use some cordage and a parcel wrap of half-hitches. For some suitable knots see my free book on the subject.

The shoulder roll can be easily discarded if needed. On the negative side, it is not a very good way to carry items that you might want while on the move.
Accessing any item within it requires stopping and unrolling the roll and then reconstructing it. It is better used to carry “end of day” items.
Using a gum-blanket or rain poncho as the outer cover of the roll has the disadvantage that if it starts raining, you will have disassemble and reassemble the entire roll.
This article describes several ways to carry a gum-blanket or similar item separately.
Osprey Men-at-Arms 214 US Infantry Equipments 1776-1910 (p.23) adds:
By the Spanish-American War Of 1898 the Army had devised a regulation manner of rolling and wearing the horseshoe roll, as Plc. Charles Johnson Post, a New York infantryman, found:
‘In the business of making a blanket roll, you lay the blanket on the ground, put into it your tent pegs [3 pegs] and your half of the two tent poles—for each man carried but one-half the tent—and then arrange your towel, socks, shirt, and extra underwear and roll up the blanket. Then, turning your attention to your half of the tent, fold it lengthwise. This you lay on top of the blanket roll, fasten it at the ends and the middle, much as if reefing a sail, then bend it until it takes its horse-collar shape, fasten the two ends—and there you are ready to stick your head through and sling it. It is excellent. But—and this we learned on our first march to the transport— the blanket roll must be made sloppy, not neat. A hard, neat horse collar will bear into the shoulder like a steel bar, so roll it loose and floppy for the part that lies over the shoulder and with no baggage inside the center section—just at the two ends. It looks like a clumsy, amateur sausage lying out straight, but it is soft on the shoulder. In Cuba our horse collars made us look like a bunch of hobo blanket- stiffs.’
Rain ponchos and similar items made from modern materials may be too light and fragile to form the outer layer of a horseshoe roll. Using them in this fashion may increase the likelihood of them becoming damaged or punctured.
A heavier duty item such as a canvas shelter half or a groundcloth may be more suitable.
There are a number of websites that explain how to make your own gum-blanket/ groundcloth by painting one side of a cloth with black latex paint.
Categories
Phillosoph

Japanese Shelter Cloth

While I was researching aspects of reducing the soldier’s load the WW2 Japanese Army often came up. Of particular interest was this in-depth article on the evolution of the Japanese soldier’s shelter cloth. I have taken the liberty of reproducing some of the illustrations from that article below.
According to the 1944 Handbook on Japanese Military Forces (TM-E 30-480): “Cotton raincoats with hoods are issued to Japanese troops, but in most theaters they prefer to use the shelter half as rain protection.” and “As a raincape it provides excellent protection against wetness and is preferred by many Japanese soldiers to the issue raincoat. A cord is attached to the middle of one end so that the shelter half can be suspended from the shoulders and tied under the chin. Loops through the eyelets on one of the sides then may be slipped through the eyelets on the opposite side to close it securely in front. Two of the corners rest approximately elbow high, allowing the arms freedom of movement. The shelter half also is used as a ground sheet, or to roll up in for protection in a foxhole. It can be pitched as a tent, either alone or in combination with varying numbers of others.”
 
The method of joining the cloths together with the cord loops is rather elegant and ingenious. Apparently this was also used when the cloth was worn as a garment. Below is an illustration I have in another book. Interesting here is that the cloth appears to be a 3:4 rectangle rather than a square.
Categories
Phillosoph

Soldier's Load : Sundries

For many years I have been involved in various discussions on minimizing or optimizing the soldier’s load.
Some of that discussion is not relevant to this blog.
Some of it may be of interest to those readers that are servicemen, or those that are considering ways to reduce the weight of their own kits.

The issues of food and ammunition loads are to be discussed on another day.
We still hear accounts of troops carrying six days rations for operations that are not expected to last long enough to need fresh underwear!
The topic of bedding and shelter I intend to address in a future article. Some of my thoughts can be found here.
Today’s blog addresses what might be termed “the sundries”.
Note that some of the following recommendations may contradict your unit’s SOPs and may not be permitted.
Part of being able to carry the stuff you really need is to not carry stuff you do not need. Personal mobile phones and music players have no place on an operation.

Backpack Contents

I will start with a discussion of the things that might be carried in your backpack.

Wash-Kit

Your wash-kit should not be in a multi-pocketted washroll. A simple mesh bag is lighter and better.  It should contain:
  • Half a bar of soap in a small PU drawcord bag. Half a bar of soap is likely to last you ages out in the field. The bag can be made from scrap waterproof material and should be within the sewing abilities of anyone.
  • One disposable razor. In the field the main purpose of shaving is to ensure that your respirator is a snug fit. You don’t have to be baby-faced or look like a male model. A single disposable razor should last you a couple of weeks. Cut a few inches off the handle to reduce weight and bulk further. If respirator use is unlikely, consider a beard.
  • Toothbrush. I doesn’t need to be a special camping or travelling model. Chop a few inches off the handle. Children's toothbrushes are more compact and seem to clean better.
  • Small tube of toothpaste or tin of baking soda. A little will last you a very long time so do not carry too much.
  • A low bulk towel. This may be a travel towel such as pertex, or better still, half of one. Alternately, your towel may be a spare bandanna or keffiyeh. If this is selected in a tactical colour it can be tied to your gear to dry in the wind.
  • A small stick of deodorant might be included here. It reduces your “scent signature” and makes things a little more pleasant for whoever you share bedding with.
  • A plastic comb is optional. Some people’s hair needs a lot of combing, some very little and others just have very little!
Note what is not included in this wash-kit:
There is no shampoo. If you need to wash your hair make do with the soap.
There is no shaving brush or foam. Use the face soap, it works fine.
The mirror for shaving is carried elsewhere and will be detailed later.
A flannel is unnecessary. If you want, use a corner of your towel/bandanna.
The soldier should carry a Swiss army knife so there is no need for items such as nail clippers.
The wash-kit goes in your “personal admin bag”. This bag may be a large pencil case or a simple sponge bag. Select something light and simple. Also carried in the personal admin bag is a medical kit, sun-cream, insect repellent and your repair kit.
The personal admin bag puts most of your personal gear in one place. It is easily grabbed and transferred between locker, patrol pack, large pack and kitbag.

Repair Kit

Take a couple of sewing needles and stick their points in a piece of foam. If possible one of your needles should be a heavy-duty type such as a triangular-section sailmaker’s needle.
Needles can be magnetized to act as emergency navigation aids.
Place the needles in a small plastic bag and add several metres of “invisible” thread and a handful of safety pins of various sizes.
A large “blanket pin” or two is worth including.
A few yards of dental floss can be used for heavier repairs. Other uses of dental floss include as fishing line and cleaning your teeth!
Add a couple of spare uniform buttons and rucksack buckles if you wish.
Items such as folding scissors and thimbles are unnecessary. Use your Swiss army knife.
In addition to the sewing items, your repair kit should hold a small tube of superglue and a few metres of duct tape. The tape can be wound around an object such as a pencil. A few metres of electrician’s tape can be added too.

Dirty Boots, Lighter Load

The personal admin kit would not normally carry boot polish and other shoe cleaning items.
For most operations this is not a priority. Boots can be cleaned before and after an operation.
In exceptional circumstances it may be necessary to take shoe cleaning supplies. Seldom will it be necessary for each man to carry a full kit. More prudent is for just one member of the squad or team to carry a tin.

Toilet Paper

A vital thing your pack should carry is some toilet paper. Flatten a roll and place it in a plastic bag. Carry it somewhere in the rucksack where it will be readily available. An external pocket is ideal. Toilet paper can, of course, be used as tinder.

Weapon Cleaning Kit

A weapon-cleaning kit should be carried.
At the minimum, this should consist of a pull-through or bore-snake with the correct size brush, half a toothbrush, small volume of solvent/lubricant, a rag and some patches.
Some of these supplies will be in the rucksack while some might be carried with the webbing.
A unit should never have more than half of its weapons being cleaned at any time. A weapon cleaning kit may therefore be shared between two soldiers.

Extra Clothing

Extra clothing carried divides into spare items and supplementary.
A spare set of underwear and at least one pair of spare socks should be in the pack.
A small container of foot-powder can be carried with the spare socks.
Additional spare socks can do double duty as carrying pouches or improvised mittens.
A spare set of combat dress may or may not be carried. In some environments you can change into your dry spare set to sleep in at night. In the morning you redress in your “day” clothes. If weight is critical, the spare set of combat dress should be one of the first items omitted.
Supplementary clothing includes such items as hats and gloves.
In addition to your helmet you will need at least two hats.
One should have a broad-brimmed and provide protection from the sun.
The other should be a warm hat such as a watchcap or headover. This can be used as a nightcap when sleeping in the cold.
Headovers are such useful items it is worth carrying more than one. Luckily they are of modest weight and bulk.
You may be carrying more than one pair of gloves. You may have a heavy pair for wire or ropework and another pair for fine work. In sub-zero conditions a spare pair of gloves/mittens is prudent.
Glove liners are also very useful. When carried in your pack, hats and gloves should be readily accessible in a pocket, not at the bottom of the pack under other gear.
Add a snaplink to your gear so you can stow your gloves when your pockets are full of other items.

Cooking Gear

In the past soldiers carried mess-tins and stoves.
Innovations such as MREs and heating pouches have reduced the need for such items and often they are not carried.
Any cooking or water heating that may be necessary can be performed with a metal canteen cup.
Mess tins were also used to receive food from field kitchens. Having only a canteen cup may be insufficient if soldiers are fed this way. Large scale catering units may provide disposable plates.
If cooking is at section or platoon-level soldiers may need vessels in addition to their canteen cup.
In such situations a pair of lightweight plastic bowls may be carried in the pack. A length of line can be added as a handle, allowing them to be carried like buckets. In this way a man with a pole or branch can carry food for several comrades.

Jacket Contents

Certain items should be carried in the jacket pockets or upper body. This includes a notebook, map protractor and writing implements. Pens malfunction. Carry at least one pencil.
Various bits of cordage, comms-cord etc is likely to be carried in jacket pockets.

Mirror

A small mirror should also be carried in a breast or sleeve pocket.
This should not be a heavy glass item as some armies issue. It should be plastic or made from a light piece of polished metal, such as a door fingerplate.
This mirror is used for shaving but serves other purposes too. It can be used for signalling or can direct a spot of light to designate a point of interest. It can also be used to look around corners, over walls or under objects when searching.
A laminated card with Morse code printed on one side should be kept with the mirror.

Whistle

A lightweight plastic whistle should be carried, perhaps attached to the dog-tag chain. Whistles are somewhat underused in the modern military. They can be used to raise an alarm or call for assistance.
A small LED light such as the Photon II can also be added to the dogchain and will prove useful. Some soldiers use a betalight instead.

Trouser Pockets

You are less likely to remove your trousers than your jacket or pack.
Therefore your emergency gear is carried in your trouser pockets.
You should be able to sleep comfortably with these items in place. Pad them with spare socks or cordage if necessary

Fire Kit

A fire kit can be carried in one of the thigh pockets. This should be relatively simple and compact: Two disposable lighters, a birthday cake candle and a container of vaseline-soaked cotton wool for tinder. A tub of storm matches or a Fresnel lens might also be added.
This fire kit is wrapped up in a waterproof bag.
An additional lighter for “everyday use” may be carried somewhere else such as a sleeve pocket.
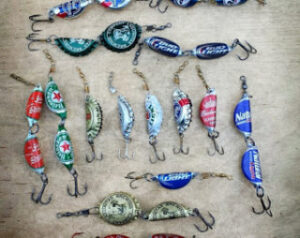
Fishing Kit

In the same pocket as the fire kit, a simple fishing kit can be carried.
This should consist of about six metres of braided line.
Hooks should be already tied to monofilament with a snap-link swivel at the other end. Split shot may be already tied to these lines.
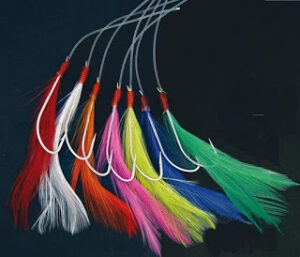
A few mackerel feather lures can be included in this kit. Items such as extra split shot should be packed so that it does not rattle.
Add a few metres of brass wire to this kit. Brass picture-hanging wire can be an economical source of the latter.
In many situations, trapping or fishing may not be tactically feasible. If an enemy discovers your trap or trot line they may lay an ambush or set booby traps.
A kit of the sort suggested takes up very little room or weight and the cordage and hooks may be used for other purposes.

First Aid Kit

In the other cargo pocket is a small first aid kit.
Field dressings are for major injuries. The first aid kit is a “boo-boo” kit for more minor injuries that may become a problem if not treated.
The kit should contain painkillers, band-aids and alcohol wipes.
Important medication such as anti-malarial drugs is also carried here.
Choice of other medical kit contents is a matter of personal preference but it is important to distinguish between “nice to have” and “very likely to be needed”. Your main medical kit is in your backpack.
The cargo pocket kit should remain small and compact so that is always carried on the solder’s person. Additional medical items can be carried in the personal admin bag.

Space Blanket

Carried with the pocket first aid kit is one of the most useful survival devices of all: A foil space blanket.
Depending on the climate, small quantities of sun-lotion and/or insect repellent are carried in the pockets or webbing. Larger volumes to refill these containers are carried in the pack.

Penknife

The soldier’s Swiss army knife should be carried in the trousers or on a pouch on the trouser belt. A small sharpening stone should be carried too.

Webbing Equipment

Intermediate between the contents of the pack and the pockets is the soldier’s webbing.
Primary purpose of the webbing is to carry ammunition and mission gear.
Ammunition and related issues may be dealt with in another post.
Today I will concentrate on other webbing-related loads.

Zip-Ties

The modern soldier should carry a number of plastic zip ties, aka cable ties or flexicuffs. Select “tactical” colours.
These can be laid along a belt and tucked behind a pouch. They are secured in this position by a couple of rubber bands or pieces of elastic.
The primary role is for securing prisoners and suspects.
Another potential use is to secure double doors by binding the handles together.

Water Supply

The webbing gear should also carry at least one litre of water.
Conventionally, this will be in a rigid plastic water bottle. One problem with such bottles is that if they have been partially emptied, the water sloshing around inside can hinder quiet movement.
If you fall on a rigid bottle it will hurt a lot!
The British 58 pattern water bottle is designed so that the plastic mug fits over the top. In other words, you have to remove the cup before you can drink from the bottle.
Water bladders such as the Camelback and Platypus brands have become popular in the last few decades. Larger volume bladders are either carried in the pack or worn as a pack and can be drank from by a sip tube.
Having a litre or two of water with your belt order is still prudent even if you use a larger water supply in your pack. Draw from the supply in your pack when possible and keep the belt supply in reserve.
Some one-litre bladders will fit in an issue water bottle pouch. Unlike rigid bottles, air can be squeezed out of a partially full bladder to reduce sloshing noises.
A supply of water purification tablets should also be carried with your belt gear or in a pocket in your clothing

Canteen Cup and Brew Kit

The belt order may include a metal canteen cup. This is used for any cooking in the field that needs to be done. It is also used to pasteurize water if purification tablets cannot be used or supplies conserved.
For the British soldier the primary purpose of the canteen cup is to make tea.
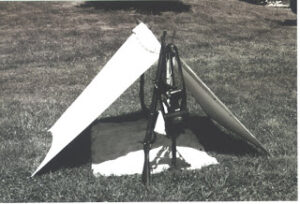
One of the lightest ways to make tea is to use three six-inch nails to support the cup over a small fire.
A number of armies have issued cookers specifically designed to work with canteen cups.
The American Natick cookers are designed to fit around a canteen instead of a cup. The GI would carry one canteen with a cup around it, the other with the stove around.
The British Crusader system has a metal cup that fits over the bottom of the water bottle and a stove that the cup nests in. Since the plastic mug fits over the top of the issue water bottle, this can be carried as well if you desire.
An improved stove, the “Crusader II” or “Fire dragon” is slightly taller and the capacity of the metal cup has been increased too.
This has resulted in the issue of a water bottle pouch that is 12" deep in order to accommodate the stove, bottle and cup(s) in one package.
This is obviously less than ideal. More practical may be to carry your water bottles/bladders in separate pouches to the stove and cup.
The space inside the cup can be used to carry some fuel for the stove. It will also accommodate a brew kit.
The basic brew kit is tea bags, sugar, powdered milk/creamer and a plastic spoon/spork. Carry sugar even if you do not normally take it in your hot drinks. Sugar is energy and your body will often give you a sweet tooth if it feels the need. Artificial sweeteners have no place in your kit!
A couple of OXO cubes provide variety. In cold climates, when you will be brewing up often, a couple of packet soups provide additional variety.
Instant coffee is not worthy of the name. Carry some coffee bags. Good coffee requires water that has cooled down a bit from boiling. Heat till water just begins to bubble and then remove from heat before adding coffee bag.
While a canteen cup and brew-kit are widely regarded as belt items, I think they are better carried in an external pocket of a pack, minimizing the mass on the belt.

Flashlight

A small flashlight such as a mini-maglite can be added to a pocket or the brew pouch.
This is used for jobs that more powerful weapon-mounted lights are not suitable for. It should be of a form that you can easily hold in your mouth or tuck in a hatband. A red filter should be fitted. A few metres of tape can be wrapped around the handle.
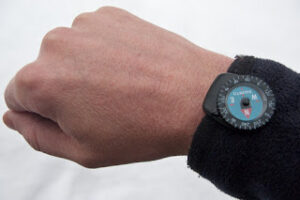
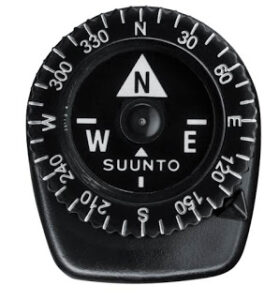
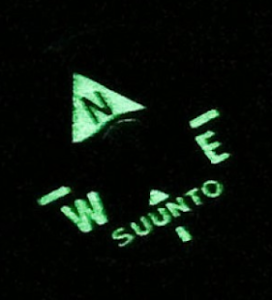
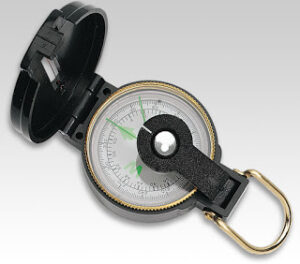
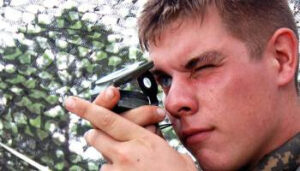
Navigation Aids

What navigation aids you carry will depend on your role and training. While land navigation skills should be encouraged, many riflemen only need a broad idea of direction during an operation. A wrist-mounted compass may provide adequate and convenient.

Fixed Blade Knife

Most modern bayonets are weighty and of limited utility. A stout but short knife of under 11" length should be carried over the weak-side pectoral muscle. This can be mounted on a suspender/brace but must be positioned so that it does not interfere with any backpack straps.
I discus the merits, uses and features of such a knife in my books “Survival Weapons: Optimizing Your Arsenal” and “Crash Combat”.

Other Tools

Most units have SOPs on where field dressings are to be carried. This is so a comrade can immediately locate a dressing when it is needed. Therefore such SOPs must be followed.
A bullet often creates both and exit and an entry wound. At least two field dressings should be carried by each soldier.

The distribution of entrenching tools poses some interesting questions.
One train of thought is for them to be only carried by half a force. This makes the assumption that half the force will be on guard while the other digs.
A few extra tools may be handy if the threat is not immediate but the task must be completed as quickly as possible.
If better tools are available, such as from vehicle pioneer kits, the carrying of personal entrenching tools may be redundant.
Ideally a range of tools should be carried by a unit. Fixed blade spades should be supplemented by picks, pick/mattocks (M1943), trench axes and similar. A few crowbars or axes with the squad will be of more use in an urban environment than entrenching tools.
A soldier should carry one “tool”, be it spade, M1943, crowbar, trench axe, tree saw etc.
On the march, such tools are best carried in the pack.
During an assault they may be transferred to the webbing.
Such tools are also used as weapons so the practice of slipping them through the belt for easy access is often seen.
In this light, the issue of bulky carrying cases to carry entrenching tools on the belt must be questioned.
As was discussed on the recent blog on tomahawks, a simple carrying loop may be all that is needed if some means of muzzling the edge and any points is provided.
Categories
Phillosoph

Three Fishing Lures

Today I’m going to briefly look at three different fishing lures. All three are designs you could potentially make at home or in the field.
The first type is the mackerel feather. Mackerel are a sea fish but these can also be used in fresh water. I will admit I have never personally tried mackerel feathers in freshwater but cannot imagine any reason why freshwater fish would not be interested. Such a lure could easily be constructed in the field by binding a feather or scrap of cloth to a hook. Mackerel feathers can be found for very reasonable prices and their low bulk makes them very suitable for compact survival kits.
The second type of lure is the mepp-type spinner. A piece of tin can or beer can can be used to make the spoon. Perhaps even thick foil or the ring-pull might be used. There are a number of videos showing how to make spinners but I particularly like this one. The only commercial parts used are the hook and bead. Everything else is made from wire or paperclips. Spinners can also be made by adding a hook and spoon to a couple of swivels.

The third lure is the bottlecap lure. Pierce or drill a bottlecap in two places. Don’t drill towards yourself or your hand as some videos show! Using a Heineken or Bud cap will catch you wimpy, weak, little fish, of course.
Bend the bottlecap inward so the markings on the top are visible. Attach a swivel to each hole. If you are short on swivels, use a no.3 split ring. If you are short on split rings make them by bending paperclips into shape. The idea tool for making split rings is round-nosed pliers. I don’t have any of these so my rings tend to be a bit oval, but no fish have complained yet. One idea is to put some BBs or bits of gravel within the cavity the bottlecap creates. The rattling is supposed to attract predatory fish to the lure. Obviously if you are likely to have to move quietly while carrying your fishing kit lures that rattle are not recommended.
Categories
Phillosoph

Suunto Clipper

          The engineer’s compass is my oldest compass, but the compass that I have used the most is my Suunto clipper. At first glance you may mistake this for a simple button compass of the sort so often found in survival kits. Look more closely and there are two distinctive features.


         The first feature, and what gives it its name, is the Suunto clipper has a clip. This can be clipped onto your watch strap but I have in the past attached it to lapels or cuffs, as needed. It is a well-designed clip which will securely grip a strap or material of sufficient thickness.
          The other feature is that this diminutive compass has a moving bezel. The bezel is marked in 10 degree increments, with letters at the four cardinal directions and numerals every 30 degrees in-between. The bezel rotates with audible “clicks”. Interestingly, there are four clicks to every 30 degree arc. For example, between N and 30 degrees there is a click at N, 10, 15, 20 and 30 degrees. You can therefore set the bezel exactly to bearings such as 15° or 45°. A very intelligent feature and some very nice attention to detail by Suunto.
          To the outside of the bezel is a small triangular pointer. Move the bezel so that the pointer is on your desired bearing. Align the needle with “N” on the bezel and select a landmark in the direction the pointer indicates. A quick stroke of model paint makes this pointer even more distinctive.
          I’ve had my clipper many decades now. It is a model with a blue card. Some websites claim the letters on the card are luminous. Either this has worn off on my own example or it was a feature that was introduced on later models. The more modern examples have a black card. Some websites also list the clipper as being suitable for diving!
 
          One reason that I have used the clipper so often is that it is the compass that I always have with me. I have a small container, rather like a 35mm film container but oval in section. The clipper lives in this at the bottom of a belt pouch, sometimes sharing its accommodation with a couple of aspirin.
          If I am out in the wilds I will pack a larger compass. The clipper has proved most useful in environments where the need for a compass is often unanticipated. Many guidebooks will give you directions such as “the hostel can be found a few blocks northeast of the station”. There are a number of techniques that can be uses to determine direction in an urban environment but sometimes these cannot be used. The sky may be overcast or satellite dishes are not visible. This is when a compass like the clipper comes in very useful.
Categories
Phillosoph

Epic Fail

There are instances when the threads of various topics I am working on intersect. Once such instance happened recently and got me looking into wrist compasses. I came across a wrist compass at a very modest price and decided that it might make an interesting topic for this blog, if nothing else. Other than my limited budget, one of the reasons I selected this model over others was the statement:
"The compass face can also be rotated to allow you to save your heading, which makes checking you're heading the right way exceedingly quick and easy."
 
  I cannot really see much point in a wrist compass that does not have a bezel or moveable section to do this.
 
I ordered the item in the afternoon and it was with me next morning, which was rather impressive for first-class mail.
I just could not get the glass to rotate. The mark on it stubbornly stayed at 12 o’clock. The compass was made by the same company as the Italian Army-style compass I recently acquired. You will recall that the bezel on this was very stiff initially so it was possible that I was doing something wrong.
The supplier had sent me an email, so I replied, asking for advice and including the statement from their webpage.
A reply arrived, stating they had checked their listings and could not find the description I had mentioned. It just so happened that the webpage address was still in my browser history. I sent them the link and cut and pasted the statement from the second paragraph.
The next day another reply arrives. This states that the webpage does not mention that you can rotate the housing.
I have a look at the webpage again. A whole paragraph has disappeared! Can you guess which one?
I have an idea. I put the webpage address into “Wayback Machine” and find an older version of the webpage. There is the second paragraph. I have sent the company this link and for good measure took a “snip” of the page including the second paragraph that had vanished overnight. No reply so far.
Two lessons learned here. The first is that if you are complaining about a misleading or incorrect representation on a webpage, take a “snapshot” or “snip” as proof for if the webpage changes. Secondly, Wayback Machine can be a useful fallback.
In fairness, the supplier did offer to let me return the item from the start. Given the low cost I was not going to bother and was just going to chalk up the loss. Now, given the changing webpage, I have decided to return the item and am curious as to how they behave. Will they return my money or will they welch because the packaging has been opened? I have no idea how I could have determined the housing could not be rotated without removing the packaging!
I will update this page when the matter is resolved, and will name and shame if necessary.

Categories
Phillosoph

The Engineer's Compass.

           Probably the oldest compass I have is an “engineer’s compass” similar to that in the photo below. These can be found at very modest prices so I suspect a number of readers might have one lying around.
           I acquired mine a long time ago. So long ago, in fact, that it predated the internet and I had very little idea as to how to use it. Books and magazine articles on compass use concentrated on baseplate compasses such as the Silva and Suunto brands. What were all these wires and notches and tiny magnifiers for?
           I had to work out how to use it myself. The method I came up with involved tilting both the cover and the lens bracket inwards so that they just made contact. I could look past the wire through the notch on the lens bracket. I could read the value off the dial using the lens. The gentleman in the photo below seems to have made the same conclusion.
 
           Nowadays there are a wealth of websites and online manuals on how to use a lensatic compass. I wasn’t quite right, but I was not that far wrong either.
           The lens bracket should be tilted inwards. By experimenting with the angle you can improve your image of the dial. According to most manuals the cover should be vertical for using the sighting wire. You will find, however, that if you incline the cover inwards it casts a shadow over the compass and the reflection of the wire allows you to read the value on the dial through the lens more accurately.
Categories
Phillosoph

Magnetic Declination

Methods for finding direction without a compass give you true north.
Strictly speaking, a map shows “grid north”, which may differ from true north, particularly on older maps.
Since we generally use a compass with a map, the difference between true north and grid north isn’t usually a worry.

A compass does not point to true nor grid north, it points at magnetic north.

Magnetic north is somewhere up in Canada, but currently seems intent on defecting to Siberia. The difference between magnetic north and true/grid north is known as the “magnetic declination” or “G-M angle”.

This map of the world shows magnetic declination in different parts of the Earth’s surface. Since magnetic north is moving, this map will be out of date when you read it.
Note that declination has very little correlation with longitude.
The green line shows the agonic line. If on this line a compass will point towards true north.
On the isogonic lines, declination may be more than 20° in the northern hemisphere and even greater values as we travel south. Easterly declinations are in red. Westerly declination are in blue and given as a negative number.
So what effect does magnetic declination have on navigation?
Suppose I am in an area where the declination is 2° west. I’m facing a direction the compass tells me is north, 0°.
I notice something of interest ahead of me and try to locate it on my map. Rather than being on the north-south line the point of interest will actually be at a bearing of 358° from my position on the map. 0° is the same as 360° so 2° west gives 358°.
In another part of the world. I might face towards magnetic north but in fact be facing at a bearing of 13° east, a significant difference.
Magnetic declination will probably be marked in the margin of your map. Some maps have a declination in each corner of the map. Use the value closest to your position on the map. If you are midway or in the centre average the relevant values.
Note that the declination diagram is not drawn to scale. Don’t try to measure it with your protractor, use the values given in the text.
To make our life more interesting, magnetic north moves over time. The magnetic declination information will include an annual rate of change so you can calculate how much the declination has changed since the map was printed.
An old map I have of London tells me the magnetic declination for June 1989 was 6°W and that this was expected to change by 9'E every year.  
In 2001 it would therefore be expected to be 4.2°W.  
In 2016 this map predicts magnetic north will have shifted by 243' from what it was in 1989. There are 60' in a degree so 243' is 4° 3' and predicts magnetic declination in London would be 1° 57' west by 2016.
This website gives the magnetic declination in London in 2016 as actually being 2° 10' west.
In practice, declination is rounded to the nearest half degree/30' or 10 mils. so we would treat both 1° 57' and 2° 10' as 2°.
The difference does illustrate that not only does magnetic declination change over time, but the rate of change may also vary.
If using old maps. it is important to get up-to-date information.

Once you have an up-to-date magnetic declination, what do you do with it?

This is where a lot of people get confused.

Declination, or G-M angle, is the difference between grid north (GN) and magnetic north (MN). The magnetic north line may have half an arrowhead or a barb. The declination diagram may also include true north, often marked with a star (★).

When do you add it, when do you subtract it? Some maps will give you this information, relevant for the area covered in the map. Where present, follow these instructions.

When a  map lacks this information, there are lots of rhymes and aide memoires that have been created to teach you what to do. Some of these, however, are only “true” in certain parts of the world.
Many readers will have been taught use the acronyms “MUGS” and “GUMA”. These stand for “Magnetic Unto Grid: Subtract” and “Grid Unto Magnetic: Add”.
A related rhyme is “Magnetic to Grid, get rid” and “Grid to Mag, Add”. Another acronym pair is “MUCA” and “CUMS”. The “M” stands for map and the “C” for compass in this case, but when stressed you might confuse these with “magnetic” and “chart”, so I find MUGS and GUMA safer, and LARS even better.
 
What MUGS means is that if you have a magnetic bearing, taken with your compass, you must subtract the magnetic declination before plotting the angle on your map. In our example above the magnetic bearing of 0°/360° has the declination of 2° subtracted from it to give the actual bearing of 358°.
When converting a bearing on the “grid” to a magnetic bearing you add the declination (GUMA).
I suspect that the MUGS/GUMA acronyms are probably British Army in origin, since they tend to favour a westward declination and could be used in the UK and most of Western Europe.
To make MUGS/GUMA global in application, we needed to learn one more thing: “West is Best, East is Least”.
“West is Best, East is Least” tells us to treat a west declination as positive and an easterly one as negative.
As you should know, subtracting a negative number adds the value of the number to the total. Adding a negative number subtracts the value.
Hence, from the above examples:
0°/360°(magnetic) – 2°W = 360°-2° = 358° grid (MUGS)
0°/360°(magnetic) – 13°E = 360°- (-13°) = 0°+ 13°= 13° grid (MUGS)

(It is possibly more logical to treat a westward declination as negative, giving us the rather nice acronyms of “MUGA” and “GUMS”. MUGS and GUMA are very well established, however.)

Another disadvantage of MUGS and GUMA is that the movement of magnetic north is changing the magnetic declination of the British Isles and parts of Western Europe to easterly.
As I update this article in February 2024, magnetic declination in London is now 1°51' East.
Yet another system, which is probably more useful in the future, is “LARS” = “Left: Add/ Right: Subtract”.
This uses the declination diagram on the map. You need to move right/clockwise to get from a westerly magnetic north line to the grid north line, so you subtract the G-M angle to convert from magnetic to grid azimuth. From the grid line to magnetic north is left/anticlockwise, so add the difference for calculating magnetic from grid.
For an easterly declination, the grid line will be to the left/anticlockwise of magnetic north, hence magnetic to grid adds the G-M angle and grid to magnetic (right/clockwise) subtracts in this case.
I recommend that you learn and use the LARS method.
Treat the G-M angle as an absolute value (always positive) and follow LARS: Left Add, Right Subtract.

The method in the illustration above will be familiar to many compass users.
Rather than aligning the needle with the “N” arrow on the face it is possible to compensate for magnetic declination by holding the needle pointing at the declination value on the dial.
Hence if the local declination is “10°W”, you hold the compass so the needle points to the “350°” mark on the bezel rather than “0°”.
You may use LARS to calculate the offset (the value the needle should point at).
You are making a magnetic bearing into a grid one.
MAGMGA: Magnetic Azimuth +/- G-M Angle = Grid Azimuth.
For a easterly declination (East/Left Add) add the G-M angle to 0.
For an westerly (West/Right Subtract) , subtract the G-M angle from 360°/6400 mils.
As a check, the needle and the north mark should resemble the declination diagram. In other words, if the G-M angle is easterly, the needle should be to the right/clockwise of the north mark.
This is useful when walking to a bearing, although you are better walking towards a landmark rather than walking staring at your compass (or phone!) all the time.
When sighting with a compass, the values you will get will still need conversion.
Remember that metal objects on your person or in your surroundings may affect a compass reading. Overhead power cables may influence the needle from as far as 55 metres away!
“West is Best, East is Least”
MUGS
GUMA
LARS
Categories
Phillosoph

Poles and Furcas

I once was tasked with the job of moving a heavy, bulky object. I forget what it actually was. It may have been a chest of drawers or a heavy cathode-ray TV. I asked a colleague to assist me. Moving the item proved to be much easier than I anticipated, so much so I felt I had wasted my colleague’s time. He wisely replied “Two men can carry a piano. One man cannot carry half a piano.”
  Yesterday I was reading an article that asserted that because of heavy weapons such as the 50lb Javelin ATGW the weight carried by modern soldiers was unlikely to decrease in the near future. There then followed proposals for high-tech solutions such powered exo-skeletons and cargo carrying robots that would follow a soldier like ducklings.
Why carry such things on a soldier’s back? Why not use a light handcart. Granted, a handcart cannot be used on all types of terrain so it would also need provision for being picked up and carried when necessary. Following such trains of thought I came across this webpage.
 
As the author notes, carrying poles are seldom used in the west except when hunters wish to carry a kill.


The ironic thing is those same two hunters probably walked into the woods sweating and carrying heavy backpacks. The idea of using a pole to carry those probably never occurred to them.
Carrying poles are still widely used in the east. Here are two interesting scientific papers on their use:


An interesting image. Western depictions of sedan chairs show the porters carrying the entire weight in their hands. If you think about it that seems rather unlikely and some form of strap or harness seems more likely. Note that in the illustration below of the stretcher the man at the rear is using a sling to take some of the weight. The Chinese sedan chair pictured uses two short poles to allow the load to be spread between four and their shoulders rather than their hands used.


If you are on your own, a carrying pole can still be used if your load can be divided. There are lots of images of heavy and/or bulky loads being carried by single individuals with carrying poles, but the one below is probably my favourite.


Another way to carry a heavy load with a pole was the roman furca. Apparently the real name was “aerumnulabut Roman soldiers preferred to call it by the same name as the structures criminals were crucified on. The furca is often described as a “forked stick” but in actuality was two sticks bound in a “T” shape, the longer being about four feet.  A furca could probably be used as a support to rig a makeshift shelter.


   Generally the furca is shown carried rather like a hobo’s pole. The website below explains how the system is more comfortable if used in conjunction with the shield and cloak. The Roman soldier carried a similar weight to that of many modern soldiers. Unlike an overloaded rucksack the furca could be quickly discarded in the event of an ambush. The same is true of other loads carried by pole.

Categories
Phillosoph

Compass and Clinometer Measurements.

As promised in the previous post, some scans on the angle measuring instructions that came with my “Italian Army” compass.

The first paragraph refers to the clinometer. If you work in certain fields the contents of column V will be familiar to you. This column can be read as either fractions or gradients. That is, for example, 25% = ¼ = 1 in 4. A slope of 14° therefore drops or rises one metre for every four metres of horizontal distance. A 45° slope is 1/1 so changes by a metre for every horizontal metre.
In the illustrated example below a hilltop is measures as being at 14° to the viewer so its height must be a quarter of the distance between the two. The converse is also true. If you know the height of an object and can measure the angle you can calculate the distance. A building storey is 3 metres so a three story building will be 9 metres. If the observed angle to the top of the third storey is 6° then the distance must be 90 (9 x 10) metres.
The same system can be used with horizontal angles, taken from bearings of each side of an object. Also illustrated is a way to use the graduations on the window in the cover to calculate the distance from an object of known width.