Categories
Phillosoph

Survival Library: Chapter 2, Bushcraft 101

Continuing my suggestions for a survival library.
Today I will look at a title that is relatively new to me. Some other reviewers consider it a “must have”.
The book is “Bushcraft 101” by Dave Canterbury.
Cover of Bushcraft 101
I quite liked this book.
The early section on safe and effective ways to use your knife and other tools is particularly good, and possibly worth the price alone.
It is a good book for rending topics down to a simply grasped form.
An interesting aide memoire Canterbury uses is “the Five Cs”: Cutting, Cover, Combustion, Containers and Cordage. Personally, I would advise adding “Consumables” and “Compass” to that list.
Another useful aide memoire is the “Four Ws”, used for selecting a good campsite: Wood, Water, Wind and Widowmakers.
To the advice given in the book, I will remind the reader that water sources often come with biting insects, so a camp should not be too near. Under the same category, one should consider watercourses. If you camp in a dried river bed or runoff, a storm miles away may result in your camp literally being washed away.
A third handy memory aid is “LURD”, used to determine the direction viewed by star movement. I recommend memorizing it as “LURD:NESW”. If a star is moving upward, you are looking east, and so on.
Determine direction of facking by star movement
The section on maps and compass is much more straight forward than in some publications:
“The most important reason to carry a compass is so that we can walk a straight line over distance.”
• Here I will insert a useful tip not given in this book. To walk in a straight line, align three objects. Tree trunks in a forest are ideal.
As you reach the first object, align the next two objects with a fourth, and keep repeating this process as necessary.
While applying a calculation to compensated for difference between magnetic and grid north is mentioned in Bushcraft 101, the actual method (LARS) is not detailed.
Perhaps it was felt that in a survival situation the difference is not significant, only a general orientation of the map being adequate. A similar approach is taken in the SAS Survival Handbook.
In some parts of the world, or for more general navigation, magnetic declination may be significant.
I would recommend regarding the navigation section of Bushcraft 101 as a useful primer and follow it with some more detailed reading on the topic.
The above brings me to one of the shortcomings of Bushcraft 101.
The book is very much written for a North American audience, and mainly geared for travel or emergencies in woodland.
If you frequent the prairies or deserts, you may wish the book had mentioned some tent poles to rig the suggested tarp. Similarly, some of the advice given may not be so valid for other parts of the world.
That said, my impressions of this book are very positive.
Once you have the suggested titles by Kephart, Greenbank and Wiseman (and my own books, of course!), Bushcraft 101 is worth considering as a useful addition. 


Categories
Phillosoph

Sun-Compass

Yesterday’s topic logically brings me onto today’s, and another ancient but useful navigation device.
If you have even just glanced through a survival manual, you will most likely have seen the shadow-stick method.
I have previously described this in the context of navigating by the moon. Like the sun, the moon and stars also rise in the east and set in the west.
The more usual context for the shadow-stick is using the sun.
The method is simple.
Place a stick or similar in the ground so that it casts a shadow. Mark the end of the shadow.
Wait for at least twenty minutes.
The tip of the shadow will have moved. Mark this new position. The first marker will be west of the second.
Draw a line between the two markers, then run a line perpendicular to this and back towards the base of your stick (gnomon).
This second line will be true north-south. The greater the distance/longer the time between marker placement, the more accurate will be your determination of north-south.
Logically, we will get a more accurate estimate if we take several hours and place a number of markers.
If we do this we will observe that the shadow is longest in the morning and evening, and shortest when the sun is directly overhead.
The arc plotted on the ground will be flattened rather than constant, unlike some illustrations of this method!
When the shadow is at its shortest, it is on the north-south line, and the time will be local midday. The shadow will be shortest at local apparent noon (LAN), which is midway between sun-up and sun-down, so may differ from 1200 hrs.
As well as determining distance, you have also made yourself a crude sundial. This can be useful in determining true local time.
Some countries on the same longitude use different times. China spans several time zones but uses one official time for the whole country!
The principle is simple enough, but it can get confusing which end of the north-south line is north. In the northern hemisphere the sun (or moon) rises in the east and travels west, passing through the south. In the southern hemisphere it goes through the north.
  • In the northern hemisphere the shadow always points in a northerly direction. At midday the shadow will point due north.
  • In the southern hemisphere the shadow always points in a southerly direction. At midday the shadow will point due south.
Memorize that and solar navigation becomes much less confusing.
In the movies, air-crash survivors usually undertake an epic journey back to safety.
In the real world, your prudent strategy is to stay near the crash site if practical.
Setting up a shadow stick is a practical way to spend the time, and establishing the bearings of visible landmarks may be useful later on.
Suppose, for whatever reason, you need to travel. This decision should never be made lightly.
Thanks to your shadow-stick, you know what bearing you are heading out on, and that of some of the local features.
But we cannot take our compass/sundial with us!
With a few modifications, we can make a portable variant.
If you have ever read about the early days of the SAS or of the Long Range Desert Group (LRDG), you will most probably have encountered to references to sun-compasses on their vehicles.
In those days, trying to use a magnetic compass while riding in a large lump of steel was problematic. The solution was the sun-compass.

Descriptions of how the sun-compass was used used to be hard to find. Thankfully, this is changing.

The sun-compass is an ancient device, and was used by the Vikings, among others. A version was also used by some Apollo missions on the moon.

As you can see, some sun-compasses are very complicated or sophisticated, so not really something you can improvise.
I am going to describe a less accurate variant that can be easily constructed.
In the previous blog, I described how a circle of 57 mm radius had a circumference of c.360 mm. (The person who taught me this trick had 5 mm and 57 mm marked on the zipper of her jacket. I notched my penknife handle).
Create such a circle on a piece of paper, back of a notebook, etc.
An alternate name for a sun-compass is “shadow board”, which reminds us it can be made with a piece of plank or other flat material.
A folded piece of paper will help us mark off the 45, 90 and even 22.5 degree points.
Each 1.5 cm of the circumference is 15 degrees.
The radius of a circle can be measured twelve times along its edge using a drawing compass, or an improvisation of one.
By folding the marked points together the circle can be divided further into 24 parts, or the drawing compass can be used further.
A nail or pin can be used as the gnomon, but a sliver of wood is more likely. In fact, you do not have to mount the gnomon, just place a shadow-casting object in the centre of the circle whenever you take a reading.

All we have to do now is mark off the circle. This will be a 24 hour clockface so mark off every 15 degrees with an hour.

Remember that the shadow will point due north at midday in the northern hemisphere, so mark 1200 hrs as North/0 degrees (In the south, 1200 will be South/180).

Fill in the rest of the face. You might get something that looks like this:

Using this simple sun-compass is simple.
Hold it level and rotate it until the gnomon shadow is over the current time. If the clocks are adjusted for daylight saving/BST or similar you will have to account for this.
Remember, “spring forward, fall back”, so the shadow will be on the north-south line at 1300hs, not 1200, so you will have to subtract an hour from local time to get the time to read on the dial.
Once you have your sun-compass orientated, use the dial to find the bearing you want. Your portable sun-compass should agree with your base-camp shadow stick.
Pick out a landmark, put away your sun-compass and walk towards the landmark. 
An alternate method is to do the same as you did with a shadow-stick. Erect a little gnomon on a board or sheet of paper and plot the tip of the shadow over the course of a day.
Draw a line from the base of the gnomon across the curve where it is at its closest.
To use this version you do not need to know the time.
Rotate the sun-compass until the tip of the shadow meets the curve. The line you drew will point north (or south if you made your sun-compass in the southern hemisphere).
You must use the same height gnomon for each reading, so mount this permanently.
The Ottomani version is suspended from three or four points by cord to ensure that it is level.
You may have realized that if you know the bearing of something, your sun-compass can be used as a crude sundial.
Related to the methods described above is using a watch directly to navigate by the sun.
Remember to adjust time for BST/DST. Substitute 1 mark for 12 mark in the above instructions.
If your watch is digital, or you are using your phone clock, use your imagination.
If you become confused as to which end of the north-south (N-S) line is north, check the local shadows.
Hold a blade of grass over the watch-face and see if it casts a shadow. The one direction a shadow cannot point in the north is south.
Useful to recall is the north gets up around 3 o'clock, goes to bed around 9”.
In other words, the north end of the N-S line will be in the small numbers in the morning, the higher numbers in the afternoon. (In the southern hemisphere replace the word north with south and the motto still works.)
Remember, sometimes shadows are still visible even when you cannot see the sun directly. 
The basic watch method is easy to remember: midpoint between “12(/1)” and the hour hand.
The specifics for each hemisphere can be difficult to remember.
It may help to think that “N” for north-hemisphere looks like a “H” for “hour-hand” and that this should be pointed at the sun. A cast shadow will point in the opposite direction to the hour hand.
For the southern-hemisphere, the 2 in “12” looks a little like an “S” so the 12 should be pointed at the sun. A cast shadow should point towards “6”.
Hopefully that will help you use this method.
Categories
Phillosoph

EDC Shopping List

The other day I had cause to look in one of my boxes of outdoor gear. Various containers that I thought might prove useful. Items brought out of curiosity or sometimes just for their novelty. Gifts from friends. Some are milestones from my path of understanding.
Most of it I will never use. Either I have acquired better alternatives or my requirements have changed. So much money spent over the years that I could very much use now. Sadly most of this stuff has very little resale value.
If I knew then what I knew now” I could have saved myself so much time and money. This inspired me to think about the idea of a prepper/survival shopping list. If you have just come into the field, what should you be looking to buy first?
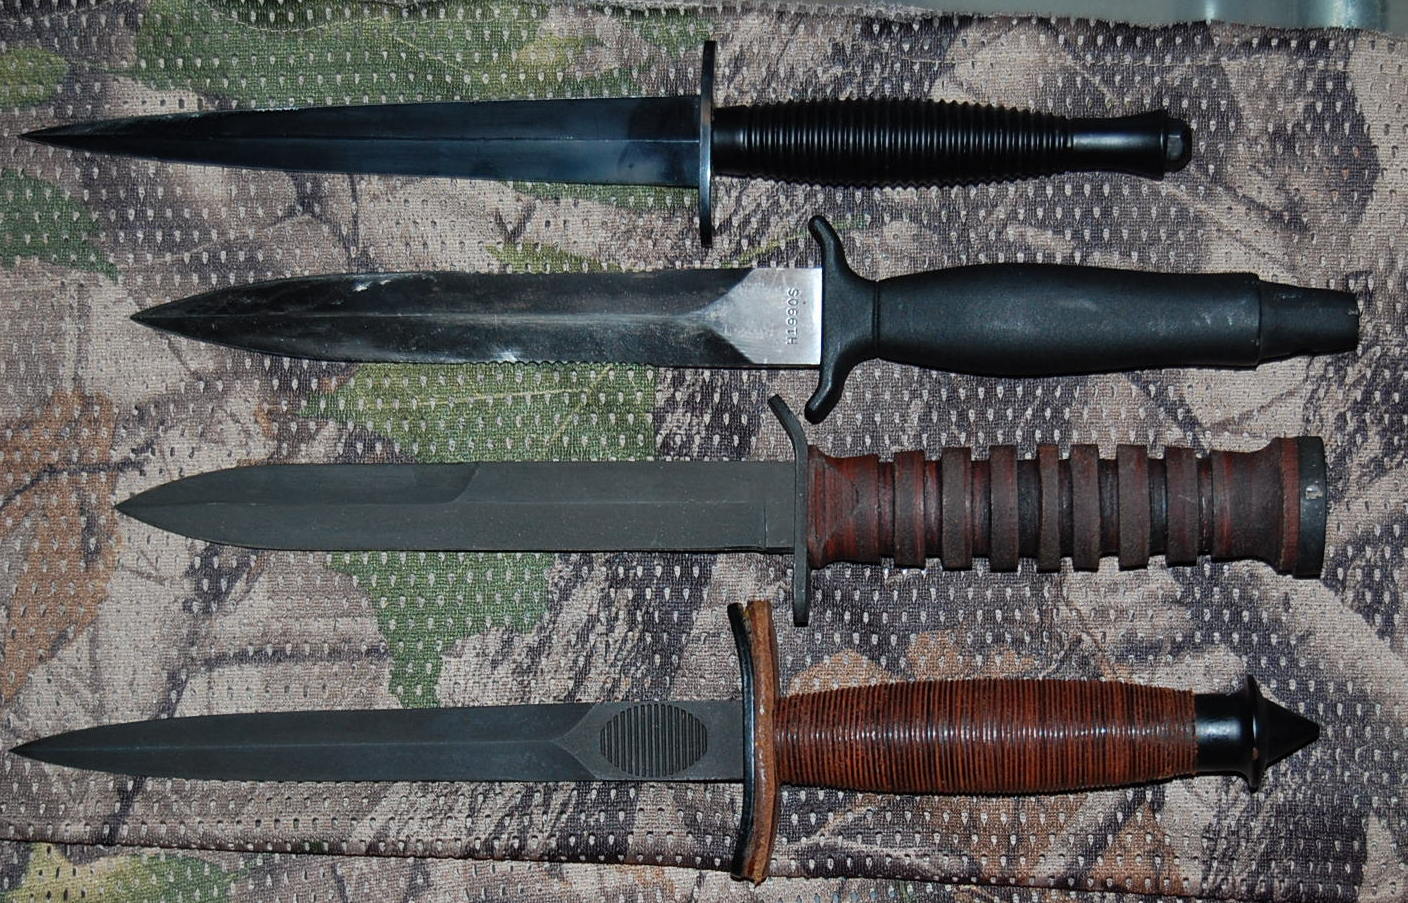
Hopefully my article on “Foundation survival kits” has proved a good start. A fire kit, bottle for carrying water and bag of toilet paper will have been easy to acquire. A poncho and liner or blanket will have cost a bit more but probably did not break the bank. You may be saving up for a good survival knife, but have hopefully bought a machete or hatchet to serve in the meantime. 
Most of the items suggested for the foundation are relatively bulky, however. They are “bag” items rather than things you can keep on your person all the time.
If you have a good “skin-level survival EDC” what you can find in your environment or in your pack is a bonus.
The good news is that you can build up a good EDC without a great outlay of cash. My article on skin-level gear mainly listed my personal items.
I have been asked for a more general list, so this might as well be a shopping list. As before, I will concentrate on the items you carry and save a discussion of clothing for another day.
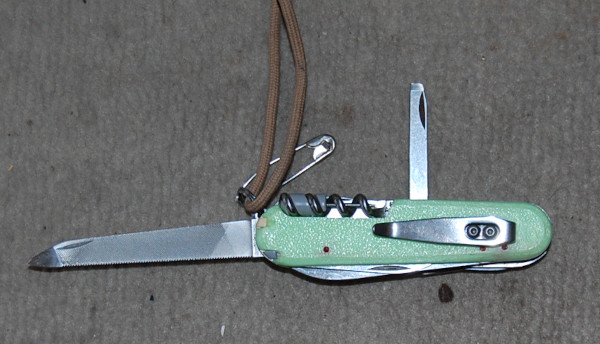
Pocket Knife: This will probably be the most expensive item on this list.
In an emergency, this may be the only knife you have available, so it makes sense to get a good one. That said, as a cash-strapped youth I carried a Chinese-made penknife. It had a really good assortment of tools and the only trouble it ever gave me was a corkscrew straightening out.
With my first full-time pay-cheque, I brought a genuine Swiss Army Knife. In my personal list you will note I also have a mini-Swiss Army Knife (SAK), a Leatherman Squirt and a number of other tools. Some redundancy and backup is always wise.
My preference is a Swiss Army Knife, but many of you will be tempted by full-size multi-pliers/multi-tools. My SAK and Squirt together weigh several ounces less than many full-size multi-pliers, but the choice is yours.
Put a loop of cord on your knife so you can secure it to belts or snap-links when necessary.
If you wear glasses and opt for an SAK, buy the mini-screwdriver that fits in the corkscrew.
Optional is a small sharpening implement. Mine is a small metal card with diamond dust on one side. Small whetstones and other devices are alternatives.
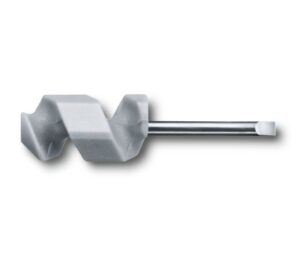
Knives are not designed for prying, especially folding ones. A pocket prybar is a good addition to your EDC.
Lighter: The most basic fire kit is to carry a lighter. Get the type with a wheel. Even if empty, it can still be used to create sparks. Multiple disposable lighters can be brought in budget stores for about a buck.
Optional: Wrap the outside of your lighter with a few inches of duct-tape. Duct-tape is flammable and a small piece may be lit with the lighter and used to get a fire going.
Bandana: Bandanas can also be found for a modest price. Multiple uses. Have one in your trouser pocket.
Space Blanket: These can be found for very reasonable prices, which is good since they are one of the most important survival items that you can carry.
Bulk-buy and place one in your EDC, and one in each bag or outdoor coat you have.
Flashlight: Flashlights can get really expensive, so it may be sometime before you save up for the one you want, especially if you want a tactical, waterproof kubotan that will survive a nuclear attack.
In the meantime, small LED lights such as copies of the Photon II can be found on ebay. Carry one on your keyring. If you wear dog-tags, add one here too.
Whistle: A whistle is another useful addition to your keyring. Budget stores and ebay have these.
If you live or travel where temperatures often drop below zero make sure your whistle is non-metallic. Another useful addition to your dog-tags.
Cordage: Cordage can be put to many uses, but how much for EDC? About two metres/a fathom/an armspan of paracord is probably a good start. Or you can carry a spare pair of long bootlaces.
Buying a hank or roll of paracord is probably prudent. You will need it for some of the other items.
Dental floss: For lighter cordage I carry a compact container of dental floss. This fits in my pocket pouch of medical items. A hank of braided fishing line or kite-string is an alternative.
Pencil with tape: Another “non-medical” addition to my pocket pouch is a short pencil, wrapped in a length of electrical tape. A detachable eraser protects the point.
Chalk: Chalk is useful for marking trails or leaving messages. Half a stick of white or light-coloured, half a stick of dark. Bag the different colours separately.
Safety Pins: Useful for failed zippers and other wardrobe malfunctions. May be used to drain blisters or possibly as improvised fish-hooks. Mine ride in a little plastic bag with a couple of hair pins and paper clips.
Needle and Thread: At skin-level, this is a single needle, already threaded with about a metre of “invisible” thread.
Experiment with magnetizing the needle. You will need to select a method for protecting you from the point. Mine used to ride in a “sheath” made from a drinking straw. Now I have taped it to the side of the pencil.
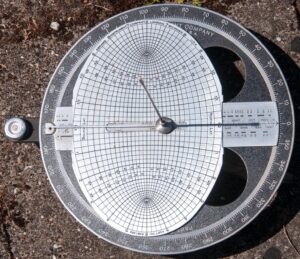
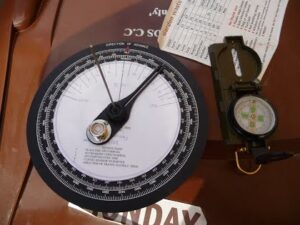
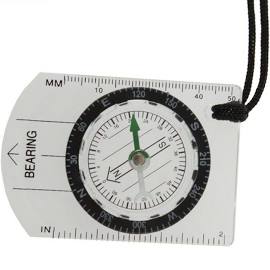
Compass: If starting out, avoid tiny button “survival” compasses. They like to hide in the corners of pockets and pouches. I have to keep my larger clipper compass in a container to avoid this.
For about a buck or two you can find budget baseplate compasses on ebay. These are good entry-level items and you can use them to teach yourself some mapwork. They weigh about an ounce and you should be able to find room for one in your EDC. Add a lanyard so you can secure it to your person.
A whistle is a good addition to a compass lanyard. I prefer to use non-metallic whistles on compass lanyards.
Condoms: Condoms have a number of survival uses. Keep them away from your needle!
First Aid Kit: Your skin-level medical kit is for immediate treatment of minor injuries, i.e. actual “first-aid”.
For longer duration problems, have a more extensive kit in your bag. When you have the option, use the items in your bag before your EDC.
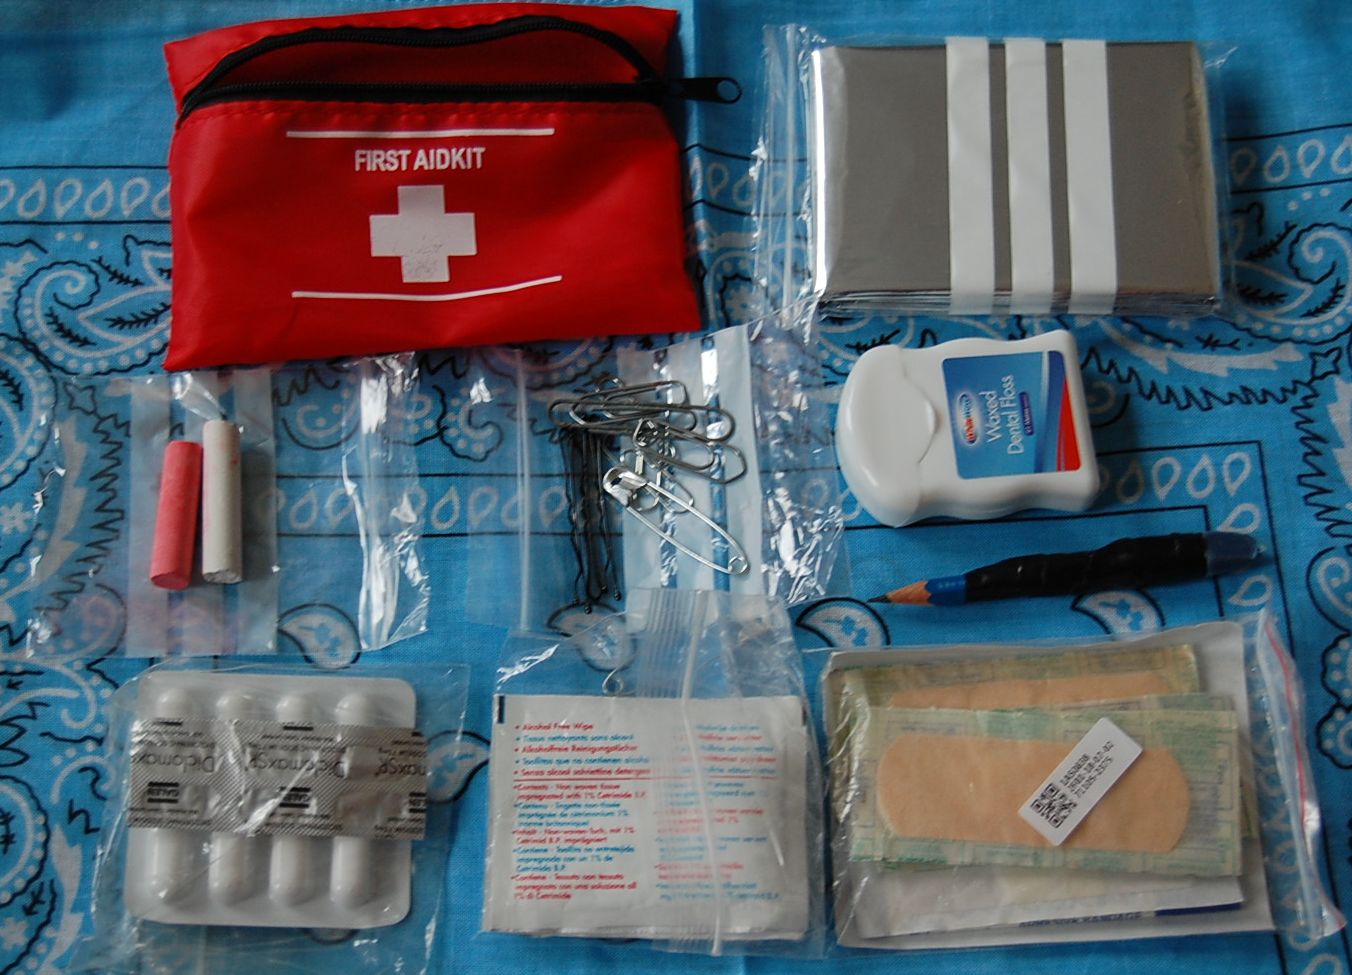
Budget stores and ebay sell little first-aid pouches that will fit in a trouser cargo pocket. Often they come with some medical items included. The contents may need a little tweaking but you can create a very useful pocket first aid kit for very little outlay.
Many of the items listed above can be fitted in the pouch. I even got my space blanket into mine.
Personal Medication: This will vary with the individual. In some environments this would include a supply of anti-malarials.
Tissues or Toilet Paper: A ziplock bag with a few metres of toilet paper.
Obviously, have a larger supply in your pack and use that in preference to your “emergency” EDC supply.
If you have a cold or nosebleed, the tissue paper saves your bandana.
Paper can be used as tinder and the plastic bag used to carry water.
The entire package can be useful padding for other items in a cargo pocket.
If, like me, you seem to accumulate lots of paper napkins from takeaways, use these instead.
A very useful addition to your kit that costs virtually nothing.
For low-level use I carry a small bag with just a few paper napkins. I add a larger bag should I plan to stray from civilization. 
Carabiner: A carabiner makes a very practical keyring and has a number of uses.
Several of the items listed above can be conveniently carried on your keyring.
If your gear has loops or rings it can be temporarily attached to the carabiner when you need your hands free. I sometimes use mine to carry shopping bags.
That concludes our basic list. A number of items but many of them can be acquired at very reasonable prices from sources such as ebay. Many of the items you may already have around the home.
In my previous article, I suggest several EDC items that “up-level” your readiness. Where practical these should be stored together in the same small pouch which can easily be added to your pocket contents. Another of the budget first aid pouches can be repurposed for this.
Up-Level Pouch contents include:
  • Fire Kit: Additional lighter, tinder in container, one or more candles. Fresel lens if you have one.
  • Fishing Kit with Snares
  • Optional: About two thirds of a metre of cooking foil, ideally the heavier duty “turkey” foil. Carefully folded and rolled.
  • Optional: Additional space blanket.
  • Optional: Larger compass, with spare whistle. Using a firesteel necklace as the lanyard is an option to consider. Add a small snap-link and Photon light.
  • Optional: Elasticated bandage. This came with one of my medical pouches. I don't include it in my daily EDC, but it is a useful addition to the higher readiness inventory.
  • Optional: Not really survival or vital items, I have added a few things that may be convenient. Ingredients and instructions on packaging seems to be getting printed even smaller, and my eyes no younger. To this end, I have added a small folding magnifying glass (actually a 10x loupe) to my money pouch where I carry my Suunto Clipper. This could be used to start a fire. In the same place, I have added a set of earplugs. Earplugs have proved so useful on some of my travels it seems only prudent to have a set on my person as well as that with my travel bag. The earplugs may not get used as often as, say, my Swiss Army Knife, but when I do need them I will probably really need them!
Categories
Phillosoph

Seven Tools of EDC

Today, as I was coming into work, I was thinking about “magic number seven”.
In short, this is an observation that the average number of related “data chunks” a person can recall is seven, plus or minus two.
This is usually specified as for short term memory, but may be relevant to longer term memorization of lists too.
A friend of mine is working on a language-related project. It seemed to me that if you must have lists of categories or affixes, then breaking them up into groupings of seven or less might be a good approach.
As it is wont to do, my mind drifted and I began to think about the ninja “six tools of travelling”.
I know six is not seven, but bear with me a moment.
I remember this list by recalling that three things on it are “flexible”: hat, rope, “towel”; and that three are not: medicine, writing kit and fire tube.
As I point out in my earlier article, this list does not include a knife, since telling a ninja or any other sensible person of that era to carry one was probably redundant. If we add knife/tool to the list it becomes seven.
OK, I thought, does what I have on me right now meet the criteria of the six/seven tools of travelling/everyday carry (EDC)?
  • Firstly, I have a hat. It’s cold out and my head has little remaining natural insulation. If it was sunny out and I was planning to spend any time outside I would probably have a hat of a different design.
  • Rope, or cordage at least. I have a spare shoelace tucked into the bottom of a pocket. I also have the dental floss in my pocket kit which can be used for a variety of purposes.
  • “Towel”. The item the ninja regarded as a towel was a relatively thin, multipurpose item. I have a bandanna in my pocket which can serve similar purposes, including as an emergency hat.
  • Medicine. My pocket kit contains plasters, painkillers and disinfectant wipes.
  • Writing kit. I have a pencil. I can also write things down on my phone.
  • Fire. No ninja tube of smouldering charcloth, but I do carry a source of fire. A lighter rides in the same pocket as the bandana and shoelace.
  • Knife. I carry a Swiss Army knife and a mini-Leatherman squirt and have a Swiss Army classic mini-knife on my key ring.
These seven tools do not just represent concrete objects.
They also represent broader, more generic categories.
For example, the hat also represents shelter, so includes a coat suited to the weather, scarf and gloves should they be needed and the survival blanket I carry.
The writing kit also represents communication, so includes my phone and the USB drive I carry. Communication can include signalling, which includes my phone and the whistle and photon light on my keychain. Illumination can be taken as a subset of signalling.
The knife also represents tools in the narrower sense, so includes my mini-prybar, diamond sharpening card and the P38-style can opener on the keychain. The knife also represents the requirement for self-defence, where such is permitted.
As can be seen, the “seven tools of EDC” are a good starting point for planning an EDC or larger kit.
There are other categories, of course.
Money is always useful and documentation may be needed.
I carry tape, pins and other items that might be used for repairs. These might be considered a subset of the knife/tools category. I may add a magnetized needle and a few feet of invisible thread to my little bag of pins and paperclips.
None of the seven categories really covers navigation, but I do carry a Suunto clipper compass which has proved to be surprisingly useful in town.
On the next level up, food and water, or the means to procure and prepare them should be addressed. At the EDC level this is addressed by the money and credit card.
If you live in a very hot, dry environment carrying a supply of water on your person is prudent.
Categories
Phillosoph

Magnetic Declination

Methods for finding direction without a compass give you true north.
Strictly speaking, a map shows “grid north”, which may differ from true north, particularly on older maps.
Since we generally use a compass with a map, the difference between true north and grid north isn’t usually a worry.

A compass does not point to true nor grid north, it points at magnetic north.

Magnetic north is somewhere up in Canada, but currently seems intent on defecting to Siberia. The difference between magnetic north and true/grid north is known as the “magnetic declination” or “G-M angle”.

This map of the world shows magnetic declination in different parts of the Earth’s surface. Since magnetic north is moving, this map will be out of date when you read it.
Note that declination has very little correlation with longitude.
The green line shows the agonic line. If on this line a compass will point towards true north.
On the isogonic lines, declination may be more than 20° in the northern hemisphere and even greater values as we travel south. Easterly declinations are in red. Westerly declination are in blue and given as a negative number.
So what effect does magnetic declination have on navigation?
Suppose I am in an area where the declination is 2° west. I’m facing a direction the compass tells me is north, 0°.
I notice something of interest ahead of me and try to locate it on my map. Rather than being on the north-south line the point of interest will actually be at a bearing of 358° from my position on the map. 0° is the same as 360° so 2° west gives 358°.
In another part of the world. I might face towards magnetic north but in fact be facing at a bearing of 13° east, a significant difference.
Magnetic declination will probably be marked in the margin of your map. Some maps have a declination in each corner of the map. Use the value closest to your position on the map. If you are midway or in the centre average the relevant values.
Note that the declination diagram is not drawn to scale. Don’t try to measure it with your protractor, use the values given in the text.
To make our life more interesting, magnetic north moves over time. The magnetic declination information will include an annual rate of change so you can calculate how much the declination has changed since the map was printed.
An old map I have of London tells me the magnetic declination for June 1989 was 6°W and that this was expected to change by 9'E every year.  
In 2001 it would therefore be expected to be 4.2°W.  
In 2016 this map predicts magnetic north will have shifted by 243' from what it was in 1989. There are 60' in a degree so 243' is 4° 3' and predicts magnetic declination in London would be 1° 57' west by 2016.
This website gives the magnetic declination in London in 2016 as actually being 2° 10' west.
In practice, declination is rounded to the nearest half degree/30' or 10 mils. so we would treat both 1° 57' and 2° 10' as 2°.
The difference does illustrate that not only does magnetic declination change over time, but the rate of change may also vary.
If using old maps. it is important to get up-to-date information.

Once you have an up-to-date magnetic declination, what do you do with it?

This is where a lot of people get confused.

Declination, or G-M angle, is the difference between grid north (GN) and magnetic north (MN). The magnetic north line may have half an arrowhead or a barb. The declination diagram may also include true north, often marked with a star (★).

When do you add it, when do you subtract it? Some maps will give you this information, relevant for the area covered in the map. Where present, follow these instructions.

When a  map lacks this information, there are lots of rhymes and aide memoires that have been created to teach you what to do. Some of these, however, are only “true” in certain parts of the world.
Many readers will have been taught use the acronyms “MUGS” and “GUMA”. These stand for “Magnetic Unto Grid: Subtract” and “Grid Unto Magnetic: Add”.
A related rhyme is “Magnetic to Grid, get rid” and “Grid to Mag, Add”. Another acronym pair is “MUCA” and “CUMS”. The “M” stands for map and the “C” for compass in this case, but when stressed you might confuse these with “magnetic” and “chart”, so I find MUGS and GUMA safer, and LARS even better.
 
What MUGS means is that if you have a magnetic bearing, taken with your compass, you must subtract the magnetic declination before plotting the angle on your map. In our example above the magnetic bearing of 0°/360° has the declination of 2° subtracted from it to give the actual bearing of 358°.
When converting a bearing on the “grid” to a magnetic bearing you add the declination (GUMA).
I suspect that the MUGS/GUMA acronyms are probably British Army in origin, since they tend to favour a westward declination and could be used in the UK and most of Western Europe.
To make MUGS/GUMA global in application, we needed to learn one more thing: “West is Best, East is Least”.
“West is Best, East is Least” tells us to treat a west declination as positive and an easterly one as negative.
As you should know, subtracting a negative number adds the value of the number to the total. Adding a negative number subtracts the value.
Hence, from the above examples:
0°/360°(magnetic) – 2°W = 360°-2° = 358° grid (MUGS)
0°/360°(magnetic) – 13°E = 360°- (-13°) = 0°+ 13°= 13° grid (MUGS)

(It is possibly more logical to treat a westward declination as negative, giving us the rather nice acronyms of “MUGA” and “GUMS”. MUGS and GUMA are very well established, however.)

Another disadvantage of MUGS and GUMA is that the movement of magnetic north is changing the magnetic declination of the British Isles and parts of Western Europe to easterly.
As I update this article in February 2024, magnetic declination in London is now 1°51' East.
Yet another system, which is probably more useful in the future, is “LARS” = “Left: Add/ Right: Subtract”.
This uses the declination diagram on the map. You need to move right/clockwise to get from a westerly magnetic north line to the grid north line, so you subtract the G-M angle to convert from magnetic to grid azimuth. From the grid line to magnetic north is left/anticlockwise, so add the difference for calculating magnetic from grid.
For an easterly declination, the grid line will be to the left/anticlockwise of magnetic north, hence magnetic to grid adds the G-M angle and grid to magnetic (right/clockwise) subtracts in this case.
I recommend that you learn and use the LARS method.
Treat the G-M angle as an absolute value (always positive) and follow LARS: Left Add, Right Subtract.

The method in the illustration above will be familiar to many compass users.
Rather than aligning the needle with the “N” arrow on the face it is possible to compensate for magnetic declination by holding the needle pointing at the declination value on the dial.
Hence if the local declination is “10°W”, you hold the compass so the needle points to the “350°” mark on the bezel rather than “0°”.
You may use LARS to calculate the offset (the value the needle should point at).
You are making a magnetic bearing into a grid one.
MAGMGA: Magnetic Azimuth +/- G-M Angle = Grid Azimuth.
For a easterly declination (East/Left Add) add the G-M angle to 0.
For an westerly (West/Right Subtract) , subtract the G-M angle from 360°/6400 mils.
As a check, the needle and the north mark should resemble the declination diagram. In other words, if the G-M angle is easterly, the needle should be to the right/clockwise of the north mark.
This is useful when walking to a bearing, although you are better walking towards a landmark rather than walking staring at your compass (or phone!) all the time.
When sighting with a compass, the values you will get will still need conversion.
Remember that metal objects on your person or in your surroundings may affect a compass reading. Overhead power cables may influence the needle from as far as 55 metres away!
“West is Best, East is Least”
MUGS
GUMA
LARS