Disclaimer: “As an Amazon Associate I may earn from qualifying purchases.” Adsense and Infolinks were no help at all.

If you have enjoyed this article or it has been helpful to you please feel free to show your appreciation. Thank you.

Read The Third Wave by Alvin Toffler!
Categories
Phillosoph

Tinderboxes

Nowadays when we use the word “tinderbox” we are usually speaking metaphorically.
To many of our ancestors this meant something more sophisticated than a simple container of tinder. I suspect some of our ancestors would have had a good chuckle at the performance some outdoorsman make of using a ferro-rod and steel! 

During my recent researches I came across a number of tinderboxes of the following pattern:


Essentially the box has two compartments. One compartment contains a flint and steel and a number of sulphur matches. The other compartment contains a pad of charcloth. A wooden damper fits into the second compartment. In some example the tinderbox only holds the charcloth and damper, the other components being kept separately.

When fire was needed, the flint and steel was struck so that sparks landed on the charcloth. Charcloth has a very low ignition temperature so is well suited to use with flint and steel. Once the charcloth is burning it is used to light one of the sulphur matches. The match is used to transfer the flame to you kindling, clay pipe or wherever else you need it. The damper is used to snuff out the burning charcloth until it is needed again. In some examples replacing the tight lid may have been enough to extinguish the flame.

An interesting component of this system were the sulphur matches. If you look at the boxes of some brands of modern matches you may still find the statement that they are “self-igniting” or similar. This is because matches as we know them are a relatively new invention. For centuries the word match meant something like the burning cord of a matchlock or the sulphur matches in a tinderbox.
Sulphur matches were also known as brimstone matches or spunks. They are simply strips of wood with each end dipped in molten sulphur and allowed to dry. Commonly they were made and sold by street vendors. Below is a nice video on making sulphur matches.
Categories
Phillosoph

Charcloth and Charpaper

I am not sure where or when was the first time I encountered the idea of charcloth.
Over the decades I have lived in a variety of locations, none of which had a garden, so certain experiments could not be conducted. The making and testing of charcloth was one of these.
Today’s blog will mainly pass on some links and impressions.
To make charcloth, you need some form of vessel. This needs to be nearly airtight, only requiring a small hole for pressure equalization and to allow the escape of smoke.
The internet shows a number of different vessels used. One of the most practical uses a soda can. Sadly, these can often be found in wilderness areas. The vessel is made by cutting the can in half and slitting the walls of the lower part so the upper can fit snuggly over it. The tab is pushed back up so only a small vent hole remains.

The bottom of the can is packed with torn-up pieces of old cloth. These can be cotton, linen or any other vegetable derived cloth. You can use some of the cotton wool you got for the fire kit!
No synthetics or mixes of synthetic and vegetable.
The upper half of the can is fitted and the can placed on a heat source. The heat source can be a campfire, barbeque or camp stove but it should be outside since the charring cloth will produce a lot of smoke.


Continue to heat your vessel while the smoke is produced.
Once the smoke production begins to die off, carefully remove the can from the heat and put it to one side to cool.
Give this plenty of time.
If you try to open the can while the contents are still hot you will probably burn your fingers and the inrush of oxygen will cause the charcloth to catch fire.
Once cool, you should have some charcloth, suitable for tinder.
Charcloth is sometimes called charpaper.
Charcloth is made from vegetable materials, so an obvious question is can you make charpaper from paper? We seem to spend much of our lives surrounded by excess paper, so why not turn them into something more useful?
This video shows an interesting method for making charpaper from a paper tissue. It might work with other layered pages too.
Can you char paper in a vessel in the same way you process cloth?
From what research that I have been able to do, the result resembles burnt newspaper. It may take a spark but has little structural strength, making it less than practical. Waste cardboard, on the other hand, may be more practical.
I have encountered suggestions that newspaper should first be mixed with water to form a sort of papier-mâché, allowed to dry into a solid mass and then charred in a vessel. This seems a bit involved, and I wonder if the lengthy drying phase can be done away with given that you will be heating the mass anyway.
Both cardboard and wet paper are materials worth experimenting with for charpaper production. Alas, I will have to leave that to those who have better access to the open air than myself.
Categories
Phillosoph

The Tale of the Stove and the Shoe

A couple of recent blog posts have been about fire and cooking and I intend to make a few more on this subject in the near future. Continuing the tradition that Friday posts are a little more “off-topic” I will relate the following story from my past.
I had recently brought a couple of those alcohol gel stoves that resemble a paint tin with a pot stand. These were a relatively new innovation back then. Hence, when visiting the family home for the weekend I took one with me to show my younger brother.
As many readers will know, these are fairly simple to use. You light the gel. You place the pot stand in place and heat your cooking vessel over the flame. Once you are done you replace the lid, which cuts off the oxygen and extinguishes the flame. The one I had was more like a paint tin than the screw-capped example above.
Pretty foolproof, you’d think?
I show the stove to my brother, who is in his bedroom. He removes the lid and regards the clear gel inside.
“Lighter!” he demands from his friend.
The gel lights immediately and a tall flame rapidly grows. After a few seconds of admiring this, my brother asks:
“How do you put it out?”
“You just put the lid back on.”
For some reason my brother decides that this does not mean to replace the tight-fitting lid exactly as it was. What passes for logic in his mind tells him the concave upper side of the lid will be better at snuffing out a flame.
He throws the lid upside down onto the flame. Naturally enough the flame licks around the edges and ignites a large blob of alcohol gel that had adhered to the bottom of the lid, which is now uppermost. The flame notably increases in size as the lid is now on fire!
I wasn’t doing much at this point, stunned and amused by the stupidity of what he had done. The primary means for extinguishing the flame is itself now on fire.
My brother snatches up a shoe from the floor and uses it to swat at the flame. As he raises his hand for a second blow there is a burning circle of fire on the sole of the shoe.
I don’t recall how he actually extinguished the stove. All I can remember decades later was how hard I was laughing at him setting his shoe on fire.
The moral is, never assume something is foolproof. Fools are always greater than you think.
Categories
Phillosoph

Did Flails Exist?

About a week ago I came across some discussion of the following article:
In brief, the author (Dr. Sturtevant) offers a hypothesis that the military flail never existed and that all (not just some) examples in museums are fakes. A friend has made the criticism that his main argument is that “flails were too difficult to use”.
“An interesting idea” was my first reaction. The second was “what about Japan?” The Japanese are known to have used a variety of chain weapons. Best known, perhaps, is the kusarigama, literally a chain (kusari) and sickle (kama). Voiced and voiceless consonants often swap in translated Japanese so kama can become gama and kusari gusari. Some kusarigama have the chain attached to the butt end of the kama, others have it attached at the head. Some have two chains attached to the head and there are variants that have one chain attached to the head and another at the butt. Some examples have the chain attached by a long hook or clip so the chain can be easily detached. The term “kusarigama” is also used for two kama joined together by a length of chain but that variant does not really concern us here.
If anything, you would expect a kama with a weighted chain to be harder to use than a simpler ball and chain without the blade. Yet, there are a number of ryu that include the kusarigama as a weapon and have a variety of techniques for using it. Kusarigama with the chain at the butt were typically used with the kama in one hand and the chain in the other. Those with a head-mounted chain were used single-handed and therefore give us some indication of how a short-handled ball flail might be used. Notably many ryu consider the kusarigama to be a “secret” weapon. More on that point later.
In another post I have talked about the chigiriki. This is similar to the familiar European medieval ball and chain flail but a two-handed weapon. Serge Mol’s “Classical Weapons of Japan” shows a variety of other chain weapons. Simplest is a chain with a weight at one end and a loop of chain at the other. The text mentions variations of this that had handles. The manrikigusari is a short chain with a weight at each end. This weapon has become relatively familiar in the west due to the popularity of the book “Spike and Chain”/ “Ninja Spike and Chain” by Charles V Grusanski. Another Japanese weapon has a weight, chain and iron truncheon. It looks like the stereotypical medieval ball and chain other than being all metal. A version with a wooden truncheon also existed.


Another weapon common in the east are the numchukas, derived from the Asian rice flail.


I had a quick glance at Cameron Stone’s book (A Glossary of the Construction, Decoration and Use of Arms and Armor: in All Countries and in All Times). He lists China and India as also being users of the flail.


If all flails are fakes, it was certainly widespread and comprehensive!


Dr. Sturtevant does state that he does not contest the existence of the long-handled flails derived from peasant tools and made with rope or leather. His stance is that it is short-handled ball flails that are fallacies  The illustrations in the article only show ball flails, although at least one appears to be long-handled.
Contemporary illustrations of the use of the ball and chain are relatively hard to find on the internet. Relatively hard, that is, unless you start on Wikipedia. Dr. Sturtevant actually uses some of these illustrations in his article. One of his arguments is that the figures using flails in some of these paintings are fantasy figures. For example, in one case they are meant to represent middle-eastern horsemen but are dressed as European knights. Many medieval painters depicted ancient events such as the Siege of Troy or Biblical scenes using contemporary weapons and armour. Lacking the body of archaeological knowledge we now have they assumed fashions had not changed much. Such paintings give us considerable information about what was in use at the time that the painting was painted. I expect many medieval painters had the same approach to the depiction of events in far-off lands that they had never visited. A middle-eastern warrior would be painted as European knight and the artist would base this on the contemporary equipment he was familiar with. It was easier to copy these than to invent.
From 1025

Whilst illustrations of the ball and chain are relatively rare, this is not the case for the long-handled bar-flail, aka the “peasant flail”. For completeness I will include some.
 

Asian horseman with long-handled flail.
This page has information on a pre-1579 manual that includes techniques for using the peasant flail. The two-handed bar-flail was an implement used to thresh grain. There can be little argument that it existed. There are numerous contemporary depictions of peasants and soldiers carrying and using them. In many illustrations these flails have been “weaponized” with the addition of spikes or iron banding. Some even have a catch so the swingle (head) does not swing around during prolonged marches.
Franz Kottenkamp’s “The History of Chivalry and Armour” (p.77) provided some useful information:
“The Morgenstern, or spike-covered club varied in its dimensions. according to Meyrick (Sir Samuel R Meyrick, Armour I, p.19), its staff was from two to five feet long, and the chain on which the ball was suspended, even exceeded the length of five feet. The balls, spiked or in the form of a channelled melon, weighed eight pounds in some specimens. Single or triple chains connected the balls with the handles. This weapon did not constitute a part of knightly armour. It was employed by German citizens and the Switzers (Swiss), and surpassed in size and weight the corresponding weapons of other nations. The French probably became acquainted with it, during the sieges of the cities in Flanders.”
Earlier in the same paragraph Kottenkamp talks about the plebeian bodyguards of princes armed with clubs. It is unclear if these clubs were flails.
Very clearly the weapon described by Meyrick  is not a description of a farm implement that has been pressed into service. It is a  ball and chain weapon that existed in both short-handled and long-handed forms.
The statement that the flail was not one of the prescribed knightly weapons is informative. In other words a knight was not obligated to learn how to use this weapon. There was no restriction on using the weapon, however. Knights who favoured the flail for any reason would use it. It was an unusual weapon for a knight. Understandably, depictions or descriptions of knights using flails are therefore relatively rare.
One of the objections to articulated weapons is that they are difficult to use. Using them effectively needs more training and familiarisation than some other weapons.

For the long-handled bar flail this argument is easily countered. A peasant would spend a big chunk of the harvesting season wielding a flail. Using one in battle would not be that different. From this page on the Chinese “big sweeper” we have this informative quote:
 
“The flail was used as though it were threshing, with the women striking the men outside the walls.”
The weapon is being used by women, who were presumably not trained warriors and may even have been unused to threshing as farm work. The peasant flail and big sweeper have long handles and relatively shorter head sections. The probability of the head section hitting the user is very remote.
It is potentially possible to block the head of a bar-flail. The more compact head of the ball-flail addresses this. The length of a chain was selected so that the weight would not swing down and strike the hand holding the handle. The chain was either at least a hand-width shorter than the shaft or was the same length or longer. In all cases the weight would not hang at the same level at which the handle was gripped.
Articulated weapons can behave differently to rigid ones, which is why the user needs to have achieved a greater level of proficiency and familiarity. A swinging chain has a considerable reach and can threaten a large area. Nearby obstacles or obstructions can affect its behaviour. A flailman could hit a nearby comrade or entangle his weapon in an overhead branch. Learning to be aware of your surroundings and those of your intended target was a component of mastering the weapon.
If a weight on a chain encounters an object it can sometimes rebound toward the user. This is known as “snapback”. Snapback is not really a problem if the head and chain is shorter than the handle. At worst, the head will slap against the shaft well above the hand. Some flails use a longer chain, however. In these cases the potential problem of snapback is countered by correct technique. Flail strikes are made with a follow through as though the hit was being pulled through the target. Any snapbacks are overcome by the overall momentum in another direction. The physicists among you will hopefully forgive me if I have termed that wrong. See the video below for a better explanation from an actual short-handled flail user.


Another “quirk” of articulated weapons might be termed a “deadstop”. The head puts all of its energy into a target and just stops and drops. Correct follow through partially addresses this. The user also learns to recognise when this happens and how to restore momentum to the head by techniques such as a quick wrist rotation.
The Japanese ryu can give us some useful insight into how the European weapons may have been used. The chapter on chain weapons in Serge Mol’s “Classical Weapons of Japan” proved very useful here. The chigiriki chapter in Sid Cambell’s “Exotic Weapons of the Ninja” was also quite insightful.
A static chain is very little threat. To attack a ball and chain must either be moving or in a position from which it can easily begin moving. Some chain-fighting ryu recommend that a chain be spun at about 80 rpm. Obviously the idea that you can step in to attack after a chain has passed is not practical against such techniques.
Strikes with a chain are made with a follow through, which naturally leads to the use of circling and figure-eight movements to keep the weapon in motion and make successive strike attempts.
I have some familiarity with the manrikigusari. Spinning and figure-eight movements are complimented by halting the chain and quickly returning it to a position from which a new strike can be made. This is done by catching the chain and sliding the hand towards the head to bring the weapon back under control. Potentially this could have been done with the short-handled European ball flail. Possibly a spinning chain could be slowed by impacting the head with the ground or intercepting the chain with your own shield edge. Since the flail was not really a knightly weapon it seems to be neglected by most of the contemporary manuals so we do not know if this was actually done.
The flail was not a weapon for use in a packed infantry formation. The flail was of little use in slowing down massed cavalry. Flail-armed troops probably only formed a small proportion of an infantry formation. Flails were probably used to compliment more commonplace weapons. If cavalry were stalled by spears or pikes flails were useful in the following melee. A flail could take a heavily armoured man from the saddle or bring down his horse. In later periods pike squares included halberdiers who sallied forth once an enemy was locked in combat with a square. Flail equipped troops were probably used in the same way. The reach and power of a flail made it a useful weapon for fighting across obstacles. The quotation above describes the flail used to defend a city wall. The two-handed flail is often associated with the Hussites and regarded as the national weapon. It would be a useful weapon for use from a Wagenburg. For the horseman who had learnt to use it the flail offered both reach and power.
I suspect that the “tail” position from sword fighting was often used with flails. This has the weapon held pointed to the rear at a low or medium level. This is a deceptive and menacing position from which powerful attacks can be thrown from a variety of angles. If a shield is used it obscures the enemy's view of what the weapon is doing. You often see the tail position used in the movie “House of Flying Daggers”. The only photo I could find shows the swords held higher than is usual.


A blow from a competently wielded flail could reach over, under or around an enemy shield. This could compliment the attacks of more conventional weapons. For example, as a spearman caused a foe to raise his shield a comrade with a flail could strike beneath.
Earlier I mentioned that many Japanese ryu regarded their chain weapons as “secret” weapons. In many cases they were not weapons for the battlefield or duelling but for more personal defensive encounters and self-defence. The kusarigama is considered to be one of the weapons suited for use by women. It was probably a weapon that many sword-armed aggressors would have been unfamiliar with. Like the naginata, the kusarigama offered superior reach and power compared to a sword. Ninja are also associated with a variety of chain weapons. Chain weapons offered reach and power in an easily concealed package. During night combat the chain would be even harder to see and avoid.
If Kottenkamp is describing bodyguards armed with flails then one can see some logic in the choice. The plebeian bodyguard was a professional fighter rather than a levy so could be expected to put time into mastering a difficult weapon if it offered an advantage.
Categories
Phillosoph

Simple Survival Fire Kit

My recent article on the simplicity of the Soviet soldier’s kit made me think about some of the items that are not included in the equipment list.
Specifically, I thought about fire kits.
An idle moment on the internet turned up commercial fire kits with nearly a dozen different types of tinder. They also came with a big price tag!
We all know fire is important for survival, but what do you actually need in your fire kit?
One of the most useful items you can carry are disposable lighters.
Zippo lighters are touted as “the professional’s choice” but in my experience they seem to need frequent refilling.
Interestingly, “Detachment B-52 (Project Delta) Reconnaissance Tips of the Trade” has the advice: “Do not take cigarette lighters as they make too much noise when opening and closing.” This is clearly in reference to zippo-type lighters.
For the same price as a Zippo, you can have dozens of disposable lighters that keep their fuel until it is used.
Take a look around your local pound store and you’ll see them being sold in multiple packs. Invest in a few of these.
Bright colours reduce the chance of losing them in the woods.
Place at least one lighter in each emergency kit that you have.
Put one in each outdoor coat that you own.
Throw a couple in the glove compartment of your car.
A disposable lighter will give your many more ignitions than the equivalent weight of matches. Some disposable-type lighters may be refilled.
Optional: wrap the outside of your lighter with a few inches of duct-tape. Duct-tape is flammable and a small piece may be lit with the lighter and used to get a fire going. It may be used like a candle, as described later. The duct tape is also handy for repairs and other duties.

The only real objection to disposable lighters is that there can be a fairly broad quality margin. Some disposable lighters seem to last for ages, others do not.
Allow for this by having a pair in your main fire kit.
A butane lighter that has run out of fuel can still provide a useful spark, and can be operated one-handed, unlike a traditional flint and steel. For this reason, the disposable lighters that have a striking wheel are preferable to other ignition systems.
Even when the lighter “flint” is exhausted, the wheel may still be used to strike sparks from a ferro-rod. This saves your knife blade, and is handy if your knife blade is of a steel that does not readily throw sparks..
Twice I have managed to run a butane lighter through the washing machine.
The first lighter changed colour from green to turquoise, but continues to work fine.
The second, a flint and wheel type, I found on the floor while unloading the laundry. I picked it up and tried it, and it lit immediately!
Disposable lighters seem to be more tolerant of water than you might think!
Water resistant cases for disposable lighters are now available. These are worth considering for your EDC lighter. Add a few inches of duct-tape to the outside.
I have come across claims that butane gas lighters will leak in low pressure environments. This may or may not be an actual problem if you are a mountaineer. For the rest of us, lighters are a very practical source of fire.
Butane lighters may be difficult to light when the temperature drops to zero or below. In such situations, carry at least one in your trouser hip pocket or an inner pocket where your body heat will keep it warm.

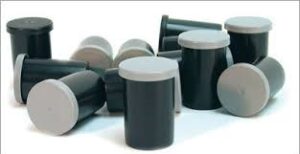
The second thing your fire kit should contain is tinder and something to carry tinder in. Ideally your tinder container should be waterproof.
A 35 mm film container is close to ideal. Ideally the lid should be attached to the container body so it cannot be lost. A strip of cord or plastic and some superglue solves this.
While film containers are not as common (or cheap) as they once were, they can still be found from on-line sources. They are sometimes marketed as “geocache” containers.
While researching this I was stunned by a site asking £123 for 15 35 mm containers!

Alternate Containers: One reader of this blog informs me he can scrounge pill bottles from local pharmacies. Another suggests that the little tins that the glucose test strips for diabetics come in can be used.
I have access to 50 ml screw-capped centrifuge tubes but to my mind these are a little too big.
At least one brand of storm matches comes with a container that might be suitable. Buying the container alone is nearly twice the cost of buying it filled with storm matches! Not sure if the cheaper examples have a screw-thread cap, however.

Pack your container with cotton wool.
Melt some Vaseline in an old spoon over a gentle heat. You will probably find Vaseline in the same store you brought the cotton wool from.
Pour the Vaseline on the cotton wool.
Pack that down, put fresh cotton wool on top and melt more Vaseline.
Keep repeating until your container is full of Vaseline-impregnated cotton wool.
Cotton wool is an excellent tinder. The Vaseline helps repel water and extends the burning time. You will only need a little, which can be teased out before ignition.
Wrap a little piece of Vaselined cotton wool around a stick before igniting, and then use this like a match/candle. You may also split the end of a stick to hold the cotton wool, or handle it with twig “chopsticks”.
As you use up the Vaselined cotton wool, you replace it in the container with “found tinder”.
“Found tinder” is anything that you find in the field that can be used as tinder.
It includes thistle or dandelion down, clothing fibres, scrap paper, woodworm dust, sawdust, shredded spent matchsticks, bird down, belly button fluff and many other materials.
Some outdoorsmen prefer to have a second container for found tinder.
You want to keep your found tinder dry. Dry it near a campfire or in the sunlight when opportunity presents itself.

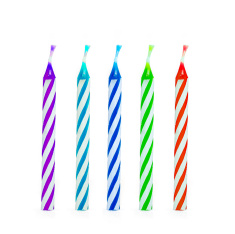
Candles are a useful addition to a fire kit.
A small bundle of birthday cake candles is nicely compact.
Whenever you strike a match, use it to light a candle. If your fire won’t light with the first attempt with a lighter, use the lighter to light a candle, and use the candle for a sustained source of ignition.
If your tinder will not light after five seconds of exposure to a lighter flame, try something else.
Candles therefore conserve your supplies of matches or lighter fuel.

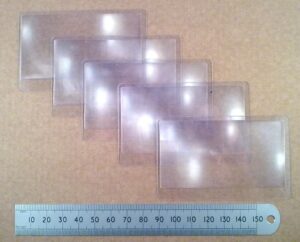
The final item I would include in the fire kit is a magnifying lens.
This can be used for fire-starting on sunny days. “The only fire-starter on Earth that isn’t!”
Your compass probably has a magnifying lens on its baseplate but it is worth including an additional one in the fire kit.
I recently picked up five Fresnel lenses for £1.99, less than the price some companies charge for one, so shop around.
I confess I have not started any fires with these yet since as soon as they arrived the sun disappeared!
The suggestions below is a fairly basic but capable fire kit:
•A pair of lighters.
• One or two tinder containers.
• Vaseline-soaked cotton wool.
• Bundle of birthday candles.
• Fresnel lens.
Store your fire kit in a sealable waterproof plastic bag. Double-bagging is a good precaution.
Some of you will note that this kit does not contain some of the more traditional survival fire-starting items.
There are no matches or storm matches because I believe the lighters are more space efficient. A single disposable lighter is estimated to be equivalent to a hundred books of matches, so it is obvious which is preferable. If you have matches, however, by all means use them!
Conventional matches may be made more water-resistant by pouring molten candle wax over them. You may dip them individually but it is easier create a block of wax with the matches encased. The alternative idea of painting the matchheads in clear nail varnish may also be encountered, but will be more time consuming than the wax method. You will need to scrape the wax or varnish from the head before attempting to light them.
Matches may be packed into any wide-mouthed, suitably sized plastic bottle, so long as it is watertight. Do not forget to include the striking surface!
There is no ferro-rod and steel in this kit because the lighters can do the same job and are more effective.
Lighting fires with a ferro-rod is fun, and you should know how to do it. But when things get serious, have a couple of lighters handy.
If you already have a ferro-rod, carry it. Always prudent to have a backup.
I have a waterproof match container that came with a ferro-rod glued to the side. Unfortunately the container is a little too narrow to make a good tinder carrier.
If you do not have a ferro-rod and striker, invest in some lighters and the other items first.
Shop around for a ferro-rod and steel if you want one. Prices vary considerably and some will cost you the same as a score of lighters!
Categories
Phillosoph

Travel Wash Kit

Once, while I was in Saltzberg, an American lad asked me to pass him his daysac. It nearly wrenched my arm from its socket with the unexpected weight.
“This is heavier than my entire kit!” I complained “What have you got in here?”
“Just my gel and moose and shampoo and conditioner and…”
You get the idea!
Choice of wash kit is personal, but I'll describe mine as a guide.
Like many travelers, I used to use a washroll or zippered bag for my wash kit.
The last one I used was quite an ingenious in that it had lots of pockets and compartments, a hook it could be hung up by and a little mirror that attached to a pad of Velcro.
One day it occurred to me just how much unnecessary bulk and weight all those thicknesses of condura contributed.
Now I just use a mesh drawcord bag.
I can hang the bag from the cord, or knot the cord around a pipe if there is nothing to hook it over.

Contents:

  • A screw topped plastic bottle of shampoo. I use a 50 ml plastic screw-topped tube. I’ve taken trips of a month or more and never managed to use up all this shampoo. Older I get, the less hair that needs washing!
  • A flannel, though half of one will do. Always give this a good wringing out before packing away. In actuality I seldom use a flannel, so this is an item that could be omitted. I mainly use mine for scrubbing stains on clothing. My old cotton flannel seems to have survived the decades, but you might like to consider the more recent microfibre face cloths if you are creating your own new kit.
  • A bar of soap. Soap can be used as an antiseptic, laundry agent and for shaving. Hence I have no need to carry a shaving brush nor foam. Many of the soap cases available in the shops are made of too brittle a plastic and therefore are of little use for travelling. Nowadays I keep the bar of soap in a small PU nylon drawcord bag, which is simpler and lighter. Unlike most soap cases, I can hang the bag up in the shower. Making such a bag should be within anyone's sewing skills. The soap bag often ends up outside the mesh bag so the soap can dry. A full bar of soap is probably unnecessary. Half a bar is more than enough for most trips.
  • A disposable razor or two, depending on the length of the trip. I have a beard these days but still pack a couple of razors to keep the stubble down on my neck and throat.

  • One of the most useful things I've carried on my travels is a little nail brush, just an inch or so long and brought for a few pence in a supermarket or cosmetics shop. I think my second one was from Body Shop. I don't think I've ever used it for my nails. What it has been used for includes:
    • Brushing dried mud off my canvas and suede summer boots: a lot easier than washing them and scrounging newspaper to pack in them to dry.
    • Using with hand soap to scrub away collar grime or food stains. Laundry is then simply done in a wash basin or shower, for free!
    • Brushing dried mud out of clothes. One of the most popular clubs with travellers in Jerusalem has a floor not unlike a farmyard. Every morning in the hostel my little brush would pass through a score of hands as garments were restored to a more presentable condition. So appreciated was this item that someone stole it from me!
  • A “fit anyhole” sink plug. You often encounter sinks without plugs. This is such a useful item I have had them stolen from me by other travellers. I have seldom used it myself. Shaving and washing under a running tap, and turning the tap off when not needed uses less water and is actually simpler, so I would not replace this if it was lost or perished.

  • A small mirror. The one that came with the wash roll broke, being glass. My current one is made from a piece of polished door finger plate, brought from a hardware store. Acrylic camping mirrors are an alternative. Shop around since price varies considerably for what is essentially the same thing. Add a short length of fishing line or rot-proof cord so you can hang it up or tie it around something. Mine also has a blob of blu tac on the back.
  • A spare comb.
  • A packet of dental floss. I have mainly used this as heavy thread for repairs. If you look at my self-built rucksac you can spot some dental floss repairs!
  • A couple of moist napkins in foil packets. These are used to freshen up when washing is not possible.
These are the contents of my mesh bag. There are a couple of associated items, several of which can be found in the same rucksack pocket.
For a very long trip I might consider taking my electric beard trimmer. This fits in a pencil case with its attachments, cleaning brush and oil.
An associated item I always carry is a mesh pencil case holding a toothbrush, toothpaste and deodorant. I found that I tended to need these items at different times to the rest of the wash kit, so it was handier to have them separate in a side pocket of the rucksack. This was probably a more logical place to carry the dental floss, so I moved it to here.
  • Deodorant/Antiperspirant. I generally use gels or soft sticks. These are a lot less bulky than aerosols and probably last longer.
  • A toothbrush and paste. You can get folding travel models of toothbrush, but I just use a normal one. I intend to replace this with a child-size brush.

Towels

Also with the wash kits is a travel towel.
Travel towels made from Pertex are not only small packing but dry very rapidly. I think I acquired my actual towel on a trip. It seems to be made from something like polyester. Not as fast drying as Pertex, I expect, but still quicker and less bulky than cotton.
There are other options if you cannot get a towel of high-tech modern material .
In the article on ninja rokugu, we encountered the tenugui. Towels do not need to be the big fluffy things you use at home.
Tenugui are unhemmed, supposedly making them easier to wring out. Thin cloth and frayed edges make it quicker drying.
Put another way, anyone with some thin cotton or linen can make themselves a travelling tenugui. You probably have an old shirt, pillowcase or bedsheet you can re-purpose.
Wikipedia says a tenugui is 35 by 90 cm, but for a travelling item you can shave a few centimetres off either of these dimensions in interests of packability.
A thin cloth such as a bandanna, tea-towel or shemagh can be used instead.
Whatever your choice of travel towel, add a loop of cord, ribbon or string to your towel and make the loop big enough to pass the towel through or to knot around something. This lets you attach the towel to a rucksac hand-loop or strap to dry in the breeze.
If a low profile is desired, use a neutral or natural coloured cloth.
In addition to these items, my daysac has a toilet roll and hand-sanitizer in a plastic bag.
You can improvise to overcome the loss of several of these items.
Soap is mainly a lubricant so a lot of the dirt can be removed with just water and more scrubbing. In the past sand or oils have been used, and certain leaves, grass or straw may make good scrubbers.
In cold dry conditions you can wash yourself with handfuls of snow. Snow is very absorbent so can be used to dry you but should not be kept on the skin too long. It is cold so you wouldn't want to do this!
Salt has been used in place of toothpaste but in fact it is the mechanical action of brushing that is more important for cleaning. Using a fingertip is well known but chewing a stick and using the frayed end is more effective.
Some hikers clean their teeth with baking soda or a mix of baking soda and salt. Apparently this does not attract bears like flavoured toothpaste can.
Plug holes can be plugged with blobs of toilet paper.
Splashing around in a river can be great fun but it’s better you carry some water away to wash with.
Your soap may be biodegradable but before it degrades it's still contaminating a water supply and many creatures' environment.
Better to pour it on the soil where the organisms there can degrade it more usefully.

And That Is a Good Way Too!

An idea I have recently encountered is to carry your wash kit in something such as a plastic sandwich or ice cream box. The mirror may be attached to the inside of the lid (I suggest blu tac).
I added an adhesive backed piece of mirrored plastic to the inside of the box lid. Not the best mirror in the world, but quite good for signalling, since it is bigger than those I carry as heliographs.
The advantage of this approach is that the bottom of the box may be used as a water bowl, should you need one.
It also provides a little more protection to your wash kit should it be rattling around in the main compartment rather than in its own side pocket.
A potential problem is that a box may keep your items from drying out, which may be undesirable under certain conditions. If this proves to be the case, consider adding some ventilation holes to the lid.
A cord run through a pair of holes could be used to hang-up the lid and mirror.
Best of both worlds would be to find a box that will hold your mesh bag.
If you are travelling very light or expect accommodations that will not need you to provide your own bowl, take just the mesh bag.
If living a little rougher, carry your mesh bag in the box.
Categories
Phillosoph

Candle Holders

Today’s topic is candles.
Candles can be a very useful part of your fire kit. Whenever you light a match or lighter use it to light a candle. Use the candle flame to ignite your tinder and kindling. This strategy helps conserve your supply of matches and fuel. A couple of birthday cake candles will fit into a compact fire kit.
Today, however, I am looking at the use of candles for illumination. In a long term survival situation candles or other sources of light such as oil lamps or rush-lights can conserve your supply of batteries.

The first item of interest is a Japanese device called a “Gando” . This resembles a small bucket with two hinged hoops inside. The bucket directs the light while the hoops ensure the candle (or other light source) remains upright. If you place the bucket rim down will the candle extinguish or keep burning? I don’t know. There are doubtless ways to construct the device so the light can be hidden without being lost.

The second item of interest is this candle holder, designed with a spike so it can be driven into a post. It happens to resemble a socket bayonet and many readers will be aware such bayonets were often driven into trench walls to be used as candle supports. This candle holder could be used as a push dagger or as an awl for less aggressive tasks.
That brings me nicely to the third item. Serge Mol’s “Classical Weapons of Japan” calls this a “kittate” and attributes it to the ninja. I have been unable to find a photo of this on the internet so I have scanned one. This is another candle holder. The long point can be driven into a wall or tree trunk and a candle placed on the smaller spike. Like many ninja items it can also be used for more aggressive purposes. Essentially it is a small kama or push dagger. The addition of a cord and weight  turns it into a compact kusarigama. The handle end can also be used as a kongo for striking. Such an implement readily lends itself to many of the sentry stalking techniques I describe in “Crash Combat”.
Categories
Phillosoph

YEC and the Cognitive Dissonance Trap

In general I try to avoid political posts on this blog.
I try to avoid attacking the beliefs of others.
This blog is about dealing with life and some of the problems that it may send against you.
There are times, however, when established mindsets can come into conflict with dealing with problems.
Some of you may stop reading my blog because of today’s post, which is not my intention.
My intention is that this post will give you some pause for thought and change your priorities a little to give you better tools for problem management.
Every now and then I come across some meme that is trying to disprove evolution. Why does this matter?
Firstly, constantly trying to “prove” the Bible in actuality displays a lack of faith.
The Bible has many useful lessons we can all learn from but constantly trying to prove it by dubious means causes people to neglect these.
You are missing the important parts of the Bible and driving others away from them.
“They're making the mistake of linking their belief in faith, in their religion, to actual factual tenets. These are not factual stories to be taken as historical events, they're really stories about how we should live our lives. They're moral homilies. What can I personally get out of the Bible for me, today. That's what those stories are about. And to take them literally is; you're missing the point of the Bible!
Secondly, you do not “believe in evolution”.
This is a relatively unsubtle manipulation designed to make you think in an unrealistic either/or mode. 
Evolution is not a religion or faith, it is a body of evidence supporting a hypothesis.
Evidence denial is a very dangerous mindset. Evolution-denial is akin to holocaust-denial but more insidious since its effects are more widespread.
Many of the world’s current problems are due to the encouragement of cognitive dissonance.
We need leaders that make the best decisions based on available evidence, not that ignore what they do not like, understand or agree with.
This is how we ourselves need to deal with what life throws at us.
Thirdly, if your support of Young Earth Creationism is that you consider the Bible is literal, you do not get to cherry pick which other bits you hold to be true.
If the Earth was made in six days then it is also flat, with corners, as the Bible tells you.
It is the centre of the universe and the sun circles it.
You do not get to eat pork, shrimp or oysters, do not get to have tattoos and are to support slavery.
You must hold that certain insects have only four legs and must perform calculations using a value of 3 for π.
Nuclear weapons do not exists since radioactive decay is not constant.
Most sciences, including astronomy, geology, mathematics and physics are all false so you should not be using their products.
You need to believe in not one, but two different creation stories as literal truth! (Chapter one and chapter two of Genesis have conflicting details!)
If you are a women you should be silent, obedient, submissive and not try to teach or have authority over men.

Vast amounts of money, effort and time are wasted on evolution denial.
Money and effort that could be put towards far better causes.
Young Earth Creationism is missing the point of the Bible and is counter-productive.
If faith or any other belief makes you a better person, it is a good thing. Any belief that blinkers you to things that may harm you is not.
Categories
Phillosoph

Soviet Soldier Simplicity

The other day I was reading an article about small unit actions. In the introduction it was explained that the men and women recruited as Soviet soldiers were used to living close to nature and tolerated and even thrived under conditions that would defeat German soldiers.
The questions that spring to mind are how was this done and how can this be applied to modern soldiers? I made a few posts on the Soviet soldier’s equipment some months back. It is apparent that the Soviet soldier of the Great Patriotic War got by with relatively little equipment. Let us start by looking at his clothing.
The basic Soviet field dress was a pull-over tunic and a pair of long breeches. This was an outfit that European fighters have used for many centuries. The Soviet tunic and loose trousers would not seem that unfamiliar to a Viking, Celt, Saxon or a medieval peasant.
Like many uniforms of the Second World War, it was constructed of wool, which has the advantage that it does not chill the wearer that much if wet. The Soviets also had a cotton version for summer use.
The tunic and trousers were worn directly over the underwear. The underwear seems to have been a long-sleeved undershirt and long johns for both summer and winter use. Both of these items were issued in summer and winter forms. Both forms were made from cotton, the difference being the winter version was fustian with a fluffy nap on the inside. The use of cotton for both the summer and winter underwear is interesting. I suspect this may have been selected to simplify mass laundering of items. Theoretically the Soviet soldier exchanged his underwear for a fresh set every ten days.
There were relatively few items for use in sub-zero temperatures. Each soldier had a greatcoat, which was also used instead of a blanket when sleeping so was carried all year. When not worn the greatcoat was usually carried rolled up and worn across the chest
The distinctive telogreika padded jacket and vatnie sharovari trousers were made from cotton and filled with cotton wool. It was cheap and simple to manufacture and very effective. Its thickness and wearing the garment over woollen clothing helped counter some of the disadvantages of cotton if it got wet. Below zero conditions meant that rain was seldom a problem. Telogreika and vatnie sharovari are often seen as outermost garments but were intended to be used under the greatcoat or sheepskin coats.
I am unsure as to how the telogreika and vatnie sharovari were carried if they were not being worn. They look like they would be too bulky to carry in the soldier’s backpack. Perhaps they were rolled up inside the greatcoat. Possibly they were treated as baggage items and only issued when the winter tunics were. Sheepskin coats might be worn in winter instead of the greatcoat. Some books claim the sheepskin coats were for cavalry and tankers but photographs prove that many other units acquired them. The greatcoat or sheepskin and telogreika were worn with ushanka fur hats, balaclavas, mittens/gloves and valenki felt overboots. With these few items the Soviet soldier operated in minus 50 conditions.
The rest of the Soviet soldier’s equipment also forms a relatively short list.
• A weapon and ammunition and grenades.
• An entrenching tool: numerous uses including as a close combat weapon.
• A canteen.
• Gas mask case and contents.
• A rain cape (plashch palatka)
• A simple haversack (myeshok).
The haversack contained a bag of tent pegs and a pole-section for constructing shelters. Contents also including a mess pail, shaving kit, soap, toothbrush and weapon-cleaning kit. There is no bayonet scabbard since bayonets were always carried fixed to the weapon.

The rain cape might be carried folded up in the haversack. It could also be rolled around the outside of the greatcoat roll or carried as a roll instead of the greatcoat. These rolls were also used to carry items. The cape is another item that would be familiar to a viking etc. Effectively it is a rain-resistant cloak and thus could be used for warmth as well as protection from the rain. The rain cape was a heavier item than modern ponchos but was also more robust. It could be used to drag a wounded man to safety, for example. One cape could be used as a shelter and another as a ground-cloth to accommodate two men, who slept together in their greatcoats. Capes could be combined to form larger shelters.
The haversack also carried rations. While I have found descriptions of what a Soviet soldier would carry, I have yet to find indications of the quantities.
Other notable items used were one or two-piece camouflage outfits designed to be worn over the field uniform. Generally these were used by scouts, snipers and engineers. White coveralls were used for camouflage in winter.
Post-war, a few interesting wrinkles were added to this basic equipment. In another post I have detailed the spetsnaz use of cotton string vests and coats with a “skirt” extension piece.
The equipment listed above is very brief compared to that of a modern soldier or outdoorsman. Part of the reason for this is that some items such as the greatcoat and raincape were multipurpose. The list above is probably incomplete. Historical sources often do not mention items such as tinderboxes and matches since it was inconceivable to the author that a peasant or outdoorsman would need to be told to carry these.
Some items we have now simply did not exist then.
Personal night-vision equipment and radio communicators had not yet been developed. The use of flashlights was restricted in the Soviet army, whilst the modern soldier often finds himself searching dark places. There is no compass and map-case in the standard Soviet field kit since navigation was for NCOs and officers.
Very often the Soviet soldier did without many of the things we regard as essentials such as kipmats, blankets, sleeping bags and tents.
The last sentence brings me to another thing that should be considered. What items on your equipment list are truly essential and what are just useful and nice to have?
Categories
Phillosoph

Simple Russian Ration Pack Stove.

I have just come across this article on Russian ration packs. Included in the sundries was a pouch of moist-wipes, a small pack of storm matches and a pack of fuel blocks.

I could not make out what the item packaged with the fuel blocks was so searched for other images. I think it is a can-opener, which would be logical given many of the ration pack items are canned. Discovered that a stove is also included in the pack of fuel blocks. A simple piece of metal that can be folded into a raised platform with pot support. Probably not that efficient, but ingenious!