Currently I am reading “The Time Traveller’s Guide to Medieval England”, which is very interesting. An astrolabe is listed among the possessions of at least one wealthy merchant. This got me thinking about similar devices.
Decades ago I watched a program on someone who had spend several weeks, possibly months, in a life-raft on the open sea.
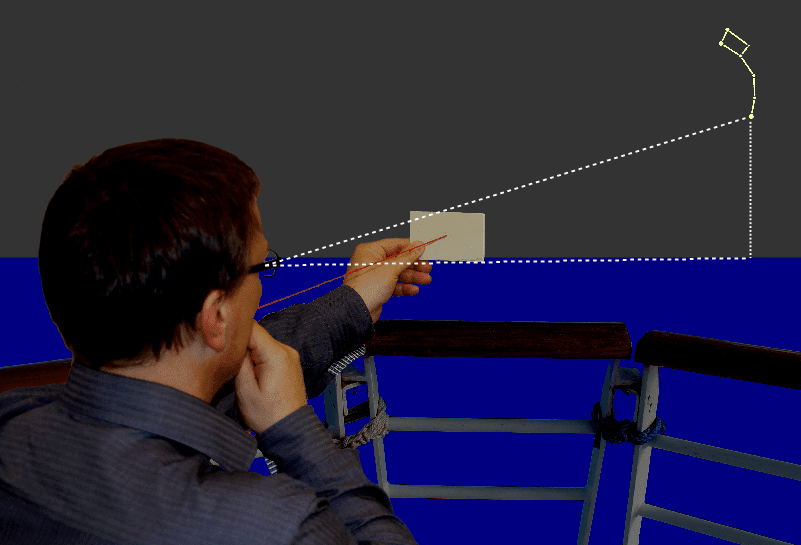
Using three pencils and elastic bands he improvised a sextant and used it to measure the angle of the Pole star.
Since the angle of the Pole star is equal to the latitude of the observer, he was able to sail his raft into the sea lanes, where his chance of encountering another vessel and rescue were greatest.
Here is a nice image of how such a device works. Other materials such as sticks and string could be used. This device is easily improved with a plumb-line.
In the southern hemisphere you can measure the angle of the Coal Sack nebula.
Similar devices date back many centuries. If you have some cord, a kamal would be easy to improvise. Note that one example below is made from a piece of cardboard.
A knot on the cord is held between the teeth and the cord pulled taunt. The bottom edge of the sight is aligned with the horizon, and the top compared with the Pole star. Different knots on the cord represented different latitudes.
For example, if you wanted to sail from Alexandra to Crete you would sail north, checking your kamal using the knot corresponding to 35 degrees. Perhaps you tied that knot when you sighted Polaris another time you were on Crete. When the Pole star aligns with the top of your sight you will know it is time to start sailing west.
The cross-staff worked the same way as the kamal, as the illustrations show. It was better suited to higher latitudes.
There were problems with using such a device to measure the angle of the sun, so the backstaff developed, a step towards the prisms and mirrors of the modern sextant.
A quadrant is relatively easy to make. A number of websites show the version in the first photo. The problem with this variant is that you have to remember to subtract 90 from your reading.
It is NOT a sextant!
Easier is to use half of a typical semi-circular protractor, mount the protractor with the straight edge vertical, or mark out a piece of card or paper.
When improvising navigational devices a useful thing to remember is that a circle of 57 mm radius has a circumference of just under 360 mm. In other words, one millimetre equals one degree.
It is no coincidence that my penknife handle has three notches, one 57 mm from the first, the other 5 mm from the first. Thus if I make a quadrant or compass rose I can mark it in 5 degree increments.
By folding paper you can accurately mark 90, 45 and 22.5 degree angles. There are several ways to draw a good circle or quarter circle with improvised means.
Or just draw around something round.
Such navigation devices can be used on the land as well as at sea. They have a long tradition of being used in deserts, exploiting the clear night skies.
There are also situations where you might wish to determine the angle of a slope.
I will close with two trigonometry-based tricks:
The first can be used to determine the width of a river or road. This uses the principle of similar triangles.
Face a landmark on the far bank of the river. Turn 90 degrees and pace out a set distance, such as five paces. Place a marker (B in the illustration) and then pace out another five paces (or whatever distance you used before). A-B should equal B-C to avoid any calculations.
Turn 90 degrees and head away from C. counting your paces. Every few paces look back at your landmark. When the landmark aligns with B then C-D will equal the distance between A and the landmark.
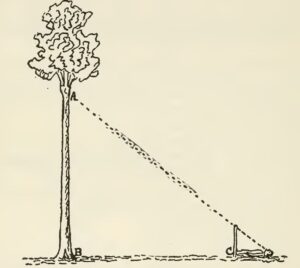
The second technique is for applications such as measuring the height of a tree or cliff.
Vertical distance will equal horizontal distance when the viewing angle is 45 degrees. You can use a quadrant or clinometer for this, but you need to remember to add the height of your eye to the horizontal distance.
Alternately, you can use a stick or staff and move back until it appears to be the same height as the object. Add the length of the stick/staff to the horizontal distance.
You may have noticed that wood axes often have a 45 degree cut across their end. A lumberjack would sight along this, moving back until he could see the top of the trunk. Height was horizontal distance, plus the length of the axe handle.