Disclaimer: “As an Amazon Associate I may earn from qualifying purchases.” Adsense and Infolinks were no help at all.

If you have enjoyed this article or it has been helpful to you please feel free to show your appreciation. Thank you.

Read The Third Wave by Alvin Toffler!
Categories
Phillosoph

Kephart's Summer Outfit

There are a number of topics I intend to cover in the near future. The starting point for many of them begins with Horace Kephart, so it is prudent to begin with looking at some of his recommendations for outfitting. Here is his list of clothing and equipment for summertime trips in the North American woods. This particular version was taken from the 1957 reprint of the 1921 edition of “Camping and Woodcraft”. My 1927 edition has an identical list. My comments and clarifications and in green. Quotes from Kephart in khaki.
SUMMER EQUIPMENT FOR BACK-PACKING WEAR
“With such an outfit and his gun or fishing tackle, camera, or whatever may be the tools of his outdoor hobby, anyone of average physique and a little gumption can fare very well in the open, and enjoy absolute independence.”
Woolen gauze undershirt.
Hard to find at a reasonable price, nowadays! Key features are its permeability and ability to dry easily. A clothing system needs to build from the inside out. Modern alternatives may be string vests, mesh synthetics and soft microfibre garments such as Coolmax tee-shirts. In winter Kephart recommends wearing two sets of medium-weight woolen underwear rather than one heavy set.
Woolen gauze (or balbriggan) drawers.
Kephart notes that the legs sweat less than the torso so in warm weather drawers of open-weave ribbed cotton are a viable alternative to woolen gauze. Cotton drawers are easier to wash in the field. If cold conditions or lots of wading is expected drawers should be wool. Drawers should be long legged to protect the knees and legs from scrapes and bumps.
Woolen socks, winter weight, natural color.
These can be safety-pinned to the bottom of the drawers to keep them up, if necessary.
Army overshirt, olive drab chambray (or flannel).

“Flannel” is an ambiguous term but I think in this context he means woolen flannel, both woolen flannel and cotton chambray being suitable for summer overshirts, but it could mean cotton flannel too. There is some mention of chambray being better than “khaki” shirts, which may refer to the army issue item of cotton. The US Army of this period issued both woolen and cotton garments. “Khaki” often refers to the cotton version, the woolen being described as “olive”. Elsewhere Kephart suggests when the weather gets cooler an officer's woolen shirt be used instead of the chambray.

Shown is an illustration from the 1907 Abercrombie and Fitch catalogue. This is likely to be the sort of shirt Kephart wore. It is a head-over design and long enough to be a serviceable nightshirt. Incidentally, this catalogue defines “khaki” as being a closely woven cotton twill.
Silk neckerchief, 27 x 27 in.
Khaki trousers, extra suspender buttons.
Kephart notes that cotton trousers survive the woods better than woolen. His preference is for “genuine English moleskin” cotton. Wool trousers have advantages where the weather is very wet or much wading is done. Army trousers of “olive-tan wool” are acceptable but he considers woolen “kersey” better. Notable is Kephart always uses the term “trousers”, never “pants”. Elsewhere he suggest trousers can be cut off six inches below the knee.
Invisible suspenders.
Kephart notes these are hard on buttons, hence the spares suggested above.
Leather belt, narrow.
Army shoes, cone-headed Hungarian nails.
Army leggings, canvas.
Among their many merits, provide some protection from snake bite.
Felt hat, medium brim, ventilated, felt sweat-band.
A felt sweat-band is preferred to leather since it is permeable and quick drying.
IN POCKETS
Left shirt—Map sections, in cover. Leaf of almanac. Note book and pencil.
The map case he favours has six transparent pockets, each of which can hold two sections of a US Geological Survey map, back to back. Note book should be quadrille ruled for mapping and drawing to scale, which is a valid suggestion even today.
Take along an almanac to regulate the watch, show the moon's changes (tides, if near the coast), and, by them, to determine the day of the month and week, which one is very apt to forget when he is away from civilization. Have a time-table of the railroad that you expect to return by.”
Right shirt.—Compass.
I wear the instrument in a small pocket sewed on my shirt for that purpose, so it fits, and attach it to a button-hole by a short, strong cord. A long cord would catch in brush. If the compass is carried in a large pocket it will flop out when you stoop over or fall down.”
Left trousers.—Purse. Waterproof match box, flat pattern (as reserve).
Kephart was a pipe smoker. These matches were for emergencies, the supply on his belt being used for his pipe.
Right trousers.—Pocket knife.
The jackknife has one stout blade equal to whittling seasoned hickory, and two small blades, of which one is ground thin for such surgery as you may have to perform”
Fob.—Watch.
Left hip.—Pipe. Tobacco.
Right hip.—Bandanna handkerchief.
ON BELT
Right side, front.—Waterproofed matches (50) in leather belt-pocket.
Right side, rear.—Sheath knife.
Blade of less than five inches. Kephart carried a tomahawk, hatchet or axe, so did not feel the need for a larger knife.
Further on, Kephart says that if part of a group it is useful for each member to carry a whistle, and have an agreed code of signals.
ON BACK
Duluth pack sack, 24 x 26 in. . . 2 lbs 4 oz.
Shelter cloth, 7 x 9 ft., waterproof. . . 2 lbs 4 oz.
No support poles are carried. The surrounding woods and the tomahawk met these needs. Unlike many modern campers, Kephart expected to have a camp fire to sleep before. At high altitudes a closed tent (3½-4 lbs) and warmer bedding might be required.
Mosquito net, 68 x 72 in . . 4 oz.
U. S. A, [US Army] blanket, summer weight, 66 x 84 in, . . 3 lbs
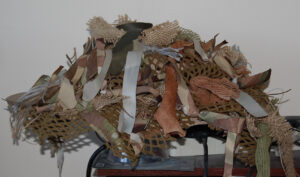
Browse bag, 32 x 78 in . . 1 lbs.
The browse bag was a sack that could be filled with foliage, straw or other soft materials to serve as a mattress.
Pillow bag, 20 x 30 in . . 3 oz.
A smaller version of the browse bag, to serve as a pillow.
Rubber cape, 34 in . . 1 lbs 5 oz.
Designed to reach to the knee. Used as protection against the wind as well as the rain.
A cape has the merits of a poncho, in that it is airy underneath, and it can be slipped on over the pack-sack, while it has the advantage of leaving your arms free to fend off bushes, to climb with, to shoot, paddle, and so on.”
Stag shirt . . 1 lbs 8 oz.
The “stag shirt” Kephart uses is made of “Mackinaw”, a strong woolen cloth. The 1907 Abercrombie and Fitch catalogue describes the Mackinaw cloth it uses as 40 oz. The shirt is used instead of a coat or jacket and may be used as a sleeping garment or in combination with the cape. Modern Mackinaw garments are very expensive, and often only available in red check patterns rather than the more discrete grey Kephart favoured. Fleece jackets are a potential alternative, but many of these are insufficiently windproof so will need to be combined with a robust shirt or hoodie worn over them.
Spare suit underwear and socks, as above . . 1 lbs 2 oz.
Tomahawk, muzzled . . 12 oz.
The knife never was made that will compare with a good tomahawk.” ( I doubt Kephart ever encountered a kukri!)
The tomahawk or similar provided both firewood and shelter.
Among my most valued possessions is a tiny Colclesser tomahawk, of 8-ounce head and 2½ inch bitt, which, with hickory handle and home-made sheath, weighs only three-quarters of a pound. I seldom go anywhere in the woods (unless in marching order with a heavier axe) without this little trick.
It is all that is needed to put up a satisfactory shelter wherever there is hemlock or balsam, or bark that will peel, while for other service I use it oftener than I do my jackknife.”
Side-cutting pliers, 5 in, . . 4 oz.
There is some speculation that if Kephart was around today he might have carried a multi-tool. I suspect he might have been quite bemused by examples that weigh half a pound or more!
Carborundum whetstone, 4 x 1 x ½ in . . 2 oz.
Wallet fitted with small scissors, needles, sail needle, awl point, 2 waxed ends, thread on card, sail twine, buttons, safety pins, horse-blanket pins, 2 short rigged fish lines, spare hooks, minnow hooks with half barb filed off, sinkers, snare wire, rubber bands, shoe laces . . 6 oz.
A combination of sewing kit, repair kit and emergency fishing and snaring kit.

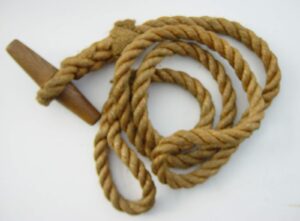
Strong twine in bag . . 1 oz.

Aluminum frying-pan (858 in.), plate, fork, white-metal dessert spoon, dish towel, in bag . . 1 lbs 1 oz.
2 Aluminum buckets (1 qt.), in bag . . 14 oz.
See my blog here for more information on these.
Tin cup, seamless (1 pt.) . . 3 oz.

Oddly the list does not include a water bottle, although elsewhere Kephart tells us:

“One may travel where water is hard to find, though this seldom is the case in a timbered region. The best canteen is one of aluminum which neither leaks nor rusts like the old-fashioned tin affairs. [Aluminum will be corroded by copper ions. Copper ions are present in most tap water.] It should have a canvas cover with felt lining. When the felt is wet its moisture cools the water in the canteen bv evaporation. The canvas cover prevents too rapid evaporation, and keeps the canteen from wetting one's clothing. At night or in case of illness, the thing can be used as a hot-water bottle, the insulation keeping the water hot for a considerable time. The best pattern is the present regulation army canteen, which is shaped like a flat flask, but with one side rounded a little and the other concaved to fit the body. It has a flat bottom, so you can stand it up. The aluminum screw-cap, held by a chain, cannot jolt out like the corks of common canteens.
Nails and tacks . . 3 oz.
Used to create camp furniture or assist in shelter construction. Kephart tells us these are only needed if expecting to stay several days in one place. Half a dozen each of 6d (2") and 3d (1¼") wire nails, and some galvanized tacks.
Cheesecloth, 1 yd . . 1 oz.
Used to carry fish or hang meat. Also used for straining. Could be used to create a head net against insects.
…substitute for a tea-ball.
Fly dope, in pocket oiler . . 2 oz.
Fly dope was insect repellent.
Talcum powder, in wpf. bag . . 1 oz.
For care of the feet.
Comb, tooth brush, tiny mirror, bit of soap in wpf. bag, rolled in small towel secured by rubber bands . . 6 oz.
Toilet paper . . 1 oz.
First aid kit . . 5 oz.
Spare matches, in tin box secured by adhesive plaster . . 2 oz.

Electric flasher, flat, round corners . . 5 oz.

Total pack without provisions. . . 18 lbs 3 oz.

Provisions will be discussed in a future post.
Categories
Phillosoph

Towards Universal Ethics.

Recently I finished a very interesting book. Worth reading if only for the crash course in science it gives. Psychology, astronomy, physics and biology are just some of the fields covered. The book is “Developing a Universal Religion” by David Hockey. If I have one issue with this book it is probably the title. “Religion” is likely to repel as many potential readers as it intrigues. What the author chooses to call “universal religion” is probably better thought of as a universal ethical environment or context. Think of it as a sort of Hippocratic oath that not only doctors are held accountable to.
Some of you may answer that your faith already provides you with an ethical environment and that something better is not needed. If so, you might consider how it is that even people of the same faiths and denominations arrive at such very different answers to the same moral problems.
Whatever your beliefs, I would recommend giving Hockey's book a read. Some sections may contradict your currently held beliefs, but I urge you to push through to the end to understand the full context.
Here is a short extract of one of the early chapters. Interesting stuff!:
Of course we all, scientists, mathematicians or laypersons, solve many problems every day. While most of these are addressed and resolved routinely and efficiently, the speed and accuracy of our problem solving depends almost entirely upon one factor—how well we understand the background situation, i.e., the “environment” (examples discussed below will shortly clarify and extend this term) that contains and presents the problem we are trying to solve. Everyday problems are solved very quickly, often without realizing a problem is being addressed, because we generally know a lot about the various environments we inhabit. On the other hand, scientific and mathematical problems not infrequently take a long time to solve; this is usually because those working on the problem do not yet have sufficient information about their problem’s environment.
To correctly solve any problem then, we must correctly understand its “environment.” This is because a problem is only properly solved when its solution can be used within (or is accepted by) the relevant environment, without causing additional problems. Luckily, each problem’s environment also invariably contains the criteria which the problem’s solution must satisfy…(snip)
…Moral problems are actually very similar to mathematical problems. Like math problems (which have their origins in the abstract mathematical environment that defines them), moral problems arise from their own abstract moral environment. And we must understand the true nature of this environment in order to find satisfactory solutions. Moreover, the more difficult the problem is, the more we have to understand about its environment. Moral problems ask the mind to decide which solutions are “right” rather than “wrong,” and which behaviours might be deemed to be “good” rather than “bad.” Now, as we have seen, the criteria needed to select the right answers for practical problems are found by examining the environment that presents the problem. But what environment actually presents moral problems? From where do they stem? This would be the rightful place to find the criteria sought, but this presents a dilemma: the universe contains no practical, concrete, “real” or verifiable moral environment waiting to be found and consulted.
Moral problems arise solely within the mind, and it is therefore the mind itself that both defines the moral environment and contains the criteria that solutions must meet to be deemed satisfactory. Everything that makes some particular concern a “moral problem” to a person is contained wholly within that person’s mind. Thus, it is the mind-set of the customer at the checkout counter that determines if being undercharged presents a moral problem, and it is this mind-set that provides the frame of reference that is drawn upon when the decision to speak up or remain silent is made.
We should stop here to consider what this means, and what we typically do about it. If a person is a practising member of a religion, then they almost certainly possess an appropriate mental environment which they can consult when contemplating moral issues, and usually nothing stops the problem-solving process for them at this point. The most important function of any religion is to build such a mental environment, to teach followers what to believe and how to behave (that is, to provide solutions that resolve various kinds of moral problems). The “religious environment,” the neural networks constituting memories that those following a religion have spent time building within their minds, is available for exactly these occasions. It is rare (although perhaps now becoming more common) to encounter a moral problem that has not been already solved by others within the doctrine, but, if ever this does occur, then the adherent is expected to think about what has been written in religious texts, taught by their religious teachers, or said by a religious leader. The devout likely solve most of the moral problems they encounter by referring to one or more of these sources. More complicated issues might involve talking to a theologian or other respected authority. But there exists, for people following a religion, a relevant environment to consult, in which can be found the criteria to judge which solutions are acceptable, as well as the valued purpose that provides reasons for making the “correct” choice.
(However, it may be that many moral problems are not actually solved this way today, even by the devout. Perhaps some, or even most, everyday “moral” problems are in fact solved by recourse to the individual’s social or cultural environment. In other words, perhaps when a person wants to know the “right thing to do,” they [possibly quite subconsciously] might think along these lines; “now, what does society sanction?” Or, “what would my group expect of me?” They might even think, “what can I get away with?” Or, “how far can I go without being caught?” The last two examples might be a little extreme, but they serve to make a point: that in many situations today we may actually be obtaining our values, our standards, the criteria we use to judge which solutions are morally acceptable, from the social sub-set we inhabit, not from our religion. I suspect that, to the extent that this may be true, it is mostly so because our religions are failing to keep up with the changing times.)
So be it for those who have a religion to follow, or those who can be satisfied by adopting their society’s criteria of what a “good person” should do. People with these ideologies can make decisions (and feel or be certain that they have behaved morally) by consulting their knowledge of these constructed environments. But, what about those who have no mental religious environment to guide their decisions and disdain the vagaries of social standards? How can these people solve moral problems? Admittedly, there may be relatively few such people today, but there must have been many pondering such dilemmas before religions became common features of social life. Since we will shortly be investigating the emergence of religions, it is particularly important to explore what such people might do.
Presumably, some who have thought about such issues will have worked out their own value system, perhaps one based upon standards drawn piecemeal from one or more existing religions or societies they know about, but personalized in some manner. Others might just “play things by ear,” letting their emotions and feelings tell them how to behave as each situation unfolds. But a few, surely, would not be satisfied by such methods, and would want to work out solutions in a careful and rational manner. Where are these individuals to obtain the criteria they need to make moral choices? The physical environment holds none. The social environment has been ruled insignificant. Every religious source has been deemed artificial or irrelevant. And, they lack an appropriate internal, or mental, environment. How can such individuals solve moral issues rationally, and make decisions they can live with? We are not quite ready to answer such questions yet but will do so in Chapter Three, where we explore how decisions are made. Before then, there are a couple of other issues that should be addressed. The first has to do with what people consider to be moral problems; the second asks why such problems arise…(snip)
…The second question we should touch upon before moving on is: what prompts the appearance of “moral” problems? If individuals possess no inherent mental “religious” environment and have to be taught in order to construct one, then why would any “moral” problem have arisen in the first place? What would have prompted its appearance?
This question is easy to answer. Moral problems arise simply because the mind has the words and language that makes posing such problems possible. It is our mind’s ability to manipulate words that causes it to ask, “is it right to do this?” Humans are so used to mentally seeking the best course of action to take when practical alternatives arise that it is done automatically whenever more than one choice is offered. To put it crudely, we simply daydream moralistic alternatives, and then become stuck when trying to decide, “what is the right thing to do now?”
Without the mental ability to pose and answer questions (i.e., to note and solve problems) we could not ask ourselves if anything were right or wrong. In short, we don’t agonize over moral problems because we must, we do so simply because our mental ability with languages makes it possible, as the “moral” problems presented earlier in this section demonstrate. Our daily requirement to decide how to behave (together with the fact that religions have made the words “moral” and “ethical” part of most people’s vocabulary) is all that is needed to prompt such inquiries.
We are now well equipped to investigate the nature of decision making. Doing so will provide answers to the questions asked earlier: how can individuals solve moral issues rationally, and make decisions they can live with, if they lack a relevant (possibly religious) mental environment?”
Categories
Phillosoph

How Safe Is Your Home?

A few weeks back I was spending a lazy Saturday watching movies. Notably, at least two of these movies had a scene where someone breaks through a door and reaches in to operate the lock. Doors with glass panels right next to the lock are quite common, and if you think about it, not a very good idea!
 
One of the companies that I buy lock picks from is UKBumpKeys. They have an informative and entertaining blog that is well worth a look. This article in particular makes for very interesting reading.
Categories
Phillosoph

Further Adventures with Coffee and Soap.

Last weekend I decided to make some more coffee soap. I made some refinements to the techniques I used last time.

·Combine your various bits of soap in a microwavable bowl. Old soap can be crumbled. Newer or larger pieces are shaved into flakes.
·Add some coffee grounds and mix.
·Add sufficient water to cover the mixture. A little too much water is better than too little. Instead of water you can use any cold coffee that is with the grounds, or a mix of water and coffee. Neither water nor coffee need to be cool, for that matter.
·Place bowl in microwave and heat for a couple of minutes.
·When the soap appears to be softening and melting remove the bowl from the microwave and stir the contents to ensure coffee and soap are mixed.
·Dump the mixture into a sieve or colander to remove the excess liquid.
·Place the drained mixture on a sheet of Clingfilm. Wrap in Clingfilm and use to roll the mixture into a long sausage.
·Flatten the sausage to form an elongated bar.
·Allow to cool naturally.
·Once cooler, cut the bar into smaller, more handy, pieces. Cutting the end of the bars square lets you stand the soap up on its narrow end, presenting more surface to dry.
·Leave the soap to further cool and dry. It will be ready to use the next day.
Coffee soap does not produce a lot of lather but has a gentle abrasive effect. Give it a try!

Categories
Phillosoph

Seven Targets on The Head

In a previous post I described the concept of learning in “chunks of seven”. Therefore, today’s post will be on seven target areas on an aggressor’s head. If you have read some of my books you will know that the head has numerous target areas. The seven I have selected have been chosen for their effectiveness and accessibility. Some have also been included since they are not as well-known as other targets.
1.Bregma. The bregma is an intersection of sutures on the skull. For our purposes it can be regarded as the apex of the skull. Vulnerable to downward blows, unless the enemy is bent forward. Use a striking technique suited to bony areas.
2.Glabella. The glabella is between and just above the eyes. When you see a TV evangelist knocking people over with “the power of god” he is actually striking the glabella. Not a miracle, just physics and physiology.
3.Eyes. The eyes are protected by reflex actions and these can be exploited to make an attacker back off. Suddenly covering the eyes can be a useful “low-impact” technique. Feint at the eyes with a swift finger jab. See my books for a variety of techniques.
4.Temples. For defensive purposes, the temple can be regarded as the area on the side of the head at a 45 degree angle up from the eye. This is sometimes described as a weak area of the skull. The bone here is not significantly thinner but it is flatter and even slightly convex, making it less effective at shedding force. Attacks include the palm heel, hammer fist and elbow.
5.Chin. Blows that jerk the head backwards or to the side are more likely to result in a knockout. The palm heel uppercut, aka “chin jab” is a good technique, as is an upward elbow strike. If the foe is bent over a knee strike may be used.
6.The Mind Point: “Qianzhen”. This is on the side of the jawbone, just in front of the earlobe. Feel around with your finger and you will locate a sensitive spot. A good target for palm heel, hammer fist or elbow strikes. Even when hit with the large surface area of a padded boxing glove a strike here can cause a knockout.
7.Ears. Slapping both the palms onto a foe’s ears is a counter to various grabbing attacks. A palm heel strike to just one ear can also be effective. Ears can be painfully grabbed, pulled and twisted. An attempted rape or grappling attack may position an ear where it can be bitten. The ear marks a “target rich” area. If you cannot hit the temple, strike the ear or just above it. Right beneath the ear is a cavity with a major blood vessel and sensitive nerves.
Since I was limiting myself to just seven targets there were some alternates that did not make the final list.
The nose remains a good target. It is easily accessible and a relatively light blow can cause considerable pain and disorientation. It can be struck upwards, downwards, from the sides and inwards. In close range fighting it is going to be the primary target for a head butt. An upward palm strike to the nose will not “drive the bones into the brain” as many fiction writers maintain. It remains a good defensive technique, however.
Upward blows aimed at the nose have a change of hitting the mouth. Being hit in the mouth is unpleasant, but it also carries the risk of the striker’s hand taking a nasty injury. For this reason I selected the chin rather than the mouth for the above list.
A strike to the back of the head can be disorientating and potentially can be fatal. I would have included this area in the above list but attacking this area is relatively well known, so I opted to include the bregma instead.


Categories
Phillosoph

Another Win for Polaris!

One of my colleagues presented me with a padlock that had been cut from a locker. The end of the shackle was still locked into the body of the padlock. Much to my annoyance, I was unable to pick the lock. I think I must have tried most of my lock picks on this padlock, but it refused to yield.
I received the Polaris kit this weekend so I decided to try it against this padlock.
I decided to start with the four-hump Bogota. While this is a reasonably-sized padlock, the key-way where the pins are is very narrow. The Bogota was not making enough contact. I decided to move on to the four-hump Sinusoid, rake no.5. A bit better, but still not opening. Rake no.7, the five-hump Sinusoid. This felt very different and the rake was clearly finding its way into the narrow key-way. A few seconds of rocking and scrubbing and the lock opened. This was a nice example of the tactile aspects of lock picking. Often you can feel what is “right” or “nearly right” and use this to guide your selection of rake or pick.
Yet another conquest for Polaris!
Categories
Phillosoph

Polaris Lock Rakes

I will admit, I have been looking forward to these ever since I heard about them several months back.
Last night a review copy of the Polaris lock rake kit arrived.
Here are some initial impressions:
The Polaris is the baby of Chris Dangerfield of UKBumpkeys. It is available from UKBumpkeys or their North American outlet, LockPickWorld.com.
Polaris went on sale a couple of days ago and apparently are selling fast! Currently available at an introductory price with a 5,000 word ebook on raking techniques.
I was expecting the usual sort of pouch that lock picks come in. Instead, the envelope contained a rather elegant-looking black wallet. As I opened the flap it was obvious that it had magnetic fastening.
Polaris Lock Pick Set
Once opened, you are confronted by a suede-type interior and a neat row of polished rakes, each in its own pocket. A flap to cover the points is thoughtfully provided, which is a nice attention to detail. On the far right, an eleventh pocket holds a pair of turning tools, one TOK and one BOK.
Each rake is nicely polished and proudly marked “DANGERFIELD – POLARIS”.
Each rake is also numbered, which is a feature I approve of. It can be useful to know you have already tried “no.4” or that “no.3” worked best on a similar lock in the past.
Polaris gives you ten rakes, and a very nice selection they are too! All rakes are 0.025"/0.635 mm thickness.
Regular readers will know that I have wanted to try a double hump Bogota. Rake no.1 is a double-hump Bogota! No.2 is the more common but very useful three-hump and no.3 is a four-hump. These all made quick work of most of my test locks.
Recently I have worked on several locks that seem to respond best to a technique that is intermediate between single pin picking (SPP) and raking. I use a rake but need to concentrate on a particular group of pins. The two-hump proved useful on these locks, having a bit more room to move about. On the other hand, the three-hump seemed a fraction faster on locks susceptible to conventional scrubbing and rocking.
Rake no.4 looked very similar to the four-hump Bogota but the peaks are more rounded. This is a cycloid rake. It resembles a Bogota but with slightly lower and more rounded peaks. No.5 is more symmetrical and you might think of it as a form of snake, worm or serpentine rake. It is actually a four-hump sinusoid. These are both useful for locks where the Bogotas are too tall.
No.6 and 7 are five-wave cycloid and sinusoid and appear to have a slightly lower wave-height, making them useful in locks that 4 and 5 are too high for.
So far, a nice, intelligent selection of rakes that nicely complement each other.
Polaris Lock Rakes
No.8 is a bit of a change of style since it is a ripple or jag, also known as an “L” or “city” rake. I think of this one as a “classic city”. I have at least two other kits with rakes of exactly the same profile. When I first started lock picking I was not particularly keen on jags. I did not then appreciate that they were not for techniques such as zipping or scrubbing. The correct way to use a jag is rocking. The no.8 is a fraction taller than some of the other city rakes I have. This is easily addressed with a little filing, but I doubt this is significant since jags tend to only be useful in taller, straighter keyways. When a jag does work, however, it tends to work very fast indeed! No.8 is no exception!
No.8 is the only straight-backed rake in the set, making it useful if you want to count the pins in a lock. Interestingly, I was able to use the straight back to rock open a mushroom-pinned practice lock.
You may have noticed that most lock pick sets seem to share the same assortment of picks? I have never seen another kit with rakes like no.9 and 10. When I first saw them I thought of them as double-sided jags. Chris Dangerfield likens them to jiggler keys.
Like more conventional jags, these can quickly open some locks by rocking. I have also had successes using them for gentle scrubbing. No.9 and 10 are fairly wide in places but I have opened some narrower, twisty locks by using the curves of the rake to probe around. Novel, but useful designs. Note that most of the rakes in this kit can be treated as double-sided. If they do not work one way up they may work inverted. Always worth trying.
I like the turning tools in this kit. Raking can be difficult with a TOK tool when used in the top of the keyway so try using it at the bottom. This suits some lock ways better than the other tool. When I first opened the wallet I was a little disappointed there was not more room for additional turning tools. Part of the reason for this is the turning tool pocket is on the wallet flap, so space is a little limited. You can probably fit a few more BOK tools in the pocket, and it would be useful to have a selection of different widths and thicknesses. Perhaps Dangerfield will release an add-on set?
I like the magnet feature of the wallet. It adds a certain “majesty” to opening it. It may have practical applications too. Turning tools and rakes can be “stuck” to either of the outer panels, useful when you need a hand free but cannot return the tool to its pocket. Will the wallet stick to a metal panel such as a locker door? Yes it does! It sticks to my fridge too!
The kit comes with a 5,000 word ebook on raking techniques. I don’t know if that is a permanent component or just for the introductory offer. Since my set is a review sample I did not get the ebook. Knowing Chris’ experience and enthusiasm for raking I expect it to be well worth a read.
In conclusion, this is a really, really nice rake set. Classy to look at but also with a really useful selection of rakes. It has all of the rakes you might wish for and also some effective novel designs. It is, as advertised, just a rake set. If you want to learn SPP you will need some hooks and half-diamonds. A Serenity and a Polaris kit would be an awesome combination! I plan to add a snake-rake to my Polaris set.
I would say, “add these to your Christmas list”, but I understand these are moving fast so the introductory offer may not last that long!
Categories
Phillosoph

Camouflage Headgear: Textilage

Recently I have been working on a number of camouflage-related projects.
There is a bit of an inherent problem with this. Good camouflage is difficult to photograph.
Decades ago I was told: “If you want to know about camouflage, read a photography book about how to take good photographs then break the rules they give you!” You will understand this better in a moment.
Today’s project was an attempt to experiment with some ideas about headgear.
If your helmet still looks like a helmet when its cover is fitted, it is not camouflaged!
Why are helmet nets designed to be flush with the helmet rim, I wondered?
Good camouflage guides tell you to break up the regular shape of the rim. If the net hung down irregularly, it would provide better camouflage. It might also keep some insects away and have other benefits, like shading the back of your neck. Done right, it would be easier to construct too.
My first problem is that I did not have a helmet handy.
I decided to camouflage a boonie hat instead.
I would construct the net in such a way that it could easily be transferred to a helmet or other headgear.
I selected a hat with “chocolate chip” desert camouflage. I wanted whatever was beneath the net to be light for some negative space effect. There is also good contrast between the major elements of this pattern.
My second problem was trying to locate a suitable net within my very limited budget.
I eventually hit on the idea of using a cheap string vest.
I would have preferred a sand-yellow, beige or coyote-brown example but could only find khaki-drab. I suppose if you are making several nets, you could dye some white vests. The holes are probably a bit small for some natural foliage, ¾ of an inch or 20 mm being preferable.
Cut a piece of the vest in an irregular, roughly rectangular shape big enough to hang past the rim of your headgear.  It should be short at the front but  longer at the sides and back.
Attachment is simple. The boonie hat already has a looped headband. Pass strings or tapes through these, through the net, and tie with reef knots. For a helmet, utilize the foliage bands of the issue helmet cover, or cut slots in the cover.
You now have a hat or helmet with a net draped over it. It is not camouflaged yet!
One purpose of the net is to hold natural foliage, selected from what commonly grows in your area of operations.
Light foliage is simply threaded through the net. Heavier stuff may need more support. More support is often achieved by placing a rubber band around the helmet, beneath the net. This can be cut from a bicycle inner tube, surgical glove, elastic or similar materials.
Natural materials are supplemented by bits of cloth. For want of any better term we will call this “textilage”, since it is typically made from textiles and adds texture.
Most of the materials used for this example were from a bag of off-cuts sold for the purpose. It would be nice if more companies started doing this.
Most of these bits are PU-nylon or condura in MTP camouflage. Some more variety and desert patterns would have been welcome, especially if the intention is to camouflage for sandy and urban environments.
Other materials used include pieces of cut-up sandbag, medical gauze dyed with acrylic paint or tea, bits of cotton sock (also dyed) and jute string.
Simply thread these pieces through the net and tie with an overhand knot.
Shorter lengths that tend to stick up are used on the top of the hat, longer lengths that droop on the rest. Note that individual textilage bits do not need to be camouflage patterned. Anything in a suitable neutral or natural shade can be used.
You will end up with something that looks nothing like a hat or helmet, and that is what we are aiming for.
Try your hat on and do some fine-tuning. You do not want anything within your visual arc that is obstructive or distracting. Pay attention to the peripheral areas of your vision.

Finished Item

OK, so what did my hat end up like?
I only have one head available to model the hat, and it is not very photogenic.
My attempt at a selfie was not really that successful, but it does show the distinctive brim shape of the hat is well disrupted.
A top view of the hat. The flash has revealed the camouflage pattern printed on the hat much more than it appears to the naked eye. I could have brought a cheaper, monochrome hat.
The effect may be different if you have a lighter-coloured net or larger mesh size.
Side view of the hat, very effectively hiding a chrome Phantasm ball.
Front view, no flash. Note how materials at the front hang past the brim less but still disrupt.
If your helmet has an NVG mounting, the net will hide it but can be raised so that it can be used.
If you have a camouflaged leaf-suit, the hood may be cut off to create the basis of a hat or helmet cover. Hoods can get caught on branches and may limit situational awareness. Turning one into a helmet cover offers a number of advantages.
The leaves of a leaf-suit often tend to be of a regular size, and many suits are too green. Adding some textilage of irregular lengths, and grey and mid-brown shades will often improve them.
Categories
Phillosoph

The Seven Low Blows

This blog has had less posts on self-defence than I originally envisioned. One of the reasons for this is that “Attack, Avoid, Survive” and “Crash Combat” cover the subject comprehensively.
I was discussing “Miller’s law” recently. This is the idea that the average number of related “data chunks” a person can recall is seven, plus or minus two. It seems prudent to keep this in mind when creating lists of ideas or concepts to memorize.
In keeping with this vein, I present the “Seven Low Blows”:
1.    The kick to the groin. We all know that a kick to the front of the pelvis can be decisive, regardless of your gender. Your attacker knows this too and landing the blow may not be as easy as some self-defence manuals make out. The classic groin kick is probably the front snap kick. Drawing the kicking foot back or stepping forward with the other foot will telegraph your intentions and is to be avoided. My personal inclination would be to use a front thrust kick. This is a kick I can perform with speed and accuracy. Hammer the front of the pelvis rather than kick his gonads up out his ears. A roundhouse kick might connect, and may be useful if the foe has his hip turned in to protect his groin. I would be cautious about using a roundhouse in this way and you may be better off attacking another target such as the near leg.
2.  Coccyx aka “tailbone”. This can be a very decisive target, resulting in serious injuries that will be slow to heal. The primary kick to hit this is a horizontal roundhouse. Kick slightly higher and you can hit the kidneys or the vertebrae where they join the pelvis. Don’t try to kick higher than this
3.  Front of the knee. Another devastating attack than can cause life changing levels of injury. None of the attacks described in today’s blog are for playing or sparring! Primary attack is the side thrust kick. It is easy to put a lot of weight and force behind this kick so it can also be directed against the thighbone. A useful variant of the side-kick is the “Moro” or oblique kick. See my books for details.
4.  Side and back of the knee. These can also be attacked with a side-kick. Alternately, use an oblique roundhouse/ snap kick against these areas. The side of the thigh, just above the knee can be attacked with the same techniques.
5.   Shin, calf and foot. The region below the knee can be attacked with a nearly vertical side-kick. This is a kick that works well with footwear. Scrape the side of your boot sole down the front of the shin and finish by stomping down on the top of the foot. A useful technique for escaping from grabs or holds. May be applied to the calf muscles at the sides and back of the leg.
6.  Knee strike. Blows with the knee can be delivered in situations where other kicks cannot. Often your foe will be holding onto you or you onto them when you use your knee. The groin is an obvious target but do not forget that the side of the thigh and the coccyx can be struck too. If a foe is bent forwards knee them in the nose, forehead, temple, hinge of the jaw, ribs or kidneys.
7.   Half-moon step. This is a stepping technique described under “Sanchin” in “Attack, Avoid, Survive”. It utilizes balance and movements you will have honed learning the crescent kicks. This step uses a semi-circular movement to move past an opponent or slip your leg behind their lead leg. This can set up a push or strike to trip or unbalance them. The arc of the foot movement may be inward or outward. One of the first practical applications for Sanchin that I learnt was to slip past an advancing opponent and then stamp backward at their calf. The motion itself can be used as a low strike. Aim it at the ankle-bone or the Achilles tendon, but be aware these may be protected by the footwear. You may also use this movement to step on or pin the foe’s foot.
Categories
Phillosoph

Toggle Ropes.

According to Home Guard Instruction Manual No.51, Part III a toggle rope is six feet long and made from hemp of one and a half inches' circumference. Spliced to one end is a wooden toggle, six inches long and one inch in diameter. At the other end is a spliced eye, described as “four inches”. Since the eye must fit over a toggle I suspect this dimension is the internal width. I will note here that most toggle ropes that appear in photographs appear much thicker than a circumference of one and a half inches would suggest. See here for more on how to construct a toggle rope.
The toggle rope is more an item for a soldier than for an individual such as a hiker or survivalist. A single toggle rope is useful, but its real strength is that it can be combined with the other toggle ropes carried in a unit. I will save descriptions of some of the ways a toggle rope could be used for a future post. Just to whet your appetite, here is a bridge made from toggle ropes.
For a modern version of a toggle rope a number of questions need to be addressed.
The first question is “how long it should be?” A storey of a building is about nine or ten feet high, so a three metre rope may be more useful in such an environment.
“How thick?” is another question. The rope needs to be thick enough that a soldier can climb it, but not so bulky it becomes a serious encumbrance. Is it practical to carry the rope with an overhand knot tied every half metre or so? If so, this may allow for an overall thinner and lighter rope. B-720 suggests: If your mission requires long ropes, consider the use of 1" [climber's] nylon tubing instead. It is lighter, more compact, and just as strong.
Rather than a toggle it may be more useful to have a large loop at one end and a smaller loop with a carabineer at the other. The larger loop should be wide enough for a booted foot to be placed in it. Two ropes can be joined by using the carabineer as a toggle in a sling toggle knot or toggled bight and eye.  
Should the toggle rope actually be a rope? Would one inch webbing work as well while being more compact. This line of thought suggests at least one man in the squad should carry an etrier rather than a toggle rope.