The other day I had cause to look in one of my boxes of outdoor gear. Various containers that I thought might prove useful. Items brought out of curiosity or sometimes just for their novelty. Gifts from friends.
Some are milestones from my path of understanding.
Most of it I will never use.
Either I have acquired better alternatives or my requirements have changed.
So much money spent over the years that I could very much use now. Sadly most of this stuff has very little resale value.
“If I knew then what I knew now” I could have saved myself so much time and money.
This inspired me to think about the idea of a prepper/survival shopping list. If you have just come into the field, what should you be looking to buy first?
Hopefully my article on “Foundation survival kits” has proved a good start. A fire kit, bottle for carrying water and bag of toilet paper will have been easy to acquire. A poncho and liner or blanket will have cost a bit more but probably did not break the bank. You may be saving up for a good survival knife, but have hopefully bought a machete or hatchet to serve in the meantime.

Most of the items suggested for the foundation are relatively bulky, however. They are “bag” items rather than things you can keep on your person all the time.
If you have a good “skin-level survival EDC” what you can find in your environment or in your pack is a bonus.
The good news is that you can build up a good EDC without a great outlay of cash. My article on skin-level gear mainly listed my personal items.
I have been asked for a more general list, so this might as well be a shopping list. As before, I will concentrate on the items you carry and save a discussion of clothing for another day.
Pocket Knife: This will probably be the most expensive item on this list.
In an emergency, this may be the only knife you have available, so it makes sense to get a good one. That said, as a cash-strapped youth I carried a Chinese-made penknife. It had a really good assortment of tools and the only trouble it ever gave me was a corkscrew straightening out.
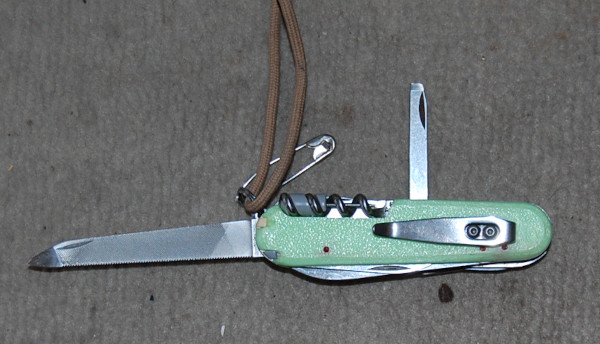
With my first full-time pay-cheque, I brought a genuine Swiss Army Knife. In my personal list you will note I also have a mini-Swiss Army Knife (SAK), a Leatherman Squirt and a number of other tools. Some redundancy and backup is always wise.
My preference is a Swiss Army Knife, but many of you will be tempted by full-size multi-pliers/multi-tools. My SAK and Squirt together weigh several ounces less than many full-size multi-pliers, but the choice is yours.
Put a loop of cord on your knife so you can secure it to belts or snap-links when necessary.
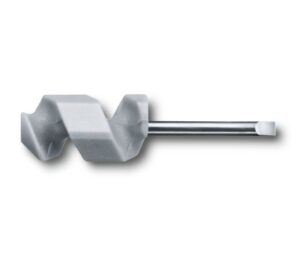
If you wear glasses and opt for an SAK, buy the mini-screwdriver that fits in the corkscrew.
Optional is a small sharpening implement. Mine is a small metal card with diamond dust on one side. Small whetstones and other devices are alternatives.
Knives are not designed for prying, especially folding ones. A pocket prybar is a good addition to your EDC.
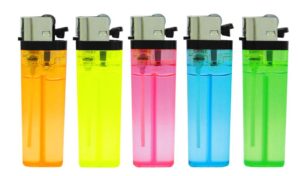
Lighter: The most basic fire kit is to carry a lighter. Get the type with a wheel. Even if empty, it can still be used to create sparks. Multiple disposable lighters can be brought in budget stores for about a buck.
Optional: Wrap the outside of your lighter with a few inches of duct-tape. Duct-tape is flammable and a small piece may be lit with the lighter and used to get a fire going.
Bandana: Bandanas can also be found for a modest price. Multiple uses. Have one in your trouser pocket.
Hat: Whether it is to keep my head warm, keep the sun off or keep the rain off my glasses, I am seldom without a suitable hat close to hand. A hat can make all the difference to your comfort. Gloves and a scarf or keffiyeh are worth carrying too.
Space Blanket: These can be found for very reasonable prices, which is good since they are one of the most important survival items that you can carry.
Bulk-buy and place one in your EDC, and one in each bag or outdoor coat you have.
Flashlight: Flashlights can get really expensive, so it may be sometime before you save up for the one you want, especially if you want a tactical, waterproof kubotan that will survive a nuclear attack.
In the meantime, small LED lights such as copies of the Photon II can be found on ebay. Carry one on your keyring. If you wear dog-tags, add one here too.
Whistle: A whistle is another useful addition to your keyring. Budget stores and ebay have these.
If you live or travel where temperatures often drop below zero make sure your whistle is non-metallic. Another useful addition to your dog-tags.
Cordage: Cordage can be put to many uses, but how much for EDC?
About two metres/a fathom/an armspan of paracord is probably a good start. Carry two such pieces orr you can carry a spare pair of long bootlaces. I like to carry a few additional cords of different diameters and materials.
A six span length of braided fishing line has a number of applications.
Buying a hank or roll of paracord is probably prudent. You will need it for some of the other items.
Dental floss: For lighter cordage I carry a compact container of dental floss. This fits in my pocket pouch of medical items. A hank of braided fishing line or kite-string is an alternative.
Pencil with tape: Another “non-medical” addition to my pocket pouch is a short pencil, wrapped in a length of electrical tape. A detachable eraser protects the point.
Sharpie/Permanent Marker: Writes on nearly anything. Obvious applications for leaving messages or warnings. If you have to apply a tourniquet, write the time of application on the patient's forehead with your sharpie.
Chalk: Chalk is useful for marking trails or leaving messages. Half a stick of white or light-coloured, half a stick of dark. Bag the different colours separately.
Safety Pins: Useful for failed zippers and other wardrobe malfunctions. May be used to drain blisters or possibly as improvised fish-hooks. Mine ride in a little plastic bag with a couple of hair pins and paper clips.
Needle and Thread: At skin-level, this is a single needle, already threaded with about a metre of “invisible” thread.
Experiment with magnetizing the needle. I carry a small, powerful magnet with my Swiss Army Knife.
You will need to select a method for protecting you from the point. Mine used to ride in a “sheath” made from a drinking straw. Now I have taped it to the side of the pencil.
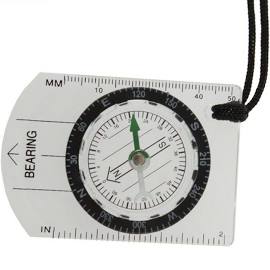
Compass: If starting out, avoid tiny button “survival” compasses. They like to hide in the corners of pockets and pouches. I have to keep my larger clipper compass in a container to avoid this.
For about a buck or two you can find budget baseplate compasses on ebay. These are good entry-level items and you can use them to teach yourself some mapwork. They weigh about an ounce and you should be able to find room for one in your EDC. Add a lanyard so you can secure it to your person.
A whistle is a good addition to a compass lanyard. I prefer to use non-metallic whistles on compass lanyards.
Tweezers: Handy to have. If you have a Swiss Army Knife, you probably carry some already.
Condoms: Condoms have a number of survival uses. Keep them away from your needle!

First Aid Kit: Your skin-level medical kit is for immediate treatment of minor injuries, i.e. actual “first-aid”.
For longer duration problems, have a more extensive kit in your bag. When you have the option, use the items in your bag before your EDC.
Budget stores and ebay sell little first-aid pouches that will fit in a trouser cargo pocket. Often they come with some medical items included. The contents may need a little tweaking but you can create a very useful pocket first aid kit for very little outlay.
Many of the items listed above can be fitted in the pouch. I even got my space blanket into mine.
Personal Medication: This will vary with the individual. In some environments this would include a supply of anti-malarials.
Sunglasses/Spectacles: These can protect you from bright light, stray branches and other threats. Carry a means to improvise a retention cord when needed.
Tissues or Toilet Paper: A ziplock bag with a few metres of toilet paper.
Obviously, have a larger supply in your pack and use that in preference to your “emergency” EDC supply.
If you have a cold or nosebleed, the tissue paper saves your bandana.
Paper can be used as tinder and the plastic bag used to carry water.
The entire package can be useful padding for other items in a cargo pocket.
If, like me, you seem to accumulate lots of paper napkins from takeaways, use these instead.
A very useful addition to your kit that costs virtually nothing.
For low-level use I carry a small bag with just a few paper napkins. I add a larger bag should I plan to stray from civilization.
Carabiner: A carabiner makes a very practical keyring and has a number of uses.
Several of the items listed above can be conveniently carried on your keyring.
If your gear has loops or rings it can be temporarily attached to the carabiner when you need your hands free. I sometimes use mine to carry shopping bags.
That concludes our basic list. A number of items but many of them can be acquired at very reasonable prices from sources such as ebay. Many of the items you may already have around the home.
In my previous article, I suggest several EDC items that “up-level” your readiness. Where practical these should be stored together in the same small pouch which can easily be added to your pocket contents. Another of the budget first aid pouches can be repurposed for this.
Up-Level Pouch contents include:
- Fire Kit: Additional lighter, tinder in container, one or more candles. Fresel lens if you have one.
- Fishing Kit with Snares
- Optional: About two thirds of a metre of cooking foil, ideally the heavier duty “turkey” foil. Carefully folded and rolled.
- Optional: Additional space blanket.
- Optional: Larger compass, with spare whistle. Using a firesteel necklace as the lanyard is an option to consider. Add a small snap-link and Photon light.
- Optional: Elasticated bandage. This came with one of my medical pouches. I don't include it in my daily EDC, but it is a useful addition to the higher readiness inventory.
Optionals
Not really survival or vital items, I have added a few things that may be convenient.
Ingredients and instructions on packaging seems to be getting printed even smaller, and my eyes no younger.
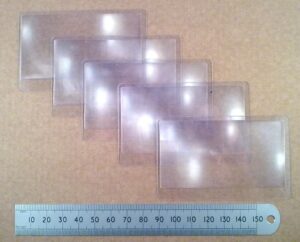
To this end, I have added a small folding magnifying glass (actually a 10x loupe) to my money pouch where I carry my Suunto Clipper. This magnifier could be used to start a fire. I also carry a frensel lens within a folding pocket mirror.
The mirror could be used for signalling, or can redirect light to illuminate a deep hole.
In the same place, I have added a set of ear plugs. Ear plugs have proved so useful on some of my travels, it seems only prudent to have a set on my person as well as that with my travel bag.
The earplugs may not get used as often as, say, my Swiss Army Knife, but when I do need them I will probably really need them! Much to my amusement, both my girlfriend and her son have become firm advocates of carrying ear plugs!
