Categories
Phillosoph

Some Thoughts on Possessions and Minimalism

Today I would like to throw out some ideas about minimalism.
This is more a collection of thoughts and ideas rather than a coherent article. I hope some of it will be of use or interest to you.
You may have too much stuff
My blogs have touched on this or related topics several times already.
Creating a capsule wardrobe in neutral and natural colours is an example of minimalism.
My friend Sam had the concept of “Sam’s Van”: that one should not have more than could be moved in a single vanload, an example of quantity-limited minimalism.
In all honesty, I cannot call myself a minimalist. My girlfriend is probably having a hearty laugh at the very notion! I have, however, attempted to make use of some of its techniques.

Don’t Count!

A very useful piece of advice I came across was “Don’t Count!”
“I only own n number of things” makes for a great blog title, but if many of us try to apply this in practice it can lead to unhealthy obsessiveness, or goal-post shifting. Well done to those who have reduced their belongings to just n-items, but bear in mind a more productive application of the exercise is to reduce your belongings to only the things you need, rather than an arbitrary number.
Some possessions naturally begat others. I have knives and other edged tools for my kitchen, hobbies, toolbox, camping and EDC. It would be very foolish for me not to own at least one other possession to keep them sharp, for example.
Sometimes a simple single addition may make a lot of difference.
I carry my keys on a carabiner. Not all of my trousers have loops in the best position for this.
I brought myself a robust key-hanger that fits on my belt. The hanger even has a couple of stout press-studs so I am able to place it on my belt without needing to unthread it. Now the keys always hang directly over the pocket.

Clear the Decks

Another good tip I have encountered is to “clear the decks”.
Ideally, nothing should be on your floor except your furniture. Once you have relocated or discarded the stuff that was taking up your floor-space, move on to the other horizontal surfaces and declutter them.
How little do you really need?

Minimalism for Preppers

Applying minimalist techniques can be a very useful exercise, especially for preppers. You can apply them just to your backpacking or bug-out outfit, or to your life in general.
I come across a lot of lists of equipment. Many of the “essentials” are actually only conveniences or “nice to haves”.
I have read a minimalist list where the person owned one bowl, one plate, one mug and one glass. Presumably their mates never came around for a cuppa or a drink. Or perhaps their mates were all minimalists too and were expected to bring their own cups!
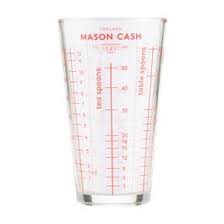
The same list included a set of measuring cups for cooking. Perhaps a single measuring jug is more minimalist than a set of cups? Perhaps they could drink out of the measuring jug! I was rather pleased to see someone offering a graduated drinking glass!
Graduated Drinking Glass

Kitchenware

If you are on the move, your minimalist cooking kit is a canteen cup and a spork. Many canteen cups now have non-stick coating, so use a non-metalic spork.
For a more leisurely camping kit, have a frying-pan, pair of billies, spork, spatula and a piece of plastic flexible cutting board. The latter is cut to size and shape to fit in your frying-pan. This is not a bad basis for your minimalist home kitchen.
Stephane Reynaud wrote a cookbook called “One Knife, One Pot, One Dish”. Not as minimalist as some would want, since the “pot” in different recipes may be a casserole, frying-pan, saucepan, baking dish, bain-marie or even a food processor.
If you want a very minimalist cooking outfit for home, a frying pan/skillet and a flameproof casserole is not a bad option. The latter should be of the sort that you can use on either the hob or in the oven. If you use a halogen oven, you will obviously need a casserole that can fit inside of it and when filled is not too heavy for you to lift out.
An oven-baking dish is a useful supplement to the casserole. If you have a halogen oven, make sure your dish is of a size and shape that fits it.
Select a spatula that can serve as a turner, server and a stirrer.
I like to cook and get a little creative in the kitchen, so I do not think it is too great a disaster if I have a couple of extra pots and spatulas.
With respect to saucepans, you will probably find you do not need more than two or three of varying size. Two frying pans of different sizes is sometimes convenient.
If you do use a halogen oven, you will know that tongs are pretty useful for removing or turning hot food. You could use a pair of spatulas, I guess, but chances are your halogen oven came with a set of tongs, so why not keep these?.
You will need a chopping board and/or a set of flexible cutting board sheets for use with your knife. I would opt for a Chinese cleaver, but you may then need a small knife for those rare jobs the cleaver is not good for. You should also have a serrated knife for cutting bread and fruit.
It is useful to have scissors and a spare penknife in the kitchen. Then again, my kitchen also has a buck-axe and Mora-knife!
I quite like the sets of measuring cups and spoons I have hanging up in the kitchen. I try to use them to stop over-serving myself portions. The minimum is probably a measuring jug.
Have at least one mixing bowl. Perhaps invest in an ovenproof one that may be used in the microwave or halogen oven.
I could probably use a larger selection of storage boxes for the fridge, and make the ones I have more accessible.
For each person, there should be a bowl, plate, mug and drinking glass. If you are a big tea drinker, you will want your mug made from glass. A glass mug is a good all-rounder for all kinds of hot or cold drinks. For cold drinks you may want something taller with more volume and room for ice.
Ideally, have two sets of tableware for each person. You will need to wash-up less frequently and you can accommodate guests. If there are more than two of you, the extra plates and bowls are useful for serving. Bowls also get used for mixing, marinating and microwaving.
For each person, a set of utensils: knife, fork, spoon. All-metal, single-piece sets are more durable. The knife should be of a form that can cut cooked food and spread butter. Have a couple of spare sets for guests. You may want a steak/cutting knife and teaspoon for each person or guest too. Personally, I like to have at least half a dozen additional teaspoons. A teaspoon is far better for spreading jam or marmalade than a knife, incidentally.
Adopt my methods of quick, economical washing-up and you will find it easy to maintain a stock of clean cutlery and dishes.
I have a dish-drying cloth, but seldom use it since letting washing-up drain and air-dry is cleaner and more convenient. It gets used more often to swat flies. Drying my hands is more common, and this only needs a small hand-towel. Same hand-towel is useful for handling hot dishes and pots.

What Do You Really Need?

It is foolish to think what applies to yourself is true for everyone else. That is quite a useful thing to remember in everyday life. Keep this in mind when you read minimalist lists.
Sometimes I find that I do not need some of the items on minimalist’s lists. Having a good penknife does away with the need for many other implements.
My girlfriend recently tidied-up a bedroom that had been used for storage.
“Transformed” is probably a better term. It was hard to believe it was the same room!
I was looking around for a rug with a two-metre high pile of junk swept under it.
One of the few items she declared surplus to requirements was a desk-lamp. She had absolutely no use for this, she declaired. Neither had I, I realized.
My room has never looked quite this bad
I have two desk-lamps, both fitted with daylight bulbs. I only ever use them when I am photographing something.
I mention this, since several minimalist lists of belongings include desk-lamps or floor-lamps as essentials. Perhaps their home is considerably darker than mine and they do actually need them.
Most of us do our writing and reading on computers these days, so I would venture that many of us do not need a separate desk-lamp. I certainly do not need a lamp to “create mood”.
Sometime ago I got rid of a freestanding lamp since I never used it.
I think television shows create a false impression here. Often on the box we see an interior with multiple lamps, all of them lit in the middle of the day!
Don’t use lights you do not need, and reduce your energy bill. Sell or donate lamps you never use.
Another item that is surprisingly common on minimalist lists of “necessities” is bathroom scales. Personally, I have never owned a set of bathroom scales. I do not need a set to tell me I am carrying extra weight, I can see it! Similarly, weight-loss that the scale claims has no value. What matters is that which I and others perceive.
Wastebaskets? I have certain in-laws that cannot grasp not to use a bin without a liner. My rubbish for recycling goes into a repurposed plastic bag. This usually hangs from one corner of a kitchen chair, so I need no bin.
Foodstuff that might attract flies goes into a bag in the freezer until it is thrown out into the bins outside.
Not that I get many flies, since I fitted all the windows I might open for ventilation with insect mesh! Simple addition: big change!
Something I don’t see on many lists is a dressing gown. I spend most of my time at home wearing little else! One of the pleasures of a nice shower is drying off in a snuggly dressing gown! My older dressing gown has fallen to bits, so I may replace it with a longer, hooded fleece gown for the colder months, and to wear when the other fleece gown is being washed.
The dressing gown is supplemented by a fleece blanket in the lounge. I spend most of my time alone, so heating the whole house if it is a little chilly is stupid. I often watch television or play video games with a blanket thrown over me. If it gets colder, I throw a poncho-liner over this too.

Constructive Minimalism

In an apparent paradox, if I have been reading a minimal list of belongings, it is more usual for me to think about buying something rather than discarding something.
This illustrates how minimalist lists can be a useful tool for making you concentrate on what are your essentials and highlighting where you might make improvements.
I have, however, taken to practicing a self-imposed “cool-down” period. I wait at least 24 hours before I click “buy”. I may miss the occasional bargain, but generally I save more money by avoiding spending it on stuff I can manage without.
Thinking of your possessions as “collections” or “kits” can be productive in rationalizing what you have.

Bedding

Considering bedding, it occurred to me my life would be a lot easier if I had two brand-new sets of sheets and duvet covers. Some of my older stuff did not quite fit the mattress I now have.
Two sets give me one new set on the bed while the other is in the wash.
I have an extra duvet and pillow, so I can use my older stuff for these, again giving a set in use and one in the wash.

Stationary

If I consider the topic of “stationary”, what do I actually need, compared to what I have?
Most writing is now done on the computer, so pens and paper are seldom used.
I have blank A4 paper for the printer (although the printer seldom behaves well enough to print anything! The device is mainly used for scanning.). That blank A4 paper can be used for various other things. A pad of lined paper and/or a notepad or two. Pad of post-it notes.
You may have uses for a highlighter, stapler or some paper-clips.
Seldom do I need envelopes these days. If I do need one, I can fold a piece of paper into one. I do occasionally send packages, so some tape is useful.
Ruler, protractor and a pair of compasses can be handy at times, and also serve in the “tools/DIY” category.
I have plenty of knives, so I could do without a pencil sharpener, although there is little point in discarding the couple I have.
I have some glue and blu tac, although these reside in my modelling supplies.
Erasers, pens, pencils, of course.
Go through your pens and discard refills or disposable pens that no longer work.
Some forms require you to fill them in in black ink, so make sure that some of your pens are black.
Recently I had to send a parcel and was unable to find a thick pen to write the address with. So I bought a pair of black Sharpies, adding one to my EDC and keeping the other for home use.
Sometimes it is a matter of organization. I had lots of pens and pencils, but distributed in various diverse locations. Pool most of your erasers, pencils and pens into a box or a large pencil case. You can still have a pen and/or pencil in places you are likely to need them, but if you do need something you only have to look in one place.
I have a pen and pencil in a box in the lounge, a pen and pencil in a kitchen drawer, and everything else in a large pencil case in my room. A handful of paper-clips form the zip-pull.

Scan It and Toss It

As mentioned, my printer is also a scanner. It can feed-in and scan whole stacks of papers automatically. Or at least, it did until Epson discontinued the software needed to do this for my model!
A scanner may be very useful for decluttering your life.
When I moved in with my girlfriend, I scanned scores of folders of documents, magazine articles and old papers. This allowed me to throw out several sacks of the old papers and makes it easier to find the information I want when I want it.

Bag and Box

Bag or box stuff when you can. You will save yourself time if these bags and boxes are transparent or mesh.
For example, stick all of your pairs of gloves that are not in jacket pockets in a mesh bag in a drawer or on a wardrobe shelf. When you need gloves, just one place to look, and no hunting for a glove hiding in with the socks.
Things that are wanted but seldom used may be tucked away on a high shelf or bottom of a wardrobe. Conversely, some things that you might make more use of may currently be hidden out of sight and out of mind.
Put your teaspoons in a small jar on the countertop rather than hidden in the bottom of a crowded drawer. Makes them much easier to find.
My final advice is to understand that decluttering is likely to be a “work-in-progress”.
Many times you will think that you are nearly done, but are not! Changing one thing will put other things in a new context.
Scanning the last of my old papers got me thinking about the various plastic and card folders they had been in.
I have lots of books and DVDs. While I like to call the exercise “decluttering”, there is no way my home will ever look uncluttered.
It might be argued that much of my minimalism is “below the surface”.
There is now less in the cupboards and drawers. What is in there is now more logically organized and more easily found.
It is quite probable that no-one will notice the difference except myself.
Psychologically, the place feels calmer.
Categories
Phillosoph

Tools in the Office

A friend of mine asked me for suggestions for the contents of a small repair/utility kit to place in a locker at his office. In his own words, he wants to be “the handy guy”.
Every time I have moved office, I have virtuously left my tool collection for my successor, (not that I had much choice in the matter last time!) Each time I have regretted this, as over the next few months I have needed tools I no longer have.
What to have in such a kit will depend on the office, and the sort of equipment likely to be encountered.
I once returned to my office to find a pair of colleagues attempting to help someone remove a finger-ring. I quickly confiscated the hacksaw(!) and demonstrated that a needle-file was the correct tool for the job.
A dearly missed friend of mine was a craftsman of the old school. He brought the best tools he could and they served him well for his entire lifetime. Good job he was cremated, since he would turn in his grave at my next suggestion!
Bear in mind the likely frequency of use of your office tool kit. For items that are only likely to be used occasionally, it may be warranted to acquire some of these items from “budget” sources.
Images are for illustration only! No recommendation of particular brands or models should be inferred.

Office Folders

My starting point for an office tool kit would be to find a penknife and/or multi-tool.
Swiss Army Champion
If you are a regular visitor to these pages, chances are you already carry a number of useful items as part of your EDC.
It is also possible that you have a couple of older items that you have replaced with something better and more suited to your needs. You may have brought yourself a full-sized multi-tool, only to decide it is too heavy for constant carry and your needs are better served by something such as a Swiss Army knife and a mini-Leatherman Squirt.
In my kitchen drawer I have a couple of penknives donated from lost property. One is large and bulky and includes a set of pliers. Both penknives hang on a hook in the drawer and are useful for tasks such as tightening cooking pot handles.
If you have a surplus penknife and/or multi-tool, make this the starting point of your office tool kit.

Screwing in the Office

The next addition would be some “proper” screwdrivers.
There are some places that the screwdrivers on a penknife or multi-tool cannot reach, or are too big for. If you have to remove a number of screws, or they are hard to remove, conventionally handled screwdrivers may be more comfortable and effective.
Items such as phones or laptops tend to use quite small screws. You may encounter cross/Phillips/posidriv or Torx-headed screws.
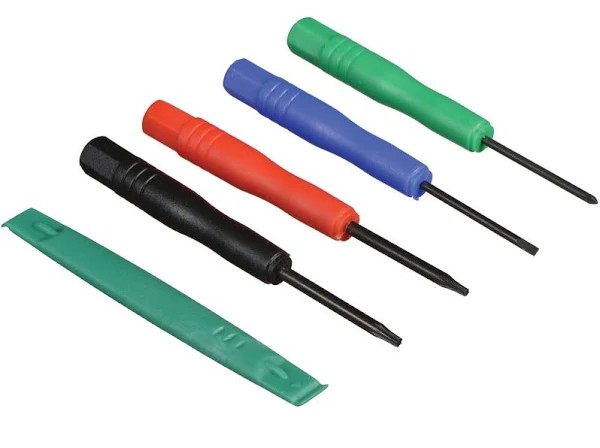
Have a set of several small screwdrivers of approximately 3 to 5mm width for the flat heads, and the other types of similar size, such as PH/PZ 0 to 2.
Small Screwdrivers and Spudger
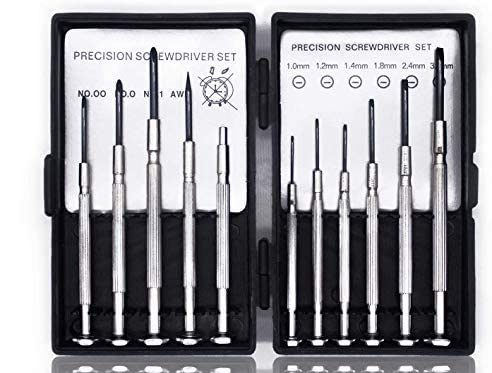
Some items have very small screws! A set of precision/“jeweller’s” screwdrivers is worth having. This will also make you popular with spectacles wearers.
Precision Screwdriver set
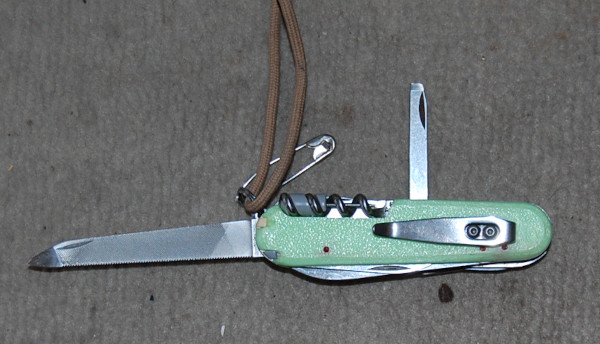
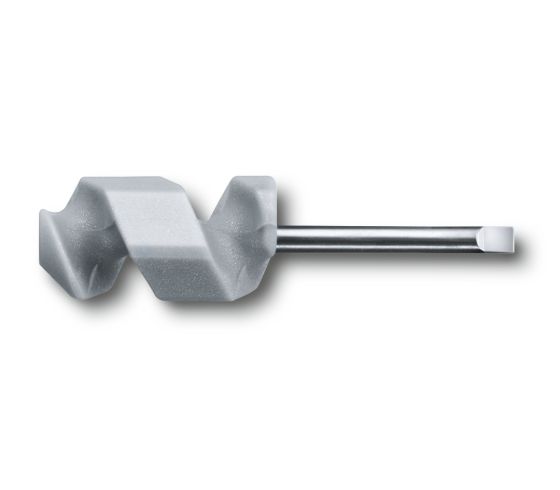
As an aside, the very small screwdriver that fits in the corkscrew of a Swiss Army knife is worth acquiring for your EDC. I once saw someone’s glasses fall to bits while they were talking to me in a pub. I repaired them there on the spot.
Very Small Swiss Army Knife Screwdriver
You should also have at least one fairly hefty large slot screwdriver.
Recently an important keycard was left in a cabinet and the key-holder was absent with Corvid. I was told to get into the desk by any means possible. Unable to pick it, I used a large screwdriver as a wedge and prybar and opened the drawer with negligible damage.
Having a crowbar at work might raise eyebrows. A large screwdriver or two is more acceptable and in many respects more versatile.

Pinching in the Office

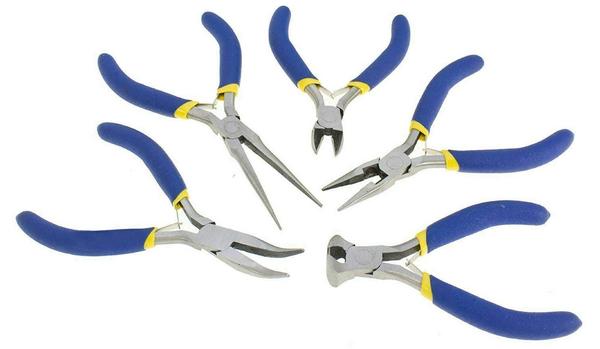
Next I would add a set of pliers. By “set” I mean a kit containing several pairs of different forms, for example fine, long-nose, curved, broad and side-cutters.
These are for all the jobs the pliers on a penknife or multitool are not ideal for.
Insulated handles are nice to have, although you should not be working on anything with live electricity.
A number of times I have been called on to repair colleagues’ jewellery.
Set of Small PLiers
I have a nice little set of five tools, each about four to five inches long. I picked these up in a model-railway shop.
These are backed up by a pair of heavier duty long-nose and standard pliers of about six to seven inches long.
○ Precision screwdrivers and fine pliers would be among the first tools I acquire for an office tool kit.

Nuts Loose in the Office

It is probably not your job to fix the sink. Even if you do actually know what you are doing, there are numerous good reasons why this should be left to someone paid to do the job.
You may, however, come across loose nuts on furniture in an office environment.
Your tool kit should have a set of Mole grips or an adjustable wrench for such contingencies.

Cuts in the Workplace

In this day and age, the sight of a penknife blade may cause some of your colleagues to soil their underwear.
A Stanley knife/box-cutter may be a more acceptable tool should you need to cut open packaging.
More assaults are probably committed with Stanley knives and box-cutters than penknives, but hoplophobia is not rational.

Tape It!

Final component of the basic kit would be a roll of duct tape and a roll of electrician’s insulating tape.

Additional Items

• Reorganizing is a popular distraction in offices. Will the desk fit? I am often asked if I have a tape-measure.
• Sometimes items using allen screws are encountered, so a small set of allen/hex keys might be handy.
There is a joke that Mole grips or duct tape are for things that move that shouldn’t, and that WD40 is for what won’t move but should!
• WD40 is handy for a number of things in the office. As well as being a lubricant, it can be used for cleaning.
• Modifying your office environment with a hammer will probably be frowned on. It may prove tempting next time the printer or photocopier plays up!
As a starting point for your office tool kit you may have used a pre-made home kit, such as the one shown below, which includes a hammer. A claw hammer does make a useful substitute for a prybar.
Home Tool KIt
• A magnifying glass may be useful for dealing with those tiny screws.
• A magnet is good for finding any screws you drop or keeping removed screws going astray.
• If working with small parts, tweezers may be handy. So too might a plastic “spudger”. You can probably carve the latter from the less-brittle examples of plastic cutlery.
• A small sewing kit may also prove handy.
• I am inclined to suggest a small flashlight might be a handy addition. My step-son will probably just point out that most people have phones with lights.
Whatever you decide upon, keep your tool kit under lock and key. Useful things like tools have a habit of getting borrowed and not returned.

Other Utility Items for the Office

My friend said tool/utility, so what else might he want in his locker? His EDC should cover most of his needs.
No idea about my friend’s current lifestyle. He may still enjoy a wild night out on the tiles. He might want a toothbrush, toothpaste, a razor and deodorant in his locker.
Female readers may wish to keep a supply of hygiene items.
Your place of work should have a stock of medical items, but you may maintain a supply of personal medication, and other items such as your preference in painkillers and anti-histamine, for example.
Spare clothing, such as clean underwear, warm hat, bandana, scarf, gloves, jumper and a poncho/rain-proof. A spare lighter and a space blanket is always prudent.
This is venturing into the topic of “get home” bags. That is a topic for another day.

Categories
Phillosoph

Daysac Backpacks

Recently I have been jotting down some thoughts on minimalism. I will share some of these observations in a future blog.
This is quite a useful exercise, since often it identifies deficiencies in what I have. It also inspired me to organize my current possessions more logically.

A Room of Rucksacs

One field I started thinking about was that of bags.
Part of my bedroom floorspace is taken up by several rucksacs, and more lurk on top of the wardrobe or in a nearby trunk.
Different models for different purposes: The Alaskan Packboard I built that I used to tour Germany, Holland and Austria. The internal-framed pack I acquired for Iceland, since I did not trust airline baggage handling with my packboard. The DPM Northern Ireland Patrol Pack and large Bergen that I treated myself to. The most travelled pack is one that converts into a soft suitcase and has six large external pockets.

Daysacs

A large rucksac is a useful thing to own, and like me, you may own several, each suited for different purposes.
A smaller bag, such as a daysac, is likely to see more use, however. It may be used weekly, or even daily. I notice many women carry small rucksacs in lieu of a handbag.
Smaller packs are less well represented in my collection. The one I have used most recently is rather small, and somewhat tatty. I acquired this from lost property at work (yes, it is amazing what people leave and never come back for). It only has one external pocket and I have had to repair the shoulder strap junction at least twice.
Elsewhere, I have told the story of why my beloved North Face daysac is no longer with me. The multi-pocked pack I brought to replace it proved to be far too small for my trip to Kos.
Given the use it will get, it makes sense to invest in a good quality daysac. Sadly, I have very little budget for such things these days. I have spent several days web-searching for a new daysac, only to find what I did not want or could not afford.
Following my recent article, I wanted something neutral and natural in colour rather than the ubiquitous black. A search for khaki backpacks turned up an item on ebay. Price had dropped and was within my budget. For that money, I would risk it.

The Sunrise Khaki Backpack

The bag arrived several days ago, and I am pleasantly surprised.

Compass and Mil-Tec Daysacs

It is a little bigger than I expected. Dimensions quoted on websites can often be misleading.
Quoted dimensions were 47 x 31 x 21 cm, and size was quoted as 31 litres. That latter figure seems to be external volume rather than internal capacity.
The bag is probably ideal size for a general-purpose daysac. When I am travelling my daysac serves as my cabin baggage or carries the items I may need when sightseeing. This bag is of a size that most airlines will permit as cabin baggage. When moving between locations the daysac needs to be small enough to fit inside my larger rucksac, so I have only one bag to carry and watch.
Colour is a nice khaki-coyote brown shade, not so light that it will show up dirt. The inside is lined with a black nylon/polyester[?], so better finished than I was expecting. This, however, is my single, very minor gripe with this bag. A black interior makes things more difficult to located within a bag. More manufactures should utilize lighter materials such as the bright lime green used inside my girlfriend's theft-resistant bags.
Unlike my old North Face, the main compartment has a padded pocket that can take a laptop computer. I could have used this a few months ago while I was hot-desking!
Interior is large enough to take my soft-core pack with plenty of room left for other items.
The main external pocket is quite large. The interior seems rather bare. This could use some internal pockets for smaller items. One can only expect so much for this price, however. Interior pocket is something I may add when I have time.
On each side is an open-topped, elasticated pocket suitable for carrying a waterbottle or collapsible umbrella.
Very little needed to be done to bring this pack “up to speed”.
The shoulder straps each have a plastic D-ring, so adding a snap-link to the left one took an instant.
The zippers needed pull-tails, and short length of “desert-camo” paracord I had proved to be ideal length and colour. The main compartment zipper is two-way, that of the exterior compartment one-way.
The other addition I made was to coil a wallet chain around the grab-handle. This is a trick I have borrowed from my girlfriend's theft-resistant bags. When stationary, feed the chain around a chair or table leg to deter sneak thieves. Obviously, this precaution does not mean you can wander off to the toilets and leave your bag unattended! Even if you added a lock, a thief could cut through part of a bag if left unwatched.
This is not the highest quality bag you can find. You can easily spend ten times as much on a daysac. Whether or not you will get ten-times the bag is for you to decide.
This is all I can afford at the moment, and nicely demonstrates some of the features you might look for in a bag, and some of the modifications you might consider.
This particular bag is has the brand “Compass, Sunrise Bags” and model number “BPC108-KK”.

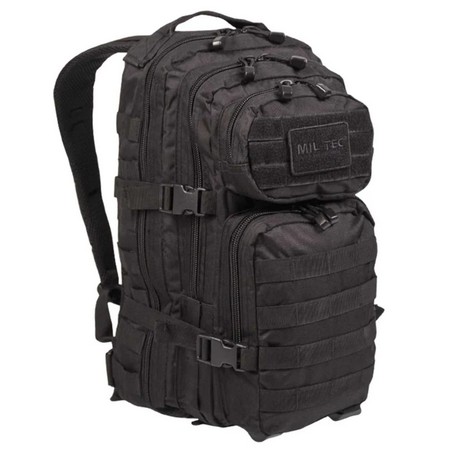
Mil-Tec MOLLE Multi-Pocket Backpack

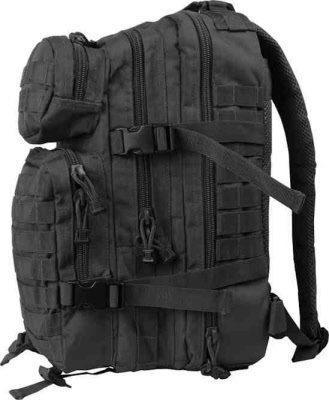
While I was researching this blog, I discovered something new about my small black multi-pocket daysac. Other than its small size, this really is a nice bag, well-made with lots of nice features.
Mil-Tec 20 litre MOLLE backpack
The bag is made by “Mil-Tec” in Germany. I discovered the same design is produced in two different capacities, 20 litres (“small”) and 36 litres (“large”). There is also a 14 litre kid's pack.
A number of sellers offer copies/knock-offs of the Mil-Tec design, many claiming to be “30 litres” The dimensions claimed for some of these suggest that even the exterior volume of the bag is less than 30 litres.
I suspect that I in fact brought the 20 litre version of the Mil-Tec, assuming it was the same as the “30 litre” bags being offered elsewhere.
The genuine 36 litre Mil-Tec can be found for quite a reasonable price, although out of my current budget, sadly. Based on my examination of the 20 litre version, the 36 litre may be a very good choice for anyone looking for a slightly larger daysac or patrol sack.
Categories
Phillosoph

Camouflage: Light, Dark, Neutral and Natural

Camouflage is about “not being seen”, which is one of the most fundamental of survival strategies. If you cannot become “invisible”, you may be able to appear insignificant, uninteresting or become easily “lost in a crowd”.
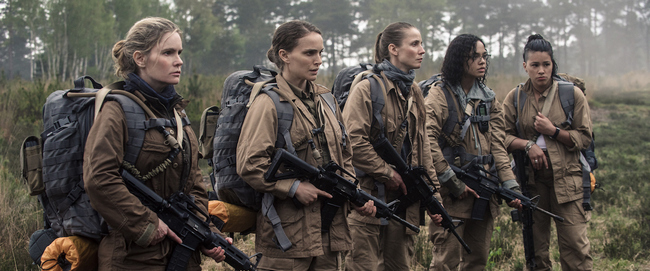
Good use of monotone neutrals. In some shots the actresses blend into the terrain.
You may have spent good money on the latest designer camouflage, but it is of no use to you hanging up at home. The most likely source of threat is other human-beings, and you are most at risk when other people are around.
Miyamoto Musashi tells us in the “Book of Five Rings”:
“In all forms of strategy, it is necessary to maintain the combat stance in everyday life and to make your everyday stance your combat stance. You must research this well.”
In clothing terms, what Musashi tells us means your everyday wear should be selected with a mind to decreasing your “visibility”.
Camouflage-patterned clothing does have a place in a prepper's wardrobe. There are, however, times when using camouflage-patterned clothing may be counter-productive. In cosmopolitan cities, clothing in camouflage or camouflage-like patterns may attract little attention. In other parts of the world, its use may attract unwelcome attention, or get you wrongly identified as military, paramilitary or a poacher.
Even if restricted to unpatterned clothing, there are strategies that we can adopt that will still decrease our visibility.
In previous blogs, I have touched upon a concept that might be called “camouflage without camouflage”. One can make oneself less observable by using a mix of non-camo-pattern clothing.
By using a variety of shades and hues, the basic identifiable human-shape can be broken up and become harder to distinguish. I have advised that you select clothing items in neutral and natural shades and colours.
While this remains good advice, a little more thought needs to be given to the system and some additional explanation may be warranted.

What is a Neutral Colour?

“Neutral colors are muted shades that appear to lack color but often have underlying hues that change with different lighting. Examples of neutral colors include beige, taupe, gray, cream, brown, black, and white. While neutral colors are not on the color wheel, they complement primary and secondary colors.”
On this blog I have stressed “neutral and natural”. Not all colours classed as neutrals are suitable for concealment.

Black

Regular readers should already know that “black is NOT a camouflage colour”.
In the movies, the bad guys, and often the hero will be dressed in black. It looks great on screen, and makes the actors stand out. This is exactly the opposite of the effect we want our clothes to have!
Even at night, black is to be avoided. In many partially lit conditions, black can be too dark, and stand out. Seldom is it dark enough for black clothing.
The special forces in Vietnam who dyed their gear black knew the colour would soon fade to a more useful dark grey.
Pure black clothing also tends to show the dirt, so you might like to rethink its usefulness as general wear.
If you want a dark suit for weddings and funeral, buy charcoal-grey rather than true black.

White

White is another colour that stands out and should be avoided. Like black, white really shows up any dirt.
The only time to wear white is when there is snow on the ground.
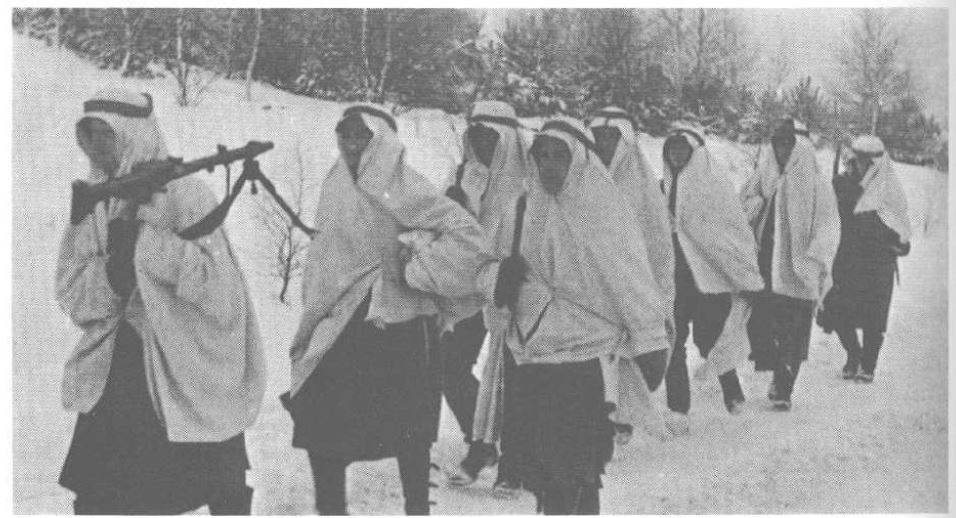
White garments used as snow camouflage should be uninsulated. If they are warm, you will be tempted to wear them all the time, they will quickly become dirty and will no longer be effective as snow camouflage.
Improvised Snow Camo
Obviously snow-camo should be unlined and of a material that is easily laundered.
Avoid white underwear if you can. Outer clothing can get damaged, and being exposed may expose you. Select underwear in neutral and natural tones.
If you have to wear a white shirt at a formal occasion, you may need a white undershirt to avoid the colour of the undergarment showing through.
If you have to wear a white shirt for work, carry a neutral colour scarf  or keffiyah you can cover it with when outdoors.

Blue

Not all shades of blue are neutral. Some that are neutral are not that natural. Neutral shades of blue or blue-grey can work in a winter or urban environment.
Light blue is generally a “cold” colour and can be used in the snow. Some snow-camouflage patterns use light blue and white to break up the shape.
Watch some nature footage of polar bears in the snow and ice and note how much the terrain appears blue, grey or blue-grey. Interestingly, the bears often appear yellow-white.
In an urban environment, light blue is often encountered as faded or mid-blue denim. Light blue is a good colour for a button-up shirt.
Darker blues are probably less useful for concealment. A blue blazer is supposedly an essential in a gentleman's wardrobe (I don't have one!). If you want one, select a neutral shade of navy. If nothing else, it will at least go better with whatever other colours you may wear with it.

Undershadow

Many animals have lighter colouration on their undersides. This makes the shadow that their bodies cast less distinctive and is an example of counter-shading. The animal appears less three-dimensional and blends in better with the surface that it is upon. Behaviours such as crouching low further reduce the shadow, and the animal will often remain immobile while it thinks it is observed.
Interestingly, many aquatic or amphibious animals show an abrupt change from light underside to darker upper. When swimming near the surface the dark upper makes the animal very difficult to spot. A predator looking up from beneath will find the light underside difficult to see against the sky seen through the water surface.
A light underbelly, or clothing to simulate it, is of little use to a human, since we spend a significant portion of our time upright and bipedal.
Keeping close to the ground and remaining still is good tactics, however. If you are concerned with being observed you should never be reluctant to crawl if necessary.
An interesting example of trying to apply counter-shading can be found in the book “Second World War British Military Camouflage”, p.27-8 by Isla Forsyth.
Solomon J. Solomon was one of the early pioneers of modern camouflage. During the First World War he proposed “alterations to [British] soldiers’ uniforms to reduce their visibility, such as the darkening of the soldier’s cap and the lightening of his trousers.”
Upper surfaces catch more light, and correspondingly, need to be darker. Body areas that are commonly thrown into shadow need to be lighter.
Watch some videos of soldiers in action, and you will see they often appear as man-shaped blobs, darker than their surroundings. Modern combat gear often uses exactly the same pattern for headgear, torso and legs. The chest area is often shaded by the position of the arms, yet often the equipment worn here is actually darker! Even in desert environments, soldiers wearing black or woodland-pattern body armour or load-bearing gear are still seen.

Illumination

When considering camouflage, a lot of attention is paid to colours and patterns. More attention should be paid to shade, light and contrast.
I have advised you to select items in natural and neutral shades, but how dark should they be?
If you have to hide in a dense wood, particularly at night, a mix of clothing items in medium or dark shades of natural and neutral colours may serve you. There will be lots of shadows, so use them. Camouflage is about behaviour as well as colouration.
Suppose you leave the wood to move across a neighbouring field. How well will your dark and medium-coloured clothes serve you then?
Even at night, the surfaces you move over may be relatively light. Grass and hay may reflect any available light, even that from the moon and stars. If you go prone, you may appear as a dark blob that attracts investigation. During the day you may be even more conspicuous.
Most of us spend a significant proportion of our time in urban areas. Even at night, this is an environment with many light or medium-shaded surfaces, and many areas are illuminated by artificial lighting. Dark outfits may make you stand out.
Discussions of camouflage often mention shade and shadow. Level of illumination in the surroundings is often not given that much attention. Clearly, if you are in a shadow, you are illuminated less, but it should be clear by now that light level has a much wider significance to camouflage and concealment.
In really deep shadow, what you wear probably matters little. There is no light, or more correctly, there is none escaping. Not all shadows or unlit areas will be this dark, however.
Stronger light can have interesting effects on concealment. Suppose someone is wearing a sand-colour outfit and lays down in a grass field on a sunny day.
You might think that someone in yellow would be easy to spot in a green field. One thing that would prevent this is that shade is more significant than hue. If the sand-coloured clothing appears a similar shade to the grass at the viewing distance, the figure can be over-looked. Another factor is that light materials reflect. Sunlight hitting the grass causes them to reflect green light. This green light may in turn be reflected from the light-coloured cloth, causing it to appear to have a green tint.
Effectively, your world should be viewed one of light and shadows.
Some areas are “shadow-dominant”. These include deep forests and jungles, and poorly-lit building interiors.
“Illuminated” areas include desert, open fields and many urban exterior areas.
This status may be changed by time of day, weather or season. At night, a wood may become even more shadow-dominant, yet in winter it may become better illuminated.
In shadow-dominant areas, clothing of medium-shade, with some dark items may be most effective. In better lit areas, lighter clothing may be less conspicuous.
Your movements may take you from light to dark areas or the reverse, so what should you wear? Having to deal with both light-dominant and shadow-dominant areas may explain why most attempts at a universal camouflage pattern have only ever proved partially effective.
In the early days of camouflage experimentation, a number of double-sided items were fielded or tested. Some had a spring-summer pattern on one side and a autumn/snow pattern on the other. Jungle/desert and green-dominant/brown-dominant were also tried.
The needs for the different patterns were thus either separated by season or by geography. As far as I know, no double-sided garments based on patterns for differing illumination levels have been tried, which is a shame.

Camouflage Patterns

For camouflage patterns for illuminated areas there are a number of options. Some of the patterns designed for desert use may prove useful in a wider range of environments. Make sure the pattern has sufficient element-size and contrast to disrupt shape and outline. Off the shelf, “tropentarn” seems to work well, although I would wish for a grey rather than green in the pattern.
Tropentarn Camouflage
Some urban patterns are good, although some use too much white or are too greyscale and could use some browns and tans.
Some newer patterns such as multicam use lots of colours and small elements, resulting in garments that appear a single colour beyond a few metres. This very much depends on the material and print. I have seen some camouflaged gaiters in these patterns that look like they might work. Polycotton trousers and shirts in the same pattern tend to blob-out at a relatively short distance. Generally I would avoid these patterns. They may be no more effective than cheaper single-colour items. Many of these patterns are also too green-dominant for a multi-terrain pattern.
For shadow-dominant terrain, you should probably consider “older” patterns such as US m81 woodland, flecktarn and British DPM. Canadian Cadpat is presumably intended for deep woods, although the green looks a little bright in some examples I have seen. Unfortunately, these patterns vary considerably. Browns can range from natural-looking shades to chocolate. Greens also vary and the lightest shade may be either light-green or a more useful tan. Contrast between elements and overall darkness may also vary.
Many of these patterns have too much green. While green is good for summer woodland and lush jungle, a pattern with more browns and greys would be better for other dark environments and seasons.
You may also encounter fashion/police patterns consisting of blacks and dark greys. These are too dark and lack sufficient contrast between the shades to disrupt the shape.
Ways to improve camouflage
Personal Camo-min

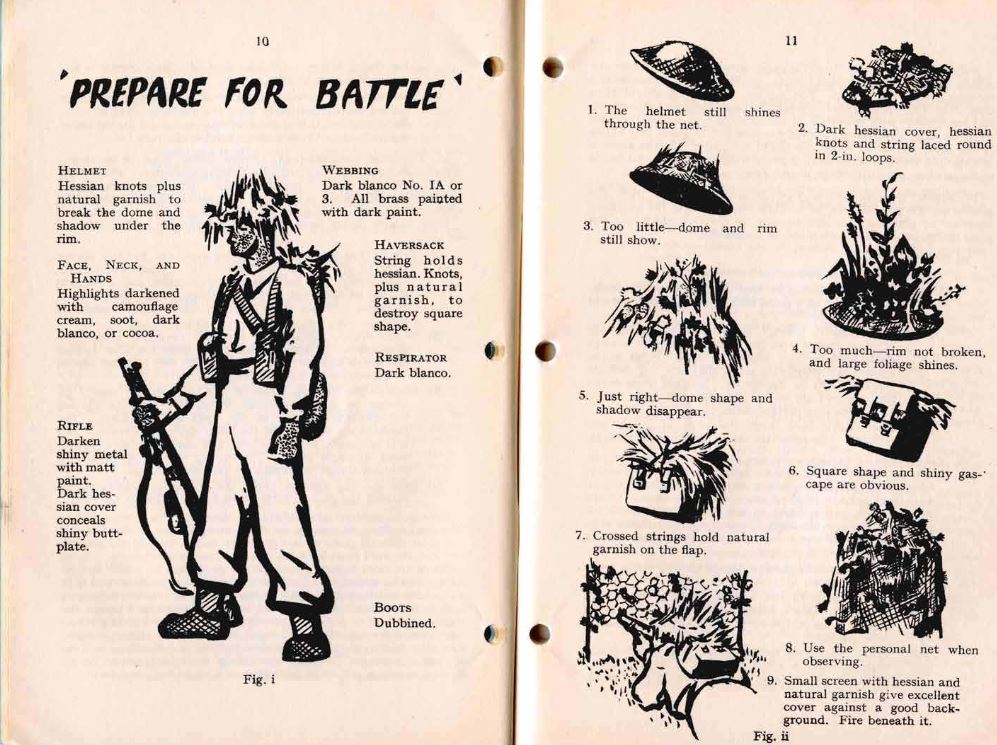
Camouflage without Camouflage

As was stated earlier, you cannot always wear a camouflage pattern. You may not have a garment such as camouflage parka (see below) with you.
How can you become less distinct wearing monotone clothing or “civvies gear”?
The first step is to mix it up! Different items should be different colours or shades. Obviously, what you select should be in neutral and natural colours suitable for your surroundings. Select medium and light shades unless the illumination level requires different.
Whilst you may not be able to wear a camouflage pattern, other patterns may have a disruptive effect, providing they do not use bright or primary colours. Some garments have pockets, collars or panels in contrasting colours, which may break up the shape.
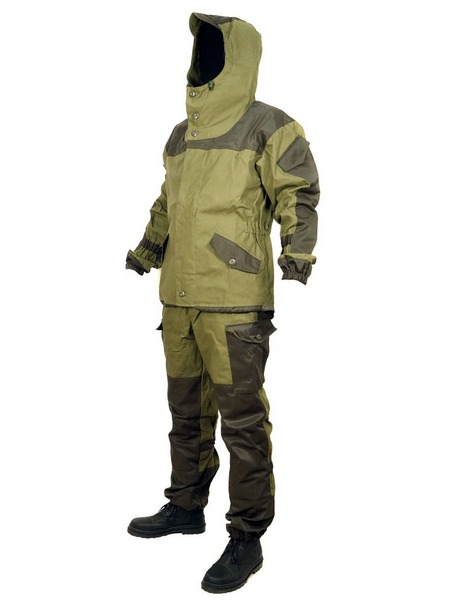
Below is an example of the Russian Gorka wind-proof outfit. Some of these use camouflage, but they are also used in unpatterned cloth. Note how the two different shades and hues of neutral coloured panels break up the basic human shape.
Gorka two-tone suit
You probably know that several thin layers of clothing will keep you warmer than a single thick garment. You can also regulate your insulation more easily by removing layers. What many people do not appreciate is that a layered clothing system can be used to change your appearance and for camouflage.
For example, on the street you may be wearing a light-tan hoodie over a dark-grey bomber jacket. If you move into a darker area, you may move the bomber jacket to being your outer layer.
More layers often means more pockets. Thus you can carry a spare scarf or more than one hat, letting you further change your appearance.
Some hoodies or jackets are reversible. Generally I think you are better off with several thin non-reversible garments. They will cost you less and offer you more options.
If your garment is lined, ensure the lining is a neutral and natural colour too.
There is another advantage of having a wardrobe that is mainly neutral colours. Neutral colours go with just about anything. Most suggestions for a capsule wardrobe are based on having a versatile selection of garments in neutral colours.

Face and Hands

When James Bond wants to skulk around at night, he wears a black polo-neck. He never bothers to cover his face nor hands. He must leave a lot of fingerprints!
There is little point using camouflage if you do not cover your face and hands. Irrespective of your skin-shade, human skin can reflect. Hidden troops are often detected from the air since someone always has to look up at the spotter aircraft. Even at several thousand feet, an uncovered human face pops out and cries “Here we are!”.
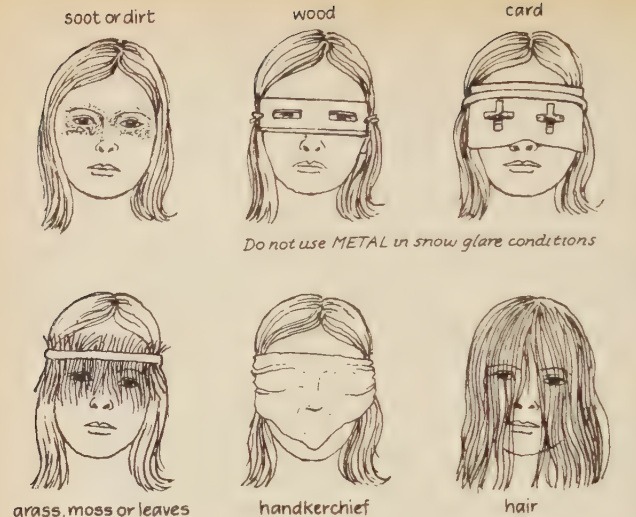
Skin can be darkened and matted down by various means. Do not overlook local resources such as dirt, soot and soil. These do nothing to conceal your hair. Face-paint or dirt are also difficult to remove easily if you want to later appear innocuous.
You should carry suitable head and face coverings. A full-face balaclava/ski mask in a medium to dark shade of grey or brown would seem a good choice. However, some cops have been know to label these “ninja masks” and treat their possession as intent if they feel inclined.
Various face and head coverings can be constructed by combinations of suitably coloured and patterned bandannas, neck gaiters, scarves and knit-caps.
Gloves will be needed, and of a suitable shade and colour. Olive meraklon glove liners are a good start. Fingerless leather gloves (aka “recondo gloves”) are worth considering in milder climates. They provide some protection to the hands when climbing or crawling, so you may be more inclined to “go low” when needed. They can be found in tan-brown, or you can cut down old gloves that are surplus to requirements.

The Lower Body

There is no reason why your lower body has to wear a camouflage pattern that matches that of the upper body. The legs are a different shape to the torso and larger than the arms, so may need a different pattern to disrupt their identifiable shape. Using a different pattern for the legs may help break-up your overall recognisable human shape.
How well the concept of countershading can be applied to the human form probably warrants further investigation. Having your trousers lighter than your upper body is worth considering.
Desert patterns are suitable for trousers. UCP/ACU might also be worth trying for leg camouflage.
If we are considering monotone garments, our choices are probably various neutral tones of light-blues, greens, tans and greys.
Many style guides for capsule wardrobes recommend trousers that are lighter than the jacket.
Personally, I am wary of light-blue outside urban or winter environments. I actually don't own any jeans, wearing cargo trousers instead. Much of my EDC is in the pockets,
Greens are good for many rural settings, but may stand-out a little more than some other colours in urban areas. Some shades of green will stand-out in rural areas. Even neutral shades of green are less common in certain rural areas or seasons that one might expect.
Tans and greys are your most versatile choices for monotones. Tans and browns have the advantage that mud does not show up so much on them. On the other hand, the contrast of mud on grey trousers probably has a disruptive effect that breaks up the leg's shape.
Gaiters should be of a suitable camouflage pattern or neutral and natural colour. Since these are seldom worn in town, bows of textilage can be added to break up the shape. Ensure any materials used for textilage will not soak-up water.
Langdon-Davis had a lot to say about the distinctive appearance of black army boots. Footwear should be natural and neutral colours and matt finish when possible.
Black socks are supposed to make your legs look longer. I am not sure that works without black shoes and dark trousers. I generally wear boots so the socks are not visible.
Update: Recently I attended a funeral and noticed my boot tops were visible when seated, at least when wearing my suit trousers. Own at least one long pair of black socks for formal occasions. 
In town I often wear white cotton sport socks since they are cheaply available in quantity. In the field, spare socks may be used as extra carrying pouches tied to the outside of a pack. These should be neutral and natural colours.

Camouflaging Gear

The institutional military mind likes uniform, regular and symmetrical.
This may be part of the reason why personal camouflage has waxed and waned as a priority for soldiers.
Improving the camouflage of an item becomes unpopular when the additions must be stripped off for every parade or inspection. If you are outside of the military, then such restrictions will not limit you.
Previous blogs have discussed methods to improve the camouflage of your backpack. Similar methods can be applied to a chest-rig, contributing to the camouflage of your torso. Base colour for a chest-rig should be light or a desert pattern, since this area will often be shaded.

Camouflage Smock

A useful technique is to have a “camo-smock”. You put it on when you need a camouflage pattern. Roll it up and carry it when you want to appear non-military. You can carry more than one, and wear the most appropriate for the conditions.
Your bug-out outfit should include an item that can be used as a camo-smock.
My main camouflage item is a German Tropentarn desert-parka. Get this as big as possible so that it can form a camouflaged outermost layer over anything you may be wearing. There is a nice liner for it that makes it into a nice cold weather coat.
Without the liner, it is unlined so can be worn for camouflage in relatively hot weather. There are vent zips under the arms.
Being a parka, it comes down to mid-thigh so will fit over anything I might wear under it and partially conceals my legs and body shape.
Sleeves are long enough to conceal my hands and keep the wind and rain off them.
If this is a “field only” item, add some bows of textilage to the sleeves and shoulders.
How to add camoflage bows of textilage
The pockets of the smock/parka include items that can be used camouflage my hands, neck, face and head. Little point in camouflaging yourself without covering your extremities!
For darker conditions, I have a several metres of camouflaged scrimm that can be worn over the parka like a poncho. Bows of suitably covered material or scraps of camouflage cloth have been tied to the scrimm.
Categories
Phillosoph

Tools for Wafer Locks

Decades ago, someone got locked out of their desk. My name was volunteered as “someone who knows about that sort of thing”. Not sure what that actually says about how my colleagues thought of me!
I had never actually picked a lock at the time, but I had read about how it was done so was game to give it a go. I gathered a selection of screwdrivers, paperclips and small allen keys and set off to see what I could do.
My first experimental jiggle of the lock caused the entire plug to separate from the lock. I used a long screwdriver to turn the catch at the back of the lock and the desk was opened.
This doesn't really count as my first lock picking, but it was a useful experience. A couple of years ago the plug of the front door did the same thing. I didn't have a long screwdriver, but the metal/nail file of my Swiss Army Knife was long enough to reach the back of the lock and open the door.
The reason this story has come to mind is that recently I was once again asked to use my knowledge in an official capacity. An important item was locked in a drawer and the key-holder was home sick. I was asked to get the item, no matter what damage was incurred by the cabinet.
Naturally, I reached for my EDC picks, not having any other tools available. Much to my annoyance, my bogotas and snake-rake had no effect. No feedback from the lock, and I could not feel any pins moving. I managed to open the cabinet by levering the top with a screwdriver. It got the job done with surprisingly little damage.
Personally, I was a little miffed thatI had been unable to pick the lock. On the other hand, I had gained considerable kudos from my colleague and manager that I had managed to retrieve the vital item. A nice example of the positive uses of entry techniques?
The challenge and mystery of this lock remained. Was I simply having an “off-day”? I have done little picking recently, and what little I have done is with familiar locks. The next day I tried by skeleton keys on the lock, suspecting it might be a warded design.

Know Your Enemy

With my colleague recovered, I asked to see the actual key. The lock is a wafer lock, the key with teeth on either side.
I have never knowingly picked a wafer lock. I suspect a couple of locks I have successfully raked have been wafers. General opinion seems to be wafers can be picked the same way as pin-tumbler locks. They supposedly have lower manufacturing tolerances, so should be easier. I have even seen them dismissed as “pickable by paperclips” or as obsolete (although still commonly used).
None of this made me feel any better about being beaten by this lock. When I had the chance, I would try and pick this lock again, and try some of the other tools I have acquired.
As chance would have it, the video channel of ukbumpkeys ran an item on the KLOM Wafer Rake kit, which is available at a very reasonable price. This has just arrived today and is very nice. This has a turning tool, 14 double-sided rakes and a fifteenth tool that looks like a half-diamond. The turning tool has a coated handle and the other tools each have a plastic grip. The tools can be used with the turning tool or on their own like jiggler keys.
KLOM Wafer Rakes
I will let you know how they work on the wafer lock.

Gathering My Forces

While I was enjoying my morning coffee I was looking at other potential solutions to this lock. Several years back I purchased a set of jiggler keys that I had found virtually no use for. What is not made clear on many sites is that jiggler keys are mainly intended for use on wafer locks. Other keyway types tend to include wards that prevent them entering, or worse still, prevent them being removed after.
The cabinet wafer lock is double-sided, which suggested that a full snowman pick might be useful. I had forgotten about it, but my first cheap Chinese lock pick set included a full snowman. (My Serentiy Plus kit included a half-snowman that I had ground down from a full double-ball rake)
Some lock pickers list snake-rakes as their go-to tool for wafer locks. I was tempted by this Rytan Rp-14 tool, but alas, horrendous overcharging  for international postage!
Rytan RP-14

Buyer Beware!

While looking for other ideas, my search engine threw up some surprising results.
One item, described as a “40-piece lock picking set” has the following illustration:
Mystery lock pick sets
Absolutely no attempt to show or describe what is inside the cases! The closest you get is this photo:
Not a useful photo of a lock pick set
This shows the ends of the picks, but not the ends most lock pickers would be interested in!
Even more worrying was that searching for lock picking kits threw up these as options:
Not lock picks
Lock picks barely included
Most of the tools shown in these photos are for key-removal. Admittedly, the description does mention that the set has key-removal tools, but it also mentions lock picks, of which their appear to be none. Just to add to confusion, the set of key-removal tools includes a training padlock and set of turning tools.
The kit in the second photo does include some lock picks, although they are hidden inside the credit-card shaped container. I have several of these credit card kits, and they tend to be variable. The first set that I brought from a UK supplier is actually very nice. Other sets I have since acquired are of lower quality, being poorly finished or made from thick (yet surprisingly tough!) steel. They can be nice picks if you are prepared to put in the time to grind and polish them, but a newcomer to lock picking may not know this.
I have to wonder how many would-be lock pickers buy the above kits and waste hours of their time trying to pick with key-removal tools!
Categories
Phillosoph

Morse Code Memory Card

A short blog today, reminiscent of the “free gift”-editions of the comics of my youth.
How likely are you to need Morse code in the modern world? Probably not very much! But as preppers we like to prepare, just in case.
As I have aged, my memory has got demonstrably worse. Also, stress can do odd things to your recall. Therefore it is not a bad thing to have a printed copy of the Morse code, no matter how well you can remember it on a good day.
Morse Code Tree
Morse Code list and Sun Navigation
The Morse code “tree” was taken from here. I like this particular version better than some of the alternates. The tree is useful when translating from Morse code.
The alphabetical list is more useful when converting a message into code. The large and bold print of this version makes it easy to use.
Also included is an aide memoir for navigating by the sun with a watch. While I have figured direction by the sun and time on several occasions, I can seldom remember the modifications for the hemispheres.
I suggest you print both images out, paste them back to back and laminate them.
They can be sized with art programs such as GIMP. I made mine 7 cm high so the laminated card could fit inside the red pouch that is part of my EDC.
EDC Pouch Contents
The card could also be used as a fan to nurture the beginnings of a camp fire.
As a bonus, a Morse code table using peaks rather than dots and dashes.Mountain Morse Code

Categories
Phillosoph

SERE Pin and EDC Bypass Knife

I have been promising to write about the SERE pin for some time.
SERE Pin and EDC Bypass Knife

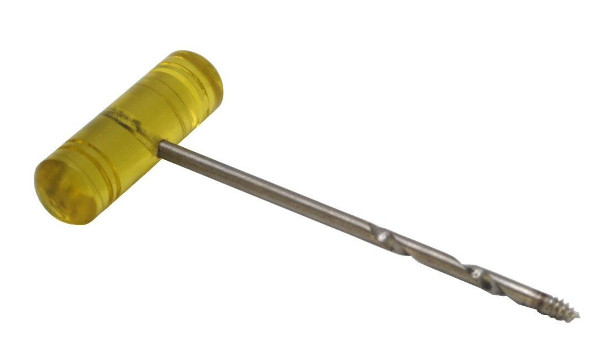
SERE Pin

The SERE Pin is an implement for escape and evasion applications. It is very easily concealed. You can push the shaft down the seam of a garment, for example.
The SERE Pin has four applications:
• It acts like a key to lift the pawl of handcuffs.
• It can disengage the double lock mechanism of handcuffs.
• It can serve as a shank to separate the teeth of a ratchet mechanism of handcuffs.
• It can be used to shim or lift the pawl of a zip/cable tie.Handcuff Internal Mechanism

For an explanation of these terms I will direct you to my older posts on double-locking and shimming.
To disengage the double-lock or handcuffs, use the long, curved end of the tool. In the illustration, one would introduce it at around the 4:30 position on the keyhole and use it to push the double-locking mechanism (the red part in the image) upward.
Once the double lock is disengaged, the pawl can be shimmed or lifted.
To lift the pawl, insert the short hooked end of the SERE pin at around the 11 o'clock position and use it to lift the lock bar (green component) inward.
To shim, insert the long part of the tool between the teeth. You may need to tighten the bracelet a little to achieve this. If the shim becomes caught you may have to straighten it a little.
SERE pins are easily fabricated from bobby pins. Do not make the short hook too long. I recommend rounding off the corners and bevelling the tips.

EDC Bypass Knife

The second item on today’s “show and tell” is a work in progress.
After I wrote yesterday’s blog, I set about creating a bypass knife that was compatible with my EDC kit.
Basic design requirement is that it should fit within the pouch that carries part of my EDC. Whether this is where I will carry it, I have yet to decide.
EDC Pouch Contents
As a lock picker, I acquire any windscreen-wiper inserts whenever I come across them. For this project I selected a narrow one that already ended in a partial point at one end. Width is about 3 mm.
The point was tapered further with a hand-file and a Dremel tool. One side was left reasonably straight, the other tapered more so the point is offset.
Once the point was formed, the end of the insert was cut 10 cm from its end. The butt end was rounded and smoothed.
The point was smoothed and polished with several grades of glass-paper.
It is possible that the point needs to be made more acute. The only bypass knife I have is a cheap Chinese one. My tool is already better finished than that! Also, I lack any bypass-knife-vulnerable locks to try it out on.
How often will I encounter a vulnerable lock I might need to use the tool on? I don’t know. This did get me thinking about other functions it may have. (Using it as a nail-cleaner probably shouldn’t count!)
The butt end may serve as a skeleton key. The width is virtually the same as the shanks of my bunch of skeleton keys. It has already opened a small warded luggage lock I have.
The pointed end could be used on the pawl of a zip-tie.
I can also confirm that the tool makes an effective handcuff shim. Worked better than I expected, if I am honest. It might be prudent to polish and smooth the rest of the shaft for such applications.
Categories
Phillosoph

EDC Lock Picking and Bypass Kits

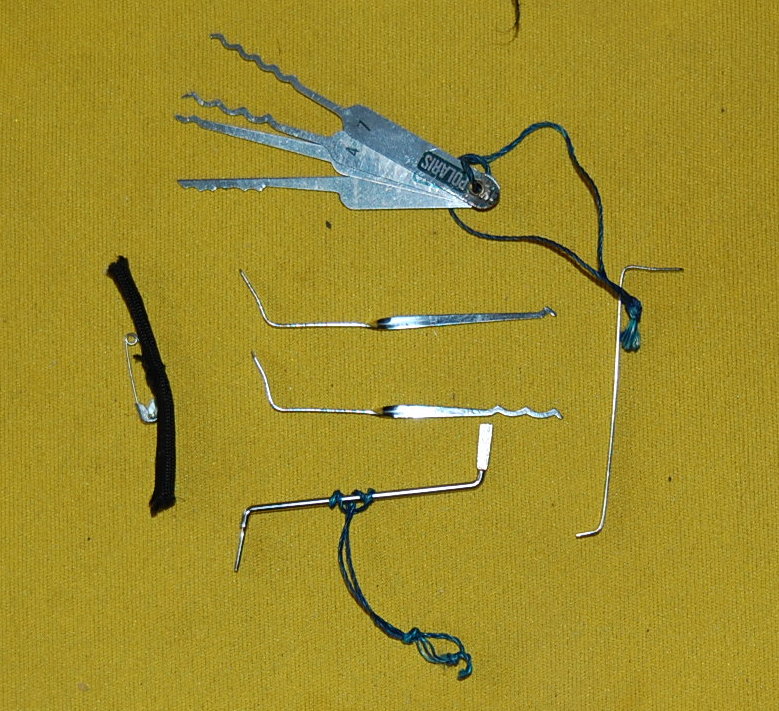
As regular readers will know, the lock picking contingent of my EDC is rather small:
— A pair of Bogotas.
— A small snake rake.
— A double-ended turning tool.
Bogota Lock Picks
Other items, such as the three-inch pocket prybar, may have applications in bypassing locks. When the barrel of my doorlock came out with my key, it was the long file on my Swiss Army Knife that was needed to open the door.
Today I will bring you two interesting videos on lock picking and bypass tools for EDC. Credit to Dean for directing me to the first one.
While I have done a bit of lock picking, I don’t have as much experience with bypass techniques as I might wish. When the zombies come, I will be grabbing my kukri, crowbar and brick hammer. Those will bypass a few obstacles!
Some thoughts on the suggestions:
— The plastic shim seems like a very prudent choice.
— I have never used them, but padlock shims might be worth having. I seem to recall padlock shims can be cut from soda or beer can material. The edges of these will probably be surprisingly sharp, so take care.
— I have a number of bobby pins in my general EDC pouch. These are in a bag with some paper clips and about a dozen safety pins. A few weeks back some of these safety pins were used to repair my girlfriend’s jeans.
— I have some comb-picks, but have not been able to open any locks with them. The same can be said of my set of jiggler keys, although I suspect the latter are intended for car doors since they are too large for all my locks. Most keyways I encounter have kinks in them, so the straight combs and jigglers would be difficult to insert or move within them. I think my Bogottas and snake are a more effective and versatile option.
— Similarly, my set of skeleton keys stays at home since large warded locks seem to be relatively uncommon. If long enough, a bypass knife may serve instead. The small warded locks often used on luggage can be popped by a variety of implements, including sturdy picks like the Bogotas.
Bunch of Skeleton Keys and Decoder
— My bunch of skeleton keys includes a decoder I made from a cut-out shape of soda can (top). I do not think I have tried it out, since I seldom encounter combination locks. There are ways to crack combination padlocks without a decoder tool, and I have used these at least once.
— A bypass knife seems worth having. My Serenity Plus kit includes one that came with a set of my Chinese picks. I cannot recall if I have ever opened anything with it. Most of my padlocks are not vulnerable to this technique. I plan to try making a bypass knife that will fit in my EDC.
Mini-Slim-Jim Dimensions
— The mini-slim-jim is interesting. Obviously this is too short to be used to open car doors. That is probably not a drawback given the number of vehicle vulnerable to slim-jims is probably decreasing every year. The mini-slim-jim is actually intended to bypass the latches of doors. The large notch on the tool is probably a legacy of its ancestry. Sparrows makes several sizes of slim-jim. They also make the “Hall Pass”, which is a credit-card-shaped tool in either metal or plastic. Southern Specialities offers their own design of tool for latches, the “Multipass”.
Sparrow's Hall Pass Southern Specialities Multipass Sparrow's Orion Hall Pass
I have tried making something similar out of an old plastic card. I didn’t have any success opening a door, but at the time I had yet to locate the correct dimensions. I am also now more familiar with the manual technique needed, so it might work better in future.
I have, however, managed to pop a latch using a TOK turning tool. This experiment seemed to indicate that a traveller hook may be a better way to attack a latch than a slim-jim. Being able to rotate the tool would have advantages. This is what the bent piece of music wire in the first video is intended for.
Sparrow's Traveller Hooks
I may try to fabricate a traveller hook that can fit in my EDC. Sparrows sell two sizes of traveller hook (also called traveller’s, travellers, shrum tool or travelling hooks). Auto-stores sell something similar as “O-ring pullers”. Skewers, ejector pins and music/piano wire can be used to fabricate traveller hooks. For reference, the Sparrow hooks use shanks 2.6mm (0.1 inch) thick.
Latches can sometimes be opened by threading a cord or wire behind them.
Categories
Phillosoph

Adding a Pin to a Swiss Army Knife

The tools on a Swiss Army Knife sometimes end up performing tasks you never imagined! A few months back I went to unlock my front door, only to have the entire barrel of the lock detach and come away with the key! The metal file/saw proved to be ideal for reaching to the back of the lock and turning the bolt.
My girlfriend’s son had asked me why I always carry my SAK. Exactly for times like the above!

The Early Years

For the first few years of my early adulthood I carried a Chinese-made version of a Swiss Army Knife. I vaguely recall there were actually two, although I do not recall why I had to replace the first. To be fair, these were quite nice knives, with a good assortment of tools. The only problem I actually recall is a time when the corkscrew straightened out as I attempted to open a bottle of wine.
Back in those days, they were all I could afford, and they served well.
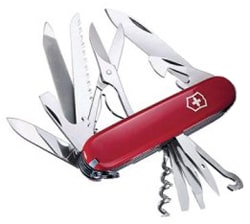
Once I had some money, I invested in a genuine Victorinox Swiss Army Knife (aka SAK).

Victorinox Champion

The model I selected was called the “Champion”, not to be confused with the “SwissChamp” that had become available a few years previously. The longer named Champion was less bulky than the Champ, lacking the pliers.
Swiss Army Champion
The seven-layer Champion was about the ideal maximum size for a SAK, and had a really useful selection of tools.
Sadly, my Champion was lost in an unfortunate chain of events that do not need to be told here. Even worse, the Champion had been discontinued, so I could not buy a replacement.
There was no ebay back then, so little chance of locating a second-hand one.
All the features of a Champion

Rise of the Ranger

As a replacement of the Champion, I selected a Ranger model. The most obvious difference between the two was the Ranger lacked a magnifying glass, fish scaler and Phillips screwdriver:
Swiss Army Ranger
• The Phillips screwdriver had proved useful at times.
• I don’t recall ever using the fish scaler/hook disgorger, at least not for its intended purpose.
• I didn’t make much used of the magnifier either, although now that I am older and more decrepit, I suspect it might prove more useful. As an aside, the magnifying glass on the Champion was very cleverly thought out. Its focal length was the same as the magnifying glasses’ height. In other word, if you placed your knife on a map, the detail under the magnifying glass would be in focus. This may have been the case for other models that had the magnifying glass. I wonder if the same applies to the newer pattern of magnifier?
Since I wear glasses, an early addition I made to both the Champion and the later Ranger was to add the mini-screwdriver that fits into the corkscrew. Originally this tool was only included with the SwissChamp. They were sold as spares, however, so I acquired one. This has proved very useful over the years, often coming to the rescue of companions rather than myself. Half a lifetime ago I repaired the glasses of a grateful Swedish beauty in old Jerusalem.
Corkscrew Mini-tools
Victorinox now offer three alternate tools, each with a different coloured end.
I have carried the Ranger for many decades now. The lack of Phillips screwdriver is compensated for by the Leatherman Squirt mini-tool I also carry. If you are in the market for a medium-size (91mm) model SAK, the Ranger must be one of the best options. The Huntsman model is a good choice, but I have often found uses for the file/metal saw of the Ranger.

Swiss Army Knife Wiki

Recently I came across the Swiss Army Knife Wiki. This site is worth a look around.
Some interesting information on how to use the various tools, and some applications for them you may not have known. My Ranger had a Phillips screwdriver all along and I never knew! I discovered that the tip of the can-opener is actually intended for use with Phillips screws as well as slot.
The tip of the file/metal saw can also be used on some Phillips or Pozidriv screws.

Adding a Pin to a SAK

The original reason I have been thinking about Swiss Army Knives recently is that I came across a blog post discussing the pin carried in the handle scales.
Below is a video on possible uses for “needles” [sic pins]. The channel has many other videos on various features of Swiss Army Knives.


Even before I watched the above video, I was thinking about adding a pin to my Ranger. I own a number of very fine drill bits, so creating a channel for a pin would not be too difficult. I could probably add a pair.
I have lots of cheap pins. I decided to try and find the pins actually used, since they were probably better quality and the head looked a little wider.
A number of ebay vendors offered replacement pins for Swiss Army Knives. The one I chose got my money since they offered another idea. Included with the five pins was a small magnet. This magnet was sized to fit in the can-opener. With such a magnet, a pin could be magnetized as a compass needle.
The bits arrived this morning.

Fitting the Magnet and Pin

The 5.8mm magnet was a perfect fit for the can-opener. The vendor included the advice that the tool next to the can-opener usually needs to be opened before closing the can-opener with the magnet stored in it. If this is not so, the magnet tends to pull out of position, attracted by the neighboring steel. Although stainless steel, the blades of a Swiss Army Knife are magnetic.
Magnet in Can-Opener
Finding a drill bit small enough for the pin was not a problem. Problem was most were too short to drill a channel as long as the pin. The other problem was my Ranger has solid scales. It lacks the air-spaces found on some newer and alternate scales.
Drilling a channel deep enough and straight enough proved problematic, and inevitably the very fine drill curved and the channel exited on the inner side of scale. This actually proved to be fortuitous, allowing me to file a notch on the inner side for end of the pin to rest in.
I settled for adding just one pin for now. Most of the alternate positions for a pin are obstructed by the rivets the scales snap on to.
Ranger Knife Modified
My Ranger with pin added (blue arrow) and notches on scale (green arrows). If the balloon goes up, I am ready!

Other Modifications

Incidentally, the back scale of my Ranger has two additional non-standard features.
One is a chip, where an idiot friend used my knife as a bottle-opener without using the bottle-opener! I could fix this damage, but it is a useful reminder to be more cautious of whom I trust.
More useful are a series of three notches. The second is five millimetres from the first, the third 57 mm for the first.
The first and third notch are used to draw a circle of 57 mm radius. The first and second are used to mark the circumference in five millimetre increments. Each millimetre of the circumference closely approximates one degree. Such a compass face can be used with various improvised modes of navigation.
Another addition I have made is to add a needle and thread. Take about a metre of invisible thread and pass one end through the eye of a needle. Tie the ends together and then wrap the thread around the needle. Push it down beneath the saw blade. It should be snug enough that it will not drop out if you invert the knife with the saw open. I used the metal saw rather than the woodsaw, since this is likely to see less use.
While you are at it, wax your woodsaw.
Categories
Phillosoph

The Soft-Core Bag

Today I am going to introduce what I call my “soft-core bag”. This is not a “bug-out bag”, although it could be included in the contents of one.
I have a number of bags and rucksacs, and there are certain items that I would invariably want in one if I was carrying it.
Stocking each pack with necessary items is not economically practical, however.
Perhaps, I thought, I should have a box containing the necessary items and potential alternatives. This was part of the solution, but I quickly realized many items could be packed together so they could easily be grabbed in one go.
I drew on the lists given in the previous post to select the current loadout.

  • Top left: A small first aid kit. This supplements the items I carry in my skin-level EDC.
  • Directly below the first aid kit in a dark brown camouflage bag is a rain poncho.
  • The white plastic bag beside the poncho contains a toilet roll. This has subsequently been replaced with a clear ziploc bag.
  • Middle top can be seen a bag of boiled sweets and a pair of warm gloves. These are sitting on top of a dark green all-weather (AW) blanket. You can see some of the shoelaces that are tied to the grommets of this. I intend to add a pair of silver space blankets too.
  • Top right, a red and black shemagh. This is a spare/additional shemagh, since I am often wearing one these days.
  • Bottom centre is my Advantage-camouflaged boonie hat.
  • Sitting on the boonie hat is a plastic bag carrying a small fire kit. This has two butane lighters, two nightlights, a 35mm film container filled with Vaseline-soaked cotton wool and a Fresnel lens.
  • Below the fire kit and to the left is an ACU-patterned headover which can serve various roles, including as warm headgear.
  • Bottom right is a one-litre Playtpus waterbottle. Sitting on it are a shoelace, hank of general purpose string, hank of green paracord and some braided fishing line wrapped around a piece of plastic (yoghurt carton) or a small tube.
  • Not shown: two supermarket carrier bags. I wear photochromic spectacles. If you do not, a pair of cheap sunglasses may be a prudent addition.

The whole collection packs into a draw-cord bag, as shown. Note snap-link added to one carrying cord.
This bag is lined with another plastic bag to provide better water resistance. Everything except the AW blanket, space blankets, shopping bags, poncho and water-bottle fit inside the waterproof liner bag.
The headover is folded into a pouch and used to contain some of the smaller items. This pouch, in turn, is placed inside the boonie hat. The folded shemagh is place with this.
Most of the pack contents are soft and crushable so no great genius at packing is really needed. Put the blanket in first and add the plastic bag of other contents. Put your water-bottle away from your back and ensure your poncho rides near the top of your bag.
Packed, but without water, the soft-core bag weighs about 1.3 kg. The volume of water I will carry and which water-bottle I will carry will vary with climate and anticipated conditions.
The soft-core pack is easily stuffed into a larger bag, immediately adding a collection of very useful items. On its own, it is a good bag to have for trips where you do not want to be bothered by a bag. It is light and low-density, and makes a pretty good pillow.
A quick glance inside the first aid kit. Items in this kit are consumed in preference to those in the skin-level EDC. Vaseline is good for chapped lips and other ailments.
The soft-core bag probably has more cordage than it needs, but I had some hanks already made up. This is a nice example of paracord carried using hojo-jitsu configuration.