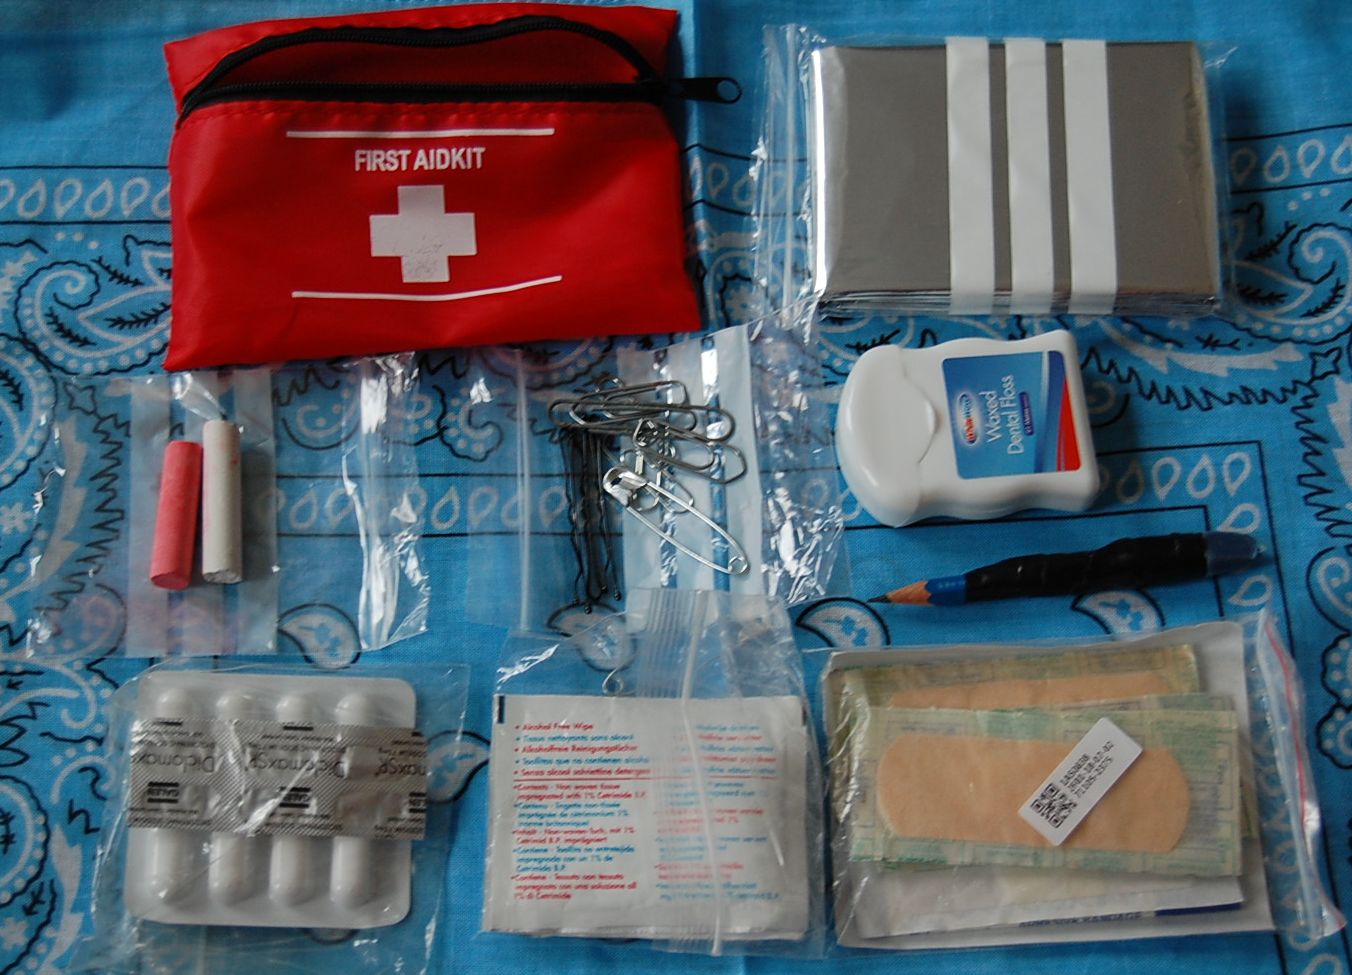
Categories
Phillosoph

Beyond the Pail: Buckets for Survival

Why a bucket?
Recently I blogged on the topic of dish-washing. Today, I want you to imagine that you are somewhere far from civilized plumbing. You may want to wash your cookware, clothing or you may want to wash yourself. What do you do?
Some of you, I suspect, may suggest that you head for the nearest body of water and wash there. We will assume you have been prudent and lucky enough to have placed your camp within an easy travel distance of water. Not too close, to limit hassles from insects.
Washing yourself or your dishes in a body of water is not ideal. Even in parts of the world where that water is not inhabited by crocodiles, alligators, mosquitoes, schistosomiasis or similar.
The problem is that your activity generates what is known as “greywater” or “sullage”. Dirty water, soap or detergent, and also suspended fats, grease and food particles.
Even if you use biodegradable products, biodegradation takes time! While this process is on-going, your greywater may have various effects on the body of water, including changes in pH, viscosity and changes in oxygen level.
A much better approach is to cast your greywater on to the soil, some distance from the nearest body of water. The creatures of the soil can deal with greywater much better than those of the water, and any effects are more localized. Choose ground that is absorbent, and do not use the same place on consecutive days.
OK, so you have seen the wisdom of washing some distance from the water source. Just how do you get the water to wash with to the desired location?
Your water bottle or bladder probably only holds a litre or three. You have probably treated the contents to make them safe for drinking, so using this for washing is a little wasteful. Your canteen cup probably only holds half a litre or so. You may have larger cooking pans, but for efficiency these will only be a couple or litres capacity or less. Many modern designs do not have handles suited to carrying a couple of kilos of liquid any distance.
You could fabricate a water carrier from local materials. Kephart has a whole chapter on making utensils from bark. Such crafts take time, and suitable materials will not be available in every environment or season.
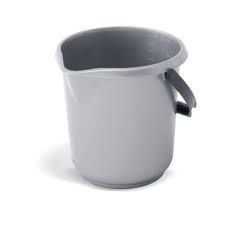
Would it not have been useful if you had brought a plastic bucket with you?
Grey Plastic Bucket

Buckets for Preppers

I recall being in a bar decades ago. I had just rented a new place, actually my first real flat with multiple rooms I did not have to share with anyone. I was chatting to a young woman and told her: “I have brought a plastic bucket and bowl, so I am all set!” Many years and many locations later, that same bucket and bowl are still with me. Used the bowl just a few weeks back to soak the grill of my halogen oven.
Some will scoff! “I'm a backpacker! I go ultra-light! There is no room for a bucket!”.
Empty buckets weight very little. Being mass-produced, they cost very little too! Shop around!
If you pack the bucket full of foodstuffs and other stores, it will take up very little room in your pack. It actually provides them with some protection. Oddly, some larger capacity buckets pack better than their smaller cousins. More on capacity later.
Camouflage 5 litre bucket

What Use Is a Bucket?

What uses can we put a bucket to? We have already mentioned carrying water for washing, dish-washing and laundry.
• A friend of mine gave me a folding camping sink that holds about ten litres. Not a priority for the bug-out bag, but he thought it might be useful for more recreational camping trips. I now look at this item and wonder just how I was supposed to fill it. Ten litres of water is around 22 pounds! A filled, folding sink is not something you want to carry from a standpipe. I would have needed a bulk-water carrier, or a bucket.
If you have tried the techniques in my dish-washing article, you will know that you do not need a large capacity vessel to wash most items.
You can use a small bowl or bucket of water to wash a large diameter item such as a plate, frying pan or yourself!
Use a cup, or your hand, as a water ladle to wet and rinse. The dirty water does not go back into the vessel, so it is cleaner and more efficient.
I doubt that folding sink will ever see use. I will find a bucket that fits into my pack. A bucket will probably be more durable than a sink/bowl designed to fold.
• Read through a survival manual or book on woodcraft, and you will probably come across references to soaking things to make them more pliable or more edible. You cannot fit much in a mess-tin!
• Cannot reach the water source? Bucket on a rope may solve that problem.
• Let the water come to you! Place your bucket to collect rainwater.
• Successful day fishing or squirrel shooting? Carry your windfall back to camp in a bucket.
• Find a patch of berries? Your bucket will hold as much as you can carry.
As a quick aside: In one of Ray Mears shows one of his local hosts had an interesting berry-picking technique. She simply swiped the bush with her basket. Enough berries apparently detached and ended up in the basket for this to be a considerable labour-saving. Something to experiment with in berry season!
• An empty bucket can be used as a drum to guide companions back to camp, or just let them know dinner is nearly ready.
• A bucket can be used to dig through soft snow or sand.
• A up-turned bucket makes a useful stool and (if sturdy enough) can be used as a step.
• If you have trouble squatting when attending to “calls of nature” an up-turned bucket can be a useful support while you hang your nether-regions over a “cat-hole”.
• And if it is really nasty outside the shelter, as a vase de nuit.
Any party of more than a couple of individuals should include a bucket in their equipment.
Smaller parties and solo travellers should give them serious consideration.
Any vehicle, be it boat, SUV or APC, should find room for a bucket. The interior of the bucket can be used to store other useful items. In an emergency, grab the bucket and be instantly equipped with useful assets.
Some companies even offer 72-hour kits packed in buckets.

Green ten litre bucket

Choosing a Bucket

For backpackers, cyclists and lightweight travellers, the bucket chosen needs some consideration.
Obviously, we want a bucket that will fit easily into our pack, with little wasted space.
There is little point in my recommending a bucket of a certain capacity. In my kitchen I have two buckets, not counting one for floor-washing. The five litre bucket is too narrow at the bottom. It will fit in a daysack, but it is space-inefficient. The three (Imperial) gallon bucket is about twice the capacity (13.6 litres) but is too wide at the top for even my largest rucksacks.
The interior dimensions of your pack will be more significant than bucket capacity. Taking your pack down to the hardware store and trying some buckets for size is not that bad an idea. Remember the bucket will be riding above your softer pack items, so perhaps put a sleeping bag and a realistic load of clothing in the pack before you hit the hardware store.
Depending on intended role, you may want bright colours or natural and neutral. The outside of a bucket can easily be spray-painted.
Cylindrical buckets, with the bottom of similar diameter to the top, may be a better choice than more conventional tapered designs. Between five and ten litre size may be a good option for these.
If you decide to buy a bucket on-line, bear in mind that perfectly suitable items may be available under various other names, such as “paint kettle” or “storage tub”. There will be bowls and various other containers that can be made into buckets with just the simple addition of a handle.
Categories
Phillosoph

Morse Code Memory Card

A short blog today, reminiscent of the “free gift”-editions of the comics of my youth.
How likely are you to need Morse code in the modern world? Probably not very much! But as preppers we like to prepare, just in case.
As I have aged, my memory has got demonstrably worse. Also, stress can do odd things to your recall. Therefore it is not a bad thing to have a printed copy of the Morse code, no matter how well you can remember it on a good day.
Morse Code Tree
Morse Code list and Sun Navigation
The Morse code “tree” was taken from here. I like this particular version better than some of the alternates. The tree is useful when translating from Morse code.
The alphabetical list is more useful when converting a message into code. The large and bold print of this version makes it easy to use.
Also included is an aide memoir for navigating by the sun with a watch. While I have figured direction by the sun and time on several occasions, I can seldom remember the modifications for the hemispheres.
I suggest you print both images out, paste them back to back and laminate them.
They can be sized with art programs such as GIMP. I made mine 7 cm high so the laminated card could fit inside the red pouch that is part of my EDC.
EDC Pouch Contents
The card could also be used as a fan to nurture the beginnings of a camp fire.
As a bonus, a Morse code table using peaks rather than dots and dashes.Mountain Morse Code

Categories
Phillosoph

Adding a Pin to a Swiss Army Knife

The tools on a Swiss Army Knife sometimes end up performing tasks you never imagined!
A few months back I went to unlock my front door, only to have the entire barrel of the lock detach and come away with the key! The metal file/saw proved to be ideal for reaching to the back of the lock and turning the bolt.
My girlfriend’s son had asked me why I always carry my SAK. Exactly for times like the above!

The Early Years

For the first few years of my early adulthood I carried a Chinese-made version of a Swiss Army Knife. I vaguely recall there were actually two, although I do not recall why I had to replace the first. To be fair, these were quite nice knives, with a good assortment of tools. The only problem I actually recall is a time when the corkscrew straightened out as I attempted to open a bottle of wine.
Back in those days, they were all I could afford, and they served well.
Once I had some money, I invested in a genuine Victorinox Swiss Army Knife (aka SAK).

Victorinox Champion

The model I selected was called the “Champion”, not to be confused with the “SwissChamp” that had become available a few years previously.
The longer named Champion was less bulky than the Champ, lacking the pliers.
Swiss Army Champion
The seven-layer Champion was about the ideal maximum size for a SAK, and had a really useful selection of tools.
Sadly, my Champion was lost in an unfortunate chain of events that do not need to be told here. Even worse, the Champion had been discontinued, so I could not buy a replacement.
There was no ebay back then, so little chance of locating a second-hand one.
All the features of a Champion

Rise of the Ranger

As a replacement of the Champion, I selected a Ranger model. The most obvious difference between the two was the Ranger lacked a magnifying glass, fish scaler and Phillips screwdriver:
Swiss Army Ranger
• The Phillips screwdriver had proved useful at times.
• I don’t recall ever using the fish scaler/hook disgorger, at least not for its intended purpose.
• I didn’t make much used of the magnifier either, although now that I am older and more decrepit, I suspect it might prove more useful.
As an aside, the magnifying glass on the Champion was very cleverly thought out. Its focal length was the same as the magnifying glasses’ height. In other words, if you placed your knife on a map, the detail under the magnifying glass would be in focus. This may have been the case for other models that had the magnifying glass.
I wonder if the same applies to the newer pattern of magnifier?
Since I wear glasses, an early addition I made to both the Champion and the later Ranger was to add the mini-screwdriver that fits into the corkscrew.
Originally this tool was only included with the SwissChamp. They were sold as spares, however, so I acquired one.
This has proved very useful over the years, often coming to the rescue of companions rather than myself. Half a lifetime ago I repaired the glasses of a grateful Swedish beauty in old Jerusalem.
Corkscrew Mini-tools
Victorinox now offer three alternate tools, each with a different coloured end.
I have carried the Ranger for many decades now.
The lack of Phillips screwdriver is compensated for by the Leatherman Squirt mini-tool I also carry. If you are in the market for a medium-size (91mm) model SAK, the Ranger must be one of the best options.
The Huntsman model is a good choice, but I have often found uses for the file/metal saw of the Ranger.

Swiss Army Knife Wiki

Recently I came across the Swiss Army Knife Wiki. This site is worth a look around.
Some interesting information on how to use the various tools, and some applications for them you may not have known.
My Ranger had a Phillips screwdriver all along and I never knew! I discovered that the tip of the can-opener is actually intended for use with Phillips screws as well as slot.
The tip of the file/metal saw can also be used on some Phillips or Pozidriv screws.

Adding a Pin to a SAK

The original reason I have been thinking about Swiss Army Knives recently is that I came across a blog post discussing the pin carried in the handle scales.
Below is a video on possible uses for “needles” [sic pins]. The channel has many other videos on various features of Swiss Army Knives.


Even before I watched the above video, I was thinking about adding a pin to my Ranger.
I own a number of very fine drill bits, so creating a channel for a pin would not be too difficult. I could probably add a pair.
I have lots of cheap pins. I decided to try and find the pins actually used, since they were probably better quality and the head looked a little wider.
A number of ebay vendors offered replacement pins for Swiss Army Knives.
The one I chose got my money since they offered another idea. Included with the five pins was a small magnet.
This magnet was sized to fit in the can-opener. With such a magnet, a pin could be magnetized as a compass needle.
The bits arrived this morning.

Fitting the Magnet and Pin

The 5.8mm magnet was a perfect fit for the can-opener.
The vendor included the advice that the tool next to the can-opener usually needs to be opened before closing the can-opener with the magnet stored in it.
If this is not so, the magnet tends to pull out of position, attracted by the neighboring steel.
Although stainless steel, the blades of a Swiss Army Knife are magnetic.
Magnet in Can-Opener
Finding a drill bit small enough for the pin was not a problem. Problem was most were too short to drill a channel as long as the pin.
The other problem was my Ranger has solid scales. It lacks the air-spaces found on some newer and alternate scales.
Drilling a channel deep enough and straight enough proved problematic, and inevitably the very fine drill curved and the channel exited on the inner side of scale. This actually proved to be fortuitous, allowing me to file a notch on the inner side for end of the pin to rest in.
I settled for adding just one pin for now.
Most of the alternate positions for a pin are obstructed by the rivets the scales snap on to.
Ranger Knife Modified
My Ranger with pin added (blue arrow) and notches on scale (green arrows). If the balloon goes up, I am ready!

Other Modifications

Incidentally, the back scale of my Ranger has two additional non-standard features.
One is a chip, where an idiot friend used my knife as a bottle-opener without using the bottle-opener!
I could fix this damage, but it is a useful reminder to be more cautious of whom I trust.
More useful are a series of three notches. The second is five millimetres from the first, the third 57 mm for the first.
The first and third notch are used to draw a circle of 57 mm radius. The first and second are used to mark the circumference in five millimetre increments. Each millimetre of the circumference closely approximates one degree. Such a compass face can be used with various improvised modes of navigation.
Another addition I have made is to add a needle and thread.
Take about a metre of invisible thread and pass one end through the eye of a needle. Tie the ends together and then wrap the thread around the needle.
Push the threade-wrapped needle down beneath the saw blade. It should be snug enough that it will not drop out if you invert the knife with the saw open.
I used the metal saw rather than the woodsaw, since this is likely to see less use.
While you are at it, wax your woodsaw.
Categories
Phillosoph

EDC Shopping List

The other day I had cause to look in one of my boxes of outdoor gear. Various containers that I thought might prove useful. Items brought out of curiosity or sometimes just for their novelty. Gifts from friends. Some are milestones from my path of understanding.
Most of it I will never use. Either I have acquired better alternatives or my requirements have changed. So much money spent over the years that I could very much use now. Sadly most of this stuff has very little resale value.
If I knew then what I knew now” I could have saved myself so much time and money. This inspired me to think about the idea of a prepper/survival shopping list. If you have just come into the field, what should you be looking to buy first?
Hopefully my article on “Foundation survival kits” has proved a good start. A fire kit, bottle for carrying water and bag of toilet paper will have been easy to acquire. A poncho and liner or blanket will have cost a bit more but probably did not break the bank. You may be saving up for a good survival knife, but have hopefully bought a machete or hatchet to serve in the meantime. 
Most of the items suggested for the foundation are relatively bulky, however. They are “bag” items rather than things you can keep on your person all the time.
If you have a good “skin-level survival EDC” what you can find in your environment or in your pack is a bonus.
The good news is that you can build up a good EDC without a great outlay of cash. My article on skin-level gear mainly listed my personal items.
I have been asked for a more general list, so this might as well be a shopping list. As before, I will concentrate on the items you carry and save a discussion of clothing for another day.
Pocket Knife: This will probably be the most expensive item on this list.
In an emergency, this may be the only knife you have available, so it makes sense to get a good one. That said, as a cash-strapped youth I carried a Chinese-made penknife. It had a really good assortment of tools and the only trouble it ever gave me was a corkscrew straightening out.
With my first full-time pay-cheque, I brought a genuine Swiss Army Knife. In my personal list you will note I also have a mini-Swiss Army Knife (SAK), a Leatherman Squirt and a number of other tools. Some redundancy and backup is always wise.
My preference is a Swiss Army Knife, but many of you will be tempted by full-size multi-pliers/multi-tools. My SAK and Squirt together weigh several ounces less than many full-size multi-pliers, but the choice is yours.
Put a loop of cord on your knife so you can secure it to belts or snap-links when necessary.
If you wear glasses and opt for an SAK, buy the mini-screwdriver that fits in the corkscrew.
Optional is a small sharpening implement. Mine is a small metal card with diamond dust on one side. Small whetstones and other devices are alternatives.
Knives are not designed for prying, especially folding ones. A pocket prybar is a good addition to your EDC.
Lighter: The most basic fire kit is to carry a lighter. Get the type with a wheel. Even if empty, it can still be used to create sparks. Multiple disposable lighters can be brought in budget stores for about a buck.
Optional: Wrap the outside of your lighter with a few inches of duct-tape. Duct-tape is flammable and a small piece may be lit with the lighter and used to get a fire going.
Bandana: Bandanas can also be found for a modest price. Multiple uses. Have one in your trouser pocket.
Space Blanket: These can be found for very reasonable prices, which is good since they are one of the most important survival items that you can carry.
Bulk-buy and place one in your EDC, and one in each bag or outdoor coat you have.
Flashlight: Flashlights can get really expensive, so it may be sometime before you save up for the one you want, especially if you want a tactical, waterproof kubotan that will survive a nuclear attack.
In the meantime, small LED lights such as copies of the Photon II can be found on ebay. Carry one on your keyring. If you wear dog-tags, add one here too.
Whistle: A whistle is another useful addition to your keyring. Budget stores and ebay have these.
If you live or travel where temperatures often drop below zero make sure your whistle is non-metallic. Another useful addition to your dog-tags.
Cordage: Cordage can be put to many uses, but how much for EDC? About two metres/a fathom/an armspan of paracord is probably a good start. Or you can carry a spare pair of long bootlaces.
Buying a hank or roll of paracord is probably prudent. You will need it for some of the other items.
Dental floss: For lighter cordage I carry a compact container of dental floss. This fits in my pocket pouch of medical items. A hank of braided fishing line or kite-string is an alternative.
Pencil with tape: Another “non-medical” addition to my pocket pouch is a short pencil, wrapped in a length of electrical tape. A detachable eraser protects the point.
Chalk: Chalk is useful for marking trails or leaving messages. Half a stick of white or light-coloured, half a stick of dark. Bag the different colours separately.
Safety Pins: Useful for failed zippers and other wardrobe malfunctions. May be used to drain blisters or possibly as improvised fish-hooks. Mine ride in a little plastic bag with a couple of hair pins and paper clips.
Needle and Thread: At skin-level, this is a single needle, already threaded with about a metre of “invisible” thread.
Experiment with magnetizing the needle. You will need to select a method for protecting you from the point. Mine used to ride in a “sheath” made from a drinking straw. Now I have taped it to the side of the pencil.
Compass: If starting out, avoid tiny button “survival” compasses. They like to hide in the corners of pockets and pouches. I have to keep my larger clipper compass in a container to avoid this.
For about a buck or two you can find budget baseplate compasses on ebay. These are good entry-level items and you can use them to teach yourself some mapwork. They weigh about an ounce and you should be able to find room for one in your EDC. Add a lanyard so you can secure it to your person.
A whistle is a good addition to a compass lanyard. I prefer to use non-metallic whistles on compass lanyards.
Condoms: Condoms have a number of survival uses. Keep them away from your needle!
First Aid Kit: Your skin-level medical kit is for immediate treatment of minor injuries, i.e. actual “first-aid”.
For longer duration problems, have a more extensive kit in your bag. When you have the option, use the items in your bag before your EDC.
Budget stores and ebay sell little first-aid pouches that will fit in a trouser cargo pocket. Often they come with some medical items included. The contents may need a little tweaking but you can create a very useful pocket first aid kit for very little outlay.
Many of the items listed above can be fitted in the pouch. I even got my space blanket into mine.
Personal Medication: This will vary with the individual. In some environments this would include a supply of anti-malarials.
Tissues or Toilet Paper: A ziplock bag with a few metres of toilet paper.
Obviously, have a larger supply in your pack and use that in preference to your “emergency” EDC supply.
If you have a cold or nosebleed, the tissue paper saves your bandana.
Paper can be used as tinder and the plastic bag used to carry water.
The entire package can be useful padding for other items in a cargo pocket.
If, like me, you seem to accumulate lots of paper napkins from takeaways, use these instead.
A very useful addition to your kit that costs virtually nothing.
For low-level use I carry a small bag with just a few paper napkins. I add a larger bag should I plan to stray from civilization. 
Carabiner: A carabiner makes a very practical keyring and has a number of uses.
Several of the items listed above can be conveniently carried on your keyring.
If your gear has loops or rings it can be temporarily attached to the carabiner when you need your hands free. I sometimes use mine to carry shopping bags.
That concludes our basic list. A number of items but many of them can be acquired at very reasonable prices from sources such as ebay. Many of the items you may already have around the home.
In my previous article, I suggest several EDC items that “up-level” your readiness. Where practical these should be stored together in the same small pouch which can easily be added to your pocket contents. Another of the budget first aid pouches can be repurposed for this.
Up-Level Pouch contents include:
  • Fire Kit: Additional lighter, tinder in container, one or more candles. Fresel lens if you have one.
  • Fishing Kit with Snares
  • Optional: About two thirds of a metre of cooking foil, ideally the heavier duty “turkey” foil. Carefully folded and rolled.
  • Optional: Additional space blanket.
  • Optional: Larger compass, with spare whistle. Using a firesteel necklace as the lanyard is an option to consider. Add a small snap-link and Photon light.
  • Optional: Elasticated bandage. This came with one of my medical pouches. I don't include it in my daily EDC, but it is a useful addition to the higher readiness inventory.
  • Optional: Not really survival or vital items, I have added a few things that may be convenient. Ingredients and instructions on packaging seems to be getting printed even smaller, and my eyes no younger. To this end, I have added a small folding magnifying glass (actually a 10x loupe) to my money pouch where I carry my Suunto Clipper. This could be used to start a fire. In the same place, I have added a set of earplugs. Earplugs have proved so useful on some of my travels it seems only prudent to have a set on my person as well as that with my travel bag. The earplugs may not get used as often as, say, my Swiss Army Knife, but when I do need them I will probably really need them!
Categories
Phillosoph

Skin-Level Survival EDC

Suppose that you are separated from your bag or rucksack. Your webbing gear, if you wore any, has become damaged or lost. All you have is the clothes you stand up in and whatever is in your pockets. This is your “skin-level” survival kit. 
Part of your skin-level kit is the clothes that you are wearing. Hopefully you were dressed appropriately for the climate. If you were chilling by the pool when everything went pear-shaped, one of your first priorities is going to be to acquire some new threads.

Today I am mainly going to concentrate on what you have in your pockets, or carried on your trouser belt. This is what many people would call “EDC” or “everyday carry”, although the exact use of this term varies.
Some people would include the contents of their daysac or handbag in their EDC. This article will assume that such items are not immediately available. Reaching them may be one of your objectives.
Some people use the term “EDC” for all the paraphernalia they have on their person, while in other contexts it is specific for defensive weapons. This article intends to examine EDC for survival.
Look on the internet and you will find EDC lists that suggest you should always carry a solar still, fishing kit, gold coins, eating utensils and so on. This is not very practical.
The heavier and bulkier your EDC kit becomes the more likely you are to not carry it all the time and omit parts you may need.
A good EDC survival kit is designed to have two tiers of readiness.
“Lower level” is what you carry all the time. Many of these items are carried because they can be useful in daily life.
“Higher level” are items that you add when you step up to a higher level of readiness.
Your lower-level kit would be on you when you go down to the store. You would add the higher-level items if you were leaving town to hike in the woods.
For example, in my lower-level kit, I have a lighter, which can be used for fire-making or illumination. The expansion to higher-level is a little pouch that adds a container of tinder, some candles and a spare lighter. I have little need for a fishing and snaring kit in town, so these items are higher-level.
Many ingenious individuals have had fun creating survival vests, survival jackets, survival walking sticks, survival pens, survival necklaces or survival hats.
These are not the best way of carrying your EDC. Jacket pockets are better used for items such as gloves, scarves and hats.
Your survival EDC should be based around your trousers. Everything should fit in your pockets, or on your trouser belt.
Since you (hopefully) wash your trousers, items should be easy to transfer to a new pair, or to a pair of shorts if the weather permits.
What you carry should not add so much weight that you have trouble keeping your trousers up. Nothing should be so bulky or hard-edged that it digs into you if you have to sleep clothed, bangs against you when walking or might injure you if you fall on it.
Personally, I am seldom not wearing cargo trousers or cargo shorts. If you have to dress more formally, there are companies that sell suitable garments with extra, hidden pockets. 
Let us have a look at what I am carrying, and how I might expand it to a higher-level. Your up-level items should be stored together in a small bag such as a pencil case. Keep this with your knife-belt (qv).
Fire: The lighter in my left pocket is my primary source of fire.
• To up-level, I will use a small fire kit that would be carried in my right cargo pocket. As described on other pages, this would have a spare lighter, a container of tinder, Fresnel lens (above), some candles and possibly some matches.
Note that the spare lighter is in a different pocket to the primary.
Food: I don't carry any food on me, so this category is more about means to procure food. At low readiness that is money and a credit card.
• For higher-level I have a container of line, hooks, wire and other fishing items. The dental floss I have in my left pocket pack could be used for snaring or fishing, the safety pins serving as hooks.
If you are diabetic, you may want to add a small supply of glucose tablets, hard-candy etc. 
You could carry a tightly rolled sheet of cooking foil, but I personally don't currently do this.
Signalling: I usually carry a phone. As well as being able to call for help, many modern phones have useful applications such as a notepad, compass or GPS capability. Phones are useful but also delicate, so should not be the sole thing you rely on.
The photon light on my keyring could be used to signal. The keyring also has a whistle.
My pocket kit includes a pencil and chalk, and I carry a pen (a retractable Zebra pen, since my belt pouch is rather small. I actually found this pen! Non-retractable, all-steel Zebras are suggested as a good alternative to more expensive “tactical” pens). A permanent marker such as a Sharpie may also prove useful.
I also have a compact flashlight.
• Up-levelling would probably add a larger, but compact, pocket torch.
A lightweight signaling mirror is another useful item. These are a good addition for tactical scenarios since they can be used to peek around cover.
You may already have an item that can be used as a signalling mirror. Many compasses have a mirror and some phones or music players have mirrored backs.
A mini-flare kit could be accommodated with the other items in the right cargo pocket, but I have never actually owned one of these.
A larger whistle, on a lanyard, might prove useful. There are cord necklaces that include a ferro-rod and steel. If you can find them at reasonable price add a whistle, photon light and a snap-link.
Shelter: Most actual shelter items are too bulky for skin-level EDC. The exception is a space blanket. One permanently rides in my pocket kit.
You may want to carry additional space blankets. Not only can they be used for warmth, but also as protection from the rain and for signalling. Penny for penny and pound for pound, space blankets are among the best survival gear you can carry. Do not leave home without at least one.
Cordage: The dental floss in my pocket kit has already been mentioned. Either carry a couple of spare bootlaces or an arm-span of paracord. This can easily be carried in the bottom of a pocket and has numerous applications. I also carry a tubular retention cord that can be fitted to my glasses if needed.
• If up-levelling, a larger hank of paracord can be carried on your person if you have room. Braided fishing line also has many uses.
Tools: My keyring includes a bottle-opener, mini-Swiss army knife, a P38 can-opener and a little tool for removing SIM cards and opening CD drives. That last tool possibly does not have a survival application. (It broke, so has been replaced with a paper-clip that can be readily adapted should the need arise),
The keyring itself is a carabiner. Several of my items can open bottles. The bottle-opener is just a convenience, particularly in social settings. 
A small pouch on my belt carries by clipper-compass, a pen, a trio of lock-picks (two Bogotas and a snake), money, credit cards and a USB drive.
A second pouch has my Swiss army knife, mini-Leatherman, pocket prybar and a sharpening card. I find small-print challenging now, so I have added a tiny pocket-magnifier to this pouch.
The Swiss army knife includes a screwdriver that can repair glasses. 
A small bag in my pocket kit contains a few safety pins, hair pins and paper clips. These can be put to various uses.
A length of electrical tape is wrapped around my pencil. I may add a needle with a metre of invisible thread. I don't regard a sewing kit as an EDC-level requirement, but the weight is negligible and a sharp point potentially useful. I have now added a couple of threaded needles, wrapping them around the pencil.
• If up-levelling my main additions would be a larger knife and compass. More of that later.
Water: There are water bottles that can fit in a cargo pocket or on a trouser belt.
The bulk and weight of water means that you are unlikely to carry water at skin level unless the weather is very hot.
A few sheets of water purification tablets can be included in your pocket medical kit.
• If up-levelling the water category, I might add a “survival straw”, ideally one that fits in a cargo pocket. A condom could be used as a water carrier, but I don't carry them, no longer being single.
Medical: Your EDC medical kit is mainly for minor injuries. Have a better kit in your bag.
My pocket medical kit rides in my left cargo pocket. In addition to the items already mentioned it has alcohol wipes, plasters and pain-killers.
There is some medication I have to take with meals, so I carry a few days supply of this in my right cargo pocket. If you need to take medication regularly then you should carry a few days supply with you, and make sure it remains in-date.
• If up-levelling, a small container of insect repellent and/or sun-cream might be a prudent addition. This need only be a small volume, your main supply being in your bag or base. Chapstick or Vaseline in winter, if you think you will need it.
Other items: If you are out in the wilds, a few metres of toilet roll or paper tissues in a ziplock bag should be added to one of your cargo pockets. Make that a permanent part of your kit if you wish.
I have a small bag with a few paper napkins for about town” and a larger bag I add for rural”.
A bandanna has numerous uses and is easily carried in a side pocket. Since I lack some hair, I have used mine for head protection when caught out without a hat.
I wear photochromic glasses so don't carry sunglasses. These protect the eyes from both excessive light levels and more physical threats.
Non-survival items carried are a USB drive, travel card and music player, although the back of the latter is a mirror.
So far we have talked about pockets and belt pouches. In years past most of my EDC was in a compact bumbag. I have learnt to make more use of my cargo pockets and have replaced the bumbag with a couple of pouches attached directly to my trouser belt. One is a repurposed pouch for a mobile phone.
You should not add so many pouches to your trouser belt that it interferes with carrying a rucksack, or sitting in a vehicle.
There are belts that are made of paracord, but if you unravel them to use the cord you have nothing to hold up your trousers, nor hang your pouches from!
There are trouser-belts with hidden storage compartments, and various ingenious buckles. The original boy scout belt had a buckle that served as a bottle opener.
Earlier on I mentioned adding a larger knife and compass to the skin-level kit.
My favorite kukri weighs just under a pound, but hanging it on the trouser-belt is a bit much. What you need is a second belt. This is effectively an intermediate level between skin-level and webbing. When at a higher level of readiness you should attempt to keep it upon your person.
Your knife belt rides below the trouser-belt, like a cowboy's gun-belt. It should be adjustable, so that it can be worn over thick clothing when desired.
Add a compass pouch to one side of the belt, and attach the compass lanyard to the belt. Add a carabiner or snap-link to the front of the belt.
I carry my kukri on one side of the belt and a Mora puukko-type knife on the other. Not surprisingly, this belt could also be used to carry a handgun. 
If I need to carry a hatchet or entrenching tool, I can slip it between belt and body.
A folded rain-jacket, poncho or unfolded space blanket can be draped over the back of the belt.
Many police officers experience medical problems from the weight of their duty belts. Detaching the duty belt from the trouser-belt and wearing it lower like a gun-belt might improve matters.
The knife belt can be used to carry a litre or two of water. The best way to carry water is in bladders since this is lighter than conventional bottles. Rather than placing the weight on the knife belt, my proposed “camelbum”concept would give more options.
I have mentioned carabiners and snap-links a couple of times. Use one as your keyring, add one to your whistle lanyard and knife belt. Also have them on your rucksac strap and/or webbing.
When you need a hand free, or there is a risk you might drop a tool, attach the tool to the nearest snap-link.
This is an extension of the idea to collect empty magazines described in my book “Survival Weapons”. Make sure your tools have loops or rings.
Categories
Phillosoph

Serenity Lock Picks Review

Regular readers will have noticed that I do not usually write unboxing articles. Firstly, this is because funds are very limited (buy some books please!) and this is not a blog that gets sent free stuff. Secondly, I would rather write a post after I have had some time to try the items out.
Currently most my time is committed to another project but I would like to record some impressions on the Dangerfield Serenity lock pick set I have just received.
It has been a tough couple of months so I decided to treat myself. In my previous post I told you about the Bogota picks I brought and the cheap Chinese set of picks I had been playing with. The pair of Bogota picks was very reasonably priced but cost at least twice what you can pick the cheap picks up for. The two Bogotas, however, are much more useful than the dozen or so tools in the Chinese kit. Conclusion is, if money is tight or you only want one set of lock picks, buy a pair of Bogotas. Have a pair for practice and at least a set with your emergency kit(s).
I’ve been getting more into the leisure side of picking and wanted to improve my single pin picking (SPP) skills, hence decided to treat myself to a better quality set of tools. I opted for the Dangerfield Serenity ten-piece set. Firstly, because it has a nice selection of hooks and lifters for SPP. It also contains a Bogota-style pick. It was also currently on discount and UK Bump keys had been nice enough to send me a 10% off voucher. Kit arrived yesterday but I only had time to unpack it this morning. Initial impressions:
Dangerfield Zip Pouch
The kit is supposed to come in a webbing/ vinyl(?) pouch with a snap-button. Instead UK Bump keys upgraded this to the Dangerfield leather zip pouch. If, like me, you grew up watching cop shows where lock picks are always in a little black zip pouch, this will give you a buzz. The zip is in a nice brass rather than the black of the cop shows, but nice enough. I had noted that UK Bump keys was running an offer where if you brought this pouch you got a free pair of Dangerfield Soho lock picks, which are similar to Bogotas. That is a pretty nice deal in itself if you want a pouch. Thoughtfully, not only did UK Bump keys upgrade the pouch with the Serentiy kit, they threw in the pair of Sohos too! Like the Bogota set, the Sohos are designed to also act as tension tools. My ten-piece kit is actually twelve piece now, and effectively has four tension tools rather than two. I quite like this type of tension tool and often use the Bogotas as tension tools in preference to other tools to hand.
Soho Lock Picks
I’ll stress there is no guarantee that you will get these upgrades if you order a Serenity, but it tells you a lot about UK Bump keys’ approach to customer care that they made these additions.
Serenity Lock Pick Kit
The actual Serenity itself has the following contents:
Classic Slimline Wrench
Pry-Bar Wrench
Half-diamond Pick
Angled Reach Ball Pick
Curved Reach Ball Pick
High Hook Pick
Bogota Rake
Swerve Rake
Prince Rake
Princess Rake
The “pry-bar wrench” is what Americans called a “top of the keyway” (TOK) tension tool. American locks tend to be mounted pins upward while in the UK and Europe they are often pins down, which confuses terminology. Note that the Bogota rake has the same handle as the other rakes and picks, not the tension tool handle of the “stand-alone” set. The Swerve rake resembles an elongated snake-rake and the tip can be used for SPP. The Half-diamond pick is often termed a “hybrid” since you can rake with it too.
All of these picks, rakes and tools are made of a thinner metal than the Soho rakes and the stand-alone Bogotas. I have heard this described as 0.22" steel, but do not have a micrometer to measure this for myself.
I have tired a couple of these tools on a practice lock and they have worked as expected. My little stubborn lock is resisting the thinner picks, but this may be due to me being a little out of practice over the last few weeks. It pops for the thicker Sohos. (Update: The Serenity Bogota rake works perfectly on this lock. The Prince and Princess also work. The Swerve is not suited to this size of lock.)
The zip case is pretty much ideal for the Serenity set. You can fit four rakes in one side and the other four picks in the other. Place the tension tools how you wish. There is room for the Soho rakes/tension tools. It begins to get a little cluttered when I add my other “good” pick, a Sandman, but there may be room for an additional snake. If I was asked to suggest one improvement, it would be to add a pocket to keep the tension tools separate.
I got this kit from the same company I got my Bogotas from, UK Bump keys. I have found them prompt and very helpful. From youtube videos I note that they have a number of American customers and I can see why. Register on their site and you will be sent a download link to a free 40+ page ebook on picking. You may also get a voucher towards your next purchase. Their webpage has a blog with some interesting articles and there is no shortage of instructional videos too.