Today's blog subject is a little removed from the usual themes of self‑defence or self‑reliance.
I would like to pass on some tips that make life a smidgen easier.
Think of them as a defence against some elements of modern life attacking your sanity, if you wish.
Reset Folder
A common theme on this blog is to urge the reader to have back‑ups, both for you computer, and for your life in general.
On my backup and external drives I have a folder I call “Reset”.
In Reset are copies of the themes, backgrounds, profile photos, keyboard shortcuts, bookmarks, macros, browser extensions, fonts and plugins that I favour.
All the things that make my computer programs look and work just like I want them to.
Also in this folder are some installation .exes of some of my favourite programs.
When I have a new machine, or have to update my operating system, or something similar, I can quickly get things back to the way I like them.
A small but useful component of this folder is a text file checklist.
* The text file lists the programs I favour.
* The file lists which files need to be changed, and with what,
* The file also records where on the computer these files need to be put.
ISO to Go
Also on my external drives is a folder containing the ISOs of the operating systems I use on my home computer and laptop.
I plan to have an ISO of my personal operating system if I can find a utility that works with my system.
Should I need a “live disc”, an ISO may easily be transferred to a flash drive with “Ventoy” on it.
Router Password Card
A previous broadband provider included with the router a plastic card with the network passkey printed on it.
That company was brought out by a less competent company that hiked the prices up, so I changed broadband providers.
The new provider did not provide a card, so I made my own.
On a blank plastic card I wrote the necessary information. I keep this card by the router.
Whenever my girlfriend or step-son visit, they will usually reach for that card to reset their devices.
This idea relies on the card being placed back with the router once it has been used. This has not been a problem in practice.
A very simple idea that has proved very useful.
Box of Computer Bits
Behind my computer is a box. It is a two-litre ice cream tub spray-painted black to match the computer. It is a useful height to rest my external hard drives on.
In the box is a multiple slot card reader for reading micro-SD, SD and other card-shaped formats.
Also in that box are various USB drives, SD cards, dongles, adaptors and computer leads.
Handy stuff to have near your computer.
Code Leads
I have a lot of computer leads, both in that box and elsewhere.
Most of them are black, so it can be time consuming finding the lead with the connectors that I need.
My solution was half an hour of time spent colour coding.
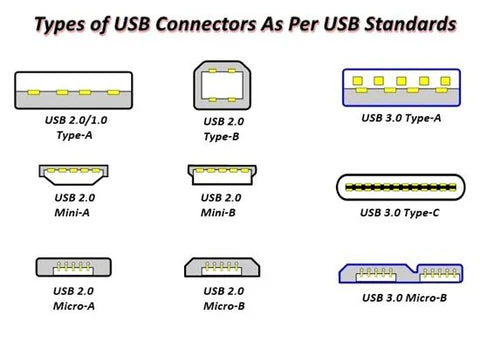
One of the lead types I use most often has a USB-A at one end and a mini-B at the other. The “A” end now has a red and a yellow band, while the mini-B end has the same colours reversed with the yellow band closest to the mini-B connector.
Not only can I tell the type of lead at a glance, but which end each type of connector is at.
Leads with a USB-C connector rather than a mini-B use red and green.
An iPod lead has red and white bands.
A lead with a micro-B connection for attaching to drive enclosures uses red and blue.
A lead that has two type-A connectors, or two type-C has only one band at each end, respectively with red or green.
Leads with a type-A to type-B are rarer and usually stay plugged into a scanner or printer. For these, each end has red, yellow and blue bands.
Initially, I added the coloured bands using electrical tape. Perhaps I should have used longer bits, since several have detached.
So I invested in a bag of mixed coloured cable-ties/zip ties.
100 x 2.5 mm are ample size for this application. I found I needed extra red and yellow.
Best review your connector types before you order.
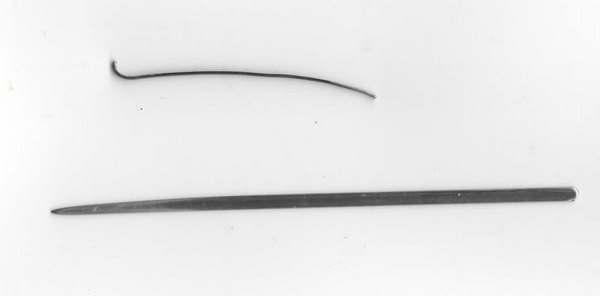
If you make a mistake, a cable-tie may be opened again using a pin. This is a variation of shimming.
If a cable-tie loosening is a concern, the cut end may be melted into a blob by gentle heating with a lighter flame or application of a heated metal implement.
My current earphones are shaped specifically for the left or right ear. I have tagged the left one with a cable-tie so it is easily distinguished by sight or touch.
Labels on USBs
My USB flash drives range from old examples with two gigabytes to more recent in 32 gigabyte sizes. Some of the smaller capacity drives are still handy for some purposes.
You can save a lot of time if you write the capacity of a USB drive on the outside.
There are two ways to plug in a USB. The right way and the first way you tried. Put your labels on the upper or outward side.
Paint Your Plugs
Ever unplugged your computer when you wanted to disconnect the device plugged in beside it?
I used to think plugs should have those little windows you can insert a piece of card into.
One day I remembered all the model paint I have, some of it in bright colours I seldom use.
So now my electrical plugs have legends such as “XBox”, “PSP”, “DVD”, “Comp”, “Shredder”, “Hoover” and similar in a variety of colours.
If you lack paint, stickers and a wide pen are an alternative.
Providing that I look at what I am doing, it is a lot easier to plug-in or unplug the device that I want.
Find the Remote
On the topic of stickers, the black TV remote control is often hard to locate when watching late at night.
I have added luminous star stickers to both sides in different configurations.
Now, not only can I find the remote, I can tell which side it is up and which end is which.
Hair Today…

I suppose, given the great diversity of humanity, there may be someone who enjoys removing hair from the plughole. Probably whole forums, websites and fetish magazines about it.
Best not look.
You may have a sink strainer in your kitchen sink. Few people seem to think of using one in the bath/shower and bathroom sink.
Removing hair from a sink strainer is a lot easier than fishing it up out the plughole.
Final Thought
A lot of time would be saved if when a website asked for a password, it included the information that the password included numbers, capitals and/or non-alphanumeric characters.