In that article, I suggested seven items that formed the foundation of a useful emergency kit.
These were:
• A water bottle
• A canteen cup or mess kit
• A fire kit
• A survival knife
• A blanket or poncho‑liner
• A rain‑poncho
• Toilet roll.
Each of these items may also be seen to represent a theme.
In this blog, I would like to expand on these themes and reflect on what further items may be acquired to expand these capabilities.
Water
Water is the cheapest category to address.
Buy a couple of bottles of soda. Once you have drunk the soda, use the bottles for water.
Soda bottles are incredibly tough and flexible. If water freezes in a bottle you can bash it around to break up the ice, with very little chance of damaging the bottle enough for it to leak.
When there is a chance that water will freeze, carry any water containers with the cap or drinking tube downwards. Ice floats, so the lowest part of an inverted bottle will be the last to freeze solid.
The soda bottle is a superior choice to more expensive, smaller, heavier and more rigid military plastic canteens. Unlike a military canteen, you can squeeze some of the air out of a soda bottle to reduce the noise of water sloshing around.
The only thing wrong with most soda bottles is the small diameter cap. It needs a little more care when refilling. It also makes it a little harder to shake broken up ice out of the bottle.
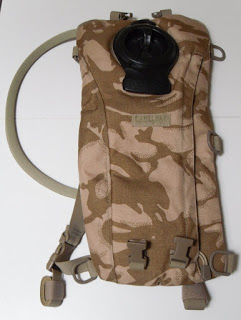
The alternative or supplement to a soda bottle is a hydration bladder.
Most of these come with drinking tubes, allowing you to drink while on the move. There are drinking tubes for soda and other plastic bottles, but the ones I have seen seem to cost as much as some models of bladder with a tube.
Being very flexible, water bladders allow air to be squeezed out of them to reduce any sloshing noises. This is useful if you want to move tactically, are hunting, nature-watching or just want some peace and quiet.
Soda bottles and large hydration bladders are a great means for carrying water in your pack.
You will need some means to carry water with you when you are not wearing your pack. However, you do not want to constantly carry such a weight of water that the effort increases your water consumption. 
There are hydration bladders that can be worn as an independent backpack. You cannot wear these when wearing another pack. Switching to them usually involves some unpacking or detachment.
Depending on conditions, one or two litres on your person will be about right. This may be a soda bottle or smaller, or one or two of the smaller capacity hydration bladders or bottles.
See the knots book for a method to construct a carrier for a soda bottle.
“Work from the outside in”. Use the water in your pack in preference to the supply you carry on your person. This policy also applies to other consumables, such as matches, emergency food and so on.
You should invest in some water purification tablets for times when you cannot heat‑treat your drinking water. It is a good idea to have a good stock of these.
There are various brands of water sterilization pumps. Given the importance of clean water, these are worth considering if they are within your means. Viruses may pass through filter systems. Water so produced may still need to be heat or chemically treated.
Cooking and Food
The topic of heat-treating water brings us to the item of a cooking vessel.
I have recently written on the subject of cooking vessels, so have little to add about them here.
A cooking vessel will be more useful if you also have some form of stove.
This theme also takes us to considering the provision of food, be it rations or that procured by hunting, fishing, trapping and gathering.
An emergency is no time to worry about the diet!
The food in your bug-out bag should be rich in calories, carbs and sugars.
It should require very little water, cooking or preparation.
It should have a long shelf life when stowed in the bag.
Ideas along these lines have been discussed on various pages on this blog.
If the 72-hour timeline of an emergency is accepted, theoretically your bug-out bag only needs half a dozen MREs or three HDRs, if you have access to them. Obviously, discard unnecessary mass such as the gum or duplicate cutlery. This is, however, an expensive option!
Your food may need to be in a bag or net that can be hung from a tree out of reach of bears. Other items that will attract their interest, such as toothpaste, cooking vessel and refuse will also need to be cached with the food. Keep about 16 metres of suitable cord with your bear bag/net.
MREs may include flameless heating pouches. You will still need your mess kit for water treatment.
Going without a cup of tea for a couple of days will not kill you, but a small brew kit may be good for morale.
A hot drink may make the difference in cold weather.
In addition to tea and coffee bags (vacuum-packed?), add some variety such as instant hot chocolate, soup and stock cubes.
Inside your mess tin is a logical place to carry a brew-kit.
Living on wild foods is more likely during a longer duration survival scenario.
After plant matter, fish are your most likely source of wild food.
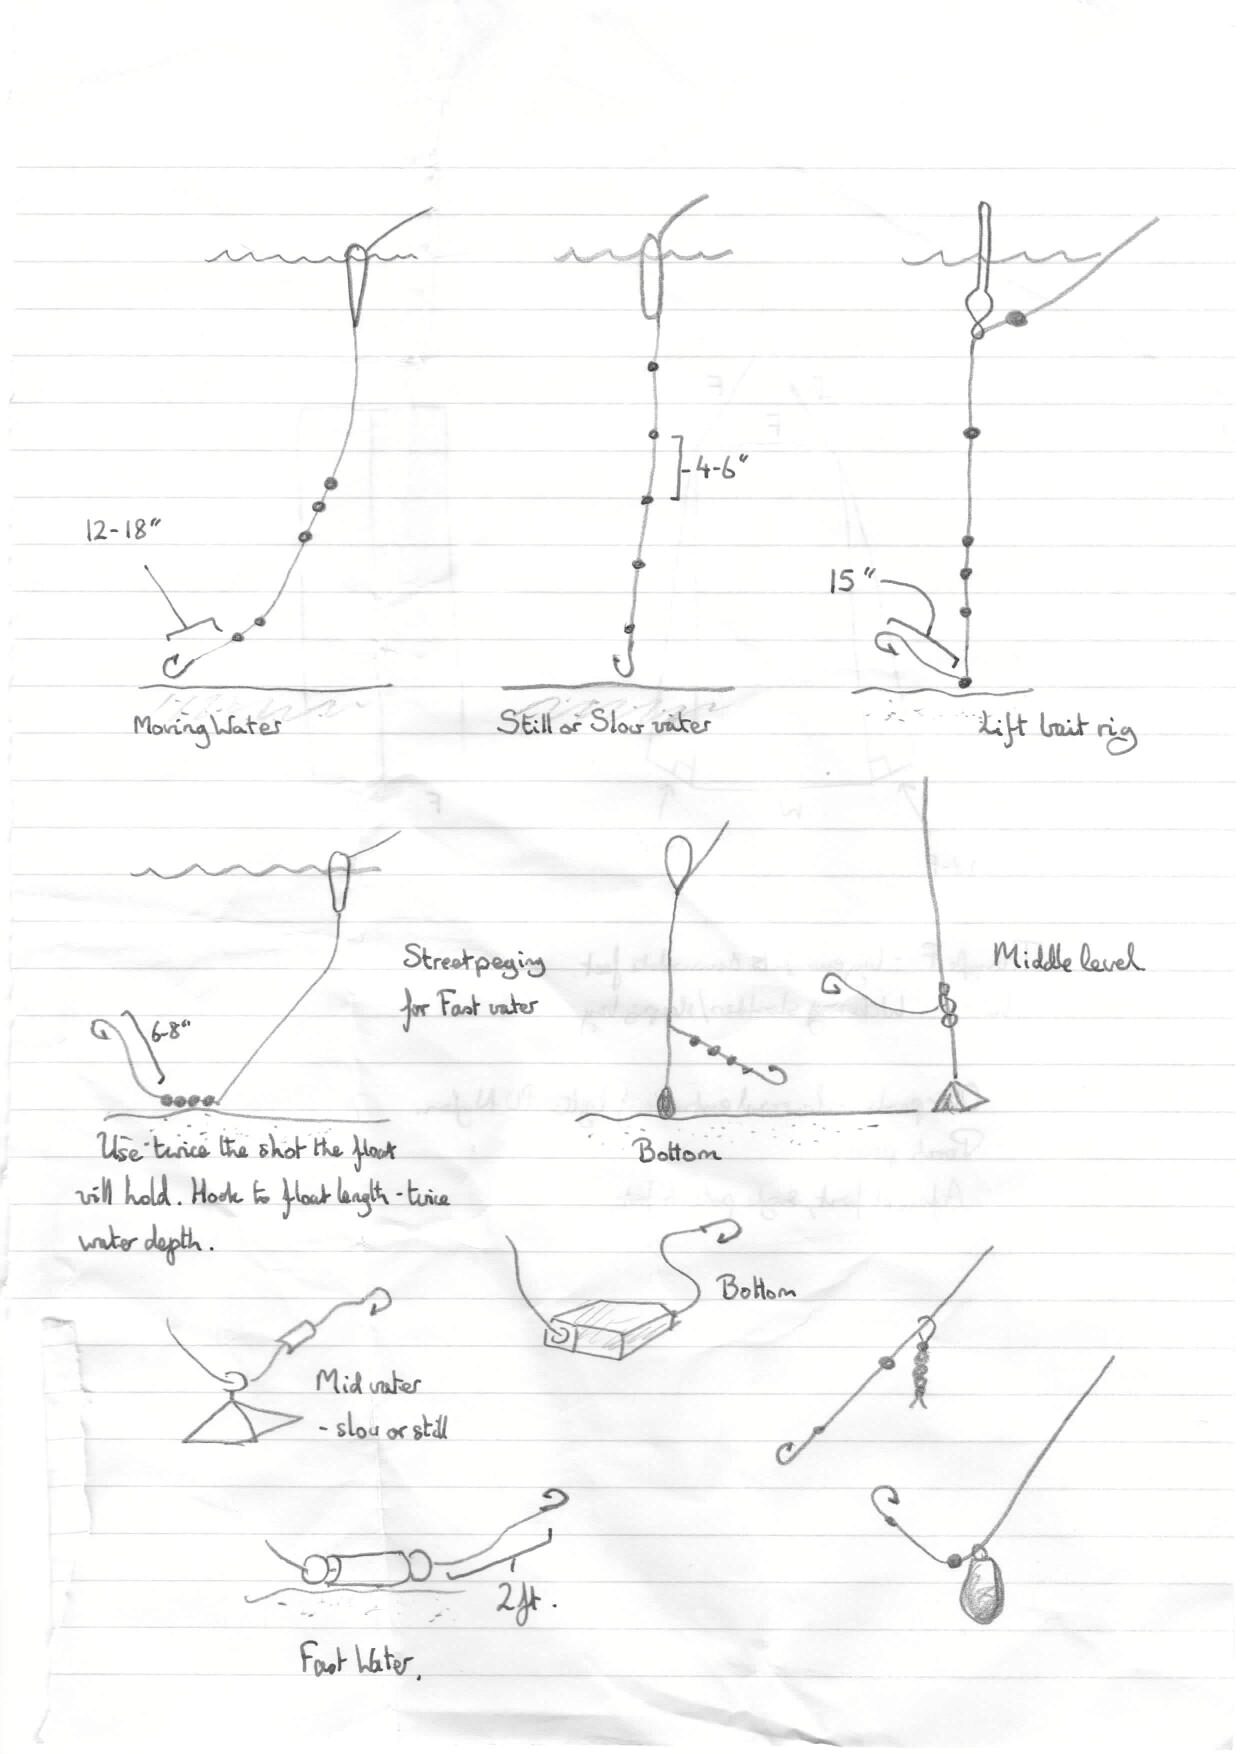
If venturing into the wilds, carry at least ten metres of braided fishing line and a dozen or so no.12 hooks, each already attached to a foot or more of monofilament line. A third to half of those hooks should have some form of lure, such as mackerel feathers.
This fishing kit gives you the capability to set up a night‑line.
If you wish, have a small fishing kit packed into something like a 35mm film container that you can easily add to your EDC.
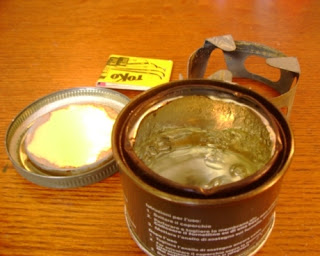
A more extensive kit, including bulkier lures, more line and copper or brass wire may be packed in a small tobacco or Altoids tin and carried in your pack.
A frog/fish gig head is worth adding to your larger fishing kit, but may need to be modified so it can be used on a field-made shaft.
For active hunting of small game, your priority purchase should be a catapult/slingshot. Potentially, this could also be used to drive off threats such as feral dogs, or knock fruit or nuts from trees.
Do not get a model of catapult that is too elaborate or bulky. Regularly inspect your catapult for deterioration of the bands.
Like any weapon, this will be of little use unless you put in the practice.
Your first hunting firearm should be .22 rifle, preferably semi-automatic and suppressed.
A useful number of rounds may be carried for very little mass and bulk.
Openly carrying a firearm may not be prudent in certain locations. A takedown design that can be stowed in a pack has merit, if it has adequate accuracy.
A small game rifle/shooter/ammo combination needs to be capable of reliably taking squirrel‑sized targets.
Many small game and birds have sharp eyes and are particularly attuned to movement. A semi-automatic allows for less body movements that might spook your target.
If forced to use the .22 defensively, the best tactic is accurate rapid fire, which also favours the semi-auto.
Examine the iron sights that come with your .22 rifle, and invest in a good set of iron-sights if you find them wanting.
Learn to use your iron-sights, before you buy a scope. If/when your scope gets damaged, you will need those iron-sights.
A survival .22 may be required to defend its user or in an emergency to take targets larger than is customary for this calibre. Both of these possibilities favour high-penetration performance. Hollow‑point “hyper‑velocity” loads such as CCI Stingers are mainly intended for small game.
For the survival weapon, the preference is for more conventional high‑velocity solids. These not only waste less meat, but generally cost less!
Fire
The fire kit is another low cost item, if you are sensible. Hold off from buying fire-starting gadgets and exotic tinder materials.
The best means to light a fire is a naked flame. Buy some disposable lighters.
Have a lighter on your person at all times.
I keep mine in my trouser pocket so that it stays warm. Have a couple of lighters in any fire kits you construct. Add a lighter to each of your outdoor coats, handbag, and other bags you commonly carry.
You should have a lighter or fire kit in your car, boat etc. Do not assume the dashboard lighter of a vehicle will work when you most need it. The car battery may be dead.
For each fire kit, have a water‑tight container or two for tinder. Fill one with cotton wool and Vaseline. Some folks prefer wax‑soaked cotton string. The Vaseline and cotton wool that you do not use to make tinder are handy things to have around the house anyway.
To this fire kit, you can add some birthday cake candles and a Fresnel lens. (Remember that your compass may also have a magnifying lens that can be used for fire‑starting).
Carry a ferro-rod if you have one, but use it as a backup to the lighters. Cold and wet is no time to get fancy.
Toilet Paper and Hygiene
Toilet paper is a low cost, low mass and relatively low-bulk item. Carrying more than one roll is not a bad idea. Better to have it but not need it than…
Toilet paper leads us to the theme of hygiene.
I have already written about washing kits and medical kits.
The common mistake with wash kits is to carry too many items, in too complicated a bag or roll.
My wash kit fits in a small mesh bag, with the toothbrush, deodorant and paste in a mesh pencil case, since it is convenient to have these separate.
Travel towel/home-made tenugui, soap in draw-cord pouch, razor(s), container of shampoo, microfibre facecloth, mini-nailbrush, small mirror, spare comb. Very little else is needed.
With medical kits, it is easy to go for too many specialist items and overload your kit.
Insect repellant and sunscreen may be needed. 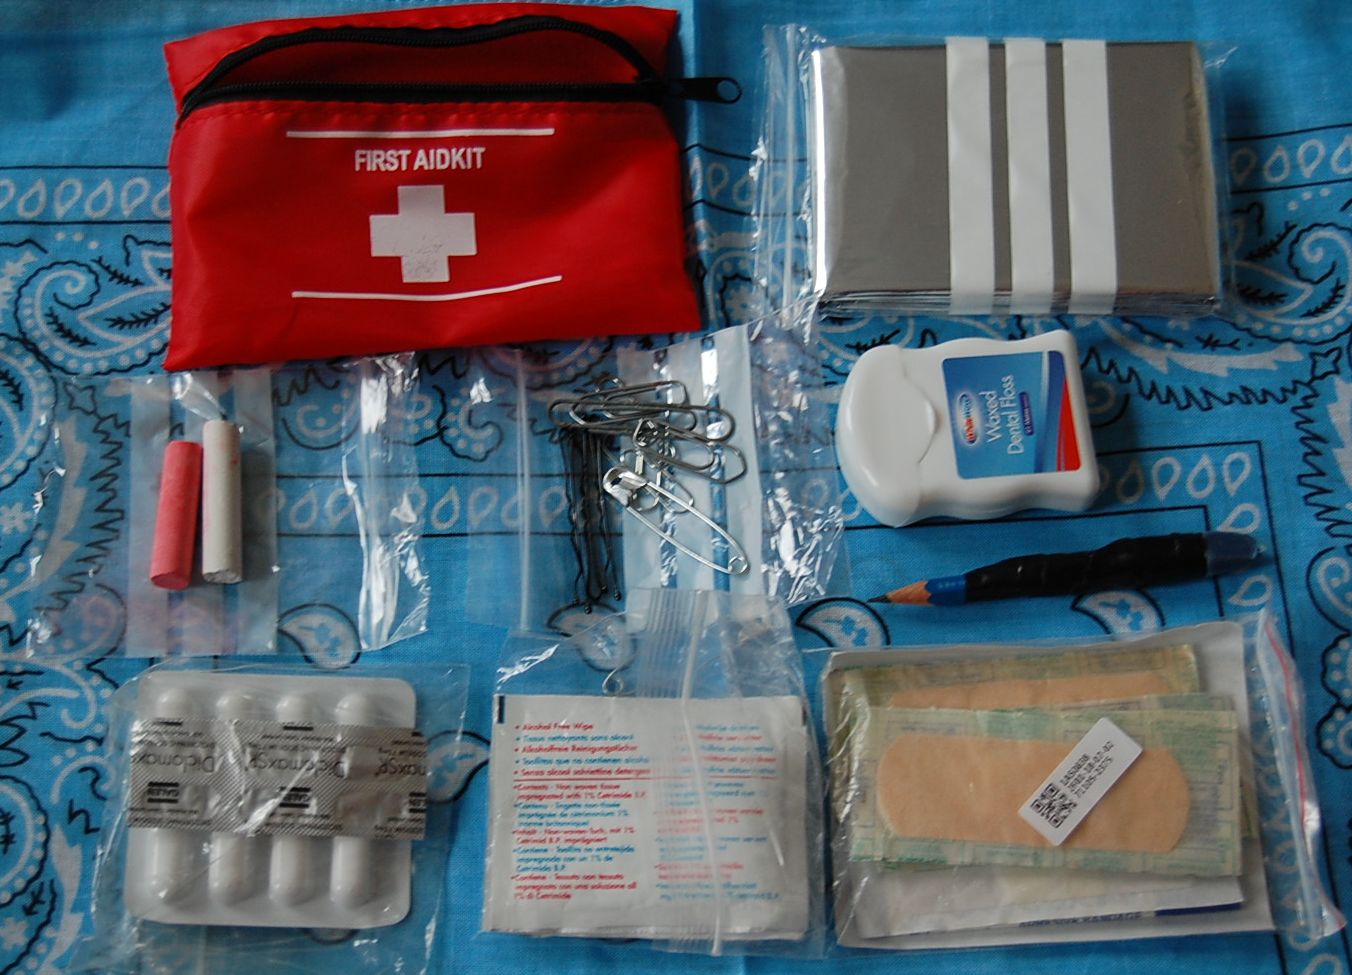
You will probably have several medical kits.
I have a few items in my EDC pouch, and a more extensive kit with my travel bag. “Intermediate” kits are in various daysacs and the soft‑core bag.
You should have a more comprehensive kit at home, in your car, truck, boat, aircraft etc.
Returning to the toilet roll(s).
Alcohol hand sanitizer is not the magical panacea that some people think. It is, however, a useful item to keep with your toilet roll(s).
You will also need some means to dig a cat‑hole.
This brings us to the theme of tools.
Tools
In the preceding article on foundation survival kits, I recommended the acquisition of a knife with “a full-tang fixed blade that is single-edged and not less than seven inches/18 cm”.
Knives and other tools are heavy, and can be very expensive.
It is very important to have a realistic understanding of what you need.
You will see certain survival experts claiming that you do not need a big blade. Buy the little (larger profit margin) knife they use, available from the website…
They fail to mention they have an axe with their pack, or a full film crew to support them.
In a survival scenario, the primary role of your knife is efficient shelter and fire construction and the ability to easily work any available materials for these purposes.
You need a knife that is an effective multi‑purpose wood‑working tool.
Hence, my primary choice is a kukri.
If on a budget, machetes and billhooks will often do the job as well as any expensive custom knife.
A big knife can be handy when butchering large game, although in a survival situation you are more likely to be living on plants, small game and fish.
This forms part of your EDC, and may be the only tool you have when you really need one.
You will also need the means to resharpen your tools.
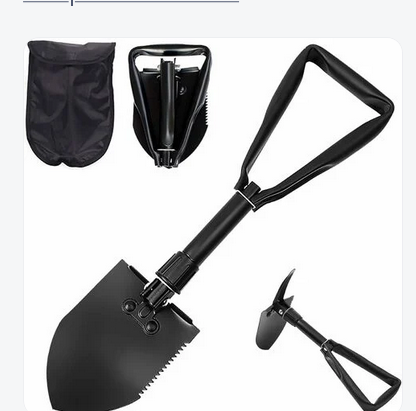
Digging
Digging tools need deeper consideration than they are sometimes accorded.
Hopefully the survivor will not have to be digging foxholes and bomb-proof dugouts.
More likely reasons to dig include:
• Edible roots and other foods
• Catholes and deeper latrines
• Disposal of biodegradable waste.
• Fire pits and trenches
• Pit traps
• Drainage gutters to keep water flooding your campsite: About 20 cm deep and as wide as your shelter
• Survival stills: About a metre across and nearly that deep. Will probably need two per person.
• Bank‑bunk/Den/Emergency dugout: A shelf to hold a sleeper, dug into the leeward side of a hill or bank. About two metres long, one wide and two thirds deep.
• Various types of snow shelter: Either digging down into snow or building a wall against the wind. When abundant fuel is available, try melting a hole down into the snow rather than digging it out.
Lightweight trowels are sold for campers and backpackers. Generally, these are either plastic or a high-tech material with a high price tag.
If on a budget, check out the trowels in the gardening centre before the camping store. The toy department is also worth a look, since beach and gardening sets for children are sometimes found.
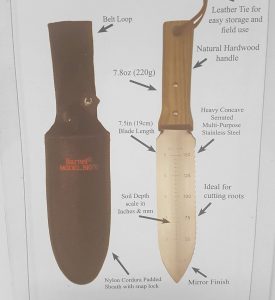
My digging implement of choice is a hori‑hori. This is compact and relatively light, yet strong and versatile.
Many of the digging tasks listed can be performed with a hori‑hori.
The larger excavations are possible in an emergency if you are methodical. For example, with the bank‑bunk, use gravity to your advantage so clods of earth levered out will drop away rather than need to be lifted.
A hori‑hori is a good choice for light and emergency digging.
In certain terrain, situations or seasons, larger excavations are more likely.
Trifold entrenching tools are probably the best off-the-shelf option for deliberate digging in terms of cost, utility and bulk/mass.
Sometimes a hoe/mattock is a more useful digging implement than a shovel/spade. Buy a tool where the head can be set at an angle. Some models include a pick‑blade too.
Although used by the military, these folding tools should not be expected to be as sturdy as larger and/or one-piece tools, so use them accordingly.
For deliberate winter travel, lightweight snow shovels are worth considering.
These may be aluminium or plastic, and some will disassemble or are telescopic for easier carrying.
Snow shovels are not much use for digging in hard earth, but can move large volumes of snow or leaf-litter.
Items such as slabs of wood, skis, snowshoes, mess tins and frying pans may be used to move loose snow.
Knives with long blades can be handy for cutting snow blocks, although some arctic travellers carry crosscut saws from the hardware store for this purpose. These are useful for wood too. They are not as compact as camping saws, but a fraction of the cost. With a covered blade, such a saw may be slipped down the side of a rucksac’s main compartment,
If you live somewhere that is wooded and often cold, an axe such as a three‑quarter or Hudson Bay style may be a wise investment.
In an emergency, you may have to get out or into a location in a hurry.
The crowbar may be a very useful addition to your kit.
Wrap the shank in electrical tape to insulate your hands when it is cold. This also provides a source of tape for repairs.
A crow bar may be used like a digging stick or pick to break up hard earth.
For those with far bigger budgets than mine, there are titanium crowbars.
A screwdriver should be carried with your tent pegs. This may help in both inserting and extracting pegs. It is also a potential prying and digging implement.
Like the character in my novel, you will find such a screwdriver may be used for a variety of useful purposes.
Cordage may be considered to come under the umbrella of tools. Invest in a reel of suitably coloured paracord or similar. A reel of tarred nylon bank line is more compact and better for certain applications.
In an emergency, some individuals may attempt to steal your food or equipment, or prey on you for other reasons. To ignore this as a potential possibility is to neglect the hard lessons of several thousand years of human history.
Many of the tools already discussed have potential as means of self-defence.
Since the publication of my book “Survival Weapons”, I have been asked which firearm an individual should consider purchasing first? Should it be a shotgun, or the .22 rifle?
It may be carried in situations where a rifle or shotgun might draw unwelcome reactions. It may be used to defend both your home and your person.
In extremis, such a firearm may be used to hunt small and medium game in the absence of a weapon more suitable.
Sleeping
We spend about a third of our lives sleeping.
Our performance when awake is often influenced by how well we slept.
Sleeping gear is an important component of your emergency kit and in keeping yourself hale and hearty.
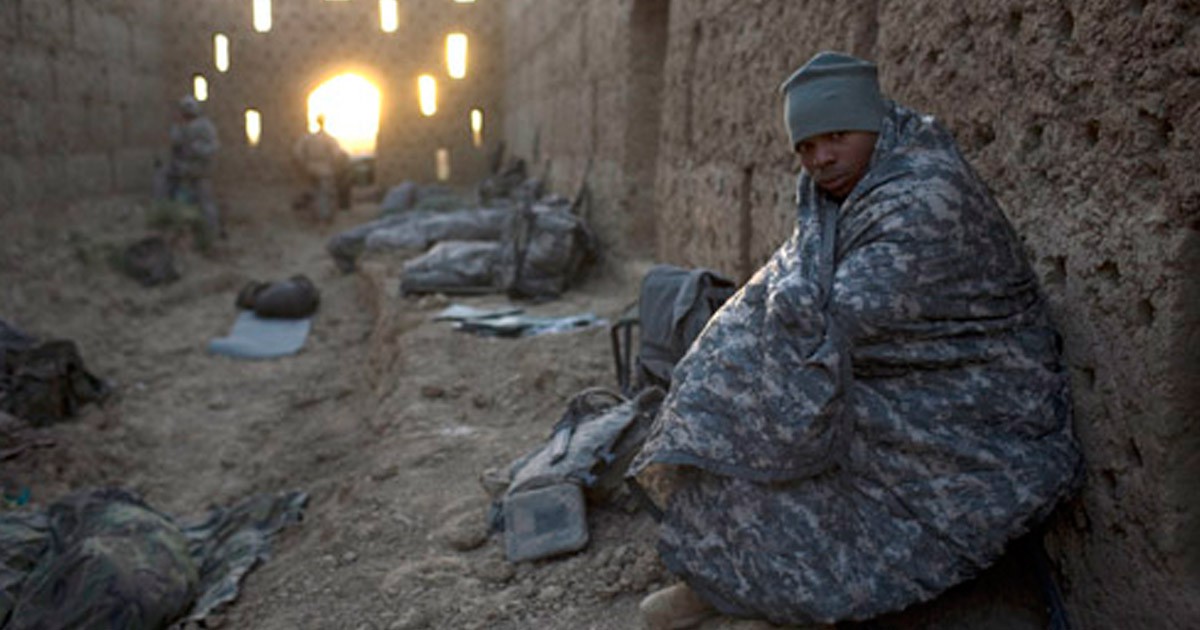
In the original article, this requirement was met and represented by a poncho-liner or blanket.
Poncho-liners, as they are issued, are mainly intended as bedding.
See my previous blog on simple measures that increase the utility of your poncho-liner as a garment.
Add a plastic survival bag to your packs and use it in addition to your blankets and shelter.
Kip Mats
Once you have a poncho-liner, the second item on your sleeping wish‑list should be a kip mat.
Quite simply, “ground chill can kill!”
A kip mat is primarily insulation rather than cushioning.
Shop around, you can sometimes find a better deal on items marketed as exercise, yoga or gym mats. The main problem seems to be finding them in neutral or natural colours.
Some folks claim the black ones are inherently warmer, while some mats are offered with a reflective foil coating. No one seems to offer a foil‑coated black foam mat!
Naturally found materials such as grass, bracken, hay, pine boughs etc can insulate you from ground chill. Use your kip mat over the top of these. It will protect you from any damp materials.
Even when you can find one in a useful colour, it will be monochrome and of a regular shape.
Kip mats are light but bulky. If you have to carry one on the outside of your pack, buy or make a suitable camouflage stuff sack. Fittings may be added to this so it attaches more securely to the outside of your pack.
You can roll a kip mat up in a camouflage bivi-bag, although potentially having a bivi-bag on the outside of a pack increases the chance of it being damaged and losing water resistance.
You can trim the corners of a mat into a more “mummy” shape if you wish, but this is not going to make much difference in mass and bulk.
Some folks carry a small pad of foam for sitting on, or standing on when changing socks.
If you prefer your kip mat inside your bivi-bag, it may fit better if you shape it.
In an emergency, kip mats may be cut up to form splints or a neck brace.
Sleeping Bag Liner
Your next sleeping acquisition should be a sleeping bag liner. Clean, dry insulation works best.
A sleeping bag liner provides a little extra warmth, but its main advantage is that it keeps your bedding clean.
I have talked about sleeping bag liners before, so will direct you to that article. If your budget won’t allow you to buy your sleeping bags for a while, you might consider the warmer examples such as pile liners.
If personal security is an issue, you may need to sleep clothed and in your boots. Wearing a pair of sandbags over your boots saves your sleeping system from damage and dirt.
Sleeping Bags
Yes, I did say sleeping bags (plural)!
The poncho-liner was designed for sleeping at temperatures of above 10°C.
If your breath is fogging, you will need to make more elaborate sleeping arrangements, such as more ground insulation and a better insulated shelter.
Your sleeping gear will most probably acquire some sleeping bags. Sleeping bags are another topic I have addressed elsewhere.
Rather than buying a super‑duper arctic mountain‑rated bag, your money will be better invested in a one‑to‑two season and a two‑to‑three season bag.
Since we are considering items for your bug‑out bag, sleeping bags should be of mummy configuration for lower bulk and better performance.
Some folks prefer zipless sleeping bags. Personally, I find a zip offers more versatility with respect to comfort and ventilation.
Ensure your choice, if zipped, has a two-way zip so that you may vent the foot area.
When you own two bags as suggested, you may use either or both together as local conditions dictate.
Your liner will add a little more warmth, and keep your bags clean and warm for longer.
Your poncho-liner will continue to see service as a supplement to your sleeping bags, or on its own in warmer conditions.
Mosquito Nets
In many regions, a mosquito net for sleeping under is a prudent investment.
Working out how to suspend it may be a challenge you don’t need at the end of a long day, so look into free‑standing variants.
Shelter
Rain-Poncho
The rain‑poncho represents the theme of “cover”, which is appropriate since the rain‑poncho is both a garment and a means of shelter.
I have written elsewhere on the topic of selecting clothing for your “bug‑out outfit”, so I will concentrate on the topic of shelter.
Your poncho probably came with a stuff‑sack.
If it did, to this add two three‑metre lengths of cord.
Paracord stretches, so something non-elastic is preferable. These will prove useful when you rig your poncho as a shelter.
A pair of bungee cords is quicker but less versatile, so may be added later.
If it is particularly windy or cold, one of these cords may be used as a belt around your poncho. The other may be used around your poncho‑liner.
A rain‑poncho and cord is not a complete shelter.
You will also need some pegs or stakes. In extremis, your knife lets you carve them from sticks.
There are a number of ways to do without pegs, or for use when pegs won’t hold. I will deal with those some other day.
To your shelter kit add a small bag of pegs. Most shelters you can construct with a poncho or basha need four to six.
Add your screwdriver to this bag. This may be used for covert pegging, or as a spare peg.
The screwdriver may also be used as a “T‑handle” to pull pegs up again.
Many of the shelters you may construct with a poncho require some means of support.
You cannot rely on convenient trees or even branches always being present.
Hiking/ski poles and bicycle frames have been used instead.
In addition to the above, your kit should also include a couple of tent poles, each with an extended or assembled length of about one metre.
The rain‑poncho “hooch” is a very basic form of shelter.
It is relatively low cost, even more so if you have ponchos issued to you.
Some servicemen carry three or four ponchos: one for wear, one or two for shelter and another as a groundsheet.
Bashas
A common upgrade is the “basha sheet”, which is a waterproof sheet of around 1.7 by 2.5 metres. It is similar to a lightweight tarp, although tarps tend to be three to four metres square.
You will still need the rain‑poncho as rainwear.
In some previous posts, we saw how the American Civil War soldier used his gum-blanket as a groundcloth, shelter-cloth and rain protection. The basha is probably the closest modern equivalent.
Most basha sheets encountered these days have a camouflage print. However, the scale of the print is such they tend to show as a regular pattern.
A poncho/basha/tarp shelter may be improved by rigging two canopies, one below the other.
The inner canopy may be another poncho, a space blanket or even a suitably large non-waterproof cloth.
The double canopy retains more heat in cold conditions. It also insulates the occupant from the heat of the sun in the desert.
In the latter situation, the outer canopy may be a space blanket or similar reflective item. This also makes your shelter highly visible, which may or may not be desired.
This brings me to the topic of security.
One of the reasons the infantry use ponchos or bashas where possible is they give better situational awareness. They are also easier to vacate in an emergency.
Use two types of cordage with different textures. Use one type for the eyelets that form the roof ridge, the other for the corners and edge eyelets. This will help when rigging a shelter in poor light.
Tents
A purpose‑designed tent may be warmer than a poncho/basha hooch, but also may make you more vulnerable to two‑legged predators.
This is something to think about when considering what form of shelter to include in your emergency or outdoor kit.
If you do opt for a tent, make sure that you buy a design that allows you to pitch the flysheet (outer) first and take it down last. Do not let any salesman con you that “flysheet pitches last” is an advantage. I have put up and taken down enough tents in the rain to know better!
When you buy a tent, the fly and inner are probably packed in the same bag. Buy another bag and pack them separately. These bags should be distinct so that you know if you are reaching for the inner or the fly.
Avoid single layer tents unless they are made of a material that is both waterproof and breathable, such as Gore-tex. The latter are usually either bivi-bags or one‑man tube tents.
Single layer tents made from other synthetic materials either have condensation problems or let the rain in.
If you do opt for a tube‑tent or bivi‑bag, you will probably need a poncho or basha as well to give you a sheltered space you can dress or cook in.
Groundsheets
While not essential, a groundsheet will help protect the bottom of your tent inner. It may make the interior of a hooch more pleasant too.
If you carry your bedding items on the outside of your pack, the groundsheet may be used as an abrasion and water-resistant cover .
A groundsheet for a tent should be no bigger than the tent’s floor. Any material outside this area will channel water underneath. Similarly, a groundsheet for a hooch should be no bigger than the sheltered area.
Currently, several sources are offering cheaply-priced foil-coated sheets that have interesting potential as groundsheets.
During the day, these could be staked out as reflector panels to attract attention.
The sheets of silver material sold as reflectors behind radiators may also have potential.
These could be combined with a sheet of waterproof, puncture resistant material.
I have, on occasion, used my all-weather blanket as a groundcloth and insulation. When the cheap tent I was in started leaking in the alpine rain, I flipped the extra width over myself and stayed dry for the night.
Bivi-Bags
A bivi-bag may be thought of as a raincoat for your sleeping bag, or a one-man tent without the poles.
Being a single waterproof layer, they need to be of a breathable material such as Gore-tex, which ups their price. Gore-tex items tend to have a finite life until they stop keeping water out.
Bivi-bags are useful when you lack a kip mat or groundsheet to keep the damp out. They may be combined with shelters such as bashas and ponchos.
The bivi-bag provides a little extra insulation, so in warm weather may be used on its own or with a poncho-liner. In very cold weather it adds an extra layer of insulating air.
When inside the rucksack, a bivi-bag may be used as a water-resistant bag to store your sleeping system in. This puts your sleeping system in its own bag, rather than at the bottom of a rucksack-liner with all your other gear.
Conclusion
Some of these requirements may be easily met, with very little outlay.
In other cases, I hope this discussion has helped you prioritise your acquisitions.
There are a number of sundry or related topics, but these I will save for another day.