A military helmet violates several of the “five S’s of camouflage”. They have a distinctive shape and silhouette. They may have a surface that appears shiny or unnatural under certain circumstances.
Both Levy and Langdon-Davis have points to make about helmets and their camouflage. Levy points out that in thick vegetation branches hitting the helmet can create noise. In such circumstances, the soldier is advised to carry the helmet rather than wear it. Both writers advocate that the best way to break up the shape of a helmet is by the application of local foliage. This garnish should be replaced when it ages and becomes unnatural looking.
Langdon-Davis notes that many soldiers that he taught assumed that their helmet was adequately camouflaged just because they had fitted the net-cover they were issued. More than half a century a century later and very little has changed! It is commonplace to see soldiers and marines that are wearing their issued helmet cover but have made no attempt to disrupt the distinctive shape of their helmet.
There are two ways commonly used to attach natural materials to a helmet.
One is the use of a rubber band that encircles the helmet. For the WW2 British army helmet Langdon-Davis suggest that two “s” shaped pieces of tin be shaped to keep this band in position. The use of a rubber foliage band is actually more commonly seen with German soldiers. Often the band was made from an tire inner tube.
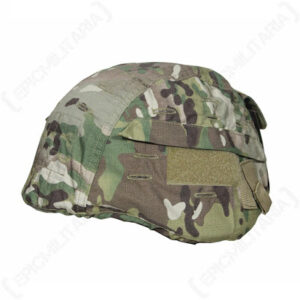
The other method is to fit a net over the helmet. Some camouflaged cloth covers have loops or straps for the placement of natural foliage. Many do not!
In arid or urban environments plant materials may appear relatively rare. Turning your head into a bush might appear to be a good way to attract attention. However, in such conditions it is still important to break up the distinctive shape of the helmet. The use of natural materials is therefore supplemented by additional means.
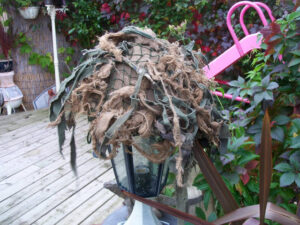
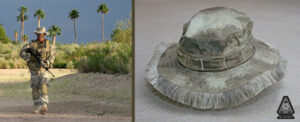
Shown above is a competently camouflaged helmet. A competently camouflaged helmet looks nothing like a helmet.
A basic cover has been constructed from hessian, possibly a sandbag. This has a light, natural looking colour that creates the impression of negative space. Cheaper than a camouflage printed cover and more effective. You could paint disruptive blotches on this cover, but it is probably redundant given that the helmet will be garnished further. If you do paint the cover bear in mind the size of the object you wish to disrupt and paint appropriately large blobs of a colour that contrasts with the base colour.
A net has been placed over the hessian. In this instance it is green but the colour probably does not matter that much so long as it is a natural shade. If the enemy gets close enough to see the net colour the matter is probably moot!
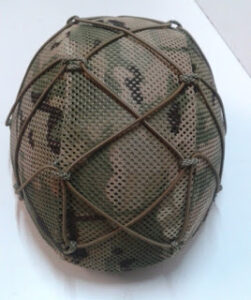
A helmet sized net can easily be constructed if you do not have one. Several methods of net making are shown in my knot book. Below is another technique. A camouflage net need not be particularly neat nor regular. Quite the opposite, in fact.
The net is intended to hold any local foliage that is used. As can be seen, textile “garnishes” have been added too. An important point when added either natural foliage or textiles is not to overdo it. You are trying to disguise the shape, not create a new solid shape. Leave space for natural materials when applying textile garnish.
Some of the garnish that has been added are strips of hessian. These are allowed to fray and go fuzzy. The owner has also used frayed cloth. He has used green but I would suggest a mid to dark brown to make a covering that will be more useful in urban and desert areas. If you are operating in a predominantly verdant area there will be plenty of local natural materials to prove greenery.
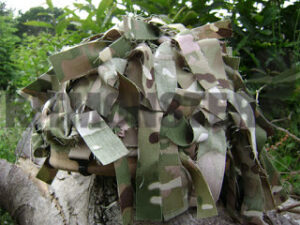
You could use strips of camouflage cloth for garnish. Bear in mind that your headgear may be used in a variety of terrains. Strips of British DPM or US woodland may work well in jungle but not so well elsewhere. Desert DPM, three-colour “coffee stain” or “chocolate chip” may be a more versatile choice. Incidentally, an economical source of camouflaged material for projects is children’s clothing. Camouflaged tee-shirts may be a cheaper source of materials than camouflaged bandannas.
You can tie your garnish directly onto the net. If that proves too fiddly an office stapler can speed the process up. If the staples go rusty and brown, so much the better.
Many of you reading this will have no interest in military helmets. The same techniques of camouflage can be applied to other forms of headgear if you are a hunter or prepper. My preference for such a project is a boonie hat. The brim creates shade, which is a component of camouflaging goggles or eyeglasses.

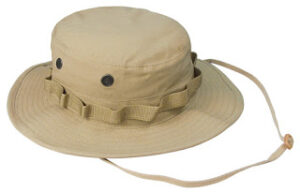
As can be seen, the band around the hat is designed to take natural foliage. On my first day on a certain Caribbean island I brought a cold drink, drank it and then inserted the ice cubes into the pockets of my boonie’s hat bang. Portable air conditioning!
Note that some desert pattern boonies lack a foliage band, which is a mistake in my opinion.
A net can be added to a boonie and textile garnish applied. You don’t actually have to have a camouflage printed boonie as a starting point for this project. Use a single coloured one if it is cheaper. My preference is for lighter colours such as sand or to use desert patterned examples. A company offers “sniper boonies” with a fringed rim. This is a feature that can be emulated.