Another Home guard themed book that I have read recently is the excellent “Home Guard Fieldcraft Manual” by John Langdon-Davies. As you might expect, this book has a lot to say about camouflage.
Langdon-Davies notes that there are several features that give away a British soldier or Home guardsman attempting to conceal themselves. These are the helmet, the gasmask bag (worn on the chest), hands, face and boots. I will discuss some of these areas further on another day. Yesterday’s blog touched on the importance of footwear so let us examine this area today.
Langdon-Davies notes that boots have a distinctive shape. He comments that the only thing in nature that might resemble there shape is a pile of horse droppings. The boots worn by British soldiers at this time were black and often shiny. Nice for parades, horse droppings for camouflage.
It has been said that it takes at least half a century for the collective military mind to get an idea out of its head. Certainly for the rest of the twentieth century most soldiers were issued black boots. While the military favoured black boots most civilian hiking boots were brown. Only in the first few decades of the twenty first century have we seem a wider use brown or tan coloured military boots.
While brown or tan boots are less distinct than black boots they are still noticeably “boot-shaped”. Is it possible to make our “field boots” less noticeable?
A quick websearch reveals that camouflage patterned boots can be purchased. Unfortunately many of this are fashion items or for children. Many of the patterns used are less than ideal. Patterns with a large number of colours often have less contrast between the elements so at a distance “blob-out” to resemble a homogenous single colour shape.
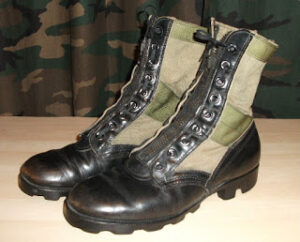
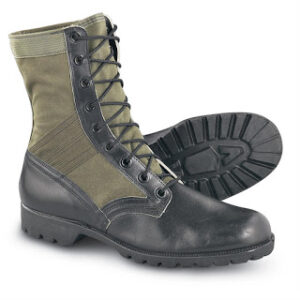
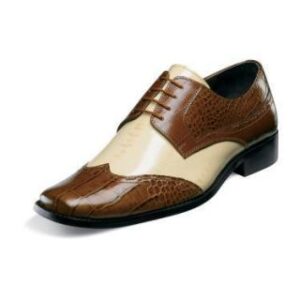
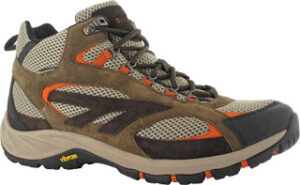
Many modern boots are constructed from several different pieces. Some, such as the Vietnam jungle boot and my beloved Magnums use a combination of nylon and leather for the uppers. Inspired by two-tone shoes (below) a friend of mine suggested that field boots have the uppers constructed with each piece of a different shade or colour. This would break up the distinctive “boot-shape”. Note how the boots in the topmost photo use two shades of green nylon. The second photo below shows some footwear made from a variety of browns, and also orange, which is not so good!
Using suitable gaiters will partially cover a boot. Using items such as scrim to break up the shape may not be that practical since it is likely to catch on underbrush and soak up water.
When I was a young man there was a brief trend in spray painting Doc Martins. I visited one of the street market areas of the city recently and saw numerous hand painted boots and leather jackets on sale, many of them true works of art.
The nylon areas of a boot are probably easy to pattern. Acrylic model paints come with a warning that if they dry on clothing the colour will be near impossible to get out. Thin the paint a little with water so that it coats the nylon fibres rather than collecting in the pores. Permanent marker pens could be used instead.
Painting the leather areas of a boot may be a little more involved. Applying colour is easy enough. What we don’t want to do is affect the permeability of the leather.
Firstly, you may need to remove the existing finish of the leather on the areas you wish to paint. There are products called “leather deglazers” for this purpose. I have also seen acetone and iso-propanol suggested, although the former came with a warning not to use nail-polish removers. Rubbing the surface with fine sandpaper before removing the finish will help the new colour adhere and produce a more matt effect. The previous steps are unnecessary on suede.
Once deglazed the boots can be recoloured. There are acrylic paints specifically marketed for colouring leather or you can use leather or suede dyes. These are fairly reasonable in price and you will only need one or two colours. These products are designed to produce a gloss or semi-gloss finish. Shine is one of the enemies of concealment. A product called “duller” can be added to paints and dyes to give them a more matt effect. It can also be added to the final finishing treatment.
The actual pattern you apply to your boots should disrupt their shape. The different colours should contrast and elements be of one to two inches width. Rather than “camouflage clothing” think “RAF aircraft pattern”, as shown on the Hurricanes below.


The Russians use a similar patterning for many of their military vehicles. A light sand/ yellow colour is used with darker shade of green or brown. Note that on one of these photos below the pattern uses three colours, but there is very little contrast between two of them. If you shrink the photo size you will see that at a distance this effectively becomes a two-colour pattern.


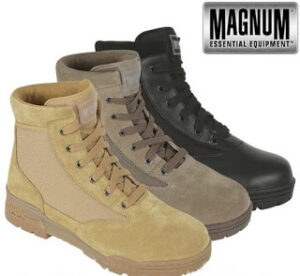
If your boots are already sand-coloured you will need to add bands and blobs of a darker brown. If they are already a darker brown you will need to add lighter sections. The trainers below give a good illustration of what to aim for, but bolder.
Once you are happy with your boots and everything has had a chance to dry you will need to apply an acrylic finisher solution. Most of those available give a gloss, satin or semi-gloss finish. If you cannot locate a matte finish use semi-gloss or satin and mix in some of the duller you used earlier.
I have yet to try this myself. Yet another project for when I have more funds.