Today’s post is a follow-up to my blog on camouflage capes.
Shortly after writing that post I acquired a length of camouflage cloth and set about creating a camouflage cape. Since cloth comes in 1.5 metre widths and I am quite a big lad, I brought two metres, with the intention that it should be about a metre at the front and 1.5 at the back, so could drape over a pack if necessary. Making a cape is a relatively easy sewing task, run a hem an inch or more from the edge to arrest any fraying. Cut the cloth on the outside of this into tassels. Doesn’t matter if these fray, it adds to the disruptive effect. Similarly,your sewing does not need to be particularly neat. Irregular and non-uniform is good for real camouflage.
Good camouflage is three-dimensional, so the most time consuming phase of production was attaching the textilage. I suspect this process could be speeded up with a staple gun, but have yet to try this.
Once I finished, I realized there was a bit of a problem! I cannot really photograph this to show you. You cannot really judge personal camouflage unless it is on a human form. Lying it on the ground or over a chair does not really tell you anything, and I do not have a mannequin or taylor’s dummy. Use the girlfriend? She is petite and shapely, while I am big and ugly, so showing you something made for me on her is not accurate. And we get little chance to be together these days, so I’ve not been able to get her and myself in the same place as cape and camera.
I can, however, pass on some of the lessons learnt while constructing this. The first is that it may be a little long. I could have made it a little shorter without much loss of performance. Secondly, underestimated the effects of the textilage so the base cloth could have been a lighter shade. I could have probably used a monocolour of beige or similar since the textilage adds quiet a lot of shape disruption.
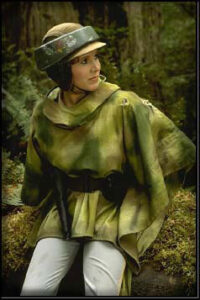
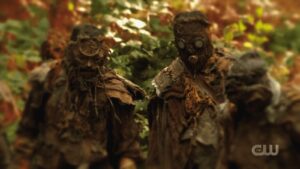
Next time I would not opt for a cape design. Regular readers will recall the “Endor poncho”. Recently two other sci-fi sources have reminded me of this. One is the series “Krypton”. Sagitari on the moon Wegthor wear a brown poncho. While it is not intended as camouflage it does make the wearer appear less of a conventional humanoid shape. The second is season six of “The 100”. The “Children of Gabriel” wear camouflage that uses textilage. Octavia and Diyoza wear examples too. and in their scenes it can be seem the basis is a poncho/ apron overhead garment.


One could easily construct an over-garment that combined the features of a short-poncho and a smock. The poncho part should be of a width to reach the elbows. Cut the edges into tassels. Don’t bother with a hood since the brush can catch such things. A properly camouflaged helmet or boonie hat camouflages your head. You can add a rectangle of cloth to make a collar for the neck opening if you wish. This can be used to show rank-insignia.
Adding sleeves to your ponchoette is simple. You just need two tubes of camouflage cloth. These need a generous width since they will have to fit over other garments. Trouser legs from old combat trousers can be used, or you can make simple tubes from any suitable cloth. If doing the latter put the hems on the outside, like the Langdon-Davies smock design and tassel them. Anchor the sleeves to the inner side of your poncho. The bottom parts of the poncho can be sewn together or you can apply other fastenings such as poppers. Leave generous side vents for freedom of movement and so you can access pocket or equipment on your trouser belt. As can be seen, the basic garment is formed from three or four rectangles

Your poncho/smock will need textilage. Some of this will be from the cloth you have left over. Use any other scraps of camouflage or suitable materials too. Apply to the sleeves and shoulder parts. The chest area does not need so much if you wear webbing or a chest rig. Apply the textilage to this instead.