Disclaimer: “As an Amazon Associate I may earn from qualifying purchases.” Adsense and Infolinks were no help at all.

If you have enjoyed this article or it has been helpful to you please feel free to show your appreciation. Thank you.

Read The Third Wave by Alvin Toffler!
Categories
Barata

Palms In! Parrying Against Knives

I will tell you something that most martial arts teachers and self‑defence instructors do not like to admit. Some do not even admit it to themselves.
Many of the techniques you may have learnt will not work if your attacker has a knife.
Switching to a specialised set of anti‑knife techniques is not a solution. In many knife attacks, the defender fails to see the knife before the attack. Poor lighting, crowded conditions or competent tactics by the knife-man are just some of the factors that can hide a blade.
Treat any attack as a potential knife attack. Defend accordingly.
Whenever you learn a technique, you should be asking yourself several questions:
• Will this technique be practical if the attacker has a knife or other weapon?
• How would I counter this technique if I was the attacker?
• Would this technique work against someone not fighting in my style or a particular style?
Today’s blog expands on an observation I made in a previous post.
I noted how frequent it was that many tai chi defensive movements presented the outer surfaces of the forearms towards an enemy.
The inner side of the forearm has a deeper covering of flesh. Within these muscles are the radial and ulnar arteries and the radial, medial and ulnar nerves.
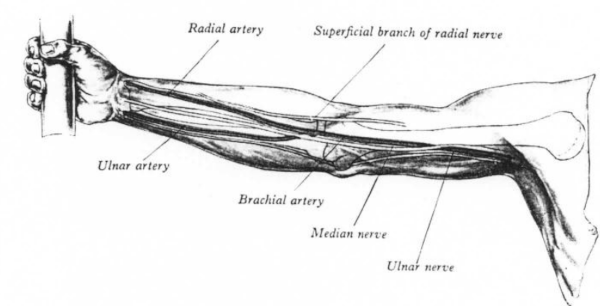
Nerves and Arteries of the forearm and upper arm
A strike to the inner forearm may numb the nerves, reducing the limb’s ability to defend or attack. A cut to the inner forearm may sever one or more arteries, resulting in a potentially fatal bleed‑out.
If you cannot avoid taking a blow or cut, taking it on the outer rather than the inner side of the forearm is preferable.
Here I will remind the reader that parrying actions are secondary defence techniques to evasion and avoidance. Techniques such a ginga and dodging will keep away from knives. Parries are used when evasion fails, or as a component of a counter‑attack action to control the weapon hand.
An effective parry does not just redirect an attack, but includes motions that remove potential targets from the path of the attack.

Palm-In Parrying

Many tai chi defensive movements/“postures” place the lead hand with the back of the hand toward the enemy or uppermost. This orientation protects the inner forearm area from the most likely direct attacks.
One of the most obvious example of this is peng/p’eng/wardoff. The lead arm is held curved and roughly horizontal before the body, back of the palm towards the threat. The rear arm is usually held below or behind the lead arm, often orientated so the inner forearm is protected.
In “How To Use Tai Chi As A Fighting Art”, Erle reminds us that in combat the “hold the ball” hand positioning is often made with the lower hand palm down.
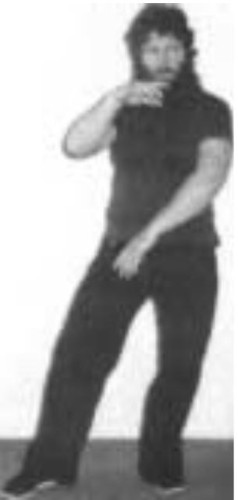
“In this posture the harder area of the forearm is used to block [parry] the attack and so not damage the soft area of the arm.”
In other movements, such as “Grasp sparrow’s tail” we see the lead arm in a more vertical position, but once again the back of the palm and outer forearm are towards the enemy.
Parries from such movements are often taken with the outer forearm making initial contract. Combined with waist movement, the arm may rotate to redirect the attack. This action may result in the hand being placed palm down on the limb. This contact may be used to grab, hook, redirect, push, control or to sense the foe’s next actions.
For an example, see the illustration of the “Outside Crane” in “Attack, Avoid, Survive”. Contact is made with the back of the hand and the hand rolls to hook the fingers over the arm.
Such contacts should be transitory. Leave a hand in contact too long and the foe may try cutting it.
For those familiar with wing chun, it will be appreciated that tan/taan sau/sao is an outer forearm towards the enemy configuration.

Palm-First Parries

Of the tai chi movements that do not present the back of the hand, many instead make initial contact with the palm or fingertips. Many of these use an approach angle that still protects the inner side of the forearm.
Under parries with the palm, I choose to include those movements that make initial contact with either edge of the palm. This is the “knife‑hand” between the base of the little finger and wrist, and the “reverse knife hand” surface between the base of the thumb and wrist. A contact made with the edge of the hand may roll into a contact with the palm. A contact with the palm may transfer to the a palm edge.
It is also possible to employ the edges of the palm when making palm-inward actions.
Remember that palm‑first actions may be parries or strikes. In fact, the only difference between a strike and a parry is often one of context and opportunity.
One of the aspects of simultaneous attack and defence is that one body-part may attack as another defends. Another aspect is that a defence may also attack and an attack also defend.
The back of the palm is also a striking weapon. For example, from peng, either hand may deliver a potent backhand strike under the jawline to the Stomach‑9 point on the side of the throat.
Less potentially lethal, the back of the hand may simultaneously hit the points above the eye and under the cheekbone.

Quadrants of Parrying

In previous writings, I have talked about the “quadrants of defence”. Most attacks may be parried by either a inward or outward parry, and will require either a high or low level parrying action. Your parrying response thus constitutes either a rhomboid or a rectangle, depending on the fighting method you train in.
The “back‑of‑the‑hand”  or “palm‑in” parries are very well suited to outward parries.
From “hold the ball” or “grasp the sparrow’s tail” the arm is easily dropped to swing outwards for a low parry or flicked up and outward against a higher attack. Because tai chi teaches you to hold your arms relaxed, such actions can be very fast and strong.
The outside of the forearm in the primary contact area, although the back of the hand may slap an attack off line. More of slapping‑style parries a little later.
Inward back‑of‑the‑hand parries may need a bit more practice.
The high inward parry may be made as a chopping action, contact area most likely being the ulnar edge of the forearm or the knife‑edge of the hand. Allow your arm to relax and power the motion by a waist twist and footwork.
The low inward back‑of‑the‑hand parry I find a little more awkward. You need a sort of combined swinging/thrusting action, with a waist twist to power it and take potential targets out of the way. This resembles the low parry of karate, but is thrust inward. A hikate action can help with the waist action.
Palm‑first parries, including knife‑hand and reverse knife‑hand actions, may either parry inward or outward. Their drawback is that using the hand rather than the forearm, the defender must be more accurate and there is a greater probability of failure.
In addition, certain palm parries will expose the inner forearm to attack. Favour palm parries that keep the outside or the forearm uppermost and/or towards the enemy.
When practical, use double‑handed parries rather than single‑arm inward parries. The outward parrying arm of the pair will probably be in a back of the palm outward configuration, with the outside of forearm available to parry.
Some parrying actions that used crossed arms were described in the last post. Practice these so the outer sides of the forearms are always outward/uppermost relative to the enemy/threat.
Double‑handed parries need not be made with the arms touching each other. See the illustration of an “inside crane” in my book. The rear arm makes an outward parry with the outside of the forearm and the palm inward, and the lead hand makes a knife‑hand parry with the outer forearm upwards.
Ready stances such as boxing ready, fighting ready and p;eng hinge should be practised with the back of the hands and forearms towards the enemy.
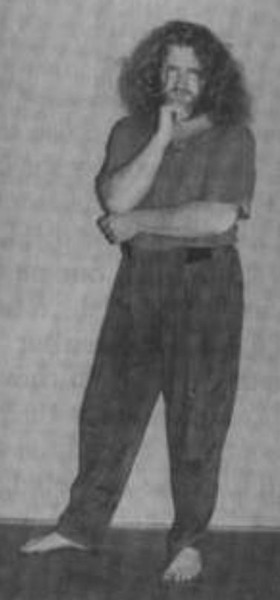
Erle Montaigue in casual peng hinge ready stance
Erle is shown in a variant of p'eng hinge (above). This posture looks non-aggressive, but one arm is positioned ready to defend the upper body, the other the lower and they both may act together.
Another useful pre‑combat stance is to stand with one hand over the other, both around belt‑buckle level.
A defence against a high hooking strike is to bring your hand up to the side of your head, as though brushing back your hair (if you still have some). Ideally this action sweeps across the face on the way. This defence also utilizes the outer forearm area of the bent arm.
Commonly depicted as a blocking action, this can be made into a parry/evasion by turning toward the attack and dropping downward and moving backward. This spiralling action may be used to drive the other hand out in a counter‑strike.
This action may offer some protection against a high knife attack, reducing the severity of an injury at least.
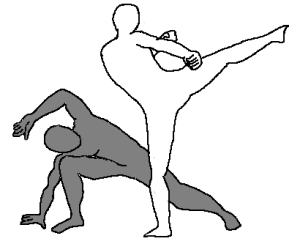
Combine this arm motion with ginga and you have esquiva.
Note that in ginga the bent arm presents the outside of the forearm towards the foe.
Whip/Slap Parries

In “Knives, Knife Fighting & Related Hassles”, Marc Macyoung recommends “whip/slap” parries. These “…originate from the wrist, using the elbow as a pivot point. One way of looking at them is, under control, you throw your wrist at an incoming strike. When done properly, the wrist will arrive at the destination the moment your arm’s motion is arrested. This allows for all of the energy to be transferred into whatever is hit.”
Striking or parrying with a relaxed or semi‑relaxed arm has obvious parallels with the tai chi techniques and principles described above.
When applied with the palm of the hand, the whip/slap parries clearly have a similarity to the tai chi palm‑first defensive moves already described. Obvious applications are as inward or downward parries.
As a parrying technique primarily using the hands, accuracy is needed as well as speed and relaxation.
Horse foot hand used in tai chi single whip
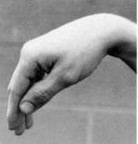
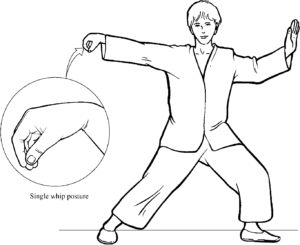
Crane/Horse Foot Hand of Whip ParryThe hand configuration shown in Macyoung’s book for the upwards whip parry (left) has a clear resemblance to the crane/turtle head/horse foot hand used in tai chi single whip (above). As the relaxed hand is flicked upward or outward, the wrist naturally bends and the fingers trail. Primary impact surface is the back of the hand or the wrist area.
I have seen a clip of Erle Montaigue conducting a knife defence workshop. A student stabs at Erle, so Erle twist to face right and brings an arm up in an explosive “Paint the fence, Daniel‑san”  move, hitting the underside of the knife arm. Much to everyone’s surprise, this impact against the arm knocks the knife out of the student’s hand and high up into the air.
This nicely illustrates that a whip/slap type technique may be used even if the contract area is the outer forearm rather than the wrist or hand. This action is therefore applicable to movements where the back of the hand is towards an enemy.
A parry with the dorsum of a horse foot palm is not just for rising parries. The back of the horse foot hand may be directed as an outward horizontal or oblique parry or even as a downward parry with the fingers raised upwards.
When the fingers of a horse foot hand are horizontal this resembles the fook sau of wing chun.
Elsewhere, I have discussed how the horse foot hand form may be used as a hammer‑fist, reverse hammer‑fist or a downward punch.
As a defensive technique, horse foot hand may both parry and hook over attacking limbs.
The sides of the horse foot hand, or even the knuckles, may also be used to parry/strike at an attack.
Note that these defensive moves have mainly used the palm, knife-hand and hammer-fist, the primary weapons taught in Crash Combat. To these has been added the use of the back of the hand and the forearm.
This is a further illustration of how defensive moves may be used offensively.
Categories
Phillosoph

Hammer-Fist and Single Whip

Sometimes you search for something only to discover it was close by all along.
A case in point:
In my recent book, Crash Combat, I reflect that the hammer-fist is a somewhat underappreciated weapon in martial arts. I may have made this assertion in my previous book too.
Reading Joseph Wayne Smith’s book on Wing Chun, he makes a similar statement.
Hammer-fist can substitute for the chop, back-fist and even some closed-fist punches. It is much less likely to result in self-injury than some of these techniques.
Hammer-fist is easy to perform correctly and can deliver powerful blows to both hard and soft targets. Along with the palm-heel, it is probably one of the best hand strikes that we have.
Naturally enough, I was experimenting with some hammer-fist attacks the other day.
I’d been looking at the rapid 270-360° turn that is possible by using the “closed step” of Pa-kua/Bagua. (See my book for details).
This could be used to power a spinning back-fist to strike a foe in the outside gate. But a true back-fist can be fiddly, requiring a terminal flick of the wrist and impact with the first two knuckles.
A spinning hammer-fist is more logical and for most fighters more powerful.
I notice that if I bend my wrist inward a fraction my hammer-fist seems a little stronger or more stable at the moment of impact.
I also note that this mode favours a sort of “snap”.
I can throw the technique with a relaxed arm and hand and snap into a clenched hand just before impact.
This, of course, lets the arm and hand acquire more initial speed and produces a more powerful attack with less muscular effort.
From a variety of positions, I can just flick my arm and have it land in a hammer-fist. This curve of the wrist seems a technique worth cultivating.
And then it dawns on me!
This is the hand form of horse-foot palm from tai chi’s single whip.
I have written about this as a parrying technique and even as a form of punch. I have probably even written about hammer-fist-like strikes with this hand form.
But I had not grasped one of the other important things that posture was trying to teach: that a relaxed, slightly bent wrist gives you a very efficient hammer-fist.
As always, experiment for yourselves.
Can you use hammer-fist instead of your other strikes?
Can you relax more to make it faster and more powerful?
Categories
Phillosoph

More Applications of Single Whip

Today's blog continues on the topic of applications of tai chi's single whip movement. Be sure to read the previous blog on this subject.
As the left foot steps forward and out, there is a moment when there is no weight placed on it.
Anytime that your foot is in this state it may be used to kick.
Kicks from the single whip movement will often be forward or horizontal snap kicks.
Since tai chi fighting tends to be at relatively short ranges, it is prudent to use your opponent for additional support.
For example, an opponent swings a club at you with his right hand. You use your left palm to parry his forearm and momentarily take hold.
Your left leg springs upward and throws a roundhouse kick, contacting with the shin, instep or toe as appropriate for the range.
A likely target is the Liv 13 point on the side of the body where the torso is narrowest. This point allows you to attack the kidneys with a strike to the side of the body.
The hold on the opponent’s arm gives you support but also allows you to sense any following movement he makes.
If you have the window of opportunity a snap kick to the groin may be possible instead. You can follow this with the hooked palm making a strike to the Liv 14 area as described in the previous blog.
The next technique is an extension of something I described in my book in the section on the outward karate parry.
In that technique, you parried across the foe’s chest and a slight turn outward and body movement forward unbalanced them.
In our single whip example, the foe’s right hand is first parried by our right, so we are on their outside gate.
You step towards your foe, your left foot advancing behind them.
This movement may allow you to make a strike under their arm with your left shoulder.
Your left arm swings up under their right arm and extends forwards across their chest. Done correctly, this will nudge the opponent off-balance and the placement of your left leg will prevent him stepping back to regain it.
The next example uses an earlier part of the single whip movement.
As an enemy punches at you with their right, you use your right arm and the hooked palm to parry it outward to your right.
The fingers of your left hand point towards your right elbow so your left arm forms a shield across your body.
Keeping your arms in the same relative positions, you step forward and use your hooked right palm to strike forward and down at the area beneath the foe’s right armpit.
This punch with the hooked palm and some of its targets were described in the previous blog on single whip.
In a variation of the above, you again parry with your hooked palm but your right hand finishes in a position where it is not on a direct line to the armpit. In this case you step forward and use your left to palm strike the foe’s body.
I mentioned single whip being used to initiate locks in the previous blog. Today I will describe some of the possible techniques in a little more detail.
Suppose we are on the outside gate and acting on the foe’s right arm. Your right arm has either hooked over or grabbed his wrist area.
One of the simplest moves from here is for the left palm to come up and strike the elbow. Since the other hand is pulling the arm in the opposite direction such an attack to the joint can be very damaging.
If the application of force is less acute, then a straight arm lock can be applied. Pull his hand back and to your right and apply your weight to his elbow.
If your left palm is applied to the lower side of his elbow, you can move the elbow up and pull his hand down to set up a bent arm lock such as a hammerlock. This can be used in various ways, including to pull him off balance.
For our third variation of lock, the left hand goes under the elbow and makes contact with the inner side of the elbow.
Readers of my book will know there are some strike points on the inside of the elbow and that the edge of the hand can be applied to these as this lock is made.
The intention here is to fold the elbow joint, raising the hand up.
You can then use the forearm as a lever to twist the upper arm and shoulder joint. Force the hand up and back and also push the upper arm backwards to unbalance the foe.
Sometimes the foe will not unbalance, orat least not enough to fall.
If this happens, release the hand and use your right to move in a fast semi-circle to hammer-fist him below the pectoral in the area detailed in the previous blog.
Bounce you right hand up again and use it to palm strike on the chest or face. Then try something else.
You can also apply locks from the inside gate, although this is a bit more dicey since you can be hit by his other hand.
In these examples the hooked palm right hand engages his left wrist area. As you step forward your left hand makes an edge-of-the-hand-strike on the crease of his elbow.
This is the same sort of lock as described in the previous section.
You fold his elbow joint and take his hand up and back, moving to his outside gate. As you stepped in, you probably placed your feet between his so this move can be turned into a thigh or knee strike to the groin.
Another technique for the inside gate is the variant of the karate outside parry. Engage the left wrist with your right hand and then step in, passing your left arm under his and extending it across his back. Turn your hips to the left to unbalance him.
In the previous blog on single whip I mentioned breaking wrist grabs.
My book contains a variety of methods for doing this, my favourite being the “underneath and outside” movement.
The video below shows a number of applications of single whip, including a method for breaking wrist grabs.
Note that as the hooked palm turns over it effectively passes underneath and to the outside of the grabbing arm.
The left hand coming over has a number of applications, one of which is to shield the body should the grab be turned into a strike or should the other hand or head be used to strike.
I hope this brief look at the applications of single whip have been of some interest.
For much more information on self-defence and the principles upon which some of these applications are based please buy a copy of my book.
 
Categories
Phillosoph

Single Whip and Horse Foot Palm

One of the advantages of writing this blog is that I can often cover topics that there was not room for in either of my books.
Today I am going to write a little about the “hooked fist”, which in turn leads to some discussion of tai chi’s single whip movement.
Single whip has a number of variations, and this is worth bearing in mind when you view videos of the movement.
Some are variations between different styles of tai chi, while others are different interpretations.
While tai chi is a potent martial art, many of its practitioners only study it for health or meditative purposes and this should be kept in mind when viewing movements.
For purposes of today’s discussion, the “whip” part of the movement will be considered to be with the right hand and the movement has three components I will discuss.

The first “component” is the right hand which comes up to chest level and moves outward, the wrist bending so that the closed hand hangs down. The arm looks a little like you are whipping the rump of a donkey with a riding crop or switch, hence the name of the position.
The shape the hand makes has a number of names. It is sometimes called “Hooked Palm” while the name “Turtle Head” is probably the most descriptive. Some instructors liken it to the “Crane Beak” hand form.
Given the equestrian aspect of the single whip position, the “Horse Foot Palm” name is perhaps most apt.
After the right hand has assumed position, the body turns to the left and the left hand comes up in an open palm. On some variants this is a simple semi-circular movement, while other variants cause the hand to roll over or spiral.
At the same time that the left hand moves the left foot steps forward and outward slightly. I used to find the turn and step unusually difficult until Erle Montaigue told me that you should keep your left elbow above your left knee when making that part.
In English, we tend to call single whip a posture or position, but it is actually a sequence of movements.
When movements from a kata or form are used in combat it is unlikely the whole thing would be used, and used exactly as you would perform it during a kata.
Elements of a kata or form are rather like clay from which you build the thing you need at the moment that you need it. They are not rigid geometric or mathematical constructions, or at least, they are not once your use of them matures.
Most tai chi moves are multifunctional. One instructor may tell you the combat application is one thing, another that it is something else. In reality there may be many more applications.
With that in mind, let us investigate some of the combat applications of the components of single whip.
Single whip is very much the signature move of tai chi.
In movies such as The Matrix you will see single whip used as an opening posture. In reality, it is better reserved until range has been closed with an opponent.
The left palm’s most obvious application is that it is a palm-strike. It is in a good position to hit the chest region or the chin, and the accompanying step forward adds power.
The open palm can also be used to parry, either with the palm or either edge of the hand. The spiralling motions used for the left hand in some varieties of single whip can be used to neutralize a wrist grab.
The horse foot palm is probably most widely understood as a parrying hand form.
It can hook over an enemy’s arm and pull it out or down.
It can parry to either side or upwards.
In his book “Knives, Knife Fighting and Related Hassles: How to Survive a Real Knife Fight” Marc MacYoung describes a tai chi-inspired “Whip Parry” as a defence against knife attack. Since the arm is semi-relaxed, the parry has a very short response time. Marc recommends that you move the wrist and let the hand go along.

Horse foot palm can also be used offensively in a number of ways.

The most obvious is to use it as a hammer-fist strike against targets such as under the arm or the temple.
The hand can also be used as a reverse hammer-fist: swing inward to hit targets such as the back of the head or the shoulder blade.
The hand can also be used to execute a downward glancing punch against certain bony areas of the body. For example, the hand hits under the armpit and the knuckles scrape downwards across the points below.
The hand posture is such that the force of hitting a bony area is dissipated along the arm.
Targets often used for such attacks include the GB 22 point about 3" under the armpit and the area just below the pectoral muscle.
The latter are Liv 14 and GB 24, on the mammary/mid-clavicle line, a couple of ribs down from the muscle in the sixth and seventh intercostal spaces.
These are all potent and potentially very harmful targets which can also be attacked by a hammer-fist from a horse foot palm. Horse foot palm can also suddenly be flipped over to make a back-fist strike to the enemy’s nose!

Both hands can of course be used together. Either hand can parry while the other counter-attacks.
If one hand grabs the wrist, the other can contact the elbow in various ways and apply various varieties of lock. This is another possible application for the spiralling movement of the left hand. Armlocks can be used to unbalance a foe.
The step forward with the left foot also has martial applications. In high level tai chi it is supposed to strike the KD 5 point on the enemy’s foot and drain their qi.
For the less advanced of us, the foot can be positioned to stop an enemy stepping back to regain their balance when the balance is disrupted by hand techniques.