Categories
Phillosoph

Survival Library: Chapter 4, No Need to Die

The other day, I went looking for an old survival book.
The search engine provided me with hundreds of titles just within the bushcraft/wilderness field alone.
Back in the 1980s, the choice seemed much more limited. Of course, with my memory I may be forgetting quite a few titles from then!
Eddie MacGee Rucksack Packing Suggestions
The main work in the field was what was then FM21-76 and related publications.
There were a few books from other official sources, such as the Air Ministry pamphlets: “Arctic Survival”, “Desert Survival”, “Jungle Survival” and “Sea Survival”. Those are still well worth a read, incidentally.
Combat Survival and Evasion” was apparently compiled from the course notes of some gentlemen in Hereford. It is an interesting, if a little eccentric, read which I may discuss in a later blog.
I owned copies of “Can You Survive” by Robert DePugh, “Jack Knife Cookery” by James Austin Wilder and “The Art of Survival” by Cord Christian Troebst. Not strictly survival manuals, but all interesting and all containing some useful information.
The SAS Survival Handbook” by John “Lofty” Wiseman was the new kid on the block, and had already established itself as one of the go-to books on the subject.
The “Survival Handbook”/“The Book of Survival” by Anthony Greenback was a little older, but did not seem to get as much attention as some other works. A shame, since it remains an excellent book.
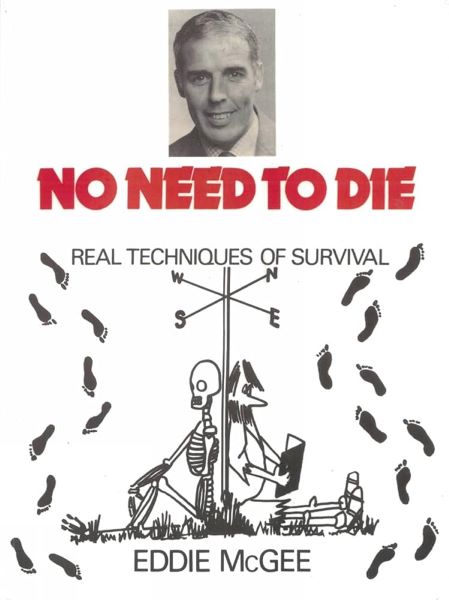
Admittedly, my memory often fails me these days, but the only other manual I can recall from that time is “No Need to Die” by Eddie McGee. This was actually the book I had been searching for, although naturally I could not recall the author nor title until I found it.
Back in those days, this had been one of the few survival books my local library had.
No Need to Die Cover
Personally, I tend to think of this book as more of a discourse than a guide. Some topics are covered in great detail, while other fields, less so.
For example, there is some discussion of direction finding using plants and other means, but very little instruction in navigation as a broader topic.
On the other hand, there are large sections on tracking, trapping and fishing. These are very good, and it will be a very rare reader that does not learn something new.
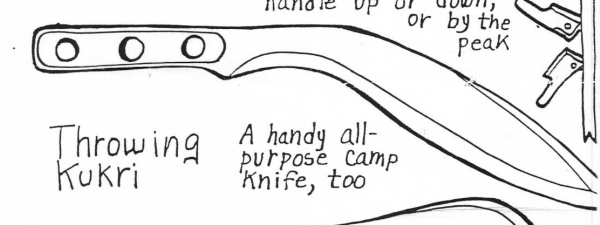
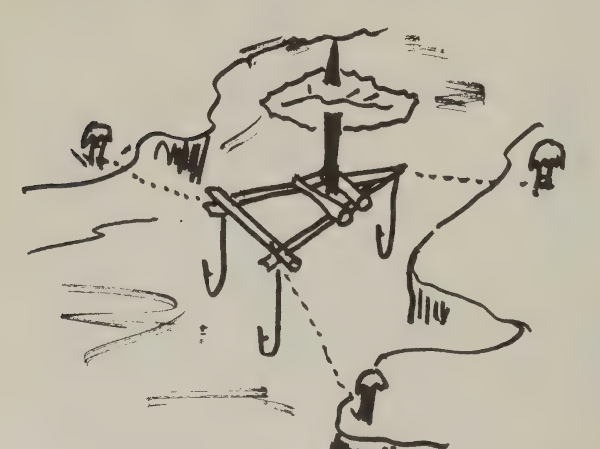
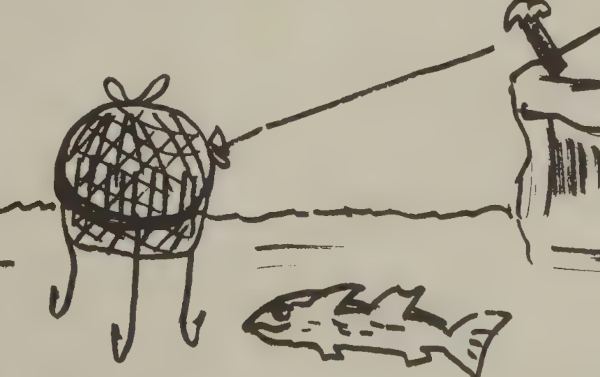
There is a certain, very British eccentricity to the book. It is written in an informal, chatty style. There are numerous cartoons and sketches by the author, some of which detail ideas only touched on in the main text.
Reading it once again after several decades, one of the sections I now find interesting me is that on the use of fishing skiffs and fishing with gourds/balloons/condoms/plastic bags.
Fishing SkiffFishing SkiffBalloon Fishing
Pine bark as insect repellent is worth knowing too. (Some other tree barks, such as birch and cedar may also be suitable, as might other parts of the pine tree)
I would not suggest “No Need to Die” as a sole or first book someone should read on survival. See Survival Library Chapter One for my recommendations in this regard.
“No Need to Die” is certainly a book worth reading once you have a grounding in the basics. You are bound to learn a few things.
McGee was later to write “Eddie McGee's Complete Book Of Survival”. I hope to find time to read and review this in the near future.
One story from “No Need to Die” sticks with me (p.178):
“I remember once on a long desert walk in the Oman, while serving with the Sultan’s forces, making my way across to a known water well. I knew that the arabs guarded their water hole tenaciously but when I arrived at the well I did not expect to find that each arab, in fact, carried his own water collection skin, so having found the water well and removed the stone covering I was dumbfounded to find the water over twenty feet down and the hole about two feet in diameter. I had no bucket, only my water bottle and no means of lowering it down by rope and it was certainly too dangerous for me to climb down, so I sat a little and thought. I removed my survival bag from my belt, took off my vest, fastened my fishing line to it and lowered this to the water. In a couple of minutes I had not only filled my container, I’d also stepped back and had a good strip wash and removed some of the grime and salt from my body. Later I made a cup of tea, went to sleep, had a good rest and moved off the next morning feeling on top of the world and re-supplied with water.”
As luck would have it, the same day I read the above passage, I came across a forum where some members were glibly challenging if anyone’s life had ever been saved by a survival fishing kit?
Right here was an example of how a component of a fishing kit (and a vest!) had potentially saved someone’s life, even though they were in a desert and probably miles from the nearest stream.
With my current situation, lifestyle and location, the chances of myself needing to fish or trap to feed myself are remote. Thus, I had been tardy getting around adding any fishing or trapping components to my skin-level EDC.
Reading the above story, I vowed to add some fishing line to my EDC pouch. A couple of packets of hooks on nylon couldn’t hurt either. Better to have them and never use them…
Categories
Phillosoph

Hidden Hand Trio: Wrist Grab Escapes

Escapes from wrist grabs are not a topic I have often covered in this blog. There are hundreds of books, blogs and videos showing such techniques. They range from simple to intricate, and from realistic to the not so much!
Here at survive.phillosoph.com, I try to offer content not found on other defence or survival pages. When I do consider a more common topic, I endeveor to look at it from a different angle, or provide fresh insight or novel information. I hope that I have achieved this, at least sometimes.
If some self-defence courses and books are to be believed, someone walking up to you and holding your wrist is a common problem. Maybe not for some of us. I am big and ugly and not that many people wish to hold my hand.
On the other hand, (pun intended!) wrist grabs are probably a more common feature of altercations between a man and a woman. And there are fighting styles that often feature controlling an arm to apply a lock, throw or to pull aside a defence for a strike.
Therefore, your repertoire of defensive techniques should include some responses to wrist grabs.
“Crash Combat” mainly concentrates on the method I have called the “under and up”, the “under and out” or even “under, out and up”. Use whichever name helps you remember how it works.
This technique works for same-side grabs (right hand to right wrist, left to left), or cross/mirror-stance grabs (left to right wrist, or right to left-wrist).
It works for whether the grabber's thumb is towards or away from the defender’s hand.
The same technique is used to respond to your knife wrist being grabbed, or someone grabbing your baton or rifle barrel.
Being a more extensive work, “Attack, Avoid, Survive” adds some additional techniques, ranging from the very simple jerking action against the thumb, to the kuk sool won-based throwing techniques.
Recently I started reading “Analysis of Shaolin Chin-na”. This included advice that I will paraphrase as: “if someone grabs you (by your wrist, fingers etc), poke them in the eyes or kick their shins. Attack, Avoid, Survive contains the same tactics, although not as catchily expressed as Jwing-Ming Yang put it, I will admit.

Techniques from Bagua

I was inspired to dig through my collection and find the DVD that included Erle Montaigue teaching eight methods of wrist escape. I found it on MTG15 “Dim-Mak and Combat Wrestling”, which is worth checking out, btw.
The clip below does not include the wrist grab section, but has some other techniques worth knowing, some of which may be used to prevent or follow-up a wrist grab.
The eight techniques Erle shows each use a hand form from bagua/pa-kur. Several of these are actually the under and up technique, but using a variety of hand configurations.
Today I would like to look at three of the other methods in the video. I personally think of these as the “Hidden Hand Wrist Grab” responses.
For ease of illustration, let us assume that it is the defender’s right wrist being held in the following descriptions.

First Method

In the first method, the wrist is grabbed, the grabber’s thumb away from the hand and his palm on the outside/back of the forearm.
In response, the fingers of the grabbed hand are splayed out. This action is also seen in the kuk sool won techniques in Attack, Avoid, Survive, so I presume the intention is to fortify the wrist.
The fingers are then thrust towards the grabber’s throat or face. This echoes the “poke ‘em in the eyes” advice, but uses the grabbed hand rather than your free hand.
The restrained hand is driven forward, not just by the arm, but by a rotation of the hips and waist and the forward movement of the whole body.
As the thrust is made, the hand is turned palm up so there is a corkscrew-type action, and considerable weight and force is applied to the space between the grabber’s thumb and fingers.
There is a supplementary technique to this move, which I will address a little later.

Second Method

The second technique is very similar, but in this case the grab is to the inner side of the wrist.
Again, splay your fingers and use your body motion to twist the arm and drive the fingers at the throat or face.

“Head Scratch” Method

The third and final technique we will look at is the fourth method on Erle’s video. To avoid confusion, I will call this the “head scratch” technique.
The wrist has been grabbed as in the first technique. The grabber holds the right wrist with his left hand.
Splay the fingers and raise your hand up so you look at your own palm. Without pausing, continue raising the hand as though you intend to scratch your head above the forehead. At the same time as you make this action, you utilize the body rotation and movement that powers it to turn to your left and move away from the grabber.
If the hold is not broken and the grabber does not let go, they will be pulled along behind the defender.
As the defender turns away, they may choose to throw their hand before them and thrust forward with their palm, applying additional force to break the hold or pull the grabber off balance.
This technique may also be used right hand against right wrist, or left against left, but you will need to change the direction you move away. Move to take yourself to the outside of the grabbing arm. This will take you out of reach of the grabber’s free hand.

Supplementary Technique

The supplementary technique for all three moves is essentially the same for all.
As your grabbed right hand begins to move, your free left hand moves toward your right elbow and then swings up toward your right hand. The left hand moves parallel to the underside of your held forearm. The grabber may not notice this motion, which is why I call these “hidden hand” escape techniques.
By grasping your wrist, the grabber has effectively immobilized their own, making it easy for you to grasp their wrist with your free hand. Use your thumb or fingers to attack nei gwan/neigwan/PC-6.
Rather than trying to grab the wrist outright, try placing your left palm on the forearm and allowing it to slip slightly down the forearm as it tightens the grip.
If the foe’s wrist grip on you is broken, use your own wrist hold to pull the foe off balance, or pull their arm out of the way while you strike with your freed arm, for example using a hammer-fist or elbow strike.
If the hold was not broken, twist your body to pull him forward, stepping across his front so that he is tripped.
Successfully exploiting a grab or lock may require disrupting the foe with some strikes. Similarly, a lock of grab may only be a prelude to a throwing technique..
For the head scratch technique, the action of turning away may be used to drive a hip or shoulder throw without waiting to see if the hold is broken.
If the hold is broken during the initial “head scratch” motion, the turn away may be replaced with a turn back to deliver a strike.
There are many other options, of course.
Your grab on his wrist may be used to pull his hand low and then up behind his back, for instance.
If moving to the outside of the grabbing arm the arm may be taken up to create a high bent arm lock to force the attack to overbalance backwards.
Categories
Phillosoph

Get Thinner! Reduce Bulk

About 20 to 25 minutes into the movie “The Omega Man”, the protagonist (Dr. Neville aka Charlton Heston) is seen searching for the mutant nest.
He apparently combines this activity with his cardiovascular exercise, so we see him with both a tracksuit and a submachine gun.
This allows him to move fast and light, with significant firepower to draw on. I have seen much less practical loadouts for a reconnaissance mission!
Omega Man in tracksuit
Neville wears a belt carrying his iconic flashlight, additional magazines, and a tape-recorder (for exposition purposes). Also on his person he carries a map.
What else he carries on this belt is hard to make out in this sequence.
There may be a holstered handgun.
No sign of a water bottle, although this would be a logical thing to have for “reconnaissance jogging”, as would some binoculars/field glasses.
Watching the movie a few months ago, I fancied I caught a glimpse of a knife on the belt, possibly a Ka-Bar. Rewatching the scenes, I am not so sure. A knife would, however, be a logical thing to take with you on such a mission, and operating as Neville does, you would not want anything too heavy or two bulky.
Bulk is always something to consider when selecting equipment. If I was planning to travel light, would I trade my kukri for a Ka-Bar or my Buck 119?
On the scales, the kukri is heavier. On the belt, the difference in length, bulk and mass seems less significant. It is the hilt you notice most, and that of all these examples is similar in size. And the ten inch kukri is a far better choice for, say, chopping through a door than a six or seven inch bowie blade.
This line of thought got me thinking about what I might carry if for some reason I was not carrying the Scrapboard Survivor. I realized that many of the “other” fixed blade knives I owned would also probably be too bulky for many such scenarios. In many cases, the limiting factor was the handle.
In contrast to most of these knives, I remembered that when I was visiting some friends on the West Coast, I had treated myself to a Hibben throwing knife.
Like most throwing knives, the grip section is of similar thickness to the blade so as not to offer too much aerodynamic resistance.
Unusually for a throwing knife, this model came with a nylon belt sheath and the grip section was wrapped in polyester thread.
It was quite possible (and not unknown) for me to take a nap and remain perfectly comfortable while still wearing that knife. Not a property that many of my other knives had!
So, I have been thinking about knives with low-bulk grips.
A notable example was the Buckmaster LT/Buck model 185. This was the Buckmaster blade fitted with a flatter grip rather than the then obligatory cylindrical hollow-handle of most survival designs.
Buckmaster LT/Buck 185 slimline survival knife
I like that the LT used a plastic coating on the grip. I once (unintentionally!) sawed through a live electrical circuit and was very grateful the saw I was using was the only brand of Gigli saw with insulating plastic tubing over the end loops. Although that incident involed a saw, since that lucky escape, the conductivity of tool handles has been a consideration for me.
Bare metal handles are not much fun in sub-zero conditions either, particularly if you do not have time to put on your gloves when you need the tool in a hurry.
On the downside side, the shape of the Buckmaster LT grip and guard looked pretty dorky.
I am wary of pronounced finger grooves. They are as likely to not suit your hand as they are. A grip that may fit your hand perfectly may not if you put on gloves.
The Buckmaster LT is no longer in production, and I am not aware of anything similar on offer.
My friend Ed once sent me sketches of a “throwing kukri” which had a simple flat grip. He suggested it might actually be a fairly useful lightweight camp tool too.
Ed's Throwing Kukri Design
Closest I have to this is a flat version of the Alphamega knife, a gift from a friend.
Slimline Alphamega
Alphamega were based on a knife I saw in a Macedonian museum, itself probably influenced by the Greek kopis, so this resembles a small kukri to many people, although the blade is actually straighter. This Alphamega is, however, a one of a kind. The Alphamega will be discussed further in a later blog.
It is debatable as to how much need there is for a seven to twelve inch blade with a flat, low profile grip. Such blades may be put to heavy uses, and such a grip configuration may be hard on the hands.

Boot Knives

A field where flatter grip designs would be more welcome would be for boot knives.
Flatter grips would make them more concealable, which is a priority for this category of knife.
There are some boot knife designs with skeletonized handles. Some of these look to be a little too narrow to give a good grip, or are fitted with deep finger grooves that may, or may not suit your fingers.
It would be nice to see some of the other models of boot knife offered with the option of covered but low-bulk grips. If a flatter grip needs to be wider to fill the hand better, so be it.
Comfort and concealability should be priorities.
Quillons should be no more than is needed to keep the fingers off the edge. .
A friend had asked me for some thoughts on boot knives:
Shape-wise, the hilt of the AG Russel Sting is hard to beat. Very comfortable and practical, yet only 0.36" in thickness. (figures from a website, I haven’t measured my own example).
The blade and hilt of the Sting is made from a single piece of steel. It is obviously possible that blade and tang be constructed from a thinner piece of steel and thin scales of some other material then added. This would allow for a greater variety, and improve thermal and electrical insulation.
Decades back, I sketched some designs for a range of boot knife type knives with ring pommels. I figured this feature might assist in drawing the knives from concealed positions.
I have cooled to that feature, thinking a more solid pommel may be more practical. I do regard a cord channel in the butt of a boot knife and essential, however.
A short loop of cord can assist in drawing the knife. Once drawn, the same loop may aid knife retention. About 40 cm tied into an 18 cm loop is good for my skinny hands. If you have big paws, start with a longer piece.
I would also like to see such boot knives offered in a choice of blade lengths and styles.
If I have one criticism of the Sting, it would be that there is not a commonly available variant with a longer blade available.
I rather like the one and a half edge/M3-style of my Smith & Wesson SW820 boot knife, and this configuration makes good business sense, allowing sales in backward places that consider double-edged blades to be “evil”.
A tanto- or modified tanto-style blade would doubtless appeal to many buyers. A kanmuri-otoshi or kissaki-moroha style might prove to be both versatile and practical.
Some users would probably prefer a clip-point or sabre-point utility-orientated blade instead. A low profile, Mora-style bladed boot knife sounds like a very useful option.
Mora and puukkot blades are available as unhilted “blanks”, although these sometimes cost more than a finished knife! Adding your own thinner grip to one is a feasible home project.

Other Knives

Boot knives are not the only knives that it would be desirable to see in flatter, low-bulk options. We have already touched on the subject of thinner field and utility knives.
CRKT knives including Stiff KISSes
The picture above shows a pair of CRKT Stiff KISS knives, along with a neck knife and A.G. Russel Sting copy (for scale) by the same company.
The Stiff KISSes were a useful low-bulk fixed blade. Typically, they are no longer in production! The point of the drop-point (“MDP”) was a little too acute to my mind. A point with more belly would have been more versatile. Similarly, the tanto's point could have been less angular.
My main purpose for showing these Stiff KISSes is they illustrate two ways a bare tang design may be modified.
The tanto has a wrap of black kangaroo leather (given to me by whip-maker Joe Strain).
The MDP has scales of teakwood added (admittedly due for a clean and oil). The scales are deliberately different, the one on the private side being thinner and flatter than the public side scale.
I have seen it suggested that the narrow hilt of the bare model, with a finger notch rather than a guard, is not ideal for “serious” use, which is probably a fair comment.
The MDP or tanto easily fits in the thigh pocket of cargo trousers. This allowed me to have a useful fixed blade available while camping at a crowded “civilized” site.

Pec-Knives

The Gerber Strongarm was not the first knife I brought as a pec-knife!
Those of you who have read “Survival Weapons” will know that my first pec-knife was a Mantis MF-1. Appropriately for its more general role, this is a thicker and larger knife than a typical boot knife. It is still a good choice.
The Gerber is good for overt wear. If concealment is more of an issue, I might be inclined to carry the flatter MF-1 instead.
Even without a cord-wrap, the grip is quite hand filling. The knife was “engineered for use with paracord wrap”. Without a wrap, the balance point is a bit more forward, although this has little practical effect.
As may be seen, my MF-1 has a wrap of paracord. If bulk was more of an issue, a wrap of tape could be used instead. Alternatively, a thin pair of wooden, plywood or plastic scales could be constructed and bolted together over the tang.
Bootknives and Pec-knives could be flatter
Photo above: CRKT/A.G.Russel Sting, SW820, Gerber Strongarm, Mantis MF-1, Gil HIbben throwing knife. Note how the Gerber and Mantis have much wider and thicker blades than the boot knives.
United Cutlery Navy SEAL Knife
Another potential low bulk utility knife was the United Cutlery S.O.A. Navy SEAL knife. (If you can find one! All my searches today are giving “out of stock” and “discontinued” messages).
I am kicking myself that I never got around to getting one of these! When I first saw the design I assumed a ridiculously high price tag. Quite the opposite, in fact!
The “BlackField Integral pocket knife” appears to be a copy with an increased price tag. Steel is listed as “440” rather the AUS-6 of the UC version
Something like the Mantis MF-1 or UC SEAL might be the sort of low-bulk, lightweight, versatile knife suitable for the Omega Man’s jogging kit.