Disclaimer: “As an Amazon Associate I may earn from qualifying purchases.” Adsense and Infolinks were no help at all.

If you have enjoyed this article or it has been helpful to you please feel free to show your appreciation. Thank you.

Read The Third Wave by Alvin Toffler!
Categories
Barata

Palms In! Parrying Against Knives

I will tell you something that most martial arts teachers and self‑defence instructors do not like to admit. Some do not even admit it to themselves.
Many of the techniques you may have learnt will not work if your attacker has a knife.
Switching to a specialised set of anti‑knife techniques is not a solution. In many knife attacks, the defender fails to see the knife before the attack. Poor lighting, crowded conditions or competent tactics by the knife-man are just some of the factors that can hide a blade.
Treat any attack as a potential knife attack. Defend accordingly.
Whenever you learn a technique, you should be asking yourself several questions:
• Will this technique be practical if the attacker has a knife or other weapon?
• How would I counter this technique if I was the attacker?
• Would this technique work against someone not fighting in my style or a particular style?
Today’s blog expands on an observation I made in a previous post.
I noted how frequent it was that many tai chi defensive movements presented the outer surfaces of the forearms towards an enemy.
The inner side of the forearm has a deeper covering of flesh. Within these muscles are the radial and ulnar arteries and the radial, medial and ulnar nerves.
Nerves and Arteries of the forearm and upper arm
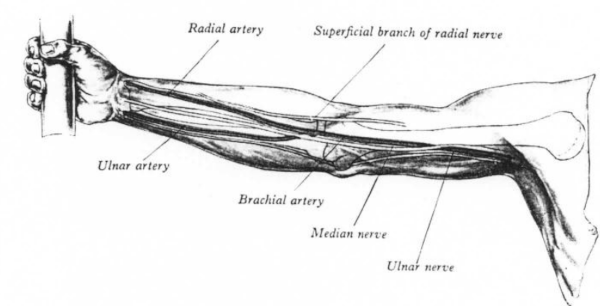
A strike to the inner forearm may numb the nerves, reducing the limb’s ability to defend or attack. A cut to the inner forearm may sever one or more arteries, resulting in a potentially fatal bleed‑out.
If you cannot avoid taking a blow or cut, taking it on the outer rather than the inner side of the forearm is preferable.
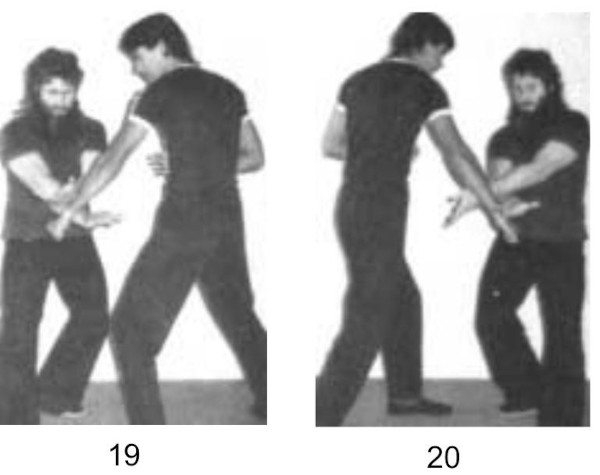
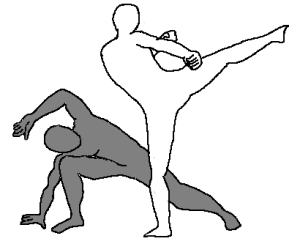
Here I will remind the reader that parrying actions are secondary defence techniques to evasion and avoidance. Techniques such a ginga and dodging will keep away from knives. Parries are used when evasion fails, or as a component of a counter‑attack action to control the weapon hand.
An effective parry does not just redirect an attack, but includes motions that remove potential targets from the path of the attack.
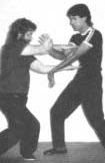
Palm-In Parrying

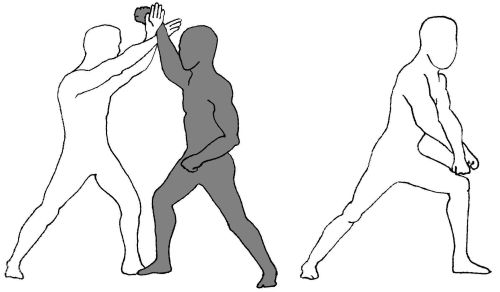
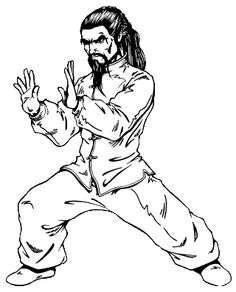
Many tai chi defensive movements/“postures” place the lead hand with the back of the hand toward the enemy or uppermost. This orientation protects the inner forearm area from the most likely direct attacks.
One of the most obvious example of this is peng/p’eng/wardoff. The lead arm is held curved and roughly horizontal before the body, back of the palm towards the threat. The rear arm is usually held below or behind the lead arm, often orientated so the inner forearm is protected.
In “How To Use Tai Chi As A Fighting Art”, Erle reminds us that in 
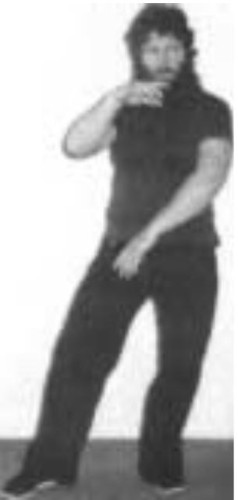
combat the “hold the ball” hand positioning is often made with the lower hand palm down.
“In this posture the harder area of the forearm is used to block [parry] the attack and so not damage the soft area of the arm.”
In other movements, such as “Grasp sparrow’s tail” we see the lead arm in a more vertical position, but once again the back of the palm and outer forearm are towards the enemy.
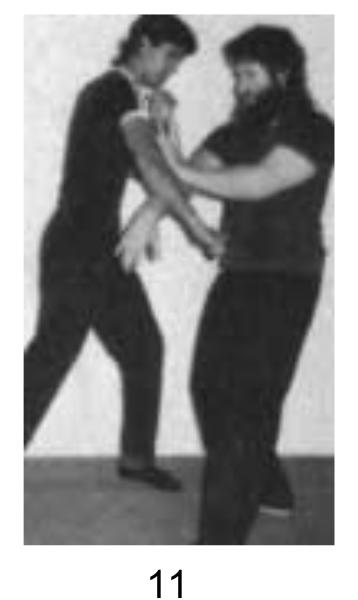
Parries from such movements are often taken with the outer forearm making initial contract. Combined with waist movement, the arm may rotate to redirect the attack. This action may result in the hand being placed palm down on the limb. This contact may be used to grab, hook, redirect, push, control or to sense the foe’s next actions.
For an example, see the illustration of the “Outside Crane” in “Attack, Avoid, Survive”. Contact is made with the back of the hand and the hand rolls to hook the fingers over the arm.
Such contacts should be transitory. Leave a hand in contact too long and the foe may try cutting it.
For those familiar with wing chun, it will be appreciated that tan/taan sau/sao is an outer forearm towards the enemy configuration.

Palm-First Parries

Of the tai chi movements that do not present the back of the hand, many instead make initial contact with the palm or fingertips. Many of these use an approach angle that still protects the inner side of the forearm.
Under parries with the palm, I choose to include those movements that make initial contact with either edge of the palm. This is the “knife‑hand” between the base of the little finger and wrist, and the “reverse knife hand” surface between the base of the thumb and wrist. A contact made with the edge of the hand may roll into a contact with the palm. A contact with the palm may transfer to the a palm edge.
It is also possible to employ the edges of the palm when making palm-inward actions.
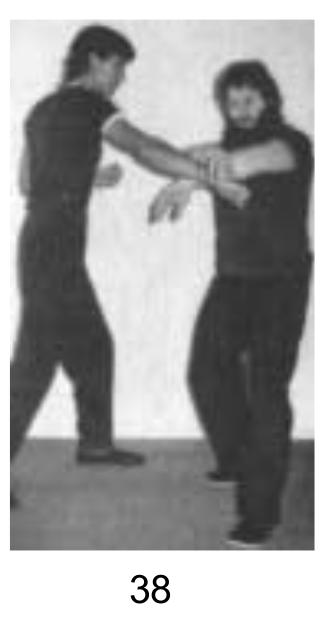
Remember that palm‑first actions may be parries or strikes. In fact, the only difference between a strike and a parry is often one of context and opportunity.
One of the aspects of simultaneous attack and defence is that one body-part may attack as another defends. Another aspect is that a defence may also attack and an attack also defend.
The back of the palm is also a striking weapon. For example, from peng, either hand may deliver a potent backhand strike under the jawline to the Stomach‑9 point on the side of the throat.
Less potentially lethal, the back of the hand may simultaneously hit the points above the eye and under the cheekbone.

Quadrants of Parrying

In previous writings, I have talked about the “quadrants of defence”. Most attacks may be parried by either a inward or outward parry, and will require either a high or low level parrying action. Your parrying response thus constitutes either a rhomboid or a rectangle, depending on the fighting method you train in.
The “back‑of‑the‑hand”  or “palm‑in” parries are very well suited to outward parries.
From “hold the ball” or “grasp the sparrow’s tail” the arm is easily dropped to swing outwards for a low parry or flicked up and outward against a higher attack. Because tai chi teaches you to hold your arms relaxed, such actions can be very fast and strong.
The outside of the forearm in the primary contact area, although the back of the hand may slap an attack off line. More of slapping‑style parries a little later.
Inward back‑of‑the‑hand parries may need a bit more practice.
The high inward parry may be made as a chopping action, contact area most likely being the ulnar edge of the forearm or the knife‑edge of the hand. Allow your arm to relax and power the motion by a waist twist and footwork.
The low inward back‑of‑the‑hand parry I find a little more awkward. You need a sort of combined swinging/thrusting action, with a waist twist to power it and take potential targets out of the way. This resembles the low parry of karate, but is thrust inward. A hikate action can help with the waist action.
Palm‑first parries, including knife‑hand and reverse knife‑hand actions, may either parry inward or outward. Their drawback is that using the hand rather than the forearm, the defender must be more accurate and there is a greater probability of failure.
In addition, certain palm parries will expose the inner forearm to attack. Favour palm parries that keep the outside or the forearm uppermost and/or towards the enemy.
When practical, use double‑handed parries rather than single‑arm inward parries. The outward parrying arm of the pair will probably be in a back of the palm outward configuration, with the outside of forearm available to parry.
Some parrying actions that used crossed arms were described in the last post. Practice these so the outer sides of the forearms are always outward/uppermost relative to the enemy/threat.
Double‑handed parries need not be made with the arms touching each other. See the illustration of an “inside crane” in my book. The rear arm makes an outward parry with the outside of the forearm and the palm inward, and the lead hand makes a knife‑hand parry with the outer forearm upwards.
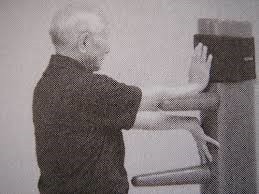
Ready stances such as boxing ready, fighting ready and p;eng hinge should be practised with the back of the hands and forearms towards the enemy.
Erle Montaigue in casual peng hinge ready stance
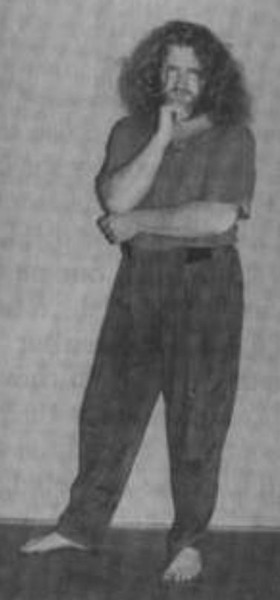
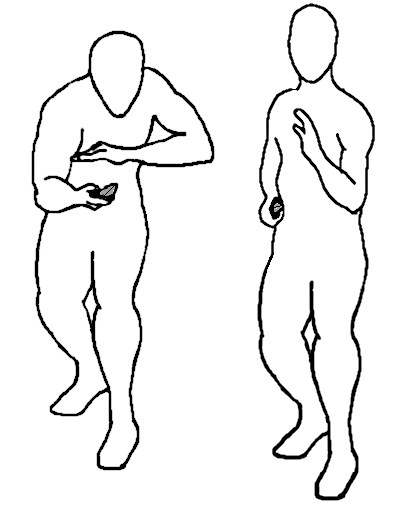
Erle is shown in a variant of p'eng hinge (above). This posture looks non-aggressive, but one arm is positioned ready to defend the upper body, the other the lower and they both may act together.
Another useful pre‑combat stance is to stand with one hand over the other, both around belt‑buckle level.
A defence against a high hooking strike is to bring your hand up to the side of your head, as though brushing back your hair (if you still have some). Ideally this action sweeps across the face on the way. This defence also utilizes the outer forearm area of the bent arm.
Commonly depicted as a blocking action, this can be made into a parry/evasion by turning toward the attack and dropping downward and moving backward. This spiralling action may be used to drive the other hand out in a counter‑strike.
This action may offer some protection against a high knife attack, reducing the severity of an injury at least.
Combine this arm motion with ginga and you have esquiva.
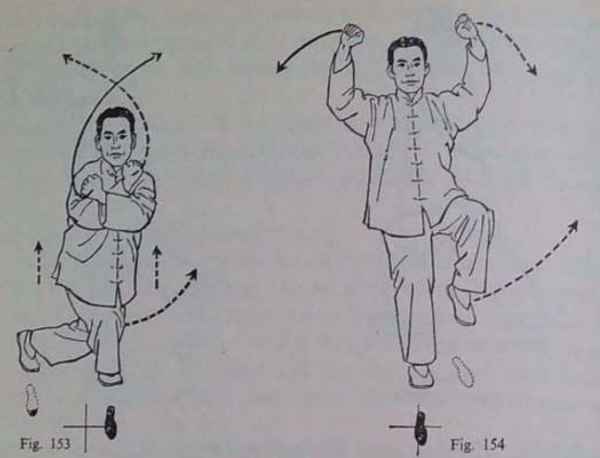
Note that in ginga the bent arm presents the outside of the forearm towards the foe.

Whip/Slap Parries

In “Knives, Knife Fighting & Related Hassles”, Marc Macyoung recommends “whip/slap” parries. These “…originate from the wrist, using the elbow as a pivot point. One way of looking at them is, under control, you throw your wrist at an incoming strike. When done properly, the wrist will arrive at the destination the moment your arm’s motion is arrested. This allows for all of the energy to be transferred into whatever is hit.”
Striking or parrying with a relaxed or semi‑relaxed arm has obvious parallels with the tai chi techniques and principles described above.
When applied with the palm of the hand, the whip/slap parries clearly have a similarity to the tai chi palm‑first defensive moves already described. Obvious applications are as inward or downward parries.
As a parrying technique primarily using the hands, accuracy is needed as well as speed and relaxation.
Horse foot hand used in tai chi single whip
Crane/Horse Foot Hand of Whip Parry
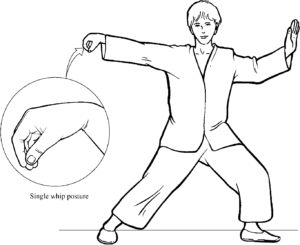
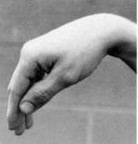
The hand configuration shown in Macyoung’s book for the upwards whip parry (left) has a clear resemblance to the crane/turtle head/horse foot hand used in tai chi single whip (above). As the relaxed hand is flicked upward or outward, the wrist naturally bends and the fingers trail. Primary impact surface is the back of the hand or the wrist area.
I have seen a clip of Erle Montaigue conducting a knife defence workshop. A student stabs at Erle, so Erle twist to face right and brings an arm up in an explosive “Paint the fence, Daniel‑san”  move, hitting the underside of the knife arm. Much to everyone’s surprise, this impact against the arm knocks the knife out of the student’s hand and high up into the air.
This nicely illustrates that a whip/slap type technique may be used even if the contract area is the outer forearm rather than the wrist or hand. This action is therefore applicable to movements where the back of the hand is towards an enemy.
A parry with the dorsum of a horse foot palm is not just for rising parries. The back of the horse foot hand may be directed as an outward horizontal or oblique parry or even as a downward parry with the fingers raised upwards.
When the fingers of a horse foot hand are horizontal this resembles the fook sau of wing chun.
Elsewhere, I have discussed how the horse foot hand form may be used as a hammer‑fist, reverse hammer‑fist or a downward punch.
As a defensive technique, horse foot hand may both parry and hook over attacking limbs.
The sides of the horse foot hand, or even the knuckles, may also be used to parry/strike at an attack.
Note that these defensive moves have mainly used the palm, knife-hand and hammer-fist, the primary weapons taught in Crash Combat. To these has been added the use of the back of the hand and the forearm.
This is a further illustration of how defensive moves may be used offensively.
Categories
Barata

Cross Hands

First of all, I will make it clear that this blog is not about the infamous scissor block aka X-block.
The danger of this technique I have addressed in both my self‑defence books and on this blog a few times already.
The infamous, dangerous scissors block
Unfortunately, every forum seems to have at least one blow‑hard who knows a guy, who knew a guy who was attacked and successfully used a scissors block. If you get really lucky, it may work, but the odds are really heavily against you.
Many readers may have seen the “Surviving Edged Weapons” (1988) video. Around the 74 minutes mark there is a simulated attack where the police officer uses a scissors block.
As soon as he is stopped, the attacker drives the point of his knife into one of the cop's forearms and cuts deep along and down the forearm.
If you made the block with the palms towards the attacker, the way it is often taught, the radial and ulnar arteries and nerves will be exposed to this counter. Getting cut on the outside of the forearm is not much fun either.
As an aside, note how often defensive moves in tai chi present the outer surfaces of the forearms towards a foe.
A long bladed weapon may reach past the scissors block and injure the face or head. While it is unlikely an attacker would have a sword bayonet, bread knives or carving knives are possible threats. Such knives are found in any domestic kitchen or hardware store and often feature in domestic violence.
For an armed fighter with a weapon in each hand, such as a pair of sai, the scissors block may work.
Fencing masters such as Joseph Swetnam called this the “double parry” and recommended it as a technique by which the rapier and dagger could deal with powerful longer weapons such as a quarterstaff. Notable is that this is described as a parry, suggesting that it is used to redirect force rather than block/obstruct/oppose it.
Any technique that leaves a target in the path of a weapon has potential for a dangerous failure.
Erle Montaigue crossed arms parry
In my last blog, I supplied a link for Erle Montaigue's “How to Use T'ai Chi as a Fighting Art”. The term “scissors block” is used twice in this work. If the associated photos are examined (Nos. 19, 20, 38 and also 11) it will be seen that what is actually being used is a type of two‑handed parry. Waist rotation is being used to divert the force away to the side rather than trying to directly oppose or absorb it.
Rather than countering a vertical downward attack, the two‑handed parry is being used against low lateral attacks. A similar technique could be used against higher level attacks. A low cross hand parry is sometimes termed a “willow tree”.
One of the reasons for using two hands is as a counter to the folding principle. The other hand helps sense or inhibit attempts to slip another attack past a successful parry.
Tai chi crossed arms parry
From long har chuan (covered in both my self-defence books) you will have learnt that one hand will often take over a parry to free the other for a more effective counter‑attack. This is facilitated if both hands are in close proximity when the initial defence is made.
With this in mind, it will come as no surprise that many tai chi forms have movements where the hands or wrists are crossed.
Both Yang and Wu styles have a movement usually translated as “cross hands”. Alternately, it is called “ten hands” since the Chinese symbol for the number ten is a cross.
The technique commonly called squeeze, press, ghi or chee may also be looked at as a type of crossed hands. Some writers use the term “cross hands” when discussing ghi. Usually one hand is held with the back toward the foe, and the palm of the other hand placed on the wrist.
One of the applications of this technique is to grasp the head, chest or a limb between the two hands, hence the squeeze/press name.
The joined hands may also be used to push or strike when close to the foe. A variation is to place one palm on the back of the other to make a two‑handed palm strike. Erle notes the press attack can either be a powerful pushing movement or it can be a snapping downward attack.
Yet another variation uses one forearm to ward‑off (peng/p'eng) the foe's attack or body. The rear palm is placed on the forearm and body motion used to unbalance or strike the foe.
The next example is taken from “Wu Style Taijiquan” by Wang Peisheng and Zeng Weiqi.
Twisting move from Wu tai chi.
Tai chi moves can often appear very abstract. In this technique, the fighter crosses his hands while apparently allowing one leg to cross behind the other. At first glance, this seems a questionable and potentially unstable move.
When seen in context, we see the twisting turn and drop to the right avoids and aborts the attacker's attempt to kick with his right foot. The motion further unbalances the attacker to fall to his left.
Wu tai chi twisting action unbalances foe.
The twisting and dropping action has acted like a spring being compressed, allowing the tai chi fighter to explode upwards and knee or kick his unbalanced attacker.
Crossing the hands puts them in a position from where they can be thrown outwards for balance, or as an alternate or follow-up means to strike.
Wu tai chi twist throws attacker and kicks out.
For a casual-looking ready stance, place one hand over the other at around belt-buckle height. From this position a variety of defensive or counter-offensive moves can be made.

Weapons

Many of the techniques described above may be used if you are only wielding a single weapon.
If you are using a baseball bat or hiking staff, you will most likely hold it like a katana with both hands. The weapon may be wielded to defend either side.
If using a weapon with less grip area, such as a knife or baton, it may seem that you unarmed side is less defended. The solution is to bring the weapon to the same central location that a longer weapon would be used from. The unarmed hand is brought up to around the opposite shoulder to defend the chest and throat area. The Filipino martial arts refer to this as the “live hand”.
Use of the alive hand with a single weapon.
With a little thought, it can be seen that the unarmed hand may be brought forward to assist the armed hand in several of the two‑hand defensive and counter‑attacking techniques already suggested for unarmed use.
Essentially, you have created a posture where your inside gate is close. You keep your inside gate towards the enemy so that you may use either hand in defence or attack.
Categories
Barata

Returning to Tai Chi

A couple of months back, I hurt my leg.
I was walking-up the slightly sloped street just before my house. Nothing different from what I have done hundreds of times before.
Something just “went” in my inner calf and the inside of my foot.
Not sure what is more worrying. How long it is taking for my leg to heal, or that such a thing can just happen again for no apparent cause or reason.
I have spent the last few months limping everywhere, to varying levels of pain or discomfort.
One thing I have noticed is I seem to have experienced less migraine attacks, which I suspect due to the leg pain stimulating endorphins/endocannabinoids. This gives me a nice choice: periodically lose chunks of vision, or walk more and be in constant discomfort.
The other day I came across two inaccurate comments about tai chi. Tai chi is the only thing I had not yet tried on my bad leg.
Tai chi puts gentle stress on the lower legs, so is known to be useful in healing certain conditions.
While the kettle was boiling, I went through what I could recall of the tai chi form.
Much to my surprise, I noticed that the constant tension along my inner calf had completely vanished. The inside of my foot still hurt, but was possibly toned down a little.
The leg thing did not come back for several days, and was usually only noticeable in the morning before I had practised the form, or if I had been immobile for some time.
For over a week now, I have been making an effort to run through a few moves each morning. I will fit in a session before bed if I am not too sleepy.
The pain in the foot is beginning to reduce, which is encouraging.
As I wait for the train, I use a modified version of the rocking from one foot to the other that is described in the “Anti-Jet Lag” book.
Rather than following my old (Yang) form, I have decided to try learning the form in the book “Compact Tai Chi” by Jesse Tsao. The early parts are mainly Yang, with some Chen, Sun and Wu techniques added in later sections.
One of the good points of my ailing memory is that I have forgotten so much of the Yang form that I learnt, it does not conflict with learning a new form.
An added bonus is that this training has interested me in other styles of tai chi. So far I have mainly found information of Wu style, although it is not often clear which Wu style. There are two styles of tai chi called “Wu”. In Chinese they have different tones, so are distinct words. Often these are simply translated as Wu, and it is not obvious if this is Wú: second, rising or high-rising tone; or Wǔ (Hǎo): third, falling-rising or low tone.
Many books on tai chi to not bother to tell you the style, or even the form they describe.
Compact Tai Chi is a good book and does a nice job of explaining the form. I have something of a tai chi background, so it is hard for me to judge if this book alone would be good for a beginner.
Tsao does describe a martial application after each posture. I would advise anyone wishing to practice tai chi for any reason to familiarize themselves with the martial applications.
It is much easier to get the movements right if you keep in mind a certain movement is intended as a strike, or as a parry sweeping an attack away from your face and abdomen, for example.
How to Use T'ai Chi as a Fighting Art” by Erle Montaigue is a good start, as is the Compilation book with Erle and I collaborated on.
“Advanced Yang Style Tai Chi Chuan Vol. 2 : Martial Applications” by Jwing-Ming Yang is also good for the applications section. The most recent edition combines all volumes in one cover. I am not sure if all the original content is retained.
“Wu Style Taijiquan” by Wang Peisheng and Zeng Weiqi includes numerous illustrations of techniques.
Categories
Phillosoph

Hidden Hand Trio: Wrist Grab Escapes

Escapes from wrist grabs are not a topic I have often covered in this blog. There are hundreds of books, blogs and videos showing such techniques. They range from simple to intricate, and from realistic to the not so much!
Here at survive.phillosoph.com, I try to offer content not found on other defence or survival pages. When I do consider a more common topic, I endeveor to look at it from a different angle, or provide fresh insight or novel information. I hope that I have achieved this, at least sometimes.
If some self-defence courses and books are to be believed, someone walking up to you and holding your wrist is a common problem. Maybe not for some of us. I am big and ugly and not that many people wish to hold my hand.
On the other hand, (pun intended!) wrist grabs are probably a more common feature of altercations between a man and a woman. And there are fighting styles that often feature controlling an arm to apply a lock, throw or to pull aside a defence for a strike.
Therefore, your repertoire of defensive techniques should include some responses to wrist grabs.
“Crash Combat” mainly concentrates on the method I have called the “under and up”, the “under and out” or even “under, out and up”. Use whichever name helps you remember how it works.
This technique works for same-side grabs (right hand to right wrist, left to left), or cross/mirror-stance grabs (left to right wrist, or right to left-wrist).
It works for whether the grabber's thumb is towards or away from the defender’s hand.
The same technique is used to respond to your knife wrist being grabbed, or someone grabbing your baton or rifle barrel.
Being a more extensive work, “Attack, Avoid, Survive” adds some additional techniques, ranging from the very simple jerking action against the thumb, to the kuk sool won-based throwing techniques.
Recently I started reading “Analysis of Shaolin Chin-na”. This included advice that I will paraphrase as: “if someone grabs you (by your wrist, fingers etc), poke them in the eyes or kick their shins. Attack, Avoid, Survive contains the same tactics, although not as catchily expressed as Jwing-Ming Yang put it, I will admit.

Techniques from Bagua

I was inspired to dig through my collection and find the DVD that included Erle Montaigue teaching eight methods of wrist escape. I found it on MTG15 “Dim-Mak and Combat Wrestling”, which is worth checking out, btw.
The clip below does not include the wrist grab section, but has some other techniques worth knowing, some of which may be used to prevent or follow-up a wrist grab.
The eight techniques Erle shows each use a hand form from bagua/pa-kur. Several of these are actually the under and up technique, but using a variety of hand configurations.
Today I would like to look at three of the other methods in the video. I personally think of these as the “Hidden Hand Wrist Grab” responses.
For ease of illustration, let us assume that it is the defender’s right wrist being held in the following descriptions.

First Method

In the first method, the wrist is grabbed, the grabber’s thumb away from the hand and his palm on the outside/back of the forearm.
In response, the fingers of the grabbed hand are splayed out. This action is also seen in the kuk sool won techniques in Attack, Avoid, Survive, so I presume the intention is to fortify the wrist.
The fingers are then thrust towards the grabber’s throat or face. This echoes the “poke ‘em in the eyes” advice, but uses the grabbed hand rather than your free hand.
The restrained hand is driven forward, not just by the arm, but by a rotation of the hips and waist and the forward movement of the whole body.
As the thrust is made, the hand is turned palm up so there is a corkscrew-type action, and considerable weight and force is applied to the space between the grabber’s thumb and fingers.
There is a supplementary technique to this move, which I will address a little later.

Second Method

The second technique is very similar, but in this case the grab is to the inner side of the wrist.
Again, splay your fingers and use your body motion to twist the arm and drive the fingers at the throat or face.

“Head Scratch” Method

The third and final technique we will look at is the fourth method on Erle’s video. To avoid confusion, I will call this the “head scratch” technique.
The wrist has been grabbed as in the first technique. The grabber holds the right wrist with his left hand.
Splay the fingers and raise your hand up so you look at your own palm. Without pausing, continue raising the hand as though you intend to scratch your head above the forehead. At the same time as you make this action, you utilize the body rotation and movement that powers it to turn to your left and move away from the grabber.
If the hold is not broken and the grabber does not let go, they will be pulled along behind the defender.
As the defender turns away, they may choose to throw their hand before them and thrust forward with their palm, applying additional force to break the hold or pull the grabber off balance.
This technique may also be used right hand against right wrist, or left against left, but you will need to change the direction you move away. Move to take yourself to the outside of the grabbing arm. This will take you out of reach of the grabber’s free hand.

Supplementary Technique

The supplementary technique for all three moves is essentially the same for all.
As your grabbed right hand begins to move, your free left hand moves toward your right elbow and then swings up toward your right hand. The left hand moves parallel to the underside of your held forearm. The grabber may not notice this motion, which is why I call these “hidden hand” escape techniques.
By grasping your wrist, the grabber has effectively immobilized their own, making it easy for you to grasp their wrist with your free hand. Use your thumb or fingers to attack nei gwan/neigwan/PC-6.
Rather than trying to grab the wrist outright, try placing your left palm on the forearm and allowing it to slip slightly down the forearm as it tightens the grip.
If the foe’s wrist grip on you is broken, use your own wrist hold to pull the foe off balance, or pull their arm out of the way while you strike with your freed arm, for example using a hammer-fist or elbow strike.
If the hold was not broken, twist your body to pull him forward, stepping across his front so that he is tripped.
Successfully exploiting a grab or lock may require disrupting the foe with some strikes. Similarly, a lock of grab may only be a prelude to a throwing technique..
For the head scratch technique, the action of turning away may be used to drive a hip or shoulder throw without waiting to see if the hold is broken.
If the hold is broken during the initial “head scratch” motion, the turn away may be replaced with a turn back to deliver a strike.
There are many other options, of course.
Your grab on his wrist may be used to pull his hand low and then up behind his back, for instance.
If moving to the outside of the grabbing arm the arm may be taken up to create a high bent arm lock to force the attack to overbalance backwards.
Categories
Phillosoph

Wind and White Crane: Hidden Hand Attacks

I have used lockdown as a chance to complete a number of projects. I have also done a lot of reading on a wide variety of topics.
This reading included finishing some books I had stalled on, and looking at some others I had just never got around to giving my full attention to.
In the latter category were a number of books on Ninjitsu, including some by Stephen Hayes. Books on this topic often have a lot of chaff in with the wheat, although to be fair, that is true of many martial arts books written in the 80s, if not in general!

The Wind Posture

One of the sections that interested me was that on stances, the stance associated with the element “wind” in particular.
As I have discussed in my own books, I feel “stance” and most of its English alternatives is an unsatisfactory term.
A stance is a transitional rather than stationary configuration. Hayes likens them to snapshots or frames from a film rather than being stationary.
Most of us, even many high-grade martial artists, have a relatively shallow immersion in the art.
Stances are an important training aid but it is easy to become diverted by the details rather than passing through to master the underlying concepts. Interestingly the Japanese term “kamae” translates as “pose” or “posture”, but also as “base”. Stances are often the foundation for learning.
From Stephen Hayes Ninja Vol.1:
“The wind level of consciousness is characterized by the receiving posture, or hira no kamae. The receiving posture couples a freely moving base and the power to harmonize the body with the intentions of an attacker. The feet are placed hip-width apart and carry the body weight evenly. The knees are flexed slightly more than in the natural posture, creating a feeling of balance in the hips similar to that experienced just before sitting down on a chair. The back is straight, in a natural manner, and the shoulders are relaxed. The arms extend outstretched to the sides with the hands open, and the eyes gaze forward in soft focus, taking in the whole picture without limiting the concentration to one single point.
The body should have an extremely light, almost floating feel to it. Epitomizing some concepts that are the opposite of those embodied in the shizen earth pose, the wind-level hira no kamae prepares the fighter for adapting to and going with the attacking moves of the enemy. This adaptive sensitivity is centered in the chest behind the breastbone. The evenly distributed balance facilitates quick and easy movement in any direction in response to the attacker’s intentions. The outstretched arms have the potential of becoming tools to carry out punches, strikes, deflections, blocks, throws and locks, as well as acting as distractions and calming techniques.
In self-protection situations, the hira posture is used to handle attackers in a way that subdues them without injury, if possible. The pose itself is nonthreatening, and it appears to be an attempt to fend off an attack or to reassure an adversary that there is no hostile intention, as upraised open hands traditionally symbolize surrender or benediction. From the hira no kamae, footwork proceeds with circular or straight- line movements, as appropriate for the specific circumstances. The arms are used to entangle the adversary with spiraling actions or intercept the adversary with direct advances.”
Another book on Taijutsu (by Charles Daniels, taught by the same sensei as Hayes, Masaaki Hatsumi) shows a posture it calls “hoe no kamae”. While this uses an L stance and raised forearms, I suspect the application is similar.
Those of you wise enough to have invested in a copy of Crash Combat or Attack, Avoid, Survive (thank you!) will know I place considerable emphasis on evasion rather than parrying or blocking.
The basis of this is the ginga movement from Capoeira.
Could the wind kamae be an alternative or complimentary evasion technique to ginga?
Sadly, I do not currently have much room to dance around, so I cannot experiment much with movement and evasive moves in hira no kamae.
Some observations:
On its own, hira no kamae and hoe no kamae look like the fighter is just standing there saying “Go on dude, hit me!”.
This is one of the symptoms of regarding a stance as static, amplified by still photography.
In practice, this posture will be used to allow fast body turns.
The outstretched arms contribute to maintaining balance.
Study the body twist used in the photos below. Hira no kamae is not used, but it could have been passed through if the defender had thrown up his arms for stability.
Both of my martial arts titles explain how to use quick evasive turns similar to that shown. You will find these in the bayonet and knife sections, as well as elsewhere in the text.

White Crane

Hira no kamae may have reminded some of you of the white crane-inspired movements used in some styles of kung fu and karate.
Not surprisingly, white crane styles often put a considerable emphasis on evasion.
The extended lead arm can be used to parry attacks that cannot be fully avoided.
Brought up under the attacker’s armpit, and we have the tai chi technique of “diagonal flying”.
This is effectively the same principle as using a straight-arm karate parry against a foe’s torso and breaking their balance.
Hayes’ books often show defensive strikes made against the attacking limb, including from hira no kamae. This is also a tactic favoured by many white crane styles.
The wind posture is likely to place a defender side-on to an attacker.
As described above, the lead hand may be used for an assortment of parries and strikes.
The latter include finger jabs to the face and clawing actions.
The rear hand has the advantage that is has a considerable distance in which to generate power, and that it is effectively hidden from the attacker’s view.
This is the equivalent of the “tail” position used with swords and other weapons.
The foe has no idea from what direction a rear hand attack may come, and the rotation of the waist can create power and velocity.
One option is to adopt a side-on horse stance as the forward arm parries.
The rear hand then executes a classic reverse punch, the hips twisting through ninety degrees to transition into forward stance.
Hook punches are another useful technique for an enemy you are side-on to.

Kup and Pow

In Complete Wing Chun (Vol.2), the author discusses Pak Hok Pai, a white crane style with several techniques suited to attacking an opponent to the side.
In best Batman tradition, two of these are called “pow” and “kup”.
Pow chui has been described as a straight uppercut employed with a semicircular body motion. I like to think of it as a “long uppercut”, although technically it is more of a long shovel-hook.
Targets for pow chui include the testicles, kidneys or throat.
Kup/cup chui is a downwards, overhead strike that can be targeted at the soft muscles of a kicking leg, or the forearm, biceps or triceps of an attacking or guarding arm.
The temple, nose or top of the head can also be targeted with kup.
Like the corkscrew hook described in Attack, Avoid, Survive, a kup can be used to reach over and around a guard. The difference is that the kup typically comes from the rear hand while the corkscrew starts as a lead jab.
Choy Lay Fut is also notable for use of large arc swinging strikes.
A more horizontal motion, intermediate between pow and kup, can be used to throw a lateral, circular strike (a “roundhouse punch”, perhaps?), that is more open and straighter-armed than a hook.
While this has elements of being a “haymaker”, many of the standard objections against a haymaker do not apply if correct tactics and a hidden hand posture is used.
The back and kidneys or below the guard are the favoured target areas.
An upward angled or horizontal strike can be applied to the area of the sixth to tenth ribs: above the floating ribs and below the level of the lower tip of the sternum. This is likely to affect the lungs.
All these punches are powered by waist/hip rotation and are most effective with a relaxed, easily accelerated arm.
Kup and pow are both performed using the second knuckle of the fingers as the striking surface. These are the knuckles that would make contact if you were knocking on a door. Some styles call this a “leopard fist”.
Attack, Avoid, Survive showed a related technique, the half-fist, used to attack soft, narrow targets such as between the ribs. The thumb is often pressed against the side of the fingers, rather than being clamped across them as with a conventional fist.
Rear hand attacks can also utilize palm-strikes, chops and hammer-fist strikes.
Recently, my girlfriend described how her mother had often fought men who had turned up with the intent of raping her sister.
Many a bully and would-be rapist who dismissed the mother as a “mere-woman” got a percussive readjustment.
Her mother's technique of choice was a powerful overhand or underarm punch.
My girlfriend learnt the same techniques and has used them to defend herself on numerous occasions.

Tai Chi

In “How To Use Tai Chi as a Fighting Art” Erle Montaigue describes the “Stork Spreads Wings Punch”, another potential rear hand attack.
The “Stork Spreads Wings” posture is often translated as “white crane…”:
“This punch is one of the most powerful punches from any martial art. It is totally centrifugal and quite fast considering its distance…This is one of only three punches in T’ai Chi that uses the first two knuckles, in T’ai Chi we use the knuckles that most suit the position of the palm upon impact otherwise we use extra muscles to hold the palm into position and there-by lessen its impact…If you block with the right fist across to the left against a left face attack with the left palm underneath it, … the left palm then takes over the block while the right fist is thrown out at the target with the turning of the waist…Your left palm looks after the left fist while your right fist circles back up in a centrifugal punch to his left temple”
Categories
Phillosoph

Cross Stepping Post: Part Three

Some time ago I started what was intended to be a series of posts on the “Cross Stepping Post”. Part One introduced two of the movements and the intention was to let the reader try these out for a couple of weeks before covering the thing as a whole. Part Two gave some advice on learning part one. As with most of my plans, real life intervened and a year has gone by! Here is part three, the full sequence. (or rather, one side of it!)
For part three we will only consider the footwork, which is the essence of the thing. There are some hand movements that can be added but it is better to concentrate on your footwork, balance and co-ordination for now.

Setup. Begin with your right foot slightly advanced and your left foot angled out. Your spine should be straight, your belly and bum pulled in. Your knees are slightly bent, your shoulders are relaxed and your arms hang down by your sides. Try not to look down at your feet. If you have some familiarity with Tai Chi or other soft or internal martial arts these conditions will be familiar. If you are not familiar with this body condition consult the Tai Chi section of my book or other good works on the subject. I have shown the lead foot pointing forwards, but the toe can be turned inward, a the lead foot may even be parallel with the rear.
First Move: Step Back. Still with your feet in the starting position it should be possible to lift your right foot from the ground without noticeably shifting your weight. If you are new to this you probably cannot do this. This is one of the objectives you will aim for.
For the first move you raise your right foot and place it behind your left. Your calves should brush or touch. The right foot is raised “flat”, without the heel or toes lifting first. It is placed flat behind the left. This will take practice, so persevere.
Second Move: Forward Foot Kick/Step. For the second move the left/forward foot is raised and the heel passes down along the inside of the right foot. As the left heel passes the right heel the left foot straightens up. The left foot is brought forwards in a sort of sweeping action and is placed on the ground. The final foot position is a mirror of the start/setup position. You should have maintained your balance throughout this sequence. The chances are you did not, but this will improve with practice.
Third Move: Forward Foot Across. For the third move, the left foot is raised and placed down ahead of the right. The heel is turned in and the toes out. The lead leg will touch the rear knee. Note that for the previous steps the forward foot has been used. The right/forward foot is stepped back. The left foot is now the forward foot and is moved in the next two steps.
Fourth Move: Back Foot Kick/Step. The next move involves the rear foot, which in this case is the right. I think of this move and the previous as “the reset” since it takes you back to the setup position.

The rear/right foot makes a semi-circular step forward. Again, lift the entire sole rather than the toes or heel. Place the entire sole down. This move returns you to the start/setup position with your right foot advanced, although you may have changed location slightly.
Transition. The next move is the “transition” step. This will take you from a right-forward stance to a left-forward stance. The action is the same as the third and  fourth step, but in this instance the right foot steps before the left. The rear foot steps forward so that you are back in the starting position, but this time with the left foot forward. You now repeat the sequence on the other side. Your left foot steps behind the right. The right then withdraws and advances etc.
Here is the sequence as a single image you can print or load onto your phone.

Categories
Phillosoph

Striking with Both Hands

Today I thought I would look at several techniques where both hands apparently strike at the same time.
The targets and techniques given in this article are potentially lethal. They are only to be used in life-or-death situations.
The first technique will be familiar from my book.
It is “arn” from tai chi. “Arn” means “press” but is often translated as “push”. Indeed, it does look like you are trying to push something.
One of the maxims of tai chi is that you should never be “double weighted”. You should never have your weight equally distributed between your feet and your hands should never be equally yin or yang.
Arn seems to violate this principle. The common explanation is that arn is in reality two palm-strikes arriving in quick succession. The hands are hitting rather than pressing or pushing, and one strikes just before another.

Arn can be a powerful attacking technique. In a frontal attack the hands strike the dim-mak points around the pectoral muscles or use the springiness of the foe’s own ribs to bounce him away.
As I have said before, this is a fighting technique that is overlooked by many other styles.
A number of combat styles do not share tai chi’s aversion to being double-weighted and include simultaneous striking techniques
Another thing to remember when interpreting forms is that if two hands are doing the same thing in a form that is not necessarily how they are intended to be used in combat.
A form may have, say, double spear-hands but in reality one spear-hand would be a feint while the other hand was used to parry or readied for a more powerful follow-up.
The second technique we will look at comes from chuka, phoenix-eye fist.
Both hands are held palm upward in phoenix-eye configuration. The wrists or forearms are crossed, the lead hand being underneath. Both hands punch at once, the hands rotating palm down. The lead hand strikes low, the rear hand high.
I regard phoenix-eye and one-knuckle fist as soft-tissue weapons so primary targets will be above the suprasternal notch and below the xiphoid process.
The xiphoid/ solar plexus region (CV 14) and a palm-width below the navel (CV 4) is another pairing.
A similar simultaneous attack is the double-dragon palms, sometimes called butterfly-palms.
This is a double-palm strike with one hand above the other.
The upper hand has its fingers up, the lower hand fingers down.
This can be used on the same targets as double phoenix-eye punches.
Palm strikes are a weapon for both hard or soft body areas so this technique can also be used directly against points on the sternum such as between the nipples or the sternal angle.

If you are using both hands to attack, it implies that you have less need to parry or control. Sometimes the technique will be pushing a foe's attack or guard to one side or down.
Such attacks are therefore a more likely option when on the outside gate. So far we have considered frontal attacks. How might the above techniques be targeted if to the side of an enemy?
Double palm strike (po pai and other spelling variations) is used several times in wing chun’s advanced-level wooden man form. Palm striking is rather common in this form, in contrast to the snap punches used in earlier forms.
Wing chun students may like to ponder why this is so.

The last technique returns us to tai chi. It is shown in “How to use Tai Chi as a Fighting Art” by Erle Montaigue and is used as a counter to double dragon-palms.
One hand is held above the other, palms flat and fingers towards the enemy. The hands come in from the side to push the dragon palms off course.
The finger tips then thrust forwards to attack the body beyond.
Categories
Phillosoph

Hammer-Fist and Single Whip

Sometimes you search for something only to discover it was close by all along.
A case in point:
In my recent book, Crash Combat, I reflect that the hammer-fist is a somewhat underappreciated weapon in martial arts. I may have made this assertion in my previous book too.
Reading Joseph Wayne Smith’s book on Wing Chun, he makes a similar statement.
Hammer-fist can substitute for the chop, back-fist and even some closed-fist punches. It is much less likely to result in self-injury than some of these techniques.
Hammer-fist is easy to perform correctly and can deliver powerful blows to both hard and soft targets. Along with the palm-heel, it is probably one of the best hand strikes that we have.
Naturally enough, I was experimenting with some hammer-fist attacks the other day.
I’d been looking at the rapid 270-360° turn that is possible by using the “closed step” of Pa-kua/Bagua. (See my book for details).
This could be used to power a spinning back-fist to strike a foe in the outside gate. But a true back-fist can be fiddly, requiring a terminal flick of the wrist and impact with the first two knuckles.
A spinning hammer-fist is more logical and for most fighters more powerful.
I notice that if I bend my wrist inward a fraction my hammer-fist seems a little stronger or more stable at the moment of impact.
I also note that this mode favours a sort of “snap”.
I can throw the technique with a relaxed arm and hand and snap into a clenched hand just before impact.
This, of course, lets the arm and hand acquire more initial speed and produces a more powerful attack with less muscular effort.
From a variety of positions, I can just flick my arm and have it land in a hammer-fist. This curve of the wrist seems a technique worth cultivating.
And then it dawns on me!
This is the hand form of horse-foot palm from tai chi’s single whip.
I have written about this as a parrying technique and even as a form of punch. I have probably even written about hammer-fist-like strikes with this hand form.
But I had not grasped one of the other important things that posture was trying to teach: that a relaxed, slightly bent wrist gives you a very efficient hammer-fist.
As always, experiment for yourselves.
Can you use hammer-fist instead of your other strikes?
Can you relax more to make it faster and more powerful?
Categories
Phillosoph

Cross Stepping Post: Part Two

It occurs to me this morning that the previous post on “the Post” needs a little more information. Some of you reading that post will not be familiar with Tai chi, Bagua or have read the relevant parts of my book. If you are only familiar with hard, external interpretations of martial arts you may find the seemingly simple movements of the Cross Stepping Post surprisingly difficult.
The essence of the Cross Stepping Post is the cultivation of stability and balance. Your upper body needs to be relaxed and your weight down in your pelvis. Since we are not performing the arm movements at this stage your arms should hang down by your sides, relaxed like hanging vines. If you are used to putting lots of muscular tension into you stances this will probably be one of your first problems in performing the Post.
1. Sinking of shoulders and dropping of elbows.
2. Relaxing of chest and rounding of back.
When you attempt the movements of the Post your upper body should be as relaxed as possible, having a slightly hunched shoulders look that comes from a lack of tension.
The other useful thing to remember is that in martial arts movement generally comes from the waist. Don’t attempt those kick-like foot movements just by moving your leg. You will need to rotate your waist/hips to swing them around.
I hope that helps. Persevere and I will post some more information on the exercise soon.
Categories
Phillosoph

Cross Stepping Post: Part One

Recently I have been looking into a concept that Erle Montaigue called “the Post”. Erle described the Post as being an abstract way to learn very practical things. He as even gone as far as to say that the Post contains two exercises that give every thinkable internal body movement for self-defence without having to think too hard, and are probably one of the most valuable training aids ever. Certainly this apparently simple sequence has much greater depth than is first apparent. I am going to devote a few blogs to this topic and invite the reader to try it with me.
What Erle calls the Post is actually two sequences, one from Tai Chi and the other from Bagua. The Tai Chi one is called “Stepping over the Gate” and the Bagua “Cross Stepping Post”. Initially I am only going to deal with Cross Stepping Post.
If you dislike long complicated katas, you will be pleased to hear that Cross Stepping Post has only four different steps. These are mirrored on the left and right sides so there are actually eight steps and two linking sets to change sides. Complexity of the arm movements varies. Performing this exercise without the arm movements is very beneficial since it lets you concentrate on your balance and foot movements. You can go through the foot movements anytime that you are standing around, waiting for the bus etc. In his main video on the post (MTG54) Erle demonstrated a very simple set of arm movements. In MTG55 he also details the post and there demonstrated a more varied set of arm movements. On this video Erle points out that what is actually going on internally is actually more important than the actual physical movements. Bear this in mind as you practice.
Both videos are available as downloads or DVDs from http://www.taijiworld.com
I am going to introduce the Cross Stepping Post gradually. For this first blog I am going to suggest learning just two of the steps. They are similar, and once you have some grasp of these you will have learnt half the necessary moves. Just practicing these two steps will also probably reveal to you that your balance and stability is not what they might be.
The first move we will learn is actually the second move in the sequence. I call this the “Forward Foot Kick/Step”, although you must keep in mind that this foot action and the others have many other applications than the one immediately apparent. It is not just a kick!
Your feet are close together and your knees are probably brushing against each other. As the lead foot heel withdraws past the other heel the foot straightens up so the toes point forwards. The foot goes back about a foot length and swings in an arc to the forward position. Heel and toe are placed down at the same time and you should be in balance for the entire movement. Cross Stepping Post actions are performed without obvious shifts in weight such as leaning.
The second move is the fourth, a “Back Foot Kick/Step”. Position of the feet is similar but a little more natural in that there is some space between the forward and rear foot. The feet are close enough for the knees to brush. In all these moves the toes always point forward or to the outside. That is, if your right foot is pointing at an angle it is to the right, and to the left for your left foot.
The beginning of this step puts some torsion on your waist and hips. You utilize this by moving the back foot in an arc and placing it down. The toes of the forward foot point forward or inward. This is a very similar movement to the Forward Foot Kick but uses the rearward foot and has less initial backward movement.
No arm movements yet. Work on your balance and footwork Experiment with these two movements for a couple of days. See if you can improve your internal balance.