I was watching something that involved a pair of Russian police/militia/soldiers.
They were wearing the sort of hat that as a kid I called a peaked cap or “officer's hat”. Also known as a “bus driver's” hat or “visor cap”.
The Russians tend to favour a style that is extra wide.
There was a shot from behind the cops, and what are supposably intended to be flat tops of their hats bulged in the middle from the shape of their heads inside.
This made me reflect on the great variety of headgear humanity has used over the centuries, and the sometimes bizarre shapes some hats have tried to create.
A common thread in my blogs is I have encouraged readers to give some thought to “accessories”: scarves, gloves and hats.
These can make a lot of difference to your comfort.
Since I do not have much hair, I have several hats.
Snow or shine, I generally have my head covered if outdoors.
Some thoughts on practical headgear may be of use.
What is a “practical” hat?
Let us assume ia practical hat not only protects the head, but keeps the ears and back of the neck warm, and/or keeps the rain and sun out of the eyes. It is also useful if a hat can be easily stowed in a typical jacket pocket when not worn.
My headgear varies with season.
It recently occurred to me that in practice I have to deal with more than four seasons: There is winter, summer, cold spring, warm spring, warm autumn and cold autumn. Winter itself may vary between snowy and non-snowy phases. Summer is sometimes extra hot.
In contrast, some parts of the world have only two seasons: too hot or too wet!
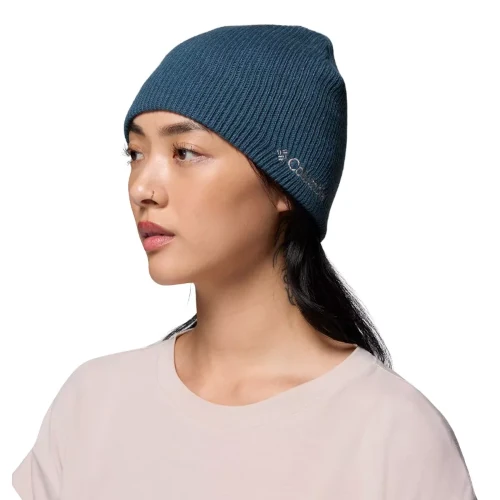
Woolly Hat
The woolly/acrylic hat, knit cap, watch cap or beanie is one of the most practical forms of headgear.
One size fits nearly everyone. When not worn, it scrunches up small and fits in a pocket. It keeps your head warm, but still allows it to breathe.
Pull it down to keep your ears warm, roll it up when it is warmer.
Cold night?. Use a beanie as a night cap.
Acrylic versions are good if you are on a budget, and may be more comfortable than expensive high quality versions in milder conditions.
I also have a red one for when I want to be seen.
When visiting an area of town famous for its busy markets and crowds, I wore this red hat and a red scarf. I told my girlfriend and stepson: “If we are separated, look for the hat and scarf”. They did lose me, but before I even noticed they were gone, they came running up, laughing that “The hat and scarf work!”
While I am not very Christmassy, I wear the red hat towards the end of December.
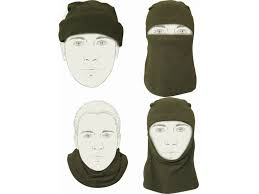
Included in this category is the headover. In addition to being used as a hat, the headover may also serve as a balaclava or neck gaiter. A versatile item worth carrying in your pack.
Balaclavas and ski-masks may also be rolled upwards and worn as watch caps.
Most of my coats have a woolly hat or headover stuffed in a pocket.
Having a spare in your bag or backpack is generally a good idea.
Ball Cap
Some people will wear a beanie all year round, indoors or out. I find mine a little hot in certain conditions.
The baseball cap, ball cap or “snap-back cap” is another very practical form of headgear.
They are adjustable for different head sizes, and easily pocketed when not being worn.
The brim keeps the sun out of your eyes and the rain off any glasses or goggles.
Most of my raincoats have some form of peaked or visored headgear in a pocket.
In many police forces and similar services, ball caps are often used instead of more traditional but less practical uniform headgear.
I have a Chinese-made cap that is closer to a military patrol cap in shape, having a flatter top, but has an adjustment strap at the back.
I use a carabineer as a keyring. I hang my cap from the carabineer by the strap when not wearing it.
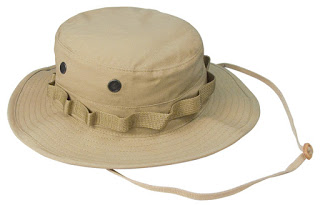
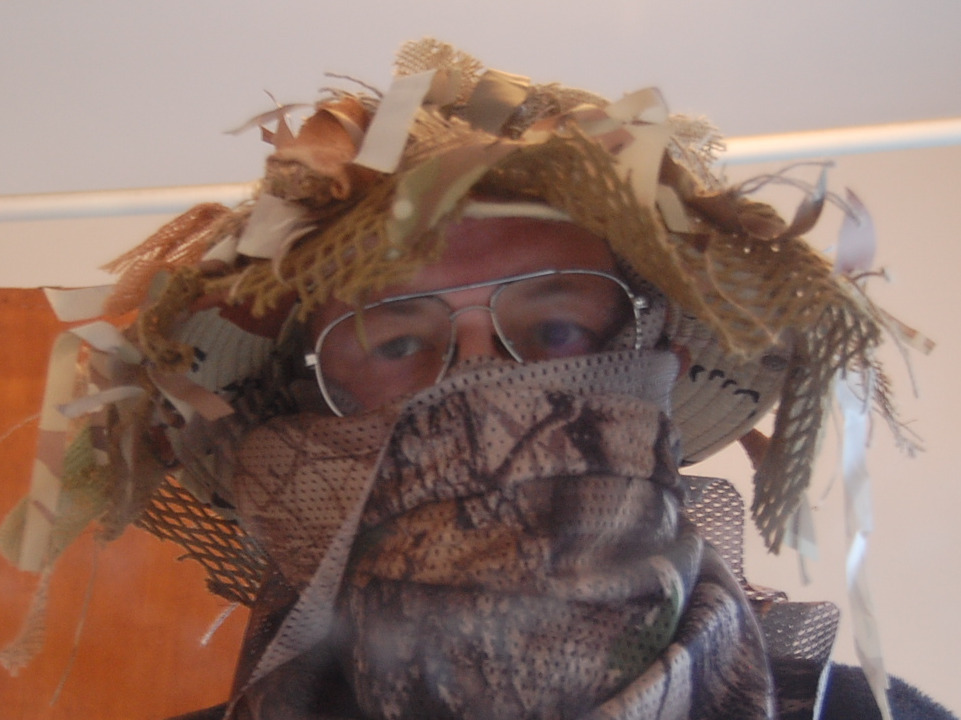
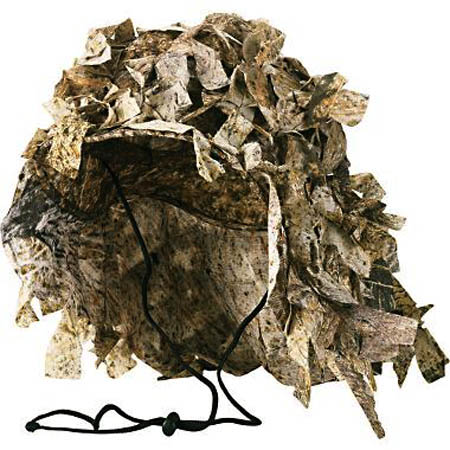
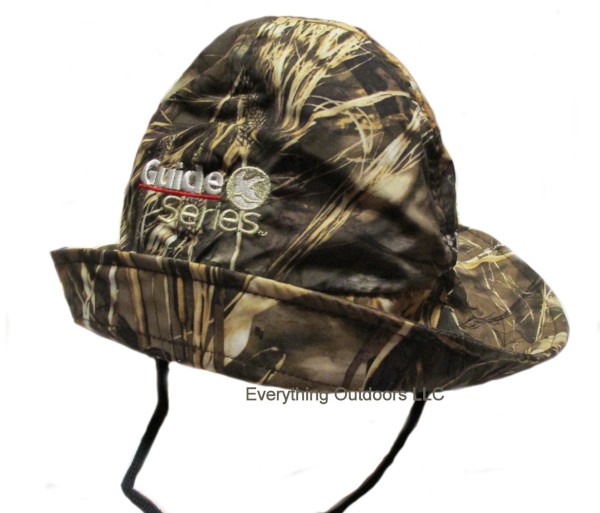
Boonie Hat
Strictly speaking, a few ball caps and watch caps/headovers will probably cover most of your headgear needs.
For summer and hot climate wear, I am fond of the boonie hat.
It is a little bulkier than a ball cap, but this was not a problem since I usually carried it in a daysac if not wearing it.
It was considerably more robust than the straw panama hat I had been using.
The boonie worked well against the sun, and shed most of the tropical storms I encountered.
Cotton or cotton mix chills you when wet. This can be exploited for hot weather headgear.
If it is really hot, soaking the hat in water and wearing it has a welcome cooling effect.
On the first day of experiencing a very hot Caribbean sun, I used the foliage loops of the boonie to hold ice cubes from a cup of soda. How much cooler this makes you has to be experienced to be believed.
My Advantage boonie spends most of its time in my soft-core pack these days. Recently, I decided to treat myself to another for daily wear this summer. This one is in Desert Auscam.
The only downside to the boonie is they are not adjustable for size. Luckily, I have a fairly average-sized head. The Auscam hat was a “small”, but soaking it in water and wearing it about the house seems to have fitted it comfortably to my head.
Boonies are available in a wide variety of camouflage patterns, and also in solid colours. Since these are primarily worn in sunny weather, lighter, more reflective patterns or colours are preferable if camouflage is not a priority.
A friend of mine uses a grey boonie since it blends in well with the forest and does not look mil-spec when in public.
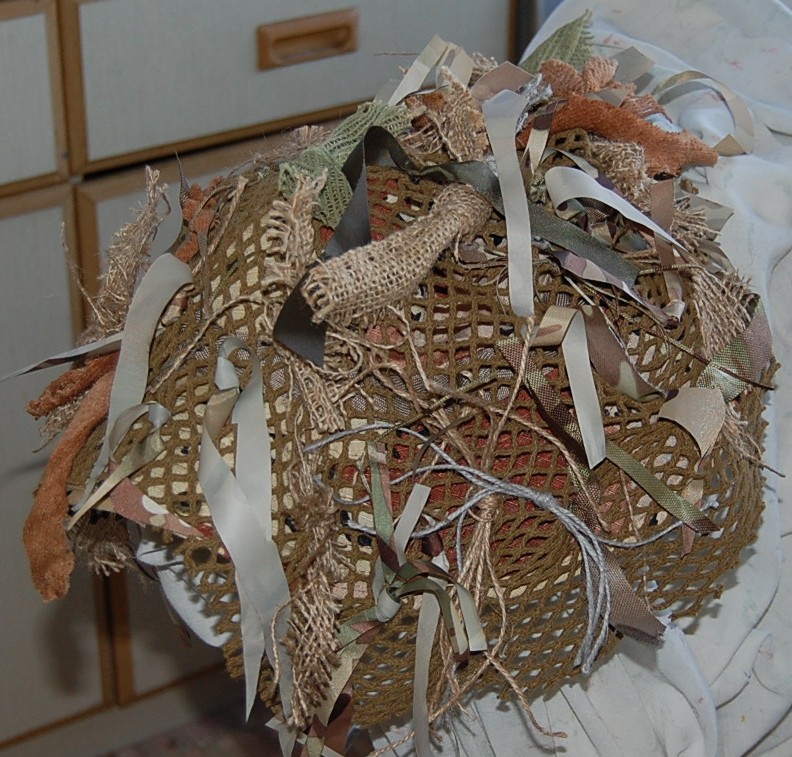
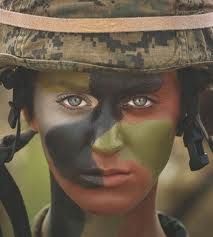
If camouflage is a priority, go 3D as explained. Simply wearing something in a camouflage pattern does not make you camouflaged. You need to be holistic, and break‑up distinctive, recognizable shapes.
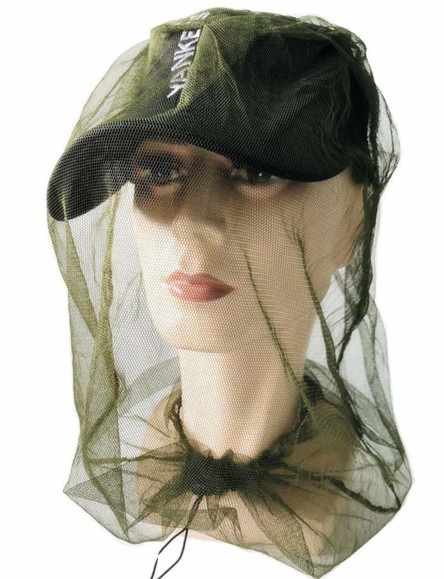
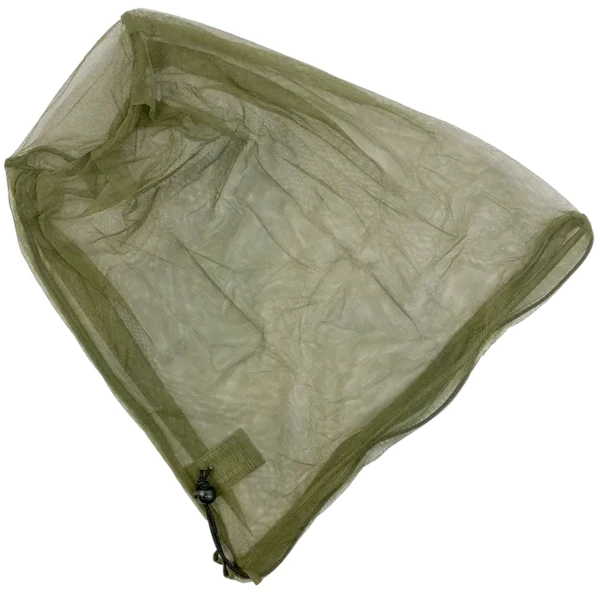
Insect head nets work well with boonies, making them hang a good distance from your tender flesh.
Pasamontañas
I find watch caps are not uncomfortable in light rain. Unfortunately, they do nothing to keep the rain off my glasses.
If I have both with me, I have been known to wear watch cap over ball cap or ball cap over watch cap.
I could insert a plastic or cardboard brim into a watch cap, or buy a “jeep cap”, but these have an undesirable “Radar from MASH” association.
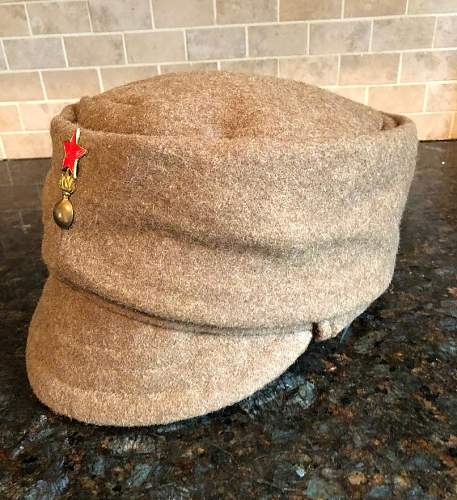
A better alternative comes from the Spanish Civil War. The Spanish Civil War (SCW) probably popularized the beret in European military circles. Oddly, the pasamontañas never caught on, despite being widely used and popular with both Spanish and foreign volunteer fighters.
Web-search “pasamontañas” and you will mainly get images of typical balaclavas.
The Spanish Civil War item was a balaclava with a peak added. Usually the face and neck part was rolled upwards to create a sort of “soft kepi”. A number of other military hats in use in Spain were shaped to resemble a rolled up pasamontañas.
Oddly, the same shape may be seen here.
Search for “peaked balaclava” and you will find some modern equivalents to the SCW pasamontañas.
Does everything a watch cap does, but keeps the low winter sun out of my eyes and the rain off my specs.
As a balaclava, mine has enough “give” that it may be worn open faced, or “letterbox” style with only the eyes exposed.
A little bulkier than a watch cap, fold it transversely to carry it in a pocket or under a shoulder strap.
The pasamontañas is worth adding to your winter gear.
A white version for wearing in snow or a version in more autumnal colours would be welcome.
The SCW versions seem to have usually been brown-khaki drab very appropriate for winter wear.
Adding a peak from another hat to a balaclava would not be too difficult a project. It would be prudent to have a green underside to the brim of a white version to reduce the effects of snow glare.
Cold Weather Hat
I have found a knit cap sufficient for most cold weather that I have encountered.
It is what I must have used when in minus thirty degree windchill in the mountains of Iceland. I suspect I also made use of my raincoat's hood in that instance.
If you follow my advice to carry a spare knit cap, you can wear both if it is really cold, or combine them with another form of headgear.
If you are in more northerly latitudes, or will not be able to move around to keep warm, a more substantial cold weather hat may be warranted.
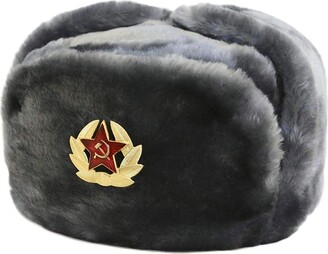
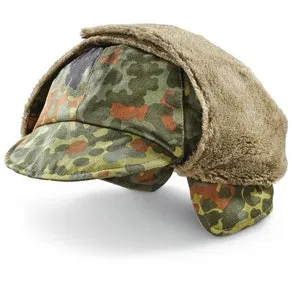
A well-proven example is the Russian “ushanka”. These became readily available since the Iron Curtain dropped.
Ear flaps may be worn up or down. Presumably the piece at the front may be folded down, but I do not ever recall seeing one worn this way. The fur on the peak seems to serve no function whatever.
A friend of mine planned to buy an ushanka and place a pair of googly eyes on the front.
Most cold weather hats from other parts of the world, such as the Canadian/Alaskan “lumberjack/trapper/Elmer Fudd hat” are similar to the ushanka, having fur, pile or fleece lining and folding ear/neck flaps.
Some examples I have seen include a drawcord or elasticated section that allows them to be adjusted for size.
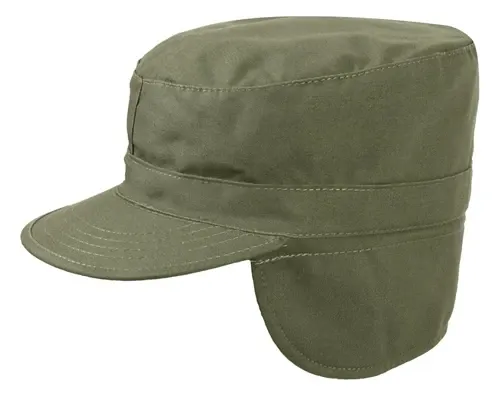
The German example above is interesting, apparently having both unfurred ear flaps and a longer furred set with a chin strap and greater comfort in a range of temperatures. The British Army seems to use a similar design.
Intermediate Weather Cap
For the start of spring or end of autumn, a knit cap or pasamontañas serves well. A Boonie or a ball cap is good for summer.
For that transitional, often changeable, phase either end of summer, something intermediate may be more comfortable.
An unlined version of a ski/mountain cap, or the type of patrol cap that has ear flaps may prove useful. This may be worn like a ball cap, and the flap section turned down to cover the ears and back of the neck if necessary.
The British Army and Royal Air Force forage cap was usually seem worn as a side cap, but was designed so that it could be unfolded into ear flaps. Many versions had a peak when unfolded.
Some of the Spanish caps designed to look like pasamontañas had fold down side flaps.
Potentially, an intermediate weather cap shaped like a pasamontañas or soft kepi/patrol cap could be created. Make it a little larger, give it a warm lining and add extra, larger side flaps and you have a cold weather variant.
Add a flat-topped snap-back cap for summer and indoor wear and you have a very practical “uniform” range of headgear
Swedish Hood
I am not a great one for wearing hoods.
When up, they can affect your peripheral vision and situational awareness.
When down, they can get snagged by branches and other projections.
Either up or down they may be grabbed and used against you.
I usually have a hat, so hoods that roll up into collars tend to stay there. Detachable hoods stay in a pocket in the coat.
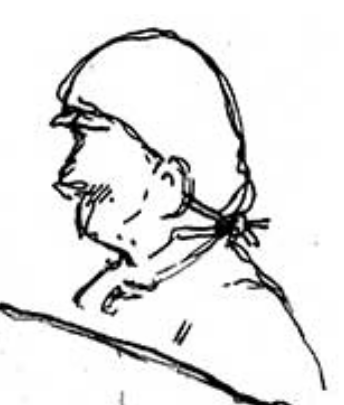
I rolled up the hood of my German Army desert parka and added some press studs so that it stays there, forming a collar.
A trick worth knowing is known as the “Swedish hood”. Arrange as shown in the image above, and tie in place with the hood drawcord.
Sou'Wester
In some parts of the world it rains a lot.
A staple of maritime foul weather gear, it is surprising that the sou'wester does not see more use on land.
You would think someone around Seattle would be making them in goretex and selling them like hot cakes.
I have been able to find just one example of a sou'wester in a camouflage pattern or tactical colours.
Helmets
One of the reasons I started thinking about hats again is I saw this video on the kettle hat.
The kettle hat was to evolve into designs such as the Spanish morion, the British Brodie helmet and the French Adrian.
However, the example shown in the video has a lot going for it, and would be great campaign headgear.
The wide brim and shape provided good defence against descending arrows and stones.
The brim and basic shape would diverts rain like a sou'wester.
The brim would also keep the sun off the face.
Such helmets might be worn with a coif, hood or other form of “cap comforter” which would somewhat mitigate the effect of hot sun heating the metal or very low temperatures.
If you live in a volcanic area, it may literally rain stones, so hard headgear such as a construction hard hat is worth considering in some instances.
Pliny the Elder investigated Vesuvius and Pompeii with a pillow on his head. A rolled poncho-liner or sleeping bag could be used in the same way.
Many special forces units have used skateboard and whitewater helmets, not to stop bullets, but to protect from the various knocks and bumps that occur when moving through complex terrain.
These helmets lack peaks and leave the ears exposed, so clearly we can do better. The Swedish Army issues a helmet cover that includes a visor, and ear flaps as well as allowing the attachment of foliage.
Bump caps resemble ball caps and are designed to protect the wearer from minor bumps and impacts.
The inserts are sold separately, so theoretically could be fitted to boonie hats, pasamontañas or knit caps. How this would effect ventilation I do not know. It will certainly make the hat harder to fit in a pocket when not worn.
Useful Modifications
Boonie hats come with a cord to reduce the chance of your losing them.
This is a useful addition to any hat that has a brim or visor. A gust of wind can take them right off your head.
I have not bothered fitting cords to my knit caps. I make sure the knit cap is pulled down snug if the wind is strong. A pasamontañas may not stay on in a gale, but if it is that windy I should be wearing it in balaclava mode.
One of the most useful additions to any hat is a hanging loop by which the hat may be attached to a snap-link, tied to a pack or similar. Invest in a few feet of ribbon.
A friend of mine put a pad of foam in his hat. This made sure the hat would float if he dropped it in a river. The foam would have also provided useful insulation against the sun or cold.
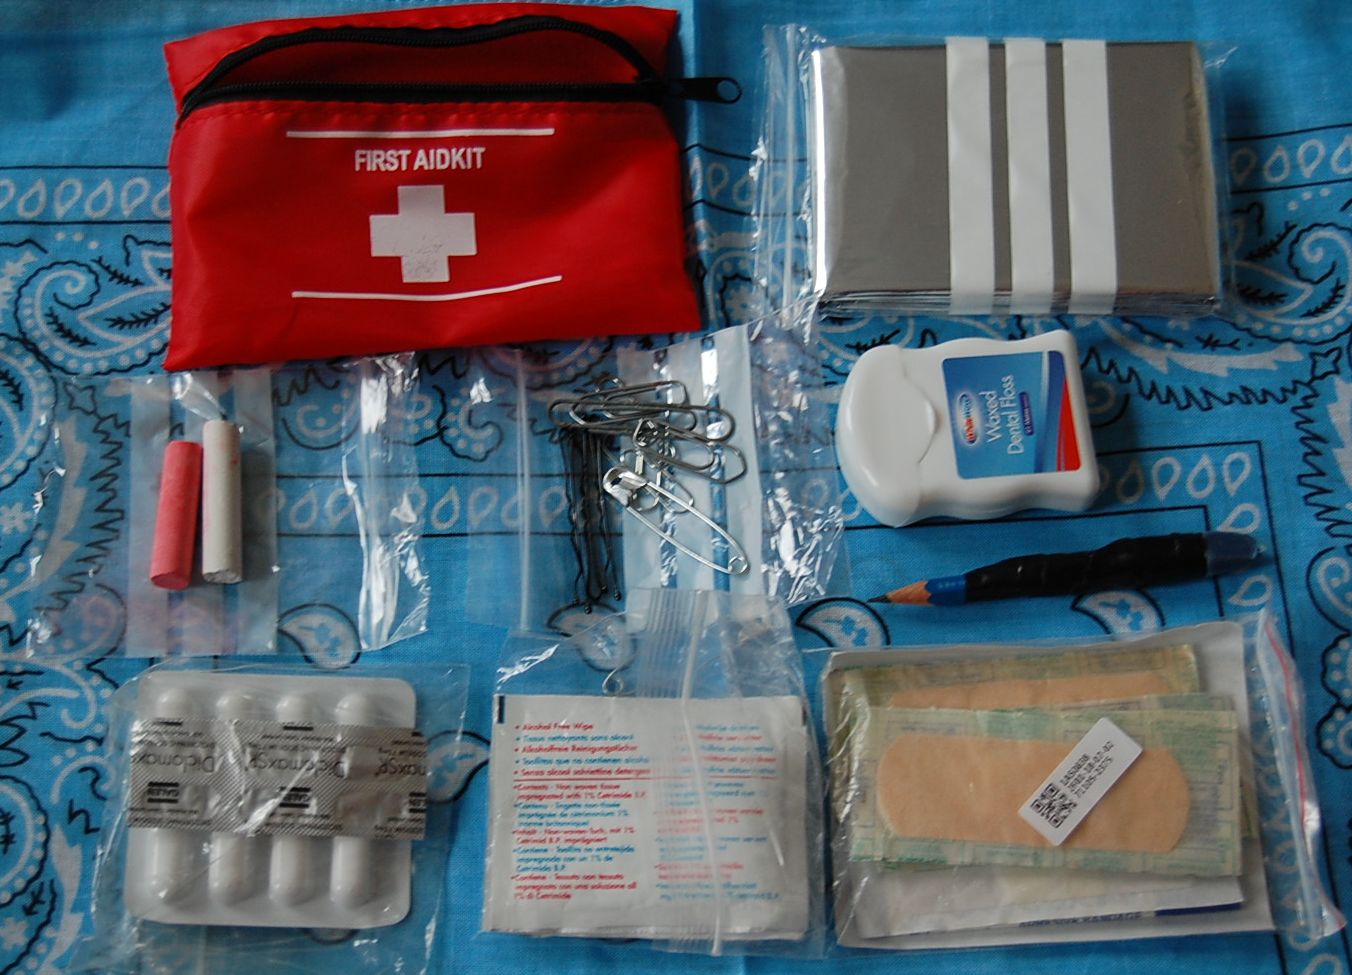
Some folks like to put fishing gear or survival kits into their hats.
Firstly, a hat is not a good place to carry any unnecessary weight. The reason special forces experimented with skateboard helmets was the issue bullet-resistant helmet was too heavy with night vision, illumination and communication gear mounted on it. The risk of taking a bullet was preferable to the neck ache.
You will not be able to get a full survival kit in your hat, just some potentially useful trinkets.
I have seen numerous forums where someone boasts of all the useful gear in their “survival hat”.
Not unreasonably, someone will point out that a hat is one of the items of clothing most likely to get lost, so not a good place for emergency gear.
“I have never lost my hat yet” will be the usual response. This tells us much more about the speaker than the subject, and does not cast them in a good light!
[This is an example of the “I have never broken my arm therefore my arm is unbreakable” hypothesis. Easily disproved by the classic “Wack with an iron bar” experiment.]
A friend of mine carries a length of spare paracord spiralled around the foliage loops of his boonie hat. This actually improves the ability to retain foliage.
With the correct choice of paracord pattern/colour, this helps break‑up the regular shape of the foliage band, which is typically made of a single colour strap.
This page has an interesting modification for hats. I have been unable to locate a sufficient-sized piece of luminous material, so do not know if this modification will trap perspiration.
The luminous part could be used for signalling, or the hat worn inside‑out when you need to be visible.
A modification of this idea is to only sew the piece of material on three sides, creating a pocket in your hat. This may be done with non‑luminous material, of course.
The most practical thing I can think to keep in such a pocket is a spare bandanna. When in the pocket it provides extra insulation and a little bit of padding.
The bandanna may be used for signalling, or camouflage, depending on colour carried.
Havelocks and Pugrees
When necessary, a bandanna or keffiyeh may be used as a havelock.
A havelock is a flap of cloth that covers the back of the neck. It will be familiar from the iconic image of a French foreign legionary. They are also seen being used by Second World War Japanese soldiers.
While on the topic of fairly rare, hat related terms, a mention of the pugree.
The pugree (in this context) was a piece of cloth wound around a pith helmet or solar topee. Often these were just decorative, but some versions had a “tail” that could be used as a face covering, or just to mop sweat from the face.
The idea could be adapted to other forms of headgear.
Improvised Headwear
If you do not have a hat with you, a keffiyeh or bandanna may be used to good effect as an improvised head covering. A trick I have used a couple of times in both cold and sunny conditions.
A bandanna may also be used as a sweatband to keep perspiration out of your eyes. This may be used with a hat or on its own.