My recent project with the machete has spurred me to sharpen a few of the tools I have around.
In my book, “Survival Weapons”, I devote an entire chapter to the topic of sharpening. That chapter remains a useful guide to a topic that can sometimes seem cryptic.
At this point I should explain that one of my “virtues” is that I am lazy. According to admiring colleagues, I can be usually be expected to find the simplest, most stress-free method of getting a job done. Over the last week or so have I noticed that how I sharpen some tools now varies somewhat from the techniques described in the book.
Regular readers will know I own a number of kukris, as well as other large blades. There was this period of ill-health where I spent my holiday budget on swords instead! Probably safe to say I have more large blades than the average prepper. Some of these have concave or convex edges, or in the case of kukris, both. Some of the techniques for sharpening you will see on some websites are not ideal for such tools.

I have, over the decades, acquired a large number of sharpening systems. The one I have found myself using the most recently is shown above.
I inherited this stone from a deceased colleague. It is most likely an Arkansas stone. The stone itself is about three inches long and a little under an inch wide. It is firmly mounted (glued?) to a wood tray about four and a half inches long by an inch and a half wide. This provides a very nice handle when using the stone. Beneath the base is the matching wooden lid.
The stone has just been cleaned. I used a little washing-up liquid and some water to remove most of the grime. A little bathroom cream cleaner took of the remaining residue.
The Angle-er
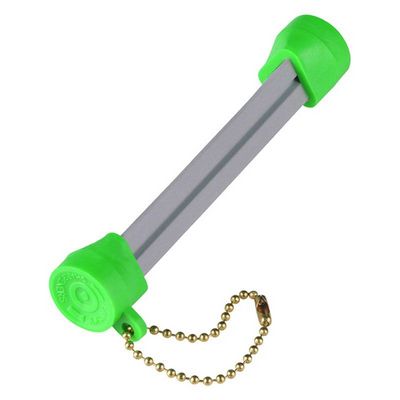
The device below the stone in the photo I call an “angle-er”.
Having this nearby helps you visualize the correct angle while sharpening. This particular example has angles of 22.5, 15 and 30 degrees, which are pretty good choices for general usage. Some may prefer 17 or 20 degree and 35 degree angles. 20 degrees is the recommended edge angle for Swiss Army Knife blades, for example. I later recut the 30 degree corner to 20.
Once you have your tool close to the correct angle it is easy to vary it a couple of degrees if desired.
The beauty of this Arkansas stone is that I can move it instead of the blade. Unlike a larger flat stone this one is narrow enough that it can follow a curved edge, rather than attempting to grind it straight.
The method I use is essentially the same as was described for sharpening a machete, only instead of using a file I use a suitably sized stone.
Sharpening Styles
There are a number of ways that a stone or file can engage a blade.
In the movies you often see a stone being dragged down a sword edge. Looks good but I have my doubts as to how useful this would be in the real world.
Usually we want the sharpener to pass down the edge with some movement across the edge too.
The sharpening technique most often seen in “how to” guides is what may be called “push-sharpening”. If you were using a large, flat stone, you would move the blade as though you were attempting to shave the surface of the blade.
You will also see “push and pull” sharpening where the blade moves back and forth across the stone. I personally don’t use this method much and would not recommend it for the novice.
Keeping the angle constant over the different strokes requires skill and it is easy to over-do things. If you can maintain an angle it is useful for quickly establishing a secondary edge.
Pull Sharpening
These days I tend to use drag- or pull-sharpening techniques.
As you might expect, the blade moves in the opposite direction to push-sharpening.
One of the advantages of pull-sharpening is that it is easier to move the sharpener across the blade edge, rather than moving the blade. This is useful when working on large or awkward blades but can be applied to small blades too. One does not need a workbench or similar for pull-sharpening. I usually sit on the sofa, watching the telly and using the advert breaks constructively.
Pull-sharpening is a good technique to use with small triangular-section sharpening stones. It is also suited to the oval stones sold for sharpening tools such as scythes.
When you use a leather strop you are using an action like pull-sharpening. If you did not you would cut the leather!
If you are sharpening a tool using a high-speed device you should be using a pull-sharpening technique. This is so that if the high-speed wheel or belt snags the blade it will throw it away from you rather than at you!
One reason I like pull-sharpening is it is easier to view the angle of contact that sharpener and blade make. It is also easier to give both sides of the blade similar treatment without trying to use your non-dominant hand or run around the table.
Lubrication
Generally, I do not use lubricants such as oil, water or spit, for sharpening. An article I read, written by a professional sharpener, claimed that his experiments had concluded dry sharpening produced superior results. Much to my surprise, this article can still be found on-line! Generally I only apply water if a stone or sharpening system is particularly crumbly or high friction.
Pull/Drag Sharpening Technique
For example, hold your blade with the edge to the left.
Place your sharpener at the desired angle, and push your sharpener right to left, moving it away from the blade spine or centre.
A “pass” starts at the heel of the blade and moves towards the tip. A pass may take several strokes, depending on blade length and sharpener size.
Make three to five passes on a side, then change.
For the other side, you have two choices. You can flip your blade over so the edge is to the right and stroke the edge left to right; or you can turn the blade upside down and stroke the other edge right to left.
Use whichever technique you prefer and better suits the tool being sharpened.
Keep changing every three to five passes, reducing the number of passes as your tool approaches the desired sharpness.
Do not push downward. The weight of the blade or stone produces sufficient pressure.
Pull sharpening is a good technique if you are not that confident about your sharpening skills. It is easy to check and maintain the desired angle. It is also not a particularly aggressive technique, so you are unlikely to damage your edge.
In fact, I recommend you try a very light touch as you make you strokes and passes. Let your stone trace the curves of the blade rather than trying to remove them.
You will find that as the edge geometry takes shape, you will be able to feel when the stone or file is at the correct angle. Light pressure also lets your feel where sections of the edge have irregularities and need more work.
So far, the only problem I have had with pull-sharpening was with a particular multi-tool where the blade was unlocked and rather loose in the open position. Pull-sharpening tended to pull the blade closed. This would only have been a danger if I had wrapped my fingers around the grip while sharpening, rather than holding the back of the blade.
One caution. With folding blades that lack a lock, be careful when pull-sharpening or stropping. Hold the sides of the grip so your fingers are not in the way should the blade unexpectedly close.
Pull-sharpening is a useful technique to add to your repertoire.
The knives in my kitchen are kept sharp mainly by a butcher’s steel and a set of crock-sticks I have in a cupboard there.
I maintain my assertion that crock-sticks (ceramic rods) are a very good way to teach yourself the fundamentals of sharpening. Crock-sticks are a form of push-sharpening, but pull-sharpening has improved my technique in using these too.
Rather than just slicing down, I now use a lighter touch and let the stick surface trace alone the curve of the edge, keeping contact to the very tip and engaging the edge at a better angle throughout its length.
I think one of the most important things I have learnt in decades of sharpening is that it is another of those skills where less is more. You will get much better results maintaining a light contact with the sharpener rather than pressing down.