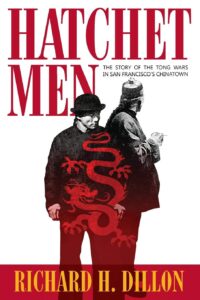
A few months back I binge-watched the excellent series “Warrior”.
This once again stirred my curiosity about the Tongs and the weapons they used.
The footsoldiers of the criminal tongs were the “highbinders” or “boo how doy”, which means “hatchet sons”, but was more commonly translated as “hatchet men”.
The term “highbinder” supposedly derives from the members of the fighting tongs wearing their hair in a style which made it difficult for an enemy to grab their queue.
In fact, the term was used for non-Chinese hoodlums long before it was applied to Chinese (Hatchet Men p.52-3).
The rationale behind “hatchet men” is usually that this was the favoured weapon of the highbinders, being useful for both dispatching an enemy and disposing of the body.
One would think that the cleaver would have been a more readily available implement in Chinese communities. Indeed, this often seems to be the choice of modern Chinese criminals.
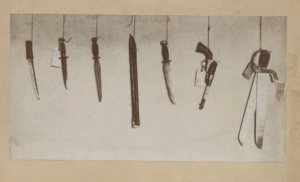
Interestingly, while displays of confiscated highbinder weapons do include hatchets, knives and firearms seem more common.
Some writers like to paint the picture that the tong fighters preferred mêlée combat, but reports from the time as well as photos make it clear modern firearms were used.
It is possible that blades were favoured for intimidation.
Police chief (1866-97) Pat Crowley was probably exaggerating when he said “Nearly every Chinaman in the city is the owner of a pistol, and we all know how handy he is in its use.”
However, it is clear firearms use by Chinese criminals was common.
This extract from a US Congressional report also makes interesting reading:
Q. They have a common habit, I understand, of carrying the pistol in the hand stuck up in their voluminous sleeve, and going up to a person and shooting him through the sleeve. Is that true?
A. They generally take out the pistol when they shoot, although they carry them very often in their sleeves. Highbinders seldom carry pistols. They are generally accompanied by another person, whom they call " jury," and who belongs to the poorer class of Chinamen. He follows the highbinder and carries the weapon. When caught, we would search the highbinder for a pistol, but would not find anything of the kind on him, and the ' jury" would have disappeared with the weapon. The only time the highbinder has a weapon is while leaving his quarters, but on the street you will not find one.
Q. Are they not oftentimes called "hatchetmen"?
A. The hatchet is a great weapon and the blade is about 6 inches long
Q. A regular cleaver?
A. A good deal like a lather's hatchet.
Q, When you said that there were 30 men killed in the streets, you meant men who were shot; that does not include men who were killed by hatchetmen, does it?
A. They do not use these hatchets very much now; they use knives more, because knives do not make any noise.
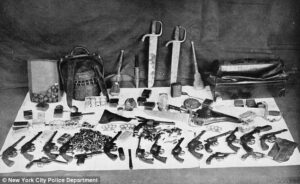
Also notable is that most of the knives displayed do not appear to be Chinese in origin. Indeed, the leftmost in the photo below appears Japanese!
The middle example appears to be made from a broken (American) sabre.
Many “American” knives would have been forged in Sheffield or Solingen!
There are very few “martial arts” weapons in these collections.
A weapon of actual Chinese pedigree in these pictures are the paired butterfly swords (Woo dip dao/ hudiedao) that appear in each photo.
These may be the “bowie knifes two feet long in the blade” mentioned by Price on page 288 of Hatchet Men.
The Wikipedia article on Tong Wars makes the following statement:
“The hatchet that the highbinders used was somewhat modified from what one usually thinks of a hatchet, as they would cut much of the handle off just enough to have a good grip, and cut a hole into it.”
This is attributed to “Hatchet Men” by Richard H Dillon but the page reference given (p.107) is incorrect, the correct reference being the testimony of Officer Michael Smith on page 163. The actual passage is:
“A great many of them carry a hatchet with the handle cut off. It may be about six inches long, with a handle and a hole cut in it. They have the handle sawed off a little, leaving just enough to keep a good hold…”
Shortening a hatchet may make it easier for it to be concealed in the sleeve of a Chinese garment.
I have been unable to find any images of shortened hatchets that were used by highbinders, nor of any corroborating references.
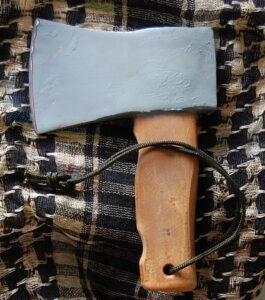
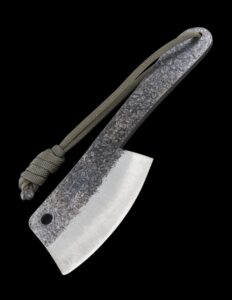
One idle weekend, I decided to make a shortened hatchet as an experiment. I worked on the premise that “cut a hole into it” referred to the handle, not seeing any easy way that myself or a highbinder could bore a hole through any other part.
The tool I chose was a low-cost hatchet that I think was described as 1.25 lb.
Even with much of the handle removed it seems surprisingly heavy, and the modification makes it seem even more top heavy.
On the other hand, it is still a pretty sturdy tool and still feels like it could break through an interior door, let alone discourage an aggressor.
It can also serve as a hammer for applications such as breaking windows.
As you can see, I painted the head to make it less visible.
Update
An interesting tool I came across recently, the Marbles Mini Hatchet. Weight is given as 159 g and length as 18 cm. Price is fairly reasonable.