Categories
Phillosoph

Around The World In 30 Litres

Decades ago I wrote a piece called something like “Travelling the World with a 30 Litre Pack”. This was so long ago it was on a floppy disc and it only ever got read as a print-out. That article is long since lost, but the experiences that contributed to it has also fueled many of the articles on this blog. I was asked if I could attempt to reproduce the article, since much of it is still relevant to travelers today.

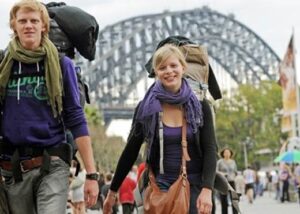
Firstly, I will point out this was not intended for wilderness expeditions or camping trips, but for holidays in areas where youth hostels or similar accommodation was available. On the trips where I expected to also do some camping, I carried a larger pack and more gear. Thinking back, I never personally made any of my trips with just a 30 litre pack. My daysac was smaller, and I already owned several larger packs. Money was often tight so I never got around to buying myself a nice 30. That said, one of the people who read the original article was inspired to spent nearly a month traveling around India with just a small pack.
One advantage of a larger pack is that you can carry a packed daysac inside it, which saves a lot of unpacking and packing when you want to dump the gear you don’t need for a few hours of sightseeing.

One of the products of my travels was “Uncle Phil’s List”, so I will use its categories for the following description.

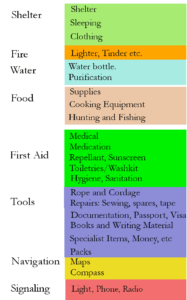
The first category was “shelter”, which divides into shelter, sleeping and clothing.
Accommodation was in hostels or budget accommodation. The former were preferred for their social aspect, and I have many fine memories from such stays. The only thing I needed to carry for shelter was a credit card and a YHA membership card.
My daysac carried (and still has) an all-weather blanket, which over the years has been put to many uses.

Many youth hostels do insist you have a sleeping bag liner. Mine got accidentally placed in the laundry on my last day at a hostel. My current one was sewn from the sheets the apologetic warden offered me as replacement. The top of the bag has some very distinctive cloth added to the top, to avoid this happening again. If I have to unpack in the dark the texture helps me orientate the bag. There are silk liners, which look really nice, but again, I have never been able to justify the expense.

I also carried a Merlin Softie one-season sleeping bag. This packs to the size of a rugby ball without using compression straps. Very useful when the bedding provided was not up to standard, or when I had to sleep on a bus, train or ferry on an overnight journey. Overnight trips were a useful trick when traveling on a tight budget. Saved on a night’s accommodation and got you to a new place to see.

Careful selection of clothing can save you lots of weight. I encountered travelers who were carrying 20+ kg of clothes!
The trick is to select items that were easy to hand-wash, and just as importantly, quick to dry. I was fortunate that about the time I began traveling there were lots of reasonably priced silk shirts on sale. My basic travel wardrobe was two long-sleeved silk shirts and two short-sleeved. Theoretically, if it was cold I could have wore a short-sleeve under a long, but don’t ever recall this need arising. Denmark was a little chilly, so I brought a thin woolen jumper to supplement my usual gear. I did not know about ranger rolling back then. I could probably have packed things even smaller.
Underwear was three pairs of black swimming shorts, the sort with pockets and inner liners. If the day was hot I could easily remove my trousers and be already in shorts. Due to the odd climate inside airliners, for the flight out I found cotton underpants more comfortable. These would probably not be worn again until the flight back. I might wear a cotton tee-shirt for the flights instead of the silks. More commonly, I wore a casual cotton shirt that served as a light jacket for the rest of the trip.
The markets no longer seem to have reasonably priced silk shirts so as mine have worn out I have replaced them with the newer microfibre synthetics.
Just before a trip I would treat myself to some new socks, usually white cotton sports socks. Three pairs of these would go in the bag and a fourth pair worn on the trip out. When I began to get pains in my legs when flying I added a pair of compression socks to my load-out.
I carried two pairs of trousers, basically a “wear and a spare”. Cargoes’ would be fine, although one of my pairs was “smarter”. On some trips I hooked up with friends I had made on other trips. This often involved a family dinner so being able to smarten-up was useful. At the airport I often needed my passport and boarding pass readily to hand, and the large thigh pockets of the cargo trousers was very useful for this.
Since I was carrying a pack, and sometimes had to deal with rough terrain, including cobbled streets within towns, ankle support was a priority. Most of my trips were to hotter climes, so footwear of choice was canvas hiking boots. Honourable mention goes to my Hi-Tech Sierras. I only wore these during holidays, but they did so many miles the soles were treadless by the time I had to retire them. I was most disappointed to discover the line had been discontinued. The Hi-Tech Trilogies I brought as replacement nearly crippled me. My tendons bled and my toes too, if I recall correctly. Brand new white cotton socks soaked in blood. I have a different set of canvas boots now. Unlike the Sierras these have gore-tex. You don’t need gore-tex for what I am using them for, but finding canvas boots without it no longer seemed to be possible. In addition to the boots I also carried a pair of espadrilles or kung-fu slippers. If you have been wearing boots all day it is nice to slip into these when you head into town looking for dinner and a beer.
An important item was a rainproof jacket, ideally a lightweight one that packed into its own pocket or small pouch. The latter quality was far more important than it being breathable or some wonder fabric. I discovered that breathable waterproofs have a finite life, and you get to know that time is up the hard way, during a rainstorm!
I carried a lightweight jacket of some synthetic material for some protection against the wind. One of these had a cotton liner which I replaced with one made from a silk shirt. I don’t recall using these jackets much. Often I would use my cotton shirt, fleece or rainproof. I carried a fleece for colder days and evenings. This had a more windproof outer than most fleeces, so was more practical for outerwear.
Clothing included a boonie hat for sun protection, and several bandannas, one in a trouser pocket, the others in the pack. I carried a pair of gloves, although seldom needed them in hot climates.
The secret to carrying so little clothing is being willing to clean it during your trip. You will notice that most of the items I carried are quick-drying materials such as synthetics or silk. The cotton socks are an obvious exception, but these dried pretty well in the climates I traveled in. In such conditions putting on slightly damp socks was not a health problem.

The only laundry gear I carried was a small nail brush. The same soap I washed and shaved myself with served as detergent. Washing socks generally involved putting them over my hands and “washing my hands”. The brush worked well on collars. Often I would step into a shower wearing a silk shirt and clutching a bundle of other items to wash. Hang a silk shirt on a hanger and it dries without needing ironing. In fact, the same is true of cotton tee-shirts!
Moving on to other categories: I carry a lighter as part of my EDC, which covered the requirement for fire. My daysac carried a water-bottle, although this might be moved to the outer pocket of a larger pack if I was carrying one. On more recent trips this has been one of my Platypus bottles, often the larger one with a drinking tube. On some trips I simply brought a large bottle of soda in a local store, then used the bottle for water once the soda was drunk. For most of my trips you could trust the local tap-water, but I did acquire a cup device that chlorinated water passed through it. You might wise to include a bottle of purification tablets instead.
I was seldom anywhere where I could not purchase food. The times I was, a few hours hungry would not kill me. Thus I carried nothing to cook with on hosteling trips. The bag soon acquired some local foods such as fruit, salami, bread and cheese. I can still recall sitting outside the Parthenon, making a sandwich with my penknife and surrounded by feral cats sunning themselves. I learnt to carry a bag of boiled sweets (aka “hard candy”). These provided an energy boost when climbing hills: most sights to see seem to be up hills or high up! And I will admit that offering a sweet to a fellow traveler was a great ice-breaker and gained me some very memorable companions over the years.
My travel medical kit I have described elsewhere. Medication appears in my current load-out, but I did not need such things in my younger days! My daysac included a bottle of sunscreen and one of insect repellent. These days you will have to ensure that the volumes of these are less than 100mls if you intend to travel by air. Another item for your daysac is a roll of toilet paper in a plastic bag. Over the years I refined and optimized my wash kit. This is described here.
My tiny sewing kit has seen a lot of use over the years, so is something it would be very foolish not to carry. My “spares and repairs” includes a couple of spare rucksac buckles, electrical tape, string and a tube of superglue.
Documents included my passport and any visa needed. Plane tickets: no e-tickets on smart phones back then! In Europe I carried the E111 medical treatment form, but these may no longer be valid. A zipped pouch such as a pencil case proved very useful to hold documents and other miscellaneous items. Traveler cheques, although I doubt modern travelers carry these. A photocopy of my passport, and record of the traveler cheque numbers went in the pencil case. I did have my cheques stolen on one trip, and got all my money back, since I had the numbers to cancel them. Wisely, I carried my credit card in a different place so that was not stolen. A couple of guide books, usually borrowed from the local library at home. Have more than one, since entries can be misleading or inaccurate. A phrasebook. A novel or similar to read while waiting for trains or just sitting in the sun. A notepad in a plastic bag, and something to write with.
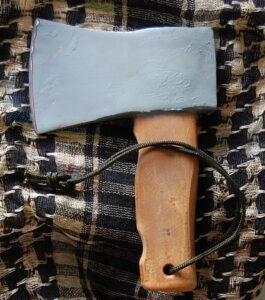
I carried my penknife on my person, and often it has proved useful. My daysac included a flashlight of some form, in an outside pocket so it was readily accessible. A telescopic hiking pole was a blessing on steep terrain or when tired.
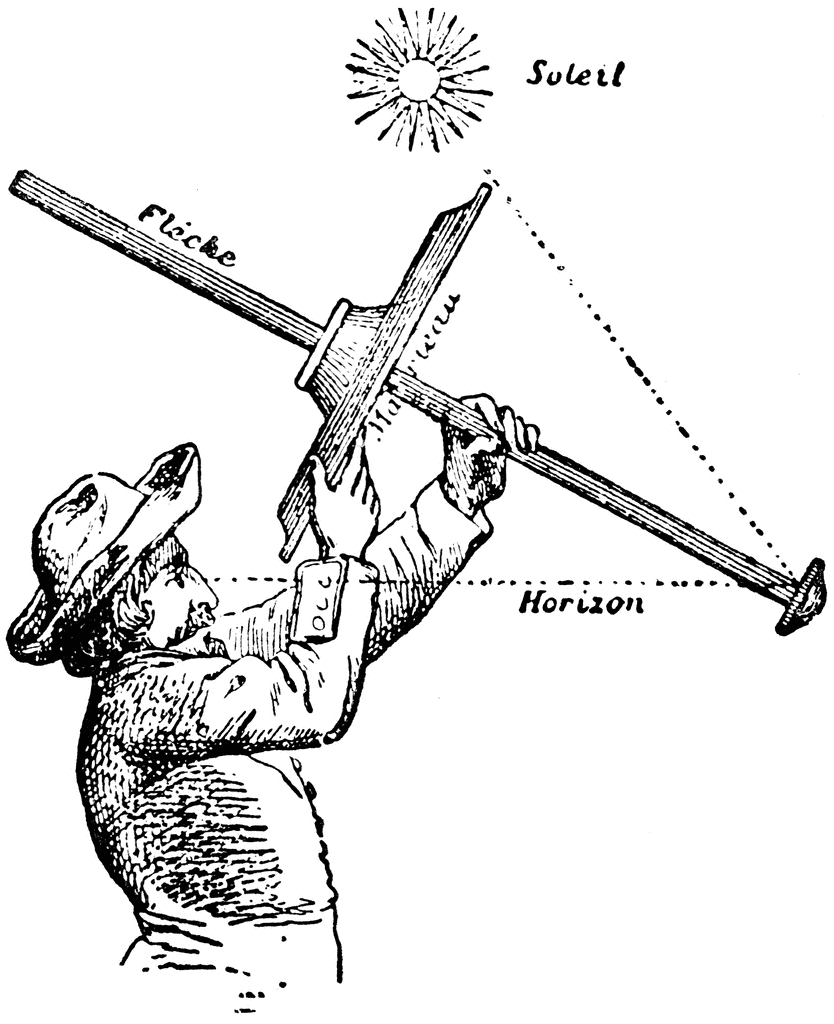
One of the first things I would do when reaching a new town was locate the tourist office and acquire any street maps they had. My EDC includes a Suunto Clipper compass and this has often proved useful when navigating a strange town. 
An item conspicuously absent from my original article was a mobile phone. They were only just coming in, they needed frequent recharging, and you were unlikely to find facilities to charge them, back then. My trips were an escape, so I made a point of leaving all my electronic devices at home, which probably would have been a Walkman back then! Not really being a photographer, I also never bothered carrying a camera.
Few backpacks are totally waterproof, so the contents should be in one or more plastic bags. These needn’t be anything expensive, just intact. If you are traveling with just one pack I suggest you divide the contents with at least two bags. One bag holds your bedding, wash-kit and most of your clothing. The other bag has the items you may need during a day’s sightseeing: medical kit, guide books, raincoat etc.
Categories
Phillosoph

Optimizing Canteen Cups

Yesterday I happened across this webpage.
This is a concept that I have encountered before: that the optimum proportions for a cylinder are to have it at a height equal to its diameter.
The non-calculus explanation for this goes something like “a sphere has the lowest ratio of surface area to volume and a cylinder of equal diameter and height is closest that a cylinder can get to a sphere”.
Optimum use of materials means less weight to carry. 
You would think there would be a special name for such a cylinder so proportioned, but if there is I have yet to encounter it. Update: Equilateral Cylinder.
This concept can be applied to the design of hiking and survival gear.
Yesterday I wrote a little about canteen cups and muckets. In a previous post I mentioned a idea that a good size for an eating vessel was around half a litre.
If you have to travel light, your main, probably only, cooking vessel will be a canteen cup, and this will also serve as your bowl and your mug.
Most of us have to make do with whatever we can get, which is usually a military design.
Perhaps our most important, most likely cooking vessel deserves greater consideration?
Let us imagine we are designing a better canteen cup. The above concepts may play a part.
The typical military canteen cup has a kidney-shaped cross-section. They are designed with the assumption that they will be carried with a water-bottle, and that that bottle may be worn on the belt.
Assumptions are always dangerous beasties, and should occasionally be tested to discover if they have gone rogue!
(Military water bottles of kidney or oval section date to at least the 18th century and therefore predate their being worn in belt pouches!)
Obviously, carrying a supply of water on your person is prudent. Depending on situation and other factors this may be anywhere between 500 mls to 2 litres. Larger volumes should be considered a pack item.
Your typical military water-bottle is not the best way to carry water on your belt. If you land on it when falling or taking cover, it can hurt or bruise you.
If it is only partially filled, noises of water sloshing may betray you.
Many designs have a cup that fits over the top of the bottle, meaning you have to remove this and keep it safe every time you want to drink from the bottle. That snap-link I told you to attach to your webbing can prove useful here, but this can still be a hassle when you are half-way up a windy hillside and trying not to drop your rifle or lose sight of your mates.
For the above reasons a lot of soldiers and outdoorsmen now prefer bladders with drinking tubes such as Camelback and Platypus.
Does the cup need to fit outside a water-bottle? That interior space can be put to use for lots of other useful items. A hank of cord, fuel tablets and/or tube of alcohol fuel paste, small medical kit, sewing kit, spare lighter, tea and coffee bags, instant soup, OXO cubes and so on.
Does the cup need to be on your belt?
Generations of British soldiers will probably disagree with me here, but usually a hot cuppa is not life and death.
Your survival gear should be at skin level and your belt/webbing reserved for immediate use items: ammo, a good knife, a couple of litres of water, CI-IFAK trauma kit.
Your canteen cup should be a pack item, preferably in a readily accessible side-pocket.
What is the ideal shape for a canteen cup?
A spherical vessel is not really practical for a number of reasons. A hemispherical bowl of around 500 mls capacity will be about 12 cm/5" across and 6 cm/2.5" deep. Such a bowl can be used for both eating and drinking from but may not be the best shape for a cooking vessel. Woks generally need to be wider.
A cube of around 500 mls capacity has 8 cm sides. The corners of a cube may be difficult to get clean with a vessel of this width.
Another space-efficient option is a half-cube, 10 cm square and 5 cm deep. This has potential. This might resemble a smaller, square-section version of the familiar British Army mess-tin. Plenty of tea has been drunk from these, but it is not the best shape for a mug.
This brings us back to a cylinder of equal diameter to height, or thereabouts. For a capacity of about 500 ml, height and diameter will need to be around 9 cm/3.5".
This seems wide enough to eat out of and keep clean, deep enough for cooking and drinking. On the other hand, this shape may be too wide for easy carriage in a back-pack side-pocket.
This suggests that our canteen cup should be flattened in cross-section, and if we take this route we might as well give it a kidney-shaped cross-section. Realistically, most end-users will probably not buy a canteen cup unless it is this shape!
There is probably an optimum ratio of height to end-size for a kidney-section vessel, but the calculus is beyond me.
The above figures are based on another assumption: that we want a volume of around 500 mls.
Looking at four of the metal canteen cups I own, there is a notable difference in sizes.
The British Crusader Mk1 is noticeably bigger than the US (actually Dutch) cup and the upper cup from the Bundeswehr M59 canteen. This may partially be so the Crusader can fit over the bottom of the Osprey waterbottle. The Osprey has a plastic mug that fits over the top (!).
Theoretically you can carry both this mug and the metal Crusader around the same bottle. In practice you are better leaving the plastic mug for kit inspections. Also notable is that the Crusader Mk2 has a larger capacity than the Mk1.
A quick exercise with a measuring jug and some water yielded the following approximate volumes:
  • German M59 upper cup: 450 ml
  • Dutch canteen cup: 500 ml
  • Crusader Mk1: 650 ml
  • Crusader Mk2: 800 ml
The Dutch cup appears closest to our theoretical ideal. This is about 13 x 8 cm across and 9.5 cm deep. I don’t know if that is optimal, but the basic shape has not changed since 1910!
The Dutch cup is a sound choice for your emergency kit, but the British cups are ahead on features such as non-stick coatings, measuring marks and accessories. 

Even more interesting was weighing the cups. The Dutch cup was 9.4 oz/266 gm, the Crusader Mk 1 was 9.7 oz/275 gm yet the larger volume Mk 2 only 6.9 oz/195 gm.
What this boils down to (pun intended) is that most of the commonly available choices are fairly sound, but there is room for improvement.
While issues such as lids and bail handles need addressing, optimizing proportions could save additional weight.
A smaller version of the Crusader Mk2 would be an attractive product.
Categories
Phillosoph

What's a Mucket?

Today I was woken from my slumbers by a hailstorm rattling against my window.
When I was a young boy, I was very interested in spiders and read many books about them. Even with this knowledge, it still impresses me that a flimsy looking cobweb caught so many hailstones, so they appeared frozen in mid air.
My day started with me being reminded of old knowledge, so I was pleased to discover something new while I drank my coffee:
I came across the word “mucket”.
Most sources will assure you that a mucket is a variety of bivalve, resembling a mussel. But it was also used for a much different beast.

Mucket is presumably a portmanteau of “mug” and “bucket”. Alternate names are “coffee boiler” or “boiler cup”.

The sites offering them for sale are mainly geared to supplying American Civil War reenactors.

Some of the examples offered us the original construction methods and materials such as soldered tin, which is less than ideal for actual use.

Others look the part but use modern construction and materials such as stainless steel.

I have been planning to write a post on canteen cups, but I am holding off until I can get around trying to make lids for mine.
At around 24 fl.oz (c.710ml) the mucket fills a similar niche to the modern canteen cup, but I have to say it is ahead on some of its features.
The mucket has a bail handle so that you can hang it over a fire.
And not only does it have a lid, but one that is attached by a hinge, at least in some examples I have seen!
The lids have a ring, allowing you to raise them with a stick or similar implement rather than burning your fingers.
Admittedly, it is not kidney shape in section, but since a canteen cup (or mucket) should be in a pack rather than extra weight on your belt, this is a minor issue.
Camouflage not being an issue, the Civil War soldier hung his mucket outside his ration bag.
Hopefully some manufactures will have a good look at the mucket and design more capable canteen cups.
Categories
Phillosoph

Umbrella Fighting in PDF

My series of articles on self-defence with an umbrella, cane or similar objects have now been combined into a single document.
brolly2
Categories
Phillosoph

Sun-Compass

Yesterday’s topic logically brings me onto today’s, and another ancient but useful navigation device.
If you have even just glanced through a survival manual, you will most likely have seen the shadow-stick method.
I have previously described this in the context of navigating by the moon. Like the sun, the moon and stars also rise in the east and set in the west.
The more usual context for the shadow-stick is using the sun.
The method is simple.
Place a stick or similar in the ground so that it casts a shadow. Mark the end of the shadow.
Wait for at least twenty minutes.
The tip of the shadow will have moved. Mark this new position. The first marker will be west of the second.
Draw a line between the two markers, then run a line perpendicular to this and back towards the base of your stick (gnomon).
This second line will be true north-south. The greater the distance/longer the time between marker placement, the more accurate will be your determination of north-south.
Logically, we will get a more accurate estimate if we take several hours and place a number of markers.
If we do this we will observe that the shadow is longest in the morning and evening, and shortest when the sun is directly overhead.
The arc plotted on the ground will be flattened rather than constant, unlike some illustrations of this method!
When the shadow is at its shortest, it is on the north-south line, and the time will be local midday. The shadow will be shortest at local apparent noon (LAN), which is midway between sun-up and sun-down, so may differ from 1200 hrs.
As well as determining distance, you have also made yourself a crude sundial. This can be useful in determining true local time.
Some countries on the same longitude use different times. China spans several time zones but uses one official time for the whole country!
The principle is simple enough, but it can get confusing which end of the north-south line is north. In the northern hemisphere the sun (or moon) rises in the east and travels west, passing through the south. In the southern hemisphere it goes through the north.
  • In the northern hemisphere the shadow always points in a northerly direction. At midday the shadow will point due north.
  • In the southern hemisphere the shadow always points in a southerly direction. At midday the shadow will point due south.
Memorize that and solar navigation becomes much less confusing.
In the movies, air-crash survivors usually undertake an epic journey back to safety.
In the real world, your prudent strategy is to stay near the crash site if practical.
Setting up a shadow stick is a practical way to spend the time, and establishing the bearings of visible landmarks may be useful later on.
Suppose, for whatever reason, you need to travel. This decision should never be made lightly.
Thanks to your shadow-stick, you know what bearing you are heading out on, and that of some of the local features.
But we cannot take our compass/sundial with us!
With a few modifications, we can make a portable variant.
If you have ever read about the early days of the SAS or of the Long Range Desert Group (LRDG), you will most probably have encountered to references to sun-compasses on their vehicles.
In those days, trying to use a magnetic compass while riding in a large lump of steel was problematic. The solution was the sun-compass.

Descriptions of how the sun-compass was used used to be hard to find. Thankfully, this is changing.

The sun-compass is an ancient device, and was used by the Vikings, among others. A version was also used by some Apollo missions on the moon.

As you can see, some sun-compasses are very complicated or sophisticated, so not really something you can improvise.
I am going to describe a less accurate variant that can be easily constructed.
In the previous blog, I described how a circle of 57 mm radius had a circumference of c.360 mm. (The person who taught me this trick had 5 mm and 57 mm marked on the zipper of her jacket. I notched my penknife handle).
Create such a circle on a piece of paper, back of a notebook, etc.
An alternate name for a sun-compass is “shadow board”, which reminds us it can be made with a piece of plank or other flat material.
A folded piece of paper will help us mark off the 45, 90 and even 22.5 degree points.
Each 1.5 cm of the circumference is 15 degrees.
The radius of a circle can be measured twelve times along its edge using a drawing compass, or an improvisation of one.
By folding the marked points together the circle can be divided further into 24 parts, or the drawing compass can be used further.
A nail or pin can be used as the gnomon, but a sliver of wood is more likely. In fact, you do not have to mount the gnomon, just place a shadow-casting object in the centre of the circle whenever you take a reading.

All we have to do now is mark off the circle. This will be a 24 hour clockface so mark off every 15 degrees with an hour.

Remember that the shadow will point due north at midday in the northern hemisphere, so mark 1200 hrs as North/0 degrees (In the south, 1200 will be South/180).

Fill in the rest of the face. You might get something that looks like this:

Using this simple sun-compass is simple.
Hold it level and rotate it until the gnomon shadow is over the current time. If the clocks are adjusted for daylight saving/BST or similar you will have to account for this.
Remember, “spring forward, fall back”, so the shadow will be on the north-south line at 1300hs, not 1200, so you will have to subtract an hour from local time to get the time to read on the dial.
Once you have your sun-compass orientated, use the dial to find the bearing you want. Your portable sun-compass should agree with your base-camp shadow stick.
Pick out a landmark, put away your sun-compass and walk towards the landmark. 
An alternate method is to do the same as you did with a shadow-stick. Erect a little gnomon on a board or sheet of paper and plot the tip of the shadow over the course of a day.
Draw a line from the base of the gnomon across the curve where it is at its closest.
To use this version you do not need to know the time.
Rotate the sun-compass until the tip of the shadow meets the curve. The line you drew will point north (or south if you made your sun-compass in the southern hemisphere).
You must use the same height gnomon for each reading, so mount this permanently.
The Ottomani version is suspended from three or four points by cord to ensure that it is level.
You may have realized that if you know the bearing of something, your sun-compass can be used as a crude sundial.
Related to the methods described above is using a watch directly to navigate by the sun.
Remember to adjust time for BST/DST. Substitute 1 mark for 12 mark in the above instructions.
If your watch is digital, or you are using your phone clock, use your imagination.
If you become confused as to which end of the north-south (N-S) line is north, check the local shadows.
Hold a blade of grass over the watch-face and see if it casts a shadow. The one direction a shadow cannot point in the north is south.
Useful to recall is the north gets up around 3 o'clock, goes to bed around 9”.
In other words, the north end of the N-S line will be in the small numbers in the morning, the higher numbers in the afternoon. (In the southern hemisphere replace the word north with south and the motto still works.)
Remember, sometimes shadows are still visible even when you cannot see the sun directly. 
The basic watch method is easy to remember: midpoint between “12(/1)” and the hour hand.
The specifics for each hemisphere can be difficult to remember.
It may help to think that “N” for north-hemisphere looks like a “H” for “hour-hand” and that this should be pointed at the sun. A cast shadow will point in the opposite direction to the hour hand.
For the southern-hemisphere, the 2 in “12” looks a little like an “S” so the 12 should be pointed at the sun. A cast shadow should point towards “6”.
Hopefully that will help you use this method.
Categories
Phillosoph

Finding Latitude.

Currently I am reading “The Time Traveller’s Guide to Medieval England”, which is very interesting. An astrolabe is listed among the possessions of at least one wealthy merchant. This got me thinking about similar devices.

Decades ago I watched a program on someone who had spend several weeks, possibly months, in a life-raft on the open sea. Using three pencils and elastic bands he improvised a sextant and used it to measure the angle of the Pole star. Since the angle of the Pole star is equal to the latitude of the observer, he was able to sail his raft into the sea lanes, where his chance of encountering another vessel and rescue were greatest.
Here is a nice image of how such a device works. Other materials such as sticks and string could be used. This device is easily improved with a plumb-line. In the southern hemisphere you can measure the angle of the Coal Sack nebula.
Similar devices date back many centuries. If you have some cord, a kamal would be easy to improvise. Note that one example below is made from a piece of cardboard. A knot on the cord is held between the teeth and the cord pulled taunt. The bottom edge of the sight is aligned with the horizon, and the top compared with the Pole star. Different knots on the cord represented different latitudes. For example, if you wanted to sail from Alexandra to Crete you would sail north, checking your kamal using the knot corresponding to 35 degrees. Perhaps you tied that knot when you sighted Polaris another time you were on Crete. When the Pole star aligns with the top of your sight you will know it is time to start sailing west.

The cross-staff worked the same way as the kamal, as the illustrations show. It was better suited to higher latitudes. There were problems with using such a device to measure the angle of the sun, so the backstaff developed, a step towards the prisms and mirrors of the modern sextant. 

A quadrant is relatively easy to make. A number of websites show the version in the first photo. The problem with this variant is that you have to remember to subtract 90 from your reading.

It is NOT a sextant!

Easier is to use half of a typical semi-circular protractor, mount the protractor with the straight edge vertical, or mark out a piece of card or paper. When improvising navigational devices a useful thing to remember is that a circle of 57mm radius has a circumference of just under 360mm. In other words, one millimetre equals one degree. It is no coincidence that my penknife handle has three notches, one 57mm from the first, the other 5mm from the first. Thus if I make a quadrant or compass rose I can mark it in 5 degree increments. By folding paper you can accurately mark 90, 45 and 22.5 degree angles. There are several ways to draw a good circle or quarter circle with improvised means.

Or just draw around something round.
Such navigation devices can be used on the land as well as at sea. They have a long tradition of being used in deserts, exploiting the clear night skies. There are also situations where you might wish to determine the angle of a slope.
I will close with two trigonometry-based tricks:

The first can be used to determine the width of a river or road. This uses the principle of similar triangles.
Face a landmark on the far bank of the river. Turn 90 degrees and pace out a set distance, such as five paces. Place a marker (B in the illustration) and then pace out another five paces (or whatever distance you used before). A-B should equal B-C to avoid any calculations. Turn 90 degrees and head away from C. counting your paces. Every few paces look back at your landmark. When the landmark aligns with B then C-D will equal the distance between A and the landmark.

The second technique is for applications such as measuring the height of a tree or cliff. Vertical distance will equal horizontal distance when the viewing angle is 45 degrees. You can use a quadrant or clinometer for this, but you need to remember to add the height of your eye to the horizontal distance. Alternately, you can use a stick or staff and move back until it appears to be the same height as the object. Add the length of the stick/staff to the horizontal distance. You may have noticed that wood axes often have a 45 degree cut across their end. A lumberjack would sight along this, moving back until he could see the top of the trunk. Height was horizontal distance, plus the length of the axe handle.
Categories
Phillosoph

Masks and Coronavirus.

English has a very large vocabulary, so it is intriguing that I can still find concepts for which there is not yet a specific term. The term I am looking for is one that means to be simultaneously both “amused” and “annoyed”.
What currently provokes this emotion? Every now and then, someone passes me in the street wearing a surgical mask. I saw the same nonsense with swine flu.

Surgical masks don’t work that way! A surgical mask does not protect you from airborne infectious agents. It does not protect the wearer, it is intended to protect the rest of the world from the wearer. If a surgeon is operating on a patient, he or she uses a mask. If they are operating on an infectious patient, they wear a space-helmet affair with powered air filtration. Don’t take my word for it, read this or this or do some research of your own.

Now perhaps I am just being grumpy, and every person I see is selflessly trying to protect everyone else from their own infections. If so, staying at home might have been a more prudent move. But since I am cynical as well as grumpy, I very much doubt it. Unlike thirty years ago, information on such matters is readily available. It is both impressive and depressing that people can still be so ignorant and foolish.
Want to really avoid coronavirus? A good start is to keep your fingers out of your mouth or up your nose and follow all those other manners people were once taught but are now neglected. A radical idea would be to put your phone back in your pocket. That way you might have a chance of spotting someone coughing and sneezing, or more likely threats like traffic! As a friend of mine recently remarked: Hoarding sanitizer is stupid. You can only sanitize your own hands so many times. If everyone else around you can't, that's going to do much more to spread the disease than you only sanitizing your hands x number of times.” People fixate on sanitizer and forget old fashioned soap is an excellent anti-microbial agent.
Categories
Phillosoph

If You Want To Get Ahead, Get A Hood

A few nights ago I stayed up late, and by the time I went to bed it was very cold indeed. So cold, that as I lay waiting for my shivering to warm the bed, I considered fetching a woolly hat. I thought about the nightcaps worn by characters such as Scrooge and reflected that some of our ancestors ideas were wiser than we treat them. This got me thinking about ancient clothing styles again. For a big chunk of their history humans wore cloaks and tunics, and there is no obvious logical explanation of why this has declined. Indeed, I am old enough to remember nurses and policemen wearing capes as outdoor wear.
Most modern people spend much of their time indoors. Features such as central heating, air-conditioning and insulation make this a very comfortable environment. Most of us wear just a shirt or tee-shirt, our modern underwear barely qualifying as a layer. In some places a jacket and tie is required, and cooling is turned up to a higher level, wasting energy. (Remember, the cloth used to make one ugly neck tie could be used to make two Brazilian bikinis!). When we leave this protective environment we need more insulation, and this usually takes the form of a thick outer garment we can easily remove in one piece when we reach the indoors again.
For our ancestors, things were different. Uniformly heating a large structure was problematic and resource intensive. Ironically, the peasant in his little hut would be better off in this respect than the lord in his vast castle or manor. I imagine certain select chambers of a castle had fires or braziers while the corridors and other chambers might be cold enough to fog the breath.
In general there would be less discrepancy between interior and exterior temperatures. Hence the typical clothing ensemble was orientated towards being comfortable outdoors. Travellers or soldiers might have to spend several days at a time out of doors. For the Celt, Roman, Viking, Saxon or Norman the answer to this was the cloak and tunic. These were made of wool, which has the merit of retaining some warmth if soaked by the rain. Some woollen garments had the lanolin left in or added, and might have a nap that shed rain and snow. Other fabrics such as linen and hemp saw some use, particularly in drier climates, but generally the cloak and the outermost tunic would be woollen. The early Roman tunic lacked true sleeves, or was short sleeved. Many Romans went bare-legged, or wore short breeches. In latter centuries the Roman soldier wore long sleeves and trousers, much like his earlier Germanic foes. (By this time many legionaries were of Germanic ancestry).

Tunic, trousers and cloak were not the whole story. Except in hot conditions, some form of short or undertunic may have been used. These might have been of easily laundered cloth such as hemp and linen. Underpants were rare or unknown in some cultures or classes. A noble may wear braies, while the poorer medieval man tucked the long tails of his shirt between his legs. In an era where many people could not afford large quantities of clothing such a shirt might also serve as a night shirt. Roman attire included a long scarf, worn under the tunic. For the soldier this prevent armour chaffing his neck, but the scarf is recorded as being a general item of wear. In addition to its other functions, such a scarf may have served like a detachable collar, protecting the tunic and other garments from soiling. Many tunics show trimming of the neck, cuffs and hem. This is often contrasting or decorated. Easily replaced, this may have allowed the practical life of a garment to be extended, an important consideration when many individuals owned only a few garments. 

If we look at medieval peasants and other commoners a very common item of clothing is the hood. A modern hood is usually part of a larger garment, and hooded cloaks date back thousands of years. What is distinctive about these medieval hoods is they are separate garments. Initially I thought this might be some prudent frugality. If a tunic wore out you could still make use of a perfectly good hood. Also, one only need buy or make a single hood that could be used with any of your garments. Some of this may have been the case, but the following video provided further enlightenment:
The hood was as much a shoulder cape as it was a head covering. The hood was usually lined, so it provided an extra couple of layers of insulation over the part of the body heat would be rising from.

Further on the video explains how in warmer conditions the hood can be configured into a chaperon-style hat

Elsewhere in this blog I have described how a shoulder covering can contribute to personal camouflage. A garment based on the medieval hood could have “garnish” applied as described here. A shaped hem adds further disruption. Camouflage cloth could be used, but this will work with any suitably neutral-coloured monotone. Being a lined garment it could be turned inside out to hide the camouflage if necessary. If made with camouflage cloth at least one side will need to cotton, so perhaps it should be made with a layer of fleece sandwiched between two layers. Some of the hoods sold for re-enactors are reasonably priced, but choice in good tactical colours is limited. Do not overlook the potential of modern versions, such as a section of poncho-liner, possibly combined with the M-51 hood attachment.
Worn as a chaperon, the hood is suitably irregular to still work as camouflage. At a distance, it looks a bit like a turban, which may be useful. One is reminded of the Mitznefet used by the Israelis.

Much to my surprise, the medieval hood has considerable potential for modern use by anyone who ventures out in cold weather.

Categories
Phillosoph

Hatchet Men by Richard H. Dillon.

My research for my last blog have resulted in me locating and reading a copy of “Hatchet Men” by Richard H. Dillon. This is proving to be a fascinating book, with scope far greater than just the Tong wars. Dillon includes an account of the psychological and sociological factors that contributed.

On one side, we have rampant bigotry. On the other, unhealthy isolationism. Thrown into this are some all too familiar factors. Sensationalist and mendacious journalists. Self-serving and opportunistic politicians. A greatly understrength, and often corrupt, police force that the law-abiding could not trust. Cosmetic, politically-motivated, laws that only penalize the law-abiding. Courts and lawyers used as weapons by the criminals rather than the victims. The innocent with no protection and unable to protect themselves. Good people trapped between parasitic criminals and prejudiced mobs.

There are sparks of inspiration too. Thousands of normal San Franciscans took to the streets as the “Pickaxe Handle Brigade” and prevented the anti-Chinese sand-lot mobs burning Chinatown. Or the tenacious, often dangerous, crusade of Donaldina “Lo Mo” Cameron to rescue Chinese women from slavery.
This is a story that has many lessons for both the present and the future. Many of the conditions and problems described still exist in our societies. Within the major cities of America and Europe thousands of women have been enslaved as prostitutes.
I recommend reading “Hatchet Men”. It is a book that should be required reading in schools.
Categories
Phillosoph

Highbinder Hatchet

A few months back I binge-watched the excellent series “Warrior”.
This once again stirred my curiosity about the Tongs and the weapons they used. 
The footsoldiers of the criminal tongs were the “highbinders” or “boo how doy”, which means “hatchet sons”, but was more commonly translated as “hatchet men”.
The term “highbinder” supposedly derives from the members of the fighting tongs wearing their hair in a style which made it difficult for an enemy to grab their queue.
In fact, the term was used for non-Chinese hoodlums long before it was applied to Chinese (Hatchet Men p.52-3).
The rationale behind “hatchet men” is usually that this was the favoured weapon of the highbinders, being useful for both dispatching an enemy and disposing of the body.
One would think that the cleaver would have been a more readily available implement in Chinese communities. Indeed, this often seems to be the choice of modern Chinese criminals.
Interestingly, while displays of confiscated highbinder weapons do include hatchets, knives and firearms seem more common.
Some writers like to paint the picture that the tong fighters preferred mêlée combat, but reports from the time as well as photos make it clear modern firearms were used.
It is possible that blades were favoured for intimidation.
Police chief (1866-97) Pat Crowley was probably exaggerating when he said “Nearly every Chinaman in the city is the owner of a pistol, and we all know how handy he is in its use.”
However, it is clear firearms use by Chinese criminals was common.

This extract from a US Congressional report also makes interesting reading:

Q. They have a common habit, I understand, of carrying the pistol in the hand stuck up in their voluminous sleeve, and going up to a person and shooting him through the sleeve. Is that true?
A. They generally take out the pistol when they shoot, although they carry them very often in their sleeves. Highbinders seldom carry pistols. They are generally accompanied by another person, whom they call " jury," and who belongs to the poorer class of Chinamen. He follows the highbinder and carries the weapon. When caught, we would search the highbinder for a pistol, but would not find anything of the kind on him, and the ' jury" would have disappeared with the weapon. The only time the highbinder has a weapon is while leaving his quarters, but on the street you will not find one. 
Q. Are they not oftentimes called "hatchetmen"?
A. The hatchet is a great weapon and the blade is about 6 inches long 
Q. A regular cleaver?
A. A good deal like a lather's hatchet. 
Q, When you said that there were 30 men killed in the streets, you meant men who were shot; that does not include men who were killed by hatchetmen, does it?
A. They do not use these hatchets very much now; they use knives more, because knives do not make any noise.
Also notable is that most of the knives displayed do not appear to be Chinese in origin. Indeed, the leftmost in the photo below appears Japanese!
The middle example appears to be made from a broken (American) sabre.
According to “The Complete story of the San Francisco Horror”, “The favorite weapon of the Highbinder is a long knife made of a file, with a brass knob and heavy handle. The other weapon in common use is a 45-calibre Colt’s revolver.”
Many American knives would have been forged in Sheffield or Solingen!
There are very few “martial artsweapons in these collections.
A weapon of actual Chinese pedigree in these pictures are the paired butterfly swords (Woo dip dao/ hudiedao) that appear in each photo.
These may be the bowie knifes two feet long in the blade mentioned by Price on page 288 of Hatchet Men.
The Wikipedia article on Tong Wars makes the following statement:
“The hatchet that the highbinders used was somewhat modified from what one usually thinks of a hatchet, as they would cut much of the handle off just enough to have a good grip, and cut a hole into it.”
This is attributed to “Hatchet Men” by Richard H Dillon but the page reference given (p.107) is incorrect, the correct reference being the testimony of Officer Michael Smith on page 163. The actual passage is: 
“A great many of them carry a hatchet with the handle cut off. It may be about six inches long, with a handle and a hole cut in it. They have the handle sawed off a little, leaving just enough to keep a good hold…”
Shortening a hatchet may make it easier for it to be concealed in the sleeve of a Chinese garment.
I have been unable to find any images of shortened hatchets that were used by highbinders, nor of any corroborating references.
One idle weekend, I decided to make a shortened hatchet as an experiment. I worked on the premise that “cut a hole into it”  referred to the handle, not seeing any easy way that myself or a highbinder could bore a hole through any other part.
The tool I chose was a low-cost hatchet that I think was described as 1.25 lb.
Even with much of the handle removed it seems surprisingly heavy, and the modification makes it seem even more top heavy.
On the other hand, it is still a pretty sturdy tool and still feels like it could break through an interior door, let alone discourage an aggressor.
It can also serve as a hammer for applications such as breaking windows.
As you can see, I painted the head to make it less visible.

Update

An interesting tool I came across recently, the Marbles Mini Hatchet. Weight is given as 159 g and length as 18 cm. Price is fairly reasonable.