Recently I have been thinking a little on the subjects of quick-draw and hip-shooting.
One reason for this is that I treated myself to the Kindle Edition of “Shooting” by J. Henry FitzGerald. A very entertaining read and lots of information that is still useful, even if the book was written in 1930.
Expect me to refer back to this work in future posts. I highly recommend it.
At around the same time, I came across an article on quick-draw by Elmer Keith.
Unfortunately the print quality is too poor for me to reproduce it here.
Much of the article is padding and anecdotes, but there were a couple of useful ideas within. The article was originally in “American Rifleman” Sep 1938. Reproduced in Poor Man’s James Bond, Vol.5, Kurt Saxon.
“No Second Place Winner” by Bill Jordan is also worth a read on this topic.
I also reread Fairbairn and Sykes’ (F&S) “Shooting to Live”. This is another “must read”, although it doesn’t have a lot on quick-draw. While most of the F&S technique is not hip-shooting, it did provide some insight.
The main reason I decided to discuss this topic was due to some of the videos I viewed. The cowboy action shooters I will discuss in a moment.
Most of the “non-cowboys” would quick draw their weapons, then slow down as they locked their arms straight, lined up their sights, held their breath and did all the other things their shooting guru of preference recommends.
Most took more than a second to draw and fire. Some individuals were faster, but still we were looking at around three-quarters of a second.
In the early part of Shooting to Live, the authors state that the considerable experience of the Shanghai Police had found making a hit within a third of a second was desirable to officer survival. Admittedly, this was not necessarily quick-draw from a holster.
Gun Magazines love to fill their column inches with “either/or” binary propositions.
One example of these is “Frontier style” vs “Aimed Technique”.
For the duration of this article, I would like you to forget all you have read along these lines and temporarily accept two other propositions:
• There is a time for aimed pistol fire, and there are times when there is no time for aimed fire.
• If you have to quick-draw, you need to put lead in the target in the shortest time possible.
“Shoot double action if it is at short range and quick draw is not necessary at long range.”
Shooting. FitzGerald, J. Henry. Sportsman's Vintage Press. Kindle Edition.
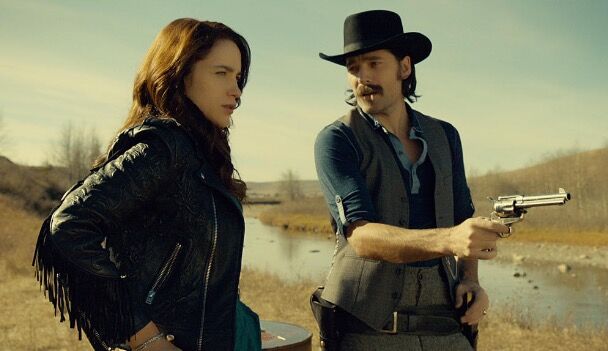
The Cowboys
Cowboy action shooting actually proved less useful than I expected.
Certainly the fast-draw experts are very fast. However, this is achieved by firing as soon as the muzzle is out of the holster. The muzzle may be right above the holster.
To speed this up, most cowboy action shooters would lean backwards.
This technique is not really applicable to self-defensive shooting. If someone is likely to be shooting back, you will probably be crouched forward. You also may have to quick-draw from a seated position where you cannot lean back.
My other reservation is that I have no idea how important accuracy is to cowboy quick-draw shooting competitions.
One shooter did say something about accuracy coming with a few thousand practice rounds. Perfecting literal hip-shooting may be beyond the means of many of us.
Some aspects of cowboy fast-draw are specific to single-action only weapons such as the Colt Peacemaker. Practical defensive handguns should have a double-action mode.
The best advice I got from my brief dip into cowboy quick-draw was “Don’t hold your breath!” As we know for other fields of combat training, relaxed bodies and untensed muscles move faster.
When Not to Draw
In a past blog, I referenced a video of some young guys practicing fast-draws against charging training partners and imaginary enemies.
As I commented then, “speed and skills were impressive, their tactics deplorable”.
No matter how fast you are, if an enemy is rushing in from close range, your first move should be to get out of the way.
A well placed palm-strike or trip may drop them more effectively than any bullet. Once the immediate threat has past, then is the time to draw your weapon.
See “Attack, Avoid, Survive” and “Survival Weapons” for more on this topic.
If a target is within a few metres, thrusting your gun nearer towards them may not be prudent.
There a numerous ways to dodge out of the line of fire at such ranges.
You may have brought your hand(s) into range of unarmed, blade or baton attacks.
Quarter-Hip Position

I am showing the F&S “quarter-hip” position here since it has some parallels to cowboy hip shooting.
Fairbairn and Sykes suggest this only be used at ranges of a yard or less.
The gun is held back so an attacker cannot reach it. The free-hand can be used to fend off the attacker.
F&S note that this is the only one of their firing techniques where the gun is not fired from the centre-line.
It can be fired parallel to the centre-line, although there is an obvious difference of half a body-width. It can be fired to intersect the centre-line, although this will require more skill at greater ranges.
I show a similar position in “Survival Weapons” and “Attack. Avoid, Survive”. Keep the free-hand well out of the possible line of fire.
Safety
As should be done before any firearm training, or handling, verify the loaded status of your firearm.
For dry-firing, chamber or chambers should be emptied. With some weapons a loaded magazine can be left in place to keep the mass realistic. A revolver will need dummy cartridges instead.
Some semi-automatics need the backward movement of the slide to recock their strikers. Magazines of live rounds should not be fitted for dry-firing practice with these models.
Draw using the lower three fingers of your hand. The trigger finger should not touch the trigger during the drawing phase. The trigger only comes into contact with the trigger when the muzzle is pointed at the target.
Consistency
The principle of consistency applies to many phases of training.
Train with the weapon, holster and holster position that you are most likely to be in when a potential need occurs.
A holster that always stays in the same relative position is obviously an advantage.
Accuracy comes from the weapon always firing from the same relative position.
Efficiency
Speed comes from efficiency.
A quick-draw has three stages: the draw, the point and firing.
Work to make each of these phases with the minimum of wasted motion.
Make the transitions between them as as efficient and smooth as possible.
The movement of the hand from the start of the draw until firing should be a single continuous motion.
Patience
To learn quick-draw safely, you should accept that you will have to practice at least several months without firing a round.
You will be tempted to try it with live rounds, “just to see how it is going”. Do not!
You will only be ready for live ammunition practice once you can honesty say that you have the phases of the draw and its whole working as efficiently as you can.
Start off at a slow speed. Trying to be fast is counter-productive. Speed will increase as you get smoother with practice.
The Quick-Draw
How you draw will depend on where you carry your holster, your weapon, your physique, manner of dress and many other factors.
Your free-hand may need to be involved to pull your jacket open or lift your shirt while the other hand draws.
For a strong-side holster, the most efficient draw may be simply to lift the pistol upwards out of the holster. As soon as the muzzle is clear of the holster, the action of pointing it towards the target begins.
Shorter weapons are theoretically quicker to draw than longer ones.
In practice, an excess of force is used on the draw and, within limits, length has little significant effect.
Shorter weapons are more practical to wear if you have to spend anytime seated.
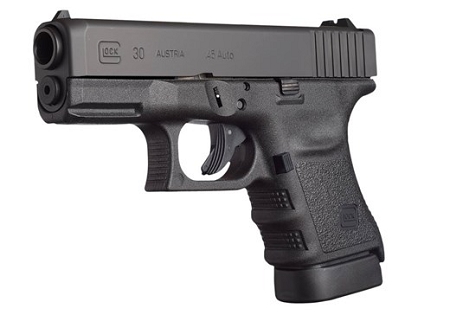
Compact/subcompact automatics of 7"/180mm loa. or less are recommended.
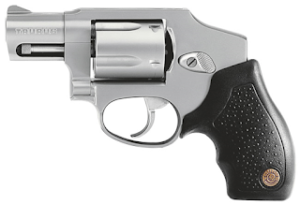
If you have to use a revolver, have a snub with a barrel of less than 3"/76mm.
Big bore options for revolver shooters include .45 Long Colt, .45 ACP, .44 Spl and .45LC/.410.
The Point
If we are quick-drawing, it is because we need to put lead in a bad guy ASAP!
Logically, this means we fire as soon as the muzzle is pointing at the target. For the cowboy shooters this is a fraction after the muzzle is clear of the holster. With a typical low-slung cowboy rig, this is literally shooting from the hip.
For a shoulder carry, your weapon may be as high as chest-level when it points at the target. For most modern belt holsters, the gun will first point at the target at between groin and chest-level.
“Hip-shooting” should not be taken too literally. I prefer to think of it as “sub-shoulder level shooting”.
If your gun reaches eye-level before you fire, you have waited too long!
To continue my example of a quick-draw from a strong-side holster: Once the muzzle is out of the holster, straighten your wrist while at the same time pushing your gun-hand forward onto your centre-line. This is a very simple action that can be made very smoothly, particularly if your body is relaxed. Draw and point are thus a simple lift and then push sequence.
Raising the gun out of the holster probably raised your shoulder. The action of dropping the shoulder helps push the gun towards the target.
Keep your trigger finger clear of the trigger until your gun points toward the target.
If your weapon uses a safety, do not release your safety until beginning to point towards the target.
If your weapon is single-action, cock as the target comes before your muzzle.
The weapon is aimed by turning the hips to place the target on your centre-line.
A sighting laser can prove useful when dry-firing. Plastic or wax ammunition can also prove useful.
For purposes of illustration, the F&S “half-hip” firing position (above). F&S suggest this for ranges of three yards.
Actual angle of the elbow will depend on factors such as physique and holster position. The elbow angle will probably be more obtuse, although a high draw may make it acute.
The point to observe here is the weapon is on the centre-line and pointed at the target.
In fact, the actual firing position may look closer to the F&S “three-quarter” position. This was for a crouched position and used for targets at three or four yards. Like the half-hip position, the gun was fired while still below the eye-line. This position is an intermediate phase of raising the pistol up to eye-level.
The Free Hand
As already mentioned, your free-hand might have an important role in making your fast-draw.
Whether you need your free-hand or not, you should practice drawing so that your free-arm does not in anyway hinder or obstruct the draw. Shooting your own fingers off is not good form!
The technique described here may be made as either a one-handed or two-handed technique. As the gun-hand is pushed towards the centre-line, the other hand comes inward and upward to intercept it and come into a two-handed grip.
Assuming a two-handed grip should disengage the safety with the free-hand (“fumble insurance!”).
Bang!
As soon as the weapon points at the target, fire.
Ideally, your handgun should have a double-action mode.
A weapon without a manual safety, or that can safely be carried without this engaged should be selected.
I have plenty of reverence for weapons like the Colt Government Model and Peacemaker, but when it comes to personal defence, and particularly quick-draw, your handgun should be as simple, straight-forward and as least fiddly to operate as possible.
Through the entire drawing process, your eyes should have been locked on your target, not your weapon.
You should have adjusted your body to place the target on your centre-line.
If your weapon has reached the centre-line and is pointing at the target, there is no reason to delay firing.
A standing human is taller than they are wide. If you have the aggressor on your centre-line, there is some margin for the elevation of your weapon.
A first-round hit is very likely at the sort of ranges fast-draw would be used at.
The pointing technique suggested tends to put the plane of the barrel parallel to the ground.
Accuracy and precision can be improved with practice, of course.
A pair of silhouette targets, set up about six feet apart and eight feet away, is a good start.
The Elmer Keith article had the useful suggestion that something like a tomato can laid on the earth was a good target for improvement. Missed shots were easily seen as impacts with the earth. Objects floating in bodies of water were also suggested as good targets (although lead in a water systems is now frowned on).
As your accuracy increases, so too will the effective range of this technique.
Conversion
Something I like about this particular system of quick-draw is that it nicely integrates with other fast-shooting techniques.
Once the first shot is fired at half-hip or three-quarter position, the arm can continue to straighten and rise up to eye-level.
If you are shooting using the basic F&S technique, you fire as soon as the weapon reaches eye-level.
If you have a shade more time, you use your foresight like a shotgun bead and place it on the target. This is how you would use a reflex sight.
If your fast first shot has brought you more time, you can line up and use the iron sights.
Bringing the gun on to the centre-line may be fractionally slower than firing from over the hip. I think this is compensated for by the benefits this has to making accurate shot placement easier.