The other night I had a dream about staff fighting. This was no real surprise.
I had been reading some books on wing chun, and two had included sections on the “six and a half pole” form.
I had also recently purchased Jesse Tsao’s “Tai Chi Hiking Staff”.
So while I slept, my brain continued to work on the topic of fighting staffs. When I woke, I had formed two conclusions:
• If you have a long weapon, exploit its reach.
• Avoid great compasses.
I was very happy with these conclusions, but what do they mean?
Length
Most people assume a quarterstaff is about six feet long.
The familiar Japanese bo is actually the rokushakubo, six shaku long. This is about 1.82 m or 71.6 inches, which would be greater than the height of the average pre-late twentieth century Japanese or Okinawan.
Wikipedia quotes this page claiming an English quarterstaff was the user’s height plus the length of a hand.
Northern Chinese martial arts say a staff should reach the base of the wrist when the user’s arm was extended over their head. I am 1.8 metres tall and by this criteria my staff would be two metres long, so about 110% of my height.
Wing chun uses a pole typically of between seven and eight feet.
George Silver maintained a staff of “perfect length” was the user’s height with their arm raised, plus a space equal to the distance between the hands (about a shoulder width).
In “Master of Defence” by Paul Wagner, travellers carrying staffs of 14 feet or longer are mentioned (p.51).
For most of us, the staff we are most likely to use to defend ourselves is a hiking staff.
If you frequently have to pole vault over streams, pole a boat, or face hostile horsemen, a long staff may be useful. Some of these long staffs may have doubled as carrying poles in daily use.
For general use, a more practical hiking staff will be of a length between elbow height and shoulder height. This will not get caught on low branches, will not be a problem passing through doorways and is more convenient if you travel inside a vehicle.
Many fighting styles use staffs shorter than the user.
In Japan, we have the jo, which is either just under armpit height or traditionally 4 shaku, 2 sun, 1 bu, which is 127.56 cm or 50 inches. Japan also has the goshakubo, a 5 shaku staff of 1.52 m or 59.7 inches.
Many cultures in fact use a staff shorter than the user and averaging around five foot/1.5 metre length.
The Portuguese and Galician Jogo do Pau uses a stick of chin height.
Silambam (India) uses a staff up to the nose or forehead.
Southern Chinese martial arts use a “equal eyebrows rod” that reaches as high as the user’ s eyebrows.
Tsao’s book mentions four foot sticks used by shepherds to defend against wolves, and similar staffs carried by beggars for defence against stray dogs.
A jo or short staff is not a bad addition to your home defence weapons.
Halfstaff
If, like me, you were raised watching Errol Flynn’s Robin Hood, “quarterstaff” will conjure up an image of a staff gripped in the middle, striking with either end.
This style of using a polearm is actually termed “halfstaff”.
Using a very long staff, halfstaff style would probably be quite awkward since the ground would limit the choice of strikes and parries that could be made.
Halfstaff position is useful as a sort of “port arms” position. A staff held at halfstaff and carried obliquely across the torso is less likely to get tangled up when passing through a doorway. Either end and the section between the hands can be used to strike or defend if surprised. By moving either hand to either end of the staff, a low guard or high guard (qv) fighting position may be quickly adopted.
Experiment with placing both hands together in the middle of the shaft and swinging either end.
Halfstaff has its uses, but it does not exploit one of the staff’s strengths, which is its length and reach. In serious combat, a staff should be held at one end.
Grips
There are several variations of gripping style that may be used with a staff.
The lead hand may be palm‑up/thumb towards the tip, or palm‑down, thumb towards the other hand.
Typically, the hands will be about shoulder‑width apart. Some martial arts have the forward hand an arms’ length from the butt.
A longer distance between hands gives more leverage to manipulate the weapon. On shorter weapons, the hands may be closer together to give more reach, allowing the staff to be wielded like a katana or bokken.
The rear hand may grasp the butt of the staff for maximum leverage. Alternately, a section of staff is left projecting from the bottom of the rear hand. This provides some protection to the rear arm. This projecting section also helps stabilise the weapon when it is used single‑handed. The bottom section is stabilised by the downward pressure of the hand and the inside of the wrist and forearm.
Experiment and find what works best for you personally with the weapons that you have.
Reach and Guards
How to use a staff to exploit its reach?
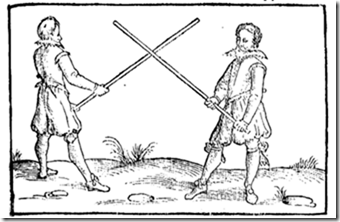
According to George Silver, a staff has four wards, two point up, two point down. Two wards are point forward, two point back. In Masters of Defence, these wards for quarterstaff are designated as low ward, high ward, open ward and tail ward.
Joseph Swetnam recommended a low guard/ward for most uses of the staff. It is called low guard since the rearmost hand is held lowest, either at waist level or down on the thigh. The forward hand is higher, so the staff slopes upward.
Different styles and instructors differ as to how much slope the staff should have. Some state a specific angle, others have the staff approaching vertical.
To my mind, it seems logical to have the tip of the staff at around head‑level. Any higher and you are just defending empty air, and the staff will have a greater distance to travel to attack or parry. Low ceilings would also be a problem.
Angle of the staff will depend on weapon length and how low the rear hand is held.
Some traditions say point the staff at the enemy’s eye so it is harder to judge the weapon’s reach. I think this is worth trying.
When in low guard the staff is sloped in three planes. If low guard is observed from the front or above, the staff is also angled. If you are in a left‑forward stance the tip of the staff should point at your foe’s right eye with the butt of the staff in your right hand and held low.
The tip of the staff should not be much further left than the foe’s right shoulder.
Stay in guard, leaving it only to attack, defend, or change guards. Return into guard as soon as possible. This is sound advice for any fighting method.
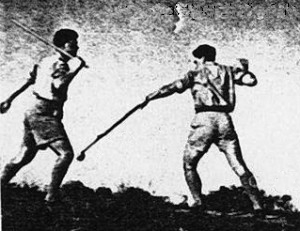
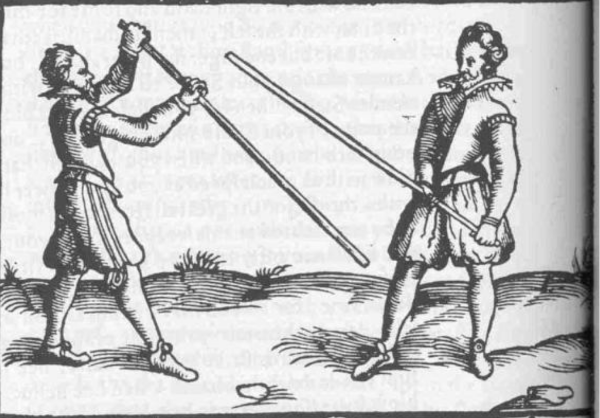
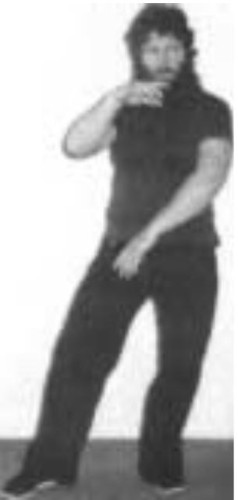
High guard is a form of hanging guard. It offers a good defence of the head. Swetnam recommends the high guard for fighting in poor light, when it might be difficult to see an incoming attack.
Note that in the illustration (above) the rear hand is held forward of the face, and just above the head. The section between the hands must be held high enough that it does not cross the face and that you have a clear view of the foe under the staff.
The high guard is also sloped in all three planes, the tip probably pointing at the foe’s leg area.
High guard is likely to be more fatiguing, so use low guard whenever practical.
Low and high guard fulfil the criteria of productively utilising the staff’s reach and length. The staff is in a good position to quickly attack and defend, and dominates the space between user and foe.
Great Compasses
Open ward has the point of the staff held high and sloped back away from the enemy. The lower section of the staff crosses the torso. The hand nearest the enemy is low, the other high.
The main offensive options from open guard are a downward or inward oblique strike. While these strikes will be very powerful, the tip of the staff has to travel a distance of several metres. This is relatively slow and gives the enemy time to dodge, parry or land an attack of their own. For similar reasons, the defensive capability of open guard is also poor. It takes too long to bring the staff into the forward area to parry.
Tail ward places the tip of the staff behind the user, either level or point low. The staff may strike downwards, obliquely or on an inward horizontal.
For some weapons, the tail guard is a useful position. With the quarterstaff, it has the same drawbacks as the open ward. The staff has too great a distance to travel to strike or parry.
Terrain features such as low overhead branches or nearby obstacles may hinder the use of open or tail ward.
These long circular strikes are what our predecessors called “great compasses”. My dream recommended avoiding using them.
The great compass blows should only be used against targets that cannot defend themselves or cannot see it coming.
How to Attack
If we should not use grand compasses, how do we attack effectively with a staff?
Watch a quarterstaff being used in a movie, and a technique you will seldom see is the use of the point to thrust.
Swetnam advocated the thrust as the primary offensive technique with a staff. In contrast to Silver, Swetnam was an advocate of the rapier, and this may be reflected in the emphasis of thrusts. Thrusts are techniques that you should master and make good use of, however.
While not sharpened in the manner of spears, many fighting staffs had their end shaped into a point or ogive to concentrate the force of impact. Some fighting staffs are tapered towards one end. Some staff ends were shod with metal.
Even without these features, a thrust from a staff can be very effective. Unlike a spear or sword, a staff is unlikely to get stuck if used on the rib area.
The basic thrust does not change the relative position of the hands, and resembles a typical bayonet thrust. Stepping forward or changing posture may increase reach.
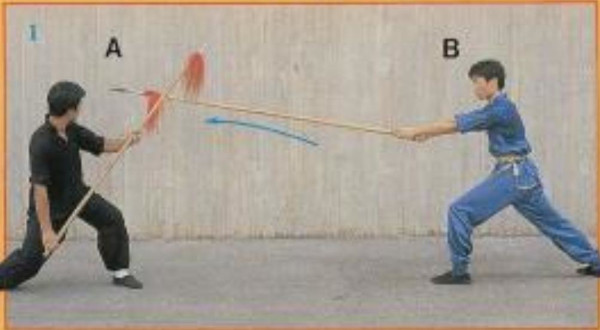
In Chinese spear fighting, the bow/archer/arrow stance/gung bu is often used. This is similar to the zenkutsu‑dachi stance of karate. Horse stance/ma bu/kiba‑dachi is also seen used. Do not use long lunging stances unless you are adept at recovering from them and quickly re-assuming low or high guard.
Swetnam was an advocate of a technique Master of Defence terms the “thrust‑single”. This is a variant of the “throw‑point” bayonet tactics I have described in my other articles and books.
To make a thrust‑single, the lead hand is removed from the staff and the rear hand thrusts the weapon forwards, often accompanied by a passing‑step forwards.
Since you may be in either a right‑ or left‑forward guard, this technique may be performed with either hand.
A variation of the thrust‑single is to slide the shaft through the lead hand like a pool cue. Both hands finish together near the butt of the weapon. This posture is often seen in Chinese spear forms.
These thrusts may be used as a counter to an attack targeting the lead hand.
Once the thrust hits or is parried, the guard position must be resumed or another attack made.
All thrusts should be made with a twisting action, which increases effect on the target and helps the staff follow the intended path.
The thrust may be used as a component of a change of facing. For example, you want to move from left forward guard to right forward. You make a thrust‑single with your right rear hand and step your rear right foot forward to generate power and reach. Bring your left hand up to the weapon’s butt and immediately slide or place your right hand further up the shaft, re-assuming low guard. A similar switch may be made using the two‑handed throw‑point technique.
For another way to smoothly change facing, place or slide your rear hand next to your lead hand and place or slide the lead hand back to the butt. Optionally, a thrust may be added to this sequence after the rear hand moves forward.
While a thrust can be fast and potent, Silver noted that “the force of a child may put it by”. (Master of Defence p.61, Paradoxes of Defence 13).
If a thrust misses, striking with the side of the weapon rather than restriking with the point may be quicker.
Since the staff is not an edged weapon, any surface may be used to strike without the need to align edge and target.
Master of Defence (p.61) explains how the quarterstaff could hit hard without the need of great compassing blows.
Due to its low mass, and being controlled by two hands spaced apart for leverage, a staff is a very nimble weapon.
By moving the tip end of the staff in small vertical circles, or parts thereof, the staff gains momentum and energy while only being moved a short distance. For example, the tip is dropped, moves in a tight clockwise circle and descends to strike the clavicle. If a forward or rearward component is added to these circles they become helices.
These “rapid circular motions”, “flourishes” or “quarter blows”, as they were termed, may possibly be an explanation for the term “quarterstaff”.(Master of Defence, p.61)
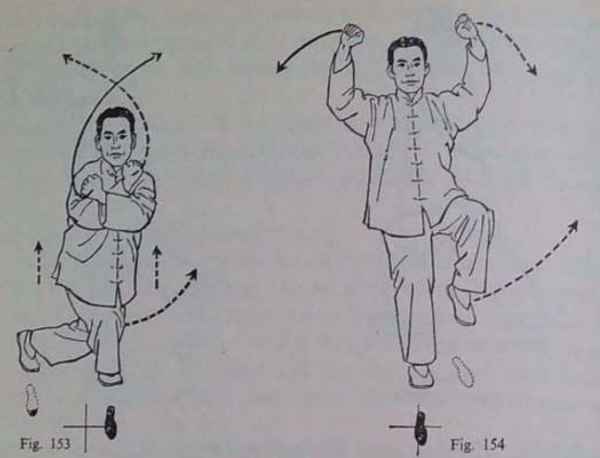
We see these small circular moves from other sources. The final “half‑point” of the six and a half point pole form is taught by some wing chun instructors as moving the tip in a half circle.
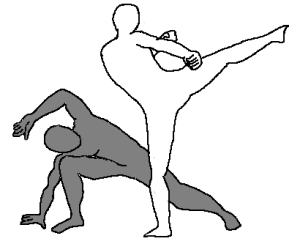
To practice such small circular actions, use your staff tip to draw a cloverleaf shape in the air. The illustration taken “Attack, Avoid, Survive” shows this shape applied to unarmed or short weapon parrying. This exercise will train you to use the four small circles and the simpler sideways “beats” and semicircular parries.
Many of these motions serve as either strikes or parries. They may be used to make disengagements and strike‑overs.
The wing chun pole form includes postures that resemble the low guard. In one part, the tip is whipped downwards to the ground then whipped back to its original position. Such a movement may be used defensively, or as an upward or downward strike. That upward action may be aimed between a foe’s legs.
Defence
Many of the offensive moves may also be used defensively. This parallels recent discussion on this blog of unarmed techniques that are both defensive and counter‑offensive.
Swetnam has an interesting defensive move whereby the rear hand is raised high and the point is allowed to rest on the ground (“pitch”), two to three feet wide of the side struck at. The lead hand is removed from the shaft to prevent it being targeted. Train to rapidly resume your guard or attack after using this tactic.
If an enemy tries to close distance, you may switch to halfstaff mode, or slide your rear hand upwards and strike by thrusting or swinging the butt end.
For more information on this style of staff fighting, this article should be read. Other aspects, such a footwork, disengagements, weapon grab counters and strike‑overs are covered in my books, so were not included here.
The staff fighting technique described in this blog post is relatively easy to learn. The techniques are applicable to staffs and other weapons of various lengths, and the skills acquired may be also applied to bayonet‑fighting or the use of spears, should you need either.
The thrust‑single is good exercise for wrist strength, flexibility and dexterity. For strength training, metal pipes may be used instead of wooden staffs.
Do not underestimate how much room you will need for training or exercising with a staff, especially if indoors.


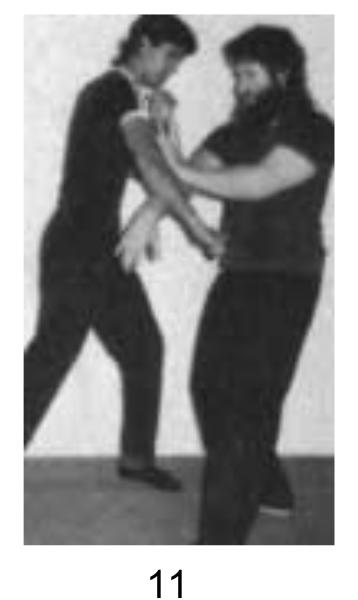
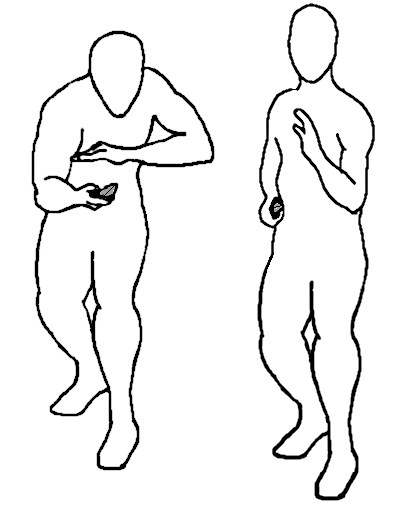
 combat the “hold the ball” hand positioning is often made with the lower hand palm down.
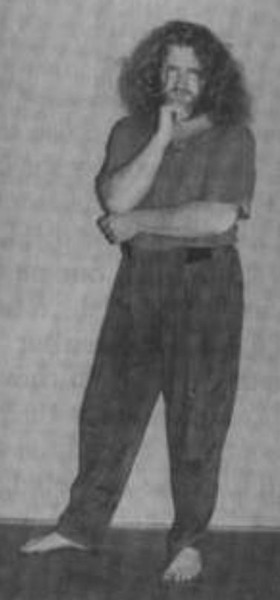

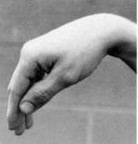 The hand configuration shown in Macyoung’s book for the upwards whip parry (left) has a clear resemblance to the crane/turtle head/horse foot hand used in
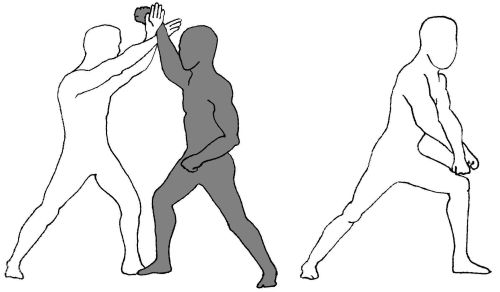


