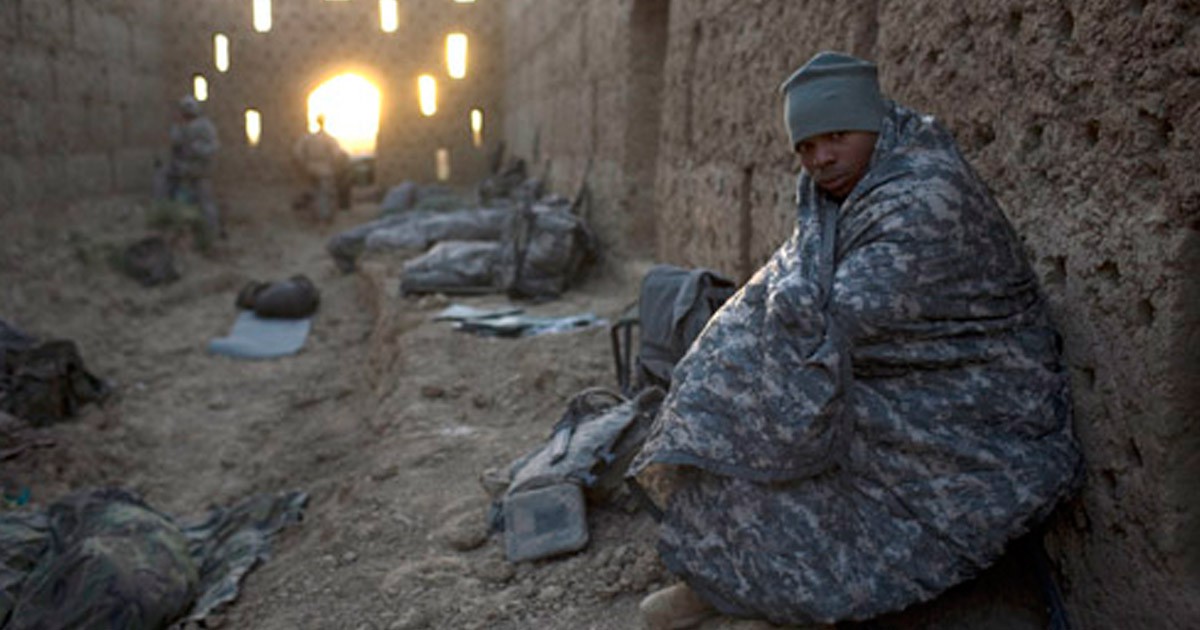
So far, this series has dealt with shelter, sleeping, clothing, food, water and cooking.
In what will probably be the final part of the series, I am going to look at a few other considerations.
Many of my other recommendations will echo those in my articles on foundation survival kits.
Making a List, Checking It Twice
In Part 2 I mentioned grabbing fresh food from the kitchen and adding it to your bag.
Realistically, it is not likely that everything you will want will be ready packed in your bag.
There may be important documents or personal items you will want to take with you.
There may be things you will want to do before you leave, if time permits. Turning the gas and water supply off will reduce the damage to the house that might occur while you are away, for example.
Sit down, and make a checklist of things you will want to do before bugging out. List things you will want to add to your bag, and their location. Then leave your list for a day or so. Other things to add to the checklist are bound to occur to you.
Then reorganize your checklist by location. In the kitchen, you will need to do this, and this, and take this, for example.
Once you are happy with your list, sleep on it, then add anything else that occurred. Print it out in large font.
You may be stressed and hurried if you have to use it. Make it clear and easy to read.
Radio
Many BOB lists suggest having a radio receiver so that you may listen to weather reports and other emergency broadcasts.
For obvious reasons, such a radio should not be too heavy or bulky.
Examples that use a hand crank power source and/or solar charging are available. Many of these also act as flashlights and phone chargers.
If the device has solar charging, you may want to come up with a way to carry it where it gets its required dose of sunlight, but is protected from damage.
Make sure that any design you buy can receive the emergency broadcasts for the region and country that you will be operating it in. Mark the dial with these frequencies.
Flashlight
You may have brought a 1000 candlepower “special forces” tactical flashlight that can survive a nuclear blast and immersion in the Marianas trench.
It won’t be much use if the battery is flat.
At least one of your light sources with your bug out bag should be hand cranked.
Fire
Have a fire kit in your pack. This will supplement the fire kit you carry on your person, some of which will be part of your EDC.
Hexamine blocks have a very long shelf life, so having a pack in your bag as firelighters or as an alternative fuel is a good idea.
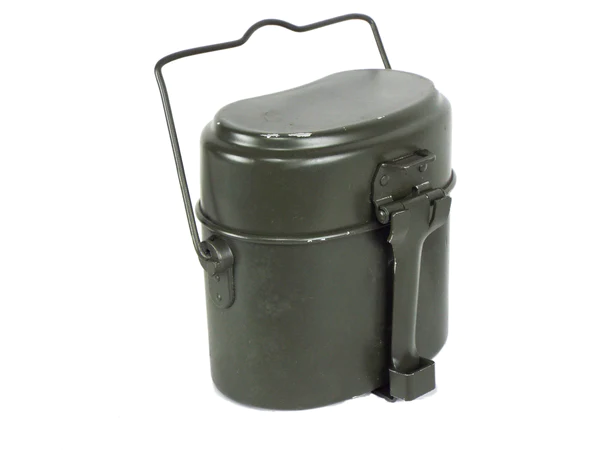
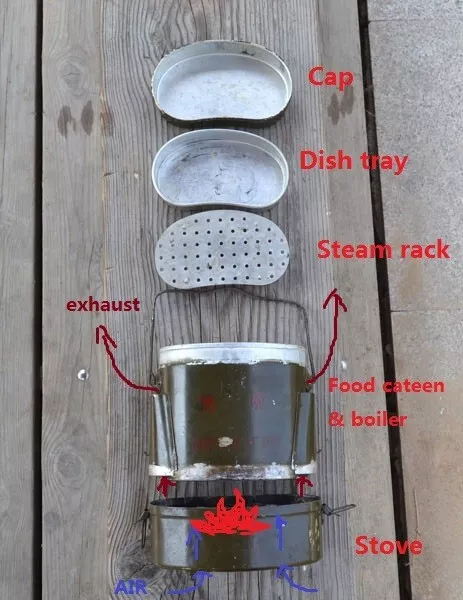
The alcohol gel for your stove may also be used for fire-lighting.
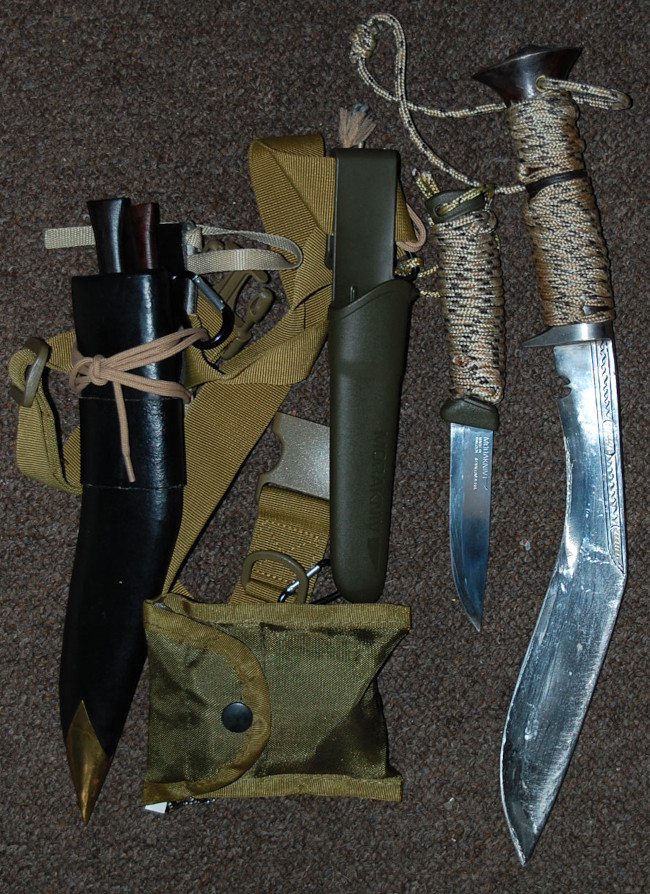
Tools
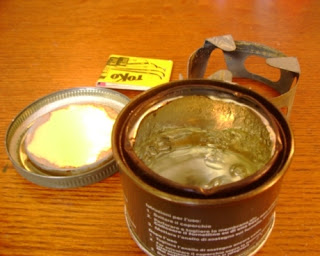
Your survival knife(s), penknife etc should be carried on your person. The small pouch in the photo above contains a sharpening stone and a fire kit.
A hiking pole or staff is worth having. Uneven ground, steep terrain, fording streams, aggressive animals, twisted ankles, shelter support and other uses. Well worth the weight
The pack carries tools that are less often needed. Unless you are in the jungle, your machete will likely ride in or on your pack until needed.
If you live in the colder, wooded latitudes, an axe may be more useful than a machete. A three-quarter or Hudson Bay model is often suggested as a good compromise between utility and portability.
Digging tools are carried in the pack and only transferred to one's person when use is expected.
A crowbar is useful in urban areas, and makes a passable digging stick.
As advised in Part 2 of this series, carrying some lengths of cordage of various types and sizes is prudent.
Wash Kit
Since we are talking about a 72 hour scenario, our wash kit should be very basic.
Toothbrush, small tube of toothpaste, half a bar of soap, one razor, perhaps a small plastic mirror and a microfibre flannel.
That is all you really need in a 72 hour emergency scenario.
All this will fit in a small drawcord mesh bag.

Fit the wash bag in a small sandwich box and you may use the box as a wash bowl.
A tenugui or microfibre towel rides elsewhere in the pack so that it can dry.
We are trying to keep our load light, so consider a children’s toothbrush, a cut down adult brush or one of the travel toothbrushes. Some of the latter come with a really tiny tube of toothpaste!
No shaving foam, you can use the soap. It is debatable if you actually need the razor in a 72 hour emergency scenario. You probably won’t be attending any job interviews!
You can survive 72 hours without shampoo (or use the soap!)
A stick of deodorant, however, may be appreciated if you share your shelter!
A supply of feminine hygiene items may need to be included in your BOB. These have alternate uses such as fire lighting or as wound dressings.
First Aid
Suggestions for first aid kits for bug out bags often go over the top.
I have seen recommendations that a bug out bag include a full stainless steel surgical kit, a couple of reference books on medicine and surgery (680 pages between them!), diethyl ether, saline solution, a thermometer and so on.
Your first aid kit is mainly there for cuts, grazes, sprained ankles and such.
My own travel kit, which I have used for trips of more than three weeks (504 hours!) is shown here. The lice comb may not be necessary for a 72 hour kit. I hope to never need it!
Some disposable gloves in a Zio‑lock bag and a CPR face shield might be useful additions.

Robert dePugh stated that the basis of a good first aid kit was water purification tablets, aspirin, soap and a toothbrush.
In addition to pain relief, aspirin can treat fevers, inflammation and cold and flu symptoms.
Soap is in your wash kit. It is a far better antiseptic than hand‐sanitizer or most other things you are likely to have available.
Use Soap and Water
Yes, Soap Is Better than Hand Sanitizer
No, Soap Is Not Infectious!
The toothbrush is probably also with your wash kit.
Some water purification tablets should be carried on your person, others with one of your water containers.
To that list I would recommend adding some plasters, alcohol wipes and a roller bandage.
A twisted or sprained ankle is no fun when you have a backpack, hence the roller bandage.
In addition to conventional plasters, have a few feet of elasticated plaster tape that is useful for the minor cuts to the fingers that accompany careless knife use. This tape may be twisted into improvised butterfly closures.
A little tin of Vaseline is also useful for chaps and chaffing.
Both the Vaseline and alcohol wipes may assist in fire lighting.
A snake bite kit should be carried where venomous snakes are a likely hazard. Have a bee-sting kit if anyone in your party is allergic.
If you expect combat, you should have shell dressings, a CAT tourniquet and an CI-IFAK kit, but these items are more useful carried on your person, not in your pack.
I am of the opinion that any activity that involves knives and hand tools should have some plasters readily available.
Likewise, any activity where guns or bows are involved should have some shell dressings and similar nearby.
If you take any personal medications, place them on your checklist and add them to your bag or clothing pockets when you bug out.
Your “internal medical kit” should be “fully stocked”. Ensure all relevant vaccinations are up to date.
Paperwork
Have a roll or two of toilet paper.
Put each in a Zip‑lock bag to keep them dry and carry a tube of hand‑sanitizer with one.
Your hand‑sanitizer should be 60 to 95% alcohol, both for its antiseptic properties and to ensure it is flammable. Sanitizer and toilet paper are both possible aids to fire lighting.
In addition to the items in the bug out bag, have a Zip‑lock bag with a number of paper napkins or sheets of toilet paper on your person. I have this in the right cargo pocket of my trousers.
Documents
You may have documents that you cannot afford to lose. Passports, work permits, visas, medical prescriptions, birth certificates and so on. They weigh little, but it may be life-changing if they go up in smoke.
Pack copies or the originals in your bug-out bag.
Make sure they are protected from water.
Books
Whether to take any books in your BOB is up to you. Most books claimed to be “ideal for your bug-out bag” are nothing of the kind.
My travel emergency kit does include a pocket edition of the “SAS Survival Handbook”. Greenbank's “The Survival Handbook” or “AFM 64-5” are good alternatives.
A book on identifying edible plants in your area might be considered.
Repairs and Spares
Repairs and Spares were described in the article on rucksack packing.
You do not need the bulky “housewives” offered by some merchants.
You just need a couple of needles, already threaded with a metre or so of invisible thread. A couple of safety pins. A couple of rucksack buckles. A few metres of electrical and duct tape. A couple of 20 cm or longer zip/cable ties. Perhaps a couple of buttons, a neutral-coloured cloth patch, square of Blu Tack and a tube of super glue. All these, except the cable ties, fit in a little Zip‑lock bag.
For heavier repairs I use dental floss. I have a reel of this in my EDC and also some in my wash kit. Ensure one of your needles has an eye large enough to take dental floss and thicker materials you might improvise.
Extras
Other items to include in your bug out bag: spare compass, goggles/sunglasses, spare glasses, plastic mirror for signalling, whistle, ear plugs, notepad, sunscreen, insect repellent.
Some of these items are backup or spares for items carried on your person.
A few extra space blankets may prove useful. Find room for several large plastic bags (clear are most versatile), and some additional Zip‑lock bags.