My girlfriend currently has to spend most of her time outside the country.
I will admit that while she is absent, the house has sometimes gotten a little too “lived in”.
Recently, I was inspired to give the house a good clean. That, in turn, spurred me to start a new phase of my attempt at decluttering.
All the experts say fully declutter before you clean, but in this case, it was the cleaning that inspired me to pay more attention to what was on the shelves or in the drawers and cupboards.
Avoid Perfect
A very wise lady (Sam’s mom) once told me:
“You can try to have a perfectly clean house, or you can have pets and kids.”
I cannot really use that as an excuse.
Marie Kondo (aka Konmari) says:
“Tidying is the act of confronting yourself; cleaning is the act of confronting nature”
It is not usually a good idea to fight against Mother Nature. She has all the big guns.
So forget about perfection and aim for clean enough. You will stay saner.
A few days after my cleaning campaign reached its peak, I was informed my stepson and his new girlfriend intended to visit. Shortly after that, my girlfriend would fly in to see them.
The cleaning had gone so well, I just said “fine”. The house was more than clean enough, so there would be no frantic clean and tidy frenzy the prospect of visitors normally triggered.
I had told my lady I had been cleaning and decluttering, and as is her wont, she was very supportive and encouraging.
Her son had told her I had transformed the place.
Secretly, she was sceptical and doubted both of us. A man’s definition of cleaning and tidying probably meant moving one thing, she thought.
She arrived very late at night, and admits she noticed a difference as soon as the door opened.
Most of the horizontal surfaces in the kitchen were clean and clear. Cupboard doors she could never get sufficiently clean to her satisfaction smirked at her clean‑faced.
In the lounge, she wanted to know how I had got the glass coffee table and vase so clean.
My model painting table she wisely declared to be creative, not clutter.
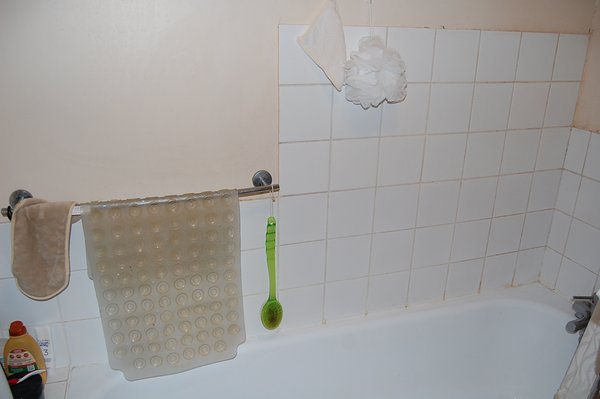
And the bathroom? Neither of us ever thought we would see the day when it was described as being “like a showroom”, but that was her verdict.
Over the next few days, she used the words “amazing” and “awesome” a lot when talking about our house. Less kindly, she claimed she was in another dimension and demanded to know what I had done with her real boyfriend.
“I had to declutter the wardrobes to make room for the pods” I explained.
She was still congratulating me when she left.
“Will it stay like this?” she asked, sounding a little concerned.
“I cannot see how it could revert.” I told her. The house has reached a level where any mess is just too apparent to ignore.
I pointed out that in the couple of weeks that she had visited, I had not needed to do any major cleaning. Just wiping up spills and putting things back where they belonged. The work of seconds. (Full disclosure, my girlfriend did vacuum a few times, since she knows it is something I dislike and that causes me discomfort)
Once you get your surroundings sufficiently decluttered and clean, it is much easier to avoid mess building up again.
I have written about my minimalism‑inspired decluttering before, and I may write about the second (Konmari‑inspired) phase of decluttering on another occasion.
How I Cleaned-Up My Act
Today’s blog will be about how I cleaned the house so effectively. My girlfriend requested that I write this one so that we may “help loads of people to save money and to have their places sparkling clean”.
The surprise is, I did nearly all of the cleaning with vinegar, with just a little baking soda or washing up liquid when needed.
One Minute Rule
The first tip is one of technique, rather than materials.
I have spoken elsewhere about the “One Minute Rule”.
If a job will take less than a minute, do it immediately:
Wipe it up, pick it up, rinse it off, put it back, put it away.
When the one minute rule becomes a habit, clutter and mess seldom build up enough to become a major cleaning chore.
In the kitchen, always have a washable, reusable cloth within reach. With such, I am much more likely to wipe up immediately than if I have to use‑up one‑use paper tissues.
In the same vein, in the bathroom is a sponge just for mopping up puddles and wiping over or wiping down surfaces.
I use a very efficient, economical method of washing‑up.
After eating, I rinse everything then leave it in the (unfilled) sink. No tedious washing up when we both want to be relaxing for the evening. I do not perform the evening reset that some declutters advocate.
Usually, I can clean all the previous night’s washing‑up while I make my morning coffee.
I achieve something positive and constructive before my first sip of coffee, and my lady wakes up to a tidy, clean kitchen and an empty sink.
Other tips: When cleaning, always start high and work down.
Pace yourself. Several short, productive sessions of cleaning are better than a single long exhausting slog.
Clean your cleaners. After use, squeeze‑out your sponges and clean‑off any other items you have used to clean.
Cleaning
This blog is a little off‑topic from the subjects I usually cover. I have chosen to write about this subject because so much of the information out there is wrong.
As a trained and qualified biochemist, it does give me a chuckle when I see someone on the web tout vinegar and/or bicarb as a way to clean “without chemicals”.
Vinegar and bicarb are chemicals (as indeed, is just about everything, including anyone reading this!).
Using vinegar and bicarb effectively and safely involves knowing some basic chemistry.
CT: "Thank you, as a non-chemist I appreciate this insight into a topic I never trusted the internet on!"
Know Your Chemistry
Vinegar
Vinegar is typically a 4 to 8% solution of acetic acid.
Any vinegar may be used for cleaning, but white vinegar lacks many of the additional components found in malt vinegar that may leave a residue.
White vinegar is not the same as white wine vinegar.
There is no point using more expensive vinegars for cleaning if you can get white vinegar.
As an aside, unless you are following a cooking recipe, if something specifies that you need to use cider vinegar, suspect bullshit.
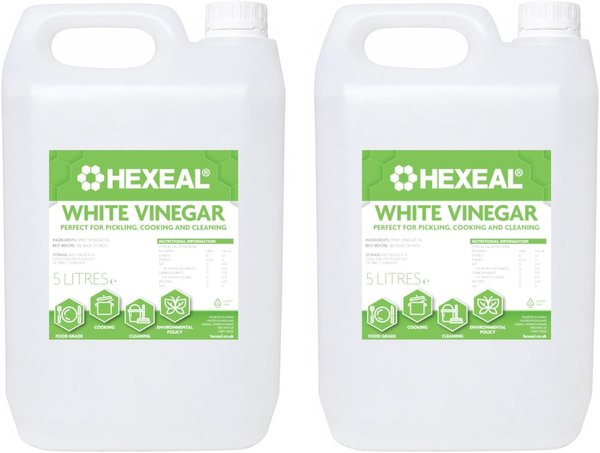
I brought two five‑litre containers of 5% white vinegar for under £8, including postage. This will give me nearly 40 litres of cleaner. Since the vinegar is used in a spray gun, very little is used at a time.
Some vinegar/acetic acid sold for cleaning is already diluted. Make sure what you buy is no less than 5%, otherwise you are just paying for the shipping of water you could have added from the tap.
Do not buy glacial acetic acid, which is 99%+ and nasty stuff.
Even diluting this down requires that you are properly trained and equipped to handle very corrosive chemicals. I once had a nosebleed just from a single accidental inhalation of the vapour.
Always try 1 in 4 diluted 5% vinegar for cleaning first.
You will seldom need 5% or stronger.
To use vinegar as a cleaning agent, dilute the 5% white vinegar 1 in 4. Fill half a cup with vinegar and top up that cup with tap water. Pour this mixture into your container and then add a full cup of water after this (which also rinses out the cup you used).
Keep a small funnel with your 5% vinegar.
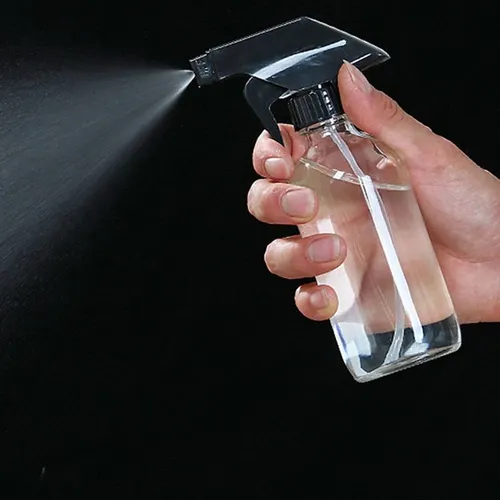
Usually I use my diluted vinegar in a spray gun. One that produces a mist rather than a jet is generally more useful. Accurately label the spray gun and any other containers you use, for example “1.25% Vinegar” or “¼ Vinegar”,.
Spray guns may not work well if you point them at steep elevations or depressions. For horizontal surfaces, spray forward and let the liquid settle on the surface.
I also have an old plastic vinegar bottle with a couple of extra holes made in the inner cap. When needed, I can pour diluted vinegar into this bottle and use it like a shaker over horizontal surfaces.
Alternately, spray a little vinegar on a cloth or sponge and apply with this. You will need to do this if cleaning a ceiling or the underside of something.
Vinegar is most effective if you give the acidity a couple of minutes to take effect.
Spray a number of surfaces and then come back to wipe down the one you sprayed first.
Incidentally, many commercial cleaning products also work better if given a little time to soak in first before wiping.
Vinegar is good against soap residue and mould. Spray the tiles in your shower, leave five minutes, then wipe down. This has removed soap discolourations in my bathroom that have withstood several soakings in neat bleach in the past.
Vinegar has a number of other household uses. It is also useful for superficial fungal infections on intact skin.
Cautions (Vinegar)
Bleach
Never allow vinegar (or any other acid) to come in contact with bleach or chlorine‑based products.
Read the labels!
Acid with bleach will generate chlorine gas which will burn your eyes, throat and lungs and is potentially fatal.
Stone
One of the useful properties of vinegar is that it dissolves limescale.
That same property means it can damage natural stone surfaces.
Wood and Wood Finishes
Vinegar can affect some wood finishes: shellac, lacquer, wax, polyurethane floor seal and similar.
On the other hand, a wipe over with diluted vinegar helps remove odours such as onion, garlic or fish from wooden chopping boards.
Diluted vinegar may also be used to soak food deposits from wooden spatulas and spoons.
Aluminium
As an acid, vinegar may affect the oxide coating on bare aluminium cookware, such as mess tins. Certain commercial aluminium cleaning products are acidic to make the cleaned items appear shinier.
As discussed elsewhere, the health risks of cooking with bare aluminium were massively over‑hyped and are now regarded as a minimal to non‑existent risk. The Alzheimer’s connection has been debunked.
If you use vinegar on bare aluminium, allow time for the protective oxide layer to reform (passivation).
Most of the attributes of vinegar as a cleaning agent also apply to other acids. Lemon juice and citric acid powder may be used as substitutes.
While I mainly use vinegar for cleaning the house, it may be used on cookware too.
Spray a little diluted vinegar on your glassware and wipe to remove water marks after washing.
Soaking or heating vinegar in burnt pans can help remove some encrusted food residue.
Diluted vinegar will become your go‑to for cleaning. When something cannot be cleaned with vinegar, try either bicarb or washing up liquid.
Baking Soda
Baking soda, also known as sodium hydrogen carbonate, bicarb, or sodium bicarbonate. Not to be confused with baking powder, which contains only a third bicarb.
I use bicarb much less than vinegar, but it is useful stuff to have.
As a cleaner, I mainly use it on paintwork such as the skirting boards, or on enamel or porcelain such as the bath and sinks.
I most often use bicarb in the same way I once used scouring powder. Sprinkle a little on a damp cloth or sponge for use.
For toilets, sprinkle sparingly around the inside of the toilet bowl above the waterline, and work in with the toilet brush.
If limescale is the main problem, you will need to use vinegar rather than bicarb as a cleaner.
For some applications, bicarb may be mixed into a paste with a little water
If a soak or heating in vinegar does not shift burnt food from a pan, try scrubbing and then a soak with bicarb paste.
Cautions (Bicarb)
Sodium hydrogen carbonate, aka baking soda, bicarb or sodium bicarbonate, forms an alkali or basic solution when dissolved with water. It may cause discolouration if used on bare aluminium.
Baking soda is used as an abrasive cleaning agent, so should not be used on electrical items, gold or silver, waxed finishes, stone or marble countertops, wood, mirrors or glass. This includes electric stoves with ceramic or glass tops.
Used on cast iron cookware, bicarb may remove the seasoning. Use salt and dilute vinegar instead to clean heavy soiling from cast iron.
Adding bicarb to bleach will not create dangerous fumes, but will decompose the bleach, making it less effective as a cleaner.
Many commercial cleaning products actually use acids or bicarb as their main active ingredients.
Vinegar and Bicarb have proved to be more effective, less toxic and better value than many commercial products.
Most of the commercial cleaning products that I already own will be used up. When finished, most are unlikely to be repurchased. Washing‑up liquid and bleach are the only “conventional” cleaning products I intend to restock.
Mixing Vinegar and Bicarb
Vinegar is an acid, bicarb is a base (alkaline).
Add them together and they consume each other. Get the ratio right and all you are left with is a solution of sodium acetate.
Baking powder is a mix of bicarb and acids and is intended to specifically generate gases to cause cakes and breads to rise.
I mention this since several webpages encourage you to make a cleaning solution by mixing detergent, vinegar, bicarb and various other materials.
Someone slept through chemistry class!.
Rather than combining the strengths of these materials, you are just wasting time, resources and money.
Putting bicarb and vinegar together down a drain or toilet looks spectacular, but you are probably better just adding one or the other, or using some bleach or hot water.
Typically, keep vinegar and bicarb separate.
There are certain applications where you might use them sequentially. For example, soak a carpet stain in bicarb solution, then later add some vinegar. The frothing supposedly helps loosen the stain particles.
Washing Up Liquid
A paste of washing up liquid and salt or washing up liquid and bicarb may be used as a scrub against stubborn spots.
Washing up liquid with bicarb added may affect sensitive skin. Glove‑up!
Alternate treatments with vinegar and washing up liquid may be used for certain jobs. Loosen grease with vinegar. Scrape off loose deposits. Wipe surface with a sponge with a little washing up liquid on. Repeat and alternate until cleaned.
For general use, washing up liquid (aka dish soap) is thicker than it needs to be.
Even with the very efficient washing up method I use, the tiny spot I put on my sponge or in the pan is often way more than is actually needed.
Save an old bottle of washing up liquid, pour half of a new bottle into the old, and top up both with water. Depending on the particular liquid you have, add a third to a half of water.
Bacterial growth in the diluted washing‑up liquid is unlikely since the mix is still very soapy and the liquid is well protected inside the bottle.
I will also use the cooled pre‑boiled water that is sitting in the kettle to dilute the liquid, which further reduces any chance of contamination..
Salt
If using vinegar or another mild acid to clean something, salt should be used to add an abrasive component other than bicarb.
Salt added to diluted washing up liquid seems to help thicken it up, if this is desired.
Bleach
Bleach is handy to have in the house, although I seldom use it for general cleaning.
The caution against mixing bleach and acids is worth repeating again.
I used to use bleach for cleaning at work. Bleach decomposes into water and salt, making it safe to use on many surfaces. And the smell convinced the boss I had been busy!
Kit of Cleaning Tools
Assemble a collection of useful items into a box such as an old ice cream tub.
When you want to clean something, grab this box along with your vinegar spray gun, shaker, or bicarb.
Suggested contents:
25mm Flat Paintbrush
(I also have a mini‑dustpan and brush)
Very useful for sweeping or dusting in unusual places.
Always remove any dry, loose dirt before trying damp or wet cleaning techniques.
Small Scrubbing Brush
Should be small enough to fit in the palm of your hand and get into small spaces. A nail brush works well.

Toothbrushes
Have a collection of old toothbrushes. Excellent for reaching where a cloth or larger brush cannot.
The neck of a plastic toothbrush may be bent if heated. Have a brush bent back at 90 degrees, one at 30 to 45 degrees and at any other angles you need for particular jobs.

Microfibre Cloths
Used for dry or damp dusting, polishing, buffing etc.
Wash and reuse.
Do not wash microfibre cloths with fabric conditioner, softener nor bleach, it reduces their useful properties.
Plastic Scrapers
You can buy these, or make them from sufficiently thick and stiff plastic packaging.
Useful for scraping gummy or burnt deposits from surfaces without damaging the surface.
Broom, Mop and Vacuum Cleaner
A broom, mop, bucket(s) and a bag‑less vacuum cleaner will also be needed.
Even in this day and age, these cleaning tools are manufactured assuming they will be used by average size women.
For most males, and females taller than 1.6 metre, the short handle of your typical mop, broom or vacuum can be uncomfortable to use for any length of time.
I am tall, and using a standard vacuum for any length of time may cause discomfort or even pain.
I have worked in warehouses where it is common to find the broom handle extended by various means.
I have experimented with working on my knees as possibly less painful than standing and bending. I kneel on a folded blanket, and the low vantage point allows me to better see the dirt.
If you really want to get a floor, carpet, rug or skirting boards clean, get down close.
A short‑handled carpet rake is useful for cleaning up the hairs and threads that many vacuums seem to have trouble with.
A cordless mini‑vac is useful if you try cleaning on your knees. It is also handy for quickly cleaning up spilt crumbs or similar.
Vacuum cleaners work better if you empty them before you start using them. Full credit to my lady for teaching me that. Obvious if you think about it, but most of us never do think about such things.
Store your broom head up or hang it from a hook to prevent the bristles being bent by being stored in contact with the floor.
I also store my mop with the head up, so that it dries more readily. The mop bucket has a notch that will hold the handle with the mop head up.
Bag of Socks
As part of the Konmari‑inspired decluttering, I paired up my socks. Surprisingly high number of odd or damaged socks. These now live in a bag in the cupboard under the stairs.
There are lots of ways to re-purpose odd socks. The one relevant here is to put one over your hand and use it for dry dusting.
It may just be me, but dusting this way seems more fun and less of a chore than using a conventional duster.
Another odd sock is in my bedroom and used to buff up my boots before I put them on.
Microwave Cleaning
My Lady: “The inside of the microwave is so clean! It is cleaner than mine!”
- Use your paintbrush to sweep any loose debris out of your microwave.
- Add a couple of tablespoons of vinegar (any type) to a microwavable bowl of water.
- Microwave the bowl of water/vinegar mix for five minutes, then wait for three more minutes before opening the door.
- Remove the bowl, which will be HOT!
- Remove the turntable and roller‑ring to wash separately.
- Wipe down inside of microwave top to bottom, back to front, not forgetting the inside of the door. Scrub any tough bits with a cloth, plastic scouring pad or old toothbrush.
- Repeat steaming of the microwave interior with water/vinegar if needed until your microwave interior is clean enough.
Let the remaining water/vinegar mix cool down and use it to clean other surfaces.
Bathroom Poultice
One of the secrets of my “showroom bathroom”. Credit to Maya Sato.
Thick limescale deposits are stone and cannot be scrubbed away. Chemical attack is the answer, but squirting a cleaner on the limescale will only remove a thin surface layer.
This is one job where undiluted (5%) vinegar should be used.
To be effective, the vinegar must be kept in contact with the limescale for several hours at least.
The trick is to soak up the vinegar in a wad of toilet paper and stick it over the patch of limescale like a poultice.
If descaling the toilet bowl, I suggest using toilet paper if you intend to just flush the poultices away afterwards.
Large quantities of stronger paper such as napkins or kitchen roll may clog your toilet.
If you are going to bin the paper, put those paper napkins from the take‑away to good use.
Leave the poultice in place for a few hours so the vinegar can do its work.
In my experience, chemical treatment of limescale needs to be supplemented by a little scrubbing.
Limescale deposits are usually worst under or just below the rim. A toothbrush with a bent‑back neck works well at scrubbing away the softened limescale.
A vinegar poultice is also useful in clearing limescale deposits off your taps.
There are more acidic products for descaling toilets on sale.
Try using vinegar first. It is always prudent to use the simpler, safer, less dangerous, less harmful option first.
The poultice method may be used with products containing more potent acids. The poultice keeps the acid in contact with the limescale, rather than most of it running down the walls of the toilet bowl, as happens if you follow the manufacturer's instructions.
Do not use more potent acid‑containing products unless you are honestly competent in working with such materials.
You should have used the method with vinegar before making such an attempt.
Use protective gloves when working with acids. Protective eyewear is also prudent. Scrubbing in particular will throw droplets in unintended directions.
Other toilet cleaning options that I have not tried personally include using WD40 or applying a paste made with citric acid powder.
Blocked Drains
If a drain is fully blocked and water will not drain away at all, it will be a physical obstruction so needs physical means to clear it.
Buy a plunger and keep it in your bathroom or kitchen. When you really need a plunger, you will have one.
A sink strainer on your kitchen plughole reduces the amount of food that goes down the drain and that may block the pipe. Throw food it catches into your compost or down the toilet. Both are much better suited to disposing of food particles.
A flexible, barbed plastic strip can be used to remove hair that may be partially obstructing a bathroom pipe. These cost very little or can be made from plastic packaging. Cut a helical strip from a plastic bottle and cut barbs along the edges.
Keep your hair extractor with your plunger for the day it may be needed.
Hair is less of a problem if you fit a sink strainer to the plugholes in your bathroom. It is easier to take hair off the sink strainer than from out of the plughole.
Putting baking soda and vinegar down your sink is a spectacular party trick that will do nothing to clean your sink pipes or toilet. The two chemicals just neutralise each other, releasing gas to create froth and bubbles with little practical effect.
My washing‑up method mainly uses cold water and detergent. I suspect this may reduce the likelihood of molten fats congealing when they come into contact with cold drainage pipes.
If you believe fat is building up in your pipes, the best thing to apply is sodium hydroxide, aka caustic soda or lye. Use pearls, since sodium hydroxide/lye is more dangerous to handle as a powder. Lye reacts with fats to form soap (aka “saponification”).
Last thing at night, when the use of the sinks has finished, drop a few tablespoons of pearls each plug hole and wash them away with a little hot tap water.
Remove your sink strainer before you do this. Not only will it hinder the pearls going down the drain, but most are aluminium so should not be exposed to caustic/alkaline chemicals.
You want the pearls to sit in the pipe and dissolve rather than flush them all the way to the sewer main, so use no more water than is needed. Leave overnight to allow chemistry to do its work.
A little bleach down each plughole in the morning will help shift any residual gunk.
Do this at least once a year, or when problems occur.
Incidentally, wood ash includes lye. Dry ash may block the drain, so soak and strain to extract the lye and pour the liquid down the drain. The liquid will be caustic, so take suitable precautions.
If you cannot get sodium hydroxide pearls, a cup or so of washing soda, aka sodium carbonate, and a little hot water will also saponification fat deposits. Washing soda is much more caustic than baking soda/bicarb, so handle accordingly.
Sodium bicarbonate will form sodium carbonate when heated, but the level of this will be minor at the temperatures you can achieve by flushing it down the pipes with hot or even boiling water. You are more likely to wash the bicarb away from where it was needed.
Bicarb down a sink (without vinegar) will mainly serve as a deodoriser.
Laundry Powder on Burnt Pots
Not tried this personally.
A BBC webpage recommends that laundry washing up powder may be used on soiled pots. If using a biological powder, I would recommend avoiding water hotter than 40 degrees if you want the digestive enzymes to have a crack at the burnt food. Leave the kettle alone and use water from the hot tap and add a good cup or so of cold water before stirring in the powder.