Categories
Phillosoph

Poncho-Liner Improvement: Pops and Zip

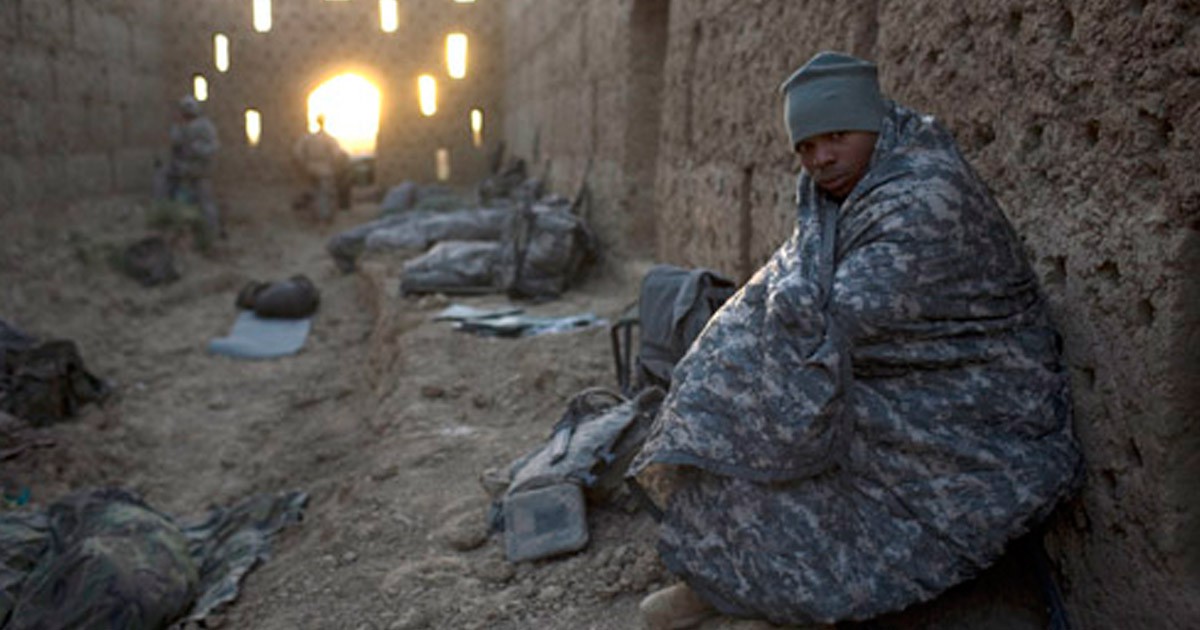
In my blog on foundation survival equipment, two of the items were a rain poncho and a blanket. Given how expensive good blankets are these days, many of you will have opted for a poncho-liner (aka “woobie”) instead.
Why a blanket/poncho-liner rather than a sleeping bag? A good sleeping bag is well worth having. In warmer conditions, however, a poncho-liner may be a better choice than that bulky five-season expedition bag you just had to buy, “just in case”. In colder conditions, a poncho-liner may be combined with a sleeping bag of more modest (and more practical) capabilities.
In case you have not worked it out, a more practical sleeping bag purchase would have been a two or three-season bag that can be combined with other items in colder weather, including another sleeping bag. Generally, several thinner layers trap more warm air than one very thick one.
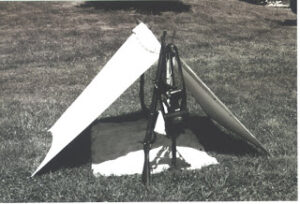
The poncho-liner was designed to be part of a warm weather sleeping system. The instructions are that the poncho-liner is to be tied to a GI-issue rain poncho, with the rain poncho outermost. The soldier lies on one half of the combination and folds the other half over themselves. The snaps (poppers) on the rain poncho should not be used to fasten the opening if sleeping in a combat zone.
Tying the liner to the poncho may not be necessary. Threading the tapes through the eyelets may keep things together by friction alone.
Easiest knot is to make a loop at the base of the cord and pass it up through the eyelet. Make a loop higher in the cord and take it over the edge of the pooncho and pass the loop through the first. Hold the free end and pull the other side of the second loop to pull the first loop snug. This is very easy to tie and easy to undo with cold, wet hands. This is “two-thirds of a Highwayman's Hitch”.
Easy knot for attaching poncho to liner
The above method of using rain poncho and liner together has become known as a “ranger roll”, not to be confused with the packing method of the same name. It has been pointed out to me that this system resembles an Australian swag, with the obvious difference a swag uses heavier but breathable canvas,
Ironically, the best way I have found to pack a poncho roll is the other kind of ranger roll.
The poncho and liner (presumably as a ranger-roll configuration) is designated as a sleeping system for temperatures above 50°F (10°C). Put another way, if your breath is fogging, make more elaborate sleeping arrangements.
Rigging your rain poncho as a shelter, such as a ridge tent or lean-to, will trap a layer of air above while you sleep wrapped in your liner. You will be better ventilated and more comfortable than the ranger-roll. Where tactically possible, a fire may be built before a lean-to.
Insulating yourself from ground-chill will also facilitate sleeping at lower temperatures. Place hay, browse, bracken etc between yourself and the ground. Wreckage such as seat cushions may be used. If you have an insulated kip-mat, it may be used instead of or in addition to the previous measures.
If you want to use your poncho as a shelter you will need to carry some cordage, pegs and possibly poles. The two hanks of cord I recommended adding to your EDC will do fine. Since most ponchos or liners do not have a waist cord such cord may be knotted around the waist when wearing a rain-poncho and/or poncho-liner. Bungee cords are an alternative to cordage for shelters, and may also be used around the waist if your brought them long enough.

Pocho Shelters

Some ponchos only have eyelets at the corners, or even lack these. Fit eyelets to each corner and the centre of each edge.
There are alternate options, of course. One of them is a bivi-bag and a pair of poncho-liners.
 
A poncho-liner is a sensible thing to acquire, even if most of the time you just throw it over yourself when watching telly in the colder months.
Useful though the poncho-liner is, there is room for improvement.
Below is a video of “Green-Craft's” poncho-liner improvements:

Personally, I found some of the modifications described hard to fully comprehend. Long, verbal descriptions on a video are not the best means of communicating information. The video could have benefited from some more illustrations and written lists.
I decided not to use many of these suggested modifications.
For one thing, I do not like “hand-warmer” pockets. Move with your hands in your pockets and you cannot defend yourself nor save yourself if you fall. Essentially, hand-warmer pockets are diametrically the opposite of what this blog is about.
I also had concerns that some of these modifications would affect the packability of my poncho-liner.
And I am short on funds, so cannot afford all the bits needed for the modifications even if I did want them.

The Head Hole

Why did the inventors of the poncho-liner not include a head hole so that it could be worn under a rain-poncho?
Perhaps it was something to do with the commitment to the war in Vietnam? Warm clothing was not seen as a high priority?
Modifying your poncho-liner so that it can be worn as a real poncho is probably the most useful modification you can make, and it is relatively simple.
You will need:
• A 40 cm open-ended zip of suitable colour and finish
• About a metre of suitably coloured double-fold bias tape
• Sewing supplies. A needle, suitably coloured thread, pins, chalk, scissors/shears, a tape measure.
You do not want a zipper with shiny nor reflective teeth, so you will probably get a plastic zip. Colour and shades should be one that blends well with the basic appearance of your poncho-liner.
My poncho-liner is in German Tropentarn desert camo (aka “desert flecktarn” or “fleckdesert”), which is actually quite a good general-purpose pattern. Thus I brought a zipper described as beige.
I brought my double bias tape and the colour was described as “stone”.
If you have some scraps of suitably coloured or patterned material you can make your own bias tape by cutting it diagonally. Using different scraps will enhance the disruptive effect.
There are videos on how to make bias tape and how to join the different sections. You will need and iron and possibly a former.

The Cut

Decide which side of your poncho-liner will be the “outer” and which the “inside.” Also decide which part will be “front” and which “back”. My poncho-liner has a label in one corner so I arranged it so that this would be inside and at the back.
As evenly as possible, fold your poncho-liner width-wise. Then fold it lengthwise. The corner of the folds should be the centre of your poncho-liner.
Many blogs ago, I advised you to buy some chalk and add it to your EDC. You probably had several sticks left. Add some to your home sewing kit, it is times such as these it comes in useful.
Measure down from the centre corner 8 cm and mark a spot with your chalk. Make an 8cm cut through both thicknesses of the poncho-liner. Note that the cut you are making is lengthwise, going from back to front.
Unfold the poncho-liner. From the edge of the cut measure 19 cm and mark a point with chalk. I used a set-square here to ensure the line was perpendicular to a width-wise fold. Cut down the front 19 cm.
You now have a poncho-liner with a 35 cm hole in the centre. Check this fits easily over your head. Make it a shade bigger if necessary.

Fitting the Zip and Collar

Unzip your zipper into separate halves.
On the outermost side of the poncho-liner, place your zipper parts on either side of the head-hole.
Position them so that for each the teeth are on the opposite side to the opening.
You should be looking at the “back side” of the zipper and the puller should be on the front-side of the poncho-liner when fully down.
Pin each of the zipper halves so that the toothless edge is flush with the cut edge of the head-hole.
Note that your zipper is longer than the hole you cut. Make sure they are closely aligned. Try closing the zipper while it is still only pinned in position and adjust as necessary.

Fitting the Double Bias Tape

Once you are happy with the position of your zipper, you need to pin the bias tape into position.
I suggest you watch a few videos to familiarize yourself with how this tape is used. We are going to fold it all the way over the edge of the head-hole. If you look at the outer edges of your poncho-liner you will see a similar method has already been used to finish that edge.
Cut two lengths of bias tape about the same length as your zipper. Unfold the tape so that you are looking at its “inside”.
Place the tape, inside uppermost, over your zipper half. Align the inner edge of the tape so that it is flush with the cut-edge of the poncho and the toothless edge of the zipper. Pin in position and repeat for the other side.
You can remove the pins you put in to hold the zipper.
There should be pins securing both tape and zipper to the poncho-liner.
Note that if I was to do this again, I would use short lengths of bias tape to cover the top and bottom of the cut before adding the zipper. What I have done does not look too bad (on the outside!), but it could have been neater.

Sewing

I started off trying to use a “mini-sewing machine”. This was very cheap when I brought it. I notice the price is creeping up now!
After attaching the first zipper half I got sick of repeatably rethreading the thing, and realized I could probably do a neater job hand-sewing. Some sections would need to be hand-sewn anyway.
Sew along the crease of the bias tape that is closer to the hole.
Once this is done, fold the tape so that it completely covers the cut edge of the liner and the other crease touches the inside of the poncho-liner, the far edge of the tape tucked in.
Both creases of the tape are thus folded and both edges of the tape tucked in.
Sew just inside the edge of the tape so your thread passes through all four layers of tape, the zipper and the poncho-liner.

Finishing the Zipper

Close your zipper and tuck each end through the cut to the inner side of the poncho-liner.
Finish the ends of the bias tape so they are sewn to the zipper.
Since the top and bottom of my head-hole was untaped, I put a few stiches through the zipper and through the poncho-liner to close off any opening that remained.
Lastly, add a length of cord or tape to your zipper-puller.
This will stop it rattling. It also lets you easily work the zipper if your hands are cold and numb or wearing thick gloves.
If you can get some bootlace that matches the ties on your poncho-liner, that would be cool. I used a length of “desert-camo” 3mm budget paracord, which does not look out of place.

The Zipper Explained

Why use this configuration for your zipper?
When used as a garment, the teeth of the opened parts of the zipper will not contact your bare neck. You can roll the edges of the opening outward if you wish. This is shown in the photo immediately below.
There are other ways to prevent the teeth rubbing the neck, but the above method is one of the simplest and involves very little sewing.
Poncho-liner with zippered neck opening
The puller of the zipper is at the front when opened so that you can adjust the neck opening to vary ventilation or retain more heat.
The zipper I brought was described as beige but the actual colour was lighter and more yellow than I had hoped. Because very little of the zipper is visible on the outside, I got lucky and it blends very nicely with the rest of the poncho-liner. I think it may work better than the dark green zipper I also considered.
In practice, the zipper will usually be covered by a scarf or shemagh.
The zipper I brought was missing a tooth at the very top. This caused the puller to jam if the zip is fully closed. Fortunately, by tucking the very bottom and top of the zip, the last few centimetres of each end are not used, yet the opening can be fully closed. A combination of luck and improvisation!
Poncho-liner with zipper opening fully open
The bias tape I brought was described as “stone” in colour. I was expecting something with a hint of brown, but it proved to be a light, very neutral-looking grey. Not surprisingly, this colour and shade goes very well with both the zipper and the poncho-liner in general.
The camera flash probably creates a greater contrast than the naked eye sees.

Poppers

Once I had fitted the zipper, I went about installing some plastic poppers (aka “snaps”, “snap-fasteners”). These may need special pliers to fit.
You will need something that can poke a small hole through the poncho-liner. I used a stout sailmaker's needle I have in my home sewing kit. A set of these is worth having. The smaller ones go in you EDC or travel kits, the larger into your home sewing and/or repair kit.
You can chalk the needle to make the holes easier to locate.

Getting the Poppers Right

Lay-out your poncho with the inner side upwards.
Mentally divide it into quarters. We will be installing poppers using the following rules. The reason for this will be explained later:
• Each quarter will have the popper halves all of the same time. A quarter will only contain “male” poppers or “female”.
• If a quarter at the top has male poppers, the quarter immediately below will have female, and vice versa.
• If a quarter on the left has male poppers, that on the immediate right will have female, and vice versa.
• Quarters that are diagonally opposite will contain the same type of popper half.
I started off by installing the corner-most popper halves. Concentrate on getting these right and then it is just a matter of using the same popper type for each quarter.
I installed the corner poppers 40mm in from the side edge of the poncho-liner and 190mm from the top or bottom edge. If you are on the large side, place the poppers closer to the edge.
Next, fold your poncho-liner width-wise. Use the top and bottom poppers you have just added if you wish.
From the width-wise fold, measure down 240 to 250mm and install a popper 40mm in from the side. Make sure each quarter of the poncho-liner has the same type popper-half.
When you are wearing the poncho-liner, using this popper forms a sort of sleeve. The opening is generous enough to allow for bulky cold weather clothing. You can also slip your hand in and use it as a hand-warmer, “Fu Manchu”-style.
You will want to add a few more poppers down the side between the “sleeve” popper. I chose to add three more to each side.
With your poncho-liner still folded width-wise, fasten the sleeve and corner poppers. Make another width-wise fold so the corner popper touches the sleeve popper. Mark where the fold is and install a popper. As always, make sure each quarter of the poncho-liner has the same type popper-half.
Install additional poppers between the sleeve and corner poppers and the middle popper you just fitted.

Finishing the Poppers

The poppers I had purchased were supposedly “beige”. They turned out to be way lighter than expected, and had a gloss finish! When installed on the poncho-liner they appeared like they were white.
Luckily, I have some enamel model paints, several in colours close to that of the poncho-liner. I used these to paint the outer sides of the popper halves. I did not bother to paint the inners. I suspect the paint on the inners will either wear off too quickly or affect functionality, but try it if you wish.
Painted poncho-liner poppers.
For the record, the colours I used were Humbrol no.84 Stone and Revell no.83 Leather Brown. None of the poppers passed through green areas of the camouflage, so I did not use any of my green paints. These are not exact colour matches for the poncho-liner, but if someone is close enough to see the difference camouflage is no longer an option!
Like most painting, a second coat will improve it. You can stipple the surface to produce a more matt-effect, or even sprinkle a little sand on the first coat. However, given that the surface of the poncho-liner is quite smooth, the practical value of this is moot.
While you are at it, see if the poppers on your rain-poncho could use some paint. 
Again, the flash on my camera probably shows them up more than the naked eye can discern them.
Below is a shot taken without flash.
Modified poncho-liner photographed without flash
You may not be able to avoid painting your poppers, but start off with some that are matt, medium shade and a natural or neutral colour if you can.

The Poppers Explained

Why did I insist such attention be paid to which popper half went in which quarter?
If you want to sleep in your poncho-liner, fold it lengthwise and tuck under the foot-end. You will find you can use the poppers to fasten the free long edges. Much more compact and less bulk than fitting a long zip on this edge!
Personally, I find sleeping like this a little restrictive and am more likely to use the liner like a conventional blanket. Part of the appeal of the liner as a warm weather sleeping system is that it does not confine you like a sleeping bag. Best way to turn the poncho-liner into a cold weather system is use it with a sleeping bag!
Obviously, if the poppers of the rain poncho on a ranger-roll should not be fastened in a threat environment, the same goes for the poppers you fitted to your liner when sleeping.
Wearing your poncho-liner? Two sets of poppers line up to create a sleeve-type opening. Those below can be used to close up the sides.
These simple modifications will take you less than a day, even if you have to hand-sew.
Categories
Phillosoph

Webbing Gear and Ventilation

Recently I have been reading some new stuff on “cold-dry” or “snow” survival.
Dipping back into one of my older books, I noticed this caption on an image:
“Most soldiers trained in Arctic warfare prefer to keep their webbing attached to their backpack, rather than over their clothes, which restricts movement. ”
“Survival” (1988), Len Cacutt (p.124)
If it is acceptable to not wear webbing during Arctic operations, this suggests that it may be practical to do without many of the contents of the webbing during operations in warmer climes.
Given the date and origin of the book, the webbing referred to would be the British 58-pattern. Below is an illustration from the SLR-era. The following comments are still applicable to later systems and those of many other nations.
As can be seen from the illustration, webbing carried a lot of gear that was not immediately mission relevant.
Earlier in “Survival” there is a recommendation to “eliminate all non-essential items” (p.60). It then shows webbing loaded with wash-kit, stove, mess-tins, boot-polish, cutlery etc.
Part of the problem is the kidney pouches. Their large size is a temptation to load them up.
The pouches cannot be easily removed from the system when the weight they carry is not needed.
The position of the kidney pouches also hindered the use of efficient rucksacks that transfer the weight to the pelvis.
The consequence of all this is the webbing is heavy and bulky. It cannot be worn comfortably unless the belt is clinched tight, and it requires some system of yoke or suspenders.
In the SLA Marshall loadout recently described, a notable feature was carrying the ammunition only in bandoliers. No equipment belt is mentioned. Presumably there is one, since the soldier had to carry a water canteen and possibly a pouch for his pair of grenades. However, this belt would be relatively light without 80 rounds (about 5 lbs) of ammunition weighing it down.
Note in the photo below the GI wears a belt without any clip-pouches and does not use suspenders.
WW2 GI wearing bandoliers
Reading about pulks produced a similar observation from a Dutch source:
“As a result, Marines are now carrying a heavy backpack while moving on skis in snowy areas. An additional disadvantage of a complete package on the man is that the function of the worn clothing is not fully utilized (breathing capacity).”
In sub-zero operations it is important to avoid overheating.
Condensing perspiration can soak into clothing, reducing its insulating capability and chilling the body. This moisture can even freeze within the clothing.
There are a number of solutions to this problem. One is to not wear too much insulation. Another is to pay attention to the permeability and venting of clothes. Sweat must be prevented or allowed to escape the clothing before it becomes cold enough to condense.
It should be obvious that venting, air-circulation and removing excess insulation will all be hindered by the torso being constricted by a system of tight straps.
Air-circulation and heat-loss remain important considerations in warmer or hot-climates too.
Not only is what we carry important, but how we carry it!
Webbing/Load Carrying Equipment should be reserved for immediate-use mission gear. Items that do not qualify should be removed to a backpack. A small pack, or the detachable side-pockets of a large pack, can carry items for a 24 hour or CBRN (Chemical, Biological, Radiological, and Nuclear) operations
Decreasing the mass and bulk of webbing gear to improve air-circulation will greatly improve soldier comfort and performance. As a regular reader so eloquently puts it, it “reduces sweating without the benefits!”
A simple chest/belly rig, as described here, should be used for the primary ammunition supply. This will have three two-magazine pouches and a couple of smaller pouches for up to six (standard size) grenades, for example, two smoke and four fragmentation grenades. The only other features of the rig would be a snap-link, map/dump pocket, small weapon-cleaning kit, flashlight carrier and a mounting for a pec-knife. comms and first field dressing.
An equipment/waist belt would be lightly loaded with an CI-IFAK pouch and up to two litres of water.
In sub-zero conditions, water might be better carried in a bladder worn under the clothing to keep it liquid.
Possible additions to the equipment belt would be a handgun, handgun-magazines, long knife and possibly additional grenades and rifle-magazines. Extra munitions may be better carried by other means such as a claymore bag.
This configuration leaves the back clear for the more comfortable carrying of backpacks.
Categories
Phillosoph

SLA Marshall Soldier's Load

Over the years, this blog has visited the topic of Soldier’s Load several times, and published a number of equipment lists.
What to carry, and what not to, is of interest to any backpacker, outdoorsperson, prepper or survivalist. Although a list may have been written for a military context, understanding the reasons for any differences is often productive.
The following list is something of a “classic”, being taken from SLA Marshall’s book “The Soldier’s Load and the Mobility of a Nation”(1949). It seems to be obligatory to mention this work when writing about Soldier’s Load. How much notice is taken of its suggestions is beyond the scope of today’s blog.
Marshall, and many other sources, had concluded that the optimum marching load for the average man is not more than one-third of body weight. Marshall also maintained that troops would carry more food, more munitions, more everything into combat than there was any reason to believe they would use.
On this basis, Marshall proposed an optimum working combat of around 40 pounds (80% of optimum carried load).
WW2 GI wearing bandoliers
SLA Marshall: “We can do it, as is shown by the following table of weights. Though we had many variations of combat dress in World War II, according to the climate, the present field uniform strikes a good general average insofar as weight is concerned.”
WEIGHT OF CLOTHING
Undershirt, drawers, socks…………..0.62
Shirt, flannel …………..1.13
Trousers, wool…………..1.69
Jacket, wool…………..3.02
Cap, field ………….. 0.25
Boots, combat…………..4.13
Belt, waist…………..0.19
Total for the field uniform…………… 11.03 [lbs]
Belt, cartridge 2/48 Rds M-1 ammunition………….. 2.29
Canteen w/cover and cup…………..2.69
First-aid packet…………..0.40
Helmet w/liner…………..2.82
Rifle M-1 w/o bayonet, w/sling…………..10.30
Two (2) Grenades (Fragmentation)…………..2.62
Light pack w/one (1) K Ration and mess gear………….. 7.79
Includes:
Haversack and carrier…………..2.46
Toilet articles…………..0.92
Change of underwear…………..0.43
Two (2) pairs of socks…………..0.38
One (1) K Ration…………..2.31
Mess gear…………..1.29
Total, field uniform and battle equipment…………..39.94 [lbs]
“On that figure, I am prepared to stand. One blanket, woolen, OD, would add another four pounds; one raincoat, another three pounds. During initial combat in hot weather, it is better to take a chance without them than to put that much extra weight on men just as they are about to undergo fire for the first time.”

Commentary

Unlike many later analysts, Marshall included the weight of the clothing in his estimate. This is often disregarded if the wearers are accustomed to wearing the items.
• Undershirt and drawers of this period are likely to be cotton tee-shirt and boxer shorts. Socks are presumably wool, rather then the cotton worn with service dress. Underwear can, of course, be varied with season and climate.
• “Flannel” is a somewhat ambiguous term these days. A M1937 wool shirt was in service at the time and this is probably that suggested. Woollen clothing is preferable if you are going to get rained on.
Incidentally, the prototype M43 combat dress had featured a “high-neck sweater” to be worn under the field coat or as outerwear in hot weather. The fatigue/utility shirt would become the preferred hot-weather wear.
A friend of mine likened soldiering to an extreme sport, which did make we wonder if field gear should be made to more closely resemble sports and active gear. Something modelled on a tracksuit top or hoodie may be a better intermediate layer than a conventional shirt.
Pocket configuration of hoodies/tracksuit tops is not ideal. Handwarmer pockets are a bad idea, since your hands should be out of them helping and defending you. Extra sleeve pockets and Napoleon chest-pockets are useful, as it a kidney-area pocket for soft items such as hats and scarves.
I prefer hoods that can be stowed away inside a collar. It is easy to snag a hood on a branch when moving through the woods.
Poppers to supplement any zip would allow for more versatility in ventilation. I am undecided as to whether a fully opening or pullover configuration works best as field wear.
• Wool trousers (M1937) are suggested. Cotton cargo trousers had seen widespread introduction with the new 1943 field gear. Cargo trousers are a good modern substitution, since the pockets are ideal for carrying much of your skin-level EDC emergency items.
• “Jacket, Wool”, could be one of several garments. It may be the M1939 wool field coat, or the ETO “Ike” Jacket. The latter had been based on British battledress and had been intended for both field and service wear. In practice they had been in short supply so usually only officers had them and kept them for non-combat use.
By the time of Marshall’s writing the M1939 had been widely replaced by the cotton and wool M41 “Parsons” field jacket and the cotton M43.
Tropentarn Camouflage
My experience with my desert parka makes me suspect that such an item is far more practical than a conventional half-length field jacket. Being uninsulated and lightweight, it can be worn comfortably across a broad range of weather. It appears a single layer, although the inside may have a closely bonded thin lining. Vent zips and a roomy interior allows for good air circulation in hot weather and cooling via bellows-effect. A loose cut allows room for the liner or other insulation when cold. Its larger size covers more of the distinctive human body-shape.
Buy your parka on the big side. Mine is thigh-length.
I have modified the hood of mine so that it rolls into a collar secured by poppers when not in use. The only other modification I might wish for is more and larger pockets.
The desert parka is a reasonably priced item, so is an easy way to modify a soldier’s appearance.
A parka intended for field use would be camouflaged and provided with textilage and attachment points for foliage. Such a field parka can easily be replaced by another more suited in colour and cut for non-combat, service or parade wear. The latter may appear something like the frock coat/greatcoat look that is used in some Japanese anime.
The idea of using a “long” coat as basic combat dress has obvious echoes of the French practice of usually fighting wearing their greatcoats.
• A woollen watchcap, beanie or headover may be a more useful and versatile item than a field-cap. A hat with a brim does keep the rain off my glasses, however.
At least one type of gloves, and something to act as a scarf such as a keffiyah or scrim should also be part of a basic outfit.
• The belt listed is probably the item intended to hold up the trousers, rather than an equipment belt.
M1923 Cartridge Belt
• “Belt, cartridge 2/48 Rds M-1 ammunition… 2.29” did give me pause. The cartridge belt for use with the Garand M1 rifle has ten pockets, each holding an eight-round clip.
With the rifle loaded, the soldier’s basic ammo load was 88 rounds. Marshall advocated soldiers carry less ammo, but only filling six pockets of the belt for 48 rounds seemed odd. And what did “2/” signify? Was it a transcription error in my PDF copy of the book?
Garand Ammunition Bandolier
Eventually, I learnt Garand ammo was issued in a throwaway cloth bandolier. This bandolier had six pockets, each holding one eight-round clip, for 48 rounds total! Soldiers would often carry a pair of bandoliers in addition to a fully loaded cartridge belt, for 23 clips/184 rounds.
It seemed logical that Marshall was suggesting that a soldier just carry a pair of bandoliers instead of a ten-pocket cartridge belt. This would still give the soldier 104 rounds (2 bandoliers of 48 + 8 loaded).
The quoted weight of “2.29 lbs” is still a mystery. A loaded Garand bandolier weighed 3.5 lbs, and a loaded M1923 cartridge belt even more, so the figure might be expected to be either 3.5 or 7 if a pair of bandoliers was intended.
This use of such bandoliers is a practical system for the Garand. I would not, however, recommend the Garand for modern shooters. There are lighter weapons with equivalent performance, and the need to have ammo in clips for the mechanism to fully function is an obvious potential problem.
The bandoliers used for the Garand were also used for the Springfield M1903, each pocket holding a pair of five-round strippers, for total of 60 rounds per bandolier. Thus something similar might be used for a bolt-action rifle or for the loose ammo for a shotgun. The bandolier was also apparently repurposed to hold six 15-round M1 Carbine magazines.
Few modern self-loading rifles can be loaded by strippers, so another arrangement for carrying their ammo must be used. The above does, however, give a useful idea of the number of ready rounds carried that may be practical.
Substantially reducing the weight carried on the waist belt and eliminating the need for tight webbing suspenders would improve both air and blood circulation. This would be very welcome in hot or very cold climates.
• A canteen/water-bottle is a reasonable item to carry on your person. Since a cartridge/equipment belt is not listed, it is not clear how Marshall’s soldier carried it. In a modern context a flexible water-bladder may be preferred to a rigid bottle. Many modern examples have a sip-tube so you can drink without unpacking your water container.
The canteen cup should probably be carried in the pack rather than on the belt.
• The first aid package is probably one area where greater quantities are prudent. Bullets often make exit holes as well as entries. Optimising the CI_IFAK/Trauma kit carried is an entire topic in itself!
• Marshall suggest a pair of fragmentation grenades, rather than the five to eight some units encouraged soldiers to carry. Modern fragmentation grenades are a little lighter than their 1949-era equivalents.
While a civilian would not carry fragmentation grenades, legal smoke bombs have practical applications for defence and signalling.
It is not explained how Marshall’s soldier was to carry his pair of grenades.
The 1943 combat gear had introduced jacket and trouser pockets designed to take several grenades.
In the thigh pockets, grenades were difficult to reach and the weight was uncomfortable. Enough weight and the trousers would not stay up without suspenders.
The lower jacket pockets were difficult to access if wearing belt-gear and cast-iron weights swinging around your genitals was objectionable!
The above items constitute what some authors call a “fighting load”. The combat load is considered to include a fighting load and an approach march load. The approach march load is usually in a small pack that is dropped or cached before closing with the enemy. The haversack Marshall describes is the approach march load.
• The suggested haversack contents are reasonable. Two pairs of spare socks and a spare set of underwear sounds about right.
On other pages, I have described effective wash-kits much lighter than those many soldiers carry. This should include a roll of toilet paper.
The K-ration can be replaced by modern equivalents. Marshall is telling us the combat load need food for a day or so, not a week or more!
Rations such as MREs may include heating pouches, reducing the need for a stove and fuel.
The mess-kit can probably be replaced by a metal canteen cup and an emergency stove, such as the British Crusader or US Natick.
Pack the interior of the cup with packets of instant noodles and other useful items.
The only other eating item needed is a spork.
A plastic sandwich box makes a useful eating bowl. When not used as such, fill the interior with a brew-kit, spork and packet-soup and OXO cubes.
• The poncho-liner can substitute for the wool field blanket suggested.
A set of goggles and a flashlight are worth adding to the pack contents.
• The issue US army raincoat would be replaced by the more versatile and lighter rain-poncho.
Incidentally, another advantage of the desert parka is that it can be worn over a lightweight plastic raincoat, providing protection and camouflage while the waterproof stops water reaching the warm layers below.
Categories
Phillosoph

Soft-Core Pack: Military Version

The battle order suggested in the previous blog raises an interesting question: How does the soldier carry his poncho?
Items such as bayonets and ammunition have obvious places on the webbing.
Not only must a poncho be carried when not worn, but it must be protected from unnecessary damage.
The official solution was most probably to carry the poncho in the butt-pack. As I have discussed in previous posts, there are objections to using a butt-pack or similar. Its capacity is a temptation to carry extra gear. Its position makes it hard to easily access, and it is inconvenient if sitting in a vehicle for any time.

Military Soft-Core Bag

In a previous post I described my “soft-core bag”. This idea can easily be adapted to military applications.
The military version of the soft-core bag actually may be lighter than my version. Items such as the fire-kit, first aid kit and sweets can be omitted, since these roles will already be met by items hopefully carried on the soldier’s webbing or person.
For the same reason, the water-bottle in the soft-core pack can be omitted unless operating in particularly arid conditions.

Contents

What should the military soft-core bag contain?
• A poncho. This should ride at the top of the bag for easy access. If the poncho has its own stuff sack, add two three metre lengths of paracord. Loops of cord for pegging should already be attached to the poncho side and corner eyelets.
• Accessory clothing items such as warm hats, work protective gloves, spare socks, bandanas, shemagh.
Many outdoor coats lack sufficient pocket space to carry such items, and you may need your pockets for more tactical items.
The soft-core bag is a practical solution. Wrap in plastic bags to waterproof them. The majority of these items would stay in the large pack. The soldier dresses in what he needs when he caches his large pack.
• A spare shirt, jumper, jacket or liner, “ranger-rolled”. Useful if the temperature drops or you reduce your actively level. Wrap in plastic bags to waterproof them.
• Toilet roll in waterproof bag. As well as the intended use, good for fire starting. Use a bag that can be sealed against water. A 100 ml bottle of alchohol hand-sanitizer may be added to this bag.
• A small notebook in a waterproof bag may be useful.
• Items such as cordage and space blankets are optional for the military soft-core pack. You may decide these are better carried in your trouser or shirt/jacket pockets.
• A “non-soft” item of equipment that might be carried in your soft-pack are your goggles.
These can get in the way if you are not wearing them. When not in use they need to be covered for camouflage purposes.
Stowing them in your soft-core bag is a very practical solution. Place them in the middle of clothing to provide padding and protection.

Carrying Bag

Like the other version, the military soft-core bag fits in a simple draw-cord bag. This is stowed in the top of your rucksack so the poncho or other contents can easily be accessed if needed.
When you stow your rucksack, you pull out the soft-core pack and wear it as part of your battle-order. When seated in a vehicle, the soft-core pack should act as additional padding for your back.
Nearly all of the contents of my civilian version of the soft-core bag may be fitted in one of the detachable side pouches of a bergen.
There is room for a water bladder and a few “mission” items.
Ideally, there should be provison to stow the mini-medical kit directly under the lid,
Tent poles that can fit down the sides of the pack, and a small bag of pegs would be useful. Currently I am not aware of any off-the-shelf shelter poles that break into sections of less than 32 cm.
The other side pocket may be used for NBC gear. When NBC (CBRN) is not a likely threat, the single side-pouch may be carried as a patrol pack.

Camouflage

Ideally, your draw-cord bag should be of an effective camouflage pattern.
A grey-beige-brown scheme may be more versatile than the green-dominant examples shown in the photos.
Sewing some textilage to the outer side is a good idea too.
If you cannot get a camouflaged example, a suitably neutral-coloured bag can be camouflaged with a few passes of spray paint.
Making a camouflage draw-cord bag will be within most reader’s capabilities. Note that the bags shown have carrying cords created by taking the cord down to eyelets at the bottom corners. If your bag lacks these, they can easily be added.
Dark or unsuitably coloured cords are easily replaced with something such as “desert-camo” paracord.
Categories
Phillosoph

Tactical Bed Rolls

I came across an interesting article called “Pedomic Mobility” in the October-November 1960 issue of “Infantry” magazine.
Pedomic_compressed
In the narrative, an officer watches his company conducting a “ruck attack” on a position. A ruck attack is an assault where the troops wear their rucksacs. This slows the soldiers down, makes them larger and more obvious targets and tires them out more quickly. Shooting from a prone position may be problematic if the pack prevents the soldier raising his head. Despite the obvious disadvantages, the ruck attack remains common in certain armies, both in training and actual combat operations.
The officer watches his near exhausted men and ponders if there is a better alternative.
The proposed solution has two parts. The first is the attacking force should be equipped thus:
• Clothing appropriate for the climate, season and weather
• Load-bearing equipment
• Helmet
• Weapon and ammunition
• Bayonet
• Water bottle, cover and canteen cup
• First aid packet
• Gas mask
• Poncho.
Personally, I consider a canteen cup a backpack item. The dynamics of operating in a platoon or company may change this, however.

Soldier's Bed Roll

If the unit was to stay in one place for any time, a bed roll for each soldier would be brought forth. A bed roll, as described in the article, consists of:
• Shelter-half with poles and pegs (“pins”)
Blanket
• Air mattress
• Sleeping bag
• One or two changes of socks and underwear
• Towel
• Toiletries
• Field jacket liner and trouser liner*
*The jacket and trouser liners were included if it was a “seasonally transitional period”. The mention of the blanket and insulated boots suggest the cold of Korea was still fresh in many soldiers’ minds.
If you have read Kephart, you will know that an outdoorsman’s pack was once exactly that: a package of items wrapped in canvas (above).

Soldiers carrying tactical bed rolls
Bed Rolls in Action. Note the man at the rear has transferred his entrenching tool to his bed roll for more comfortable carrying.

The bed roll was primarily intended to be moved by truck or jeep. When necessary it could be carried by the infantryman. The author suggest re-rolling the item into a horseshoe roll, or fitting the bed roll with a rope or carrying strap.
The use of a shelter-half for the outer layer is particularly clever. Being made of canvas, it is robust and relatively damage tolerant. It is better suited for this roll than a poncho or more modern nylon tent might be. Shelter-halves were widely available from military supplies and easily replaced. A shelter-half could be put to a number of other uses other than as a pup-tent.
See this video for a “pegs before poles” method of setting up a shelter-half tent.
The only objection to using a shelter-half is that most are green, rather than more versatile dull brown or camouflage finishes.
Also notable was this officer understood that toiletries were not something a soldier needed to carry on his person.
Can we adapt this concept to more modern equipment? An all-weather blanket that can serve as a ground cloth and for other uses would be a good addition. Air mattresses are not common with modern users. I do know some soldiers who use self-inflating sleeping mats. Most, however, use foam kip-mats. Even when trimmed down, these tend to be bulky. Similarly, a poncho liner is rather bulky when rolled. I am not sure you could roll these up in a shelter half with a sleeping bag and still have a roll only a foot in diameter.
In the article, mention is made of stowing bed rolls in waterproof bags. An obvious extrapolation of this is to carry a bagged bed roll within a medium-sized rucksac. Packs would be clearly marked with name, squad, platoon and company, for example: Grant N. 471, 3-2-B. The pockets of a rucksack are a more convenient place to carry a wash-kit, canteen cup and some other items. A foam kip mat can be rolled separately from the bed roll and carried along side it within or outside the pack. Kip mats have uses in addition to sleeping on, so having them separate is more convenient.
When bed rolls are brought forward, rations and ammunition will probably be brought with them. If a unit has to fall back the rucksacks used to move the bed rolls can also carry some of the rations and ammunition too.
The specific contents of a bed roll with vary with climate and other factors.
When in transit, experianced soldiers will keep their bed roll close to hand. If baggage gets misdirected or delayed, the soldier still has the essentials necessary for a good night’s rest.
The article Pedomic Mobility was written for infantry companies conducting operations within range of support units. It may, however, provide some inspiration for independent outdoorsman both as to how and what they may carry.
Categories
Phillosoph

The Brooksbank Carrying System

I have talked about using Claymore mine bags to carry ammunition on a number of instances. I was therefore intrigued by this idea from 1943, called the “Brooksbank” method. All credit to Karkee Web for the images and information:

(a) The gas cape folded flat, about 10 in by 12 in, is put on first in the normal manner.

(b) The small pack is slung over the right shoulder and the two valise straps fastened (firmly but not tightly) over the stomach with the bayonet and frog on the right hand side, slung on the valise strap.

(c) The respirator is put on in the reverse alert position, i.e., the haversack goes on the back resting on the gas cape with the sling (shortened as far as possible) on the chest, with a piece of tape on each lower " D " on the haversack coming round to the front and with the left tape underneath the brace, through the sling, fastening on the right with a slip knot. (The right tape therefore will be only approximately 4 in to 6 in in length).

Commentary

Some clarification is in order. The “gas cape” or “anti-gas cape” was a protective garment against chemical warfare agents such as mustard gas. It actually resembled a long, sleeved coat rather than a cape. The model in use in 1943 was provided with long tapes so that the rolled garment could be carried across the back of the shoulders. No webbing was needed to carry the cape in this fashion. In the figure on the reader’s right in figure 1 the tapes of the cape can be made up coming up from under the soldier’s armpits and disappearing behind his neck. The cape could be quickly unrolled down the back and put on without unfastening the tapes. An excellent source of information on these items can be found on this video.
What is possibly not made clear is that the small pack would spend most of its time across the small of the back, and would only be pulled around the side when ammunition or other items were wanted. A photo of how just the pack would be worn is shown on this page.
The Brooksbank method was supposed to save weight. While it does away with the ammo pouches, belt and water-bottle carrier, the soldier still carries his standard haversack contents, plus finding some room inside for carrying individual and squad ammunition. Although called a haversack, not many of the recommended contents of the 37 pattern small pack were actual clothing. The interior was divided into two compartments, the forward one bisected by an additional divider. One forward pocket held the soldier’s pair of mess-tins, the other a water-bottle. Carried in the main compartment was a groundsheet, towel, soap, pair of spare spare socks, cutlery and possibly an emergency ration and cardigan. Below is a photo of a typical British infantryman’s small pack contents, taken from “British Army Handbook 1939-45” by George Forty.
Many of these items should probably have been left with the truck rather than being carried into combat. I recently read a 1940s manual on street-fighting and soldiers were told not to bring their haversacks into action. Urban environments had plenty of shelter so groundsheets and gas capes were not needed. Haversack items that might prove useful could probably be carried by other means.
The groundsheet carried at this time is of interest, since this would probably be of some variety of MkVII, and was designed to also act as the soldier’s rain protection. The gas cape was supposed to be reserved for the event of chemical warfare, but in practice might be used as a raincoat.
Many years ago, I travelled down Italy, my belongings packed in a sports bag. At one town I had to walk longer and further than usual to located accommodation. Even though I could swap over the shoulder I carried the bag on the uneven weight caused me to sprain one ankle, resulting in a rather painful couple of days. Since then I have always used rucksacs. I don’t know if that would have been a problem with the Brooksbank method, but do feel more though should have been given to what was carried, as well as how.
Categories
Phillosoph

Equipment Pouches

One of my reasons for writing this post is that I came across a statement that a certain army was currently issuing several dozen different designs of equipment pouch.
I see pouches for survival tins offered, which misses the point of a survival tin!
One even sees belt pouches for KFS!
This got me thinking about what configurations would be most useful. Some of us do not have an unlimited budget or supply system, after all!
It would be very nice to have pouches designed based on the golden ratio, such as in the proportions 1: 1.618: 2.618. Such gives a litre pouch of about 6 x 10 x 16 cm and a two litre of 7.8 x 12.6 x 20.3 cm.
Attractive though these are, we must also consider more practical considerations such as the dimensions of the already existing items that such pouches will be required to carry.

Medium Utility Pouch Size One

To begin with, let us consider a medium-sized utility pouch with internal dimensions of approximately a litre volume.
This could serve as a water-bottle carrier for typical military designs such as the British 1-litre ’58 pattern and the US 1-quart M-1961.
There should also be room for associated items such as canteen-cups and stoves, so size may be something around 9 x 14 x 22cm.
Personally, I think a two-litre bladder with a drinking tube is more practical, but designing the medium utility pouch to take a water-bottle also gives us a convenient size for many other items.
If you don’t carry a water-bottle, the pouch can still carry a cup and stove, zip ties, pliers, cordage, flashlight and a useful collection of other items.
Personally, I think a cup and stove are pack items rather than something that should be weighing down your belt. A size-one pouch containing these could be mounted on the outside of a pack for easy access.
It can be used to carry several magazines, bagged stripper-clips or several grenades.
The pouch itself would be fairly basic. If a draw-cord neck is desired, a suitable liner is added. Likewise, inserts can configure the interior to specialist roles.
There will be provision to mount smaller pouches on the outside should external pockets be desired

Small Utility/Frag Pouch

There would also be a small utility pouch, perhaps of about 10 x 12 cm.
This item is obviously inspired by the M1967 compass/field dressing pouch, and like this item it can exploit mounting positions high on the body.
It will also be convenient for mounting on the sides of a chest rig where larger pouches might be awkward.
The proposed item will not use the popper fastening that the M1967 does, since these are fiddly if a pouch is partially filled or contains soft contents.
For some contents it may be convenient to be able to mount the pouch with the opening downwards or to the side.
As well as compasses and first field dressings (FFD) such a pouch can hold various other items and would serve as a pouch for frag-grenades. This latter requirement may require a change in proportions.
There may be a case for sizing this pouch to carry mobile phone-shaped items.
Small utility pouches would be designed so they can be mounted on larger pouches. When used for FFD the soldier's blood group should be clearly marked on the outside and a TCCC casualty card or equivalent carried inside

Medium Utility Pouch Size Two

The medium utility pouch will be complemented by a larger version of approximately twice the capacity.
We will call this the “medium size 2” and the previously described variant the “medium size 1”.
The size 2 utility pouch would serve a number of functions and be designed so that it can be worn on the belt or be carried by shoulder strap.
One of its roles is to carry a 2-litre hydration bladder fitted with a drinking tube. This allows the wearer to easily access a source of drinking water independent of any backpack.
Another role for this pouch is to hold an Combat Injury-Immediate First Aid Kkit (CI-IFAK). This pouch would contain an insert roll holding a vacuum-packed major trauma kit and a pair of combat tourniquets.
Two such pouches at the back of a soldier’s belt resembles a more compact version of the British army kidney pouches, but their contents are more useful and combat relevant
The size 2 utility pouch was inspired by the Canadian utility pouch that was found to be useful for carrying a (C9) 200rd SAW drum. Alternately, a 100rd belt of 7.62x51mm/6.5mm Creedmore or five 30-round rifle magazines could be carried instead.
If the one-litre/quart water-bottle is the item we design the size 1 pouch around, then the SAW reload is what the size 2 is designed around.
For the ammunition carrying role, the contents of the utility pouch should be rapidly and easily accessible. This again suggests that the utility pouches be a relatively simple design.
For other roles one or more small stuff sacks could be carried in the pouch. It may be prudent to proportion the pouch so it can carry 2-litre plastic ice cream containers. Other possible contents include the US 2-quart canteen
Utility pouches with shoulder straps allow a machine gunner’s ammunition load to be shared throughout a unit. Each soldier carries a bag and deposits it with the machine gun team when they take position.
Such bags can also increase an individual’s ammunition if that carried by the chest rig is felt insufficient

Munitions Pouch

The fourth design of pouch would be the “munitions pouch”.
As regular readers will know, I am fond of the chest rig. I am also a fan of not overloading said rig.
The basic component of the chest rig should be a pouch that can accommodate a pair of magazines.
Depending on body form, a rig will have three or four of these. It makes sense to design the pouch to accommodate  a pair of AKM 30-round magazines, allowing it to also carry 20-25 round 7.62x51mm/.260 Rem/6.5mm Creedmore magazines. Such a pouch can easily take a pair of 30-round 5.56mm magazines or a 60-round 5.56mm coffin-mag.
Box magazines for shotguns may also need to be considered.
The pouch may be a little too big for the 5.56mm magazines but this may be addressed in several ways.
The pouch may be adjustable or some item used as a spacer beneath the magazines (extra socks are always useful!).
If the magazines are fitted with pull loops it probably does not matter if they sit deep in the pouch. Pull loops are detailed in my book “Survival Weapons: Optimizing Your Arsenal”.
Should such pouches be built, some smart company might produce larger capacity 5.56mm magazines the same length as those of the AKM.
A number of pouches capable of taking a variety of magazines are already offered by a number of manufactures
Other features of the munition pouch need to be considered.
Some ammunition pouches have a pocket for a pistol magazine on their front. Such could also be used for other equipment such as wire cutters, flashlights etc.
Many ammunition pouches do not have flaps, so it may be prudent to design the flap as removable.
If fitted, should a flap need to be lifted up, as is traditional or is it more efficient to have it open forward?
What is the most useful fastening for an ammunition pouch? Fastex buckle or tab and staple?  
A possible design might be a separate flap piece held by a strap and quick release buckle at both front and back. This might also facilitate the pouch being adjustable to magazines or loads of varying height
A single, filled munition pouch and a magazine on the rifle gives a shooter 90 – 120 ready rounds, which should be ample if correct fire discipline is observed.
The remaining munition pouches might carry other contents.
Such a pouch can take items such as rifle grenades or smoke grenades.
It may also be used for items such as some designs of radios.
At least one manufacture makes a “trauma insert” for ammunition pouches which contains an abbreviated CI-IFAK. The Size 1 utility pouch could be used for an intermediate-sized CI-IFAK
Extra small utility/frag pouches to hold additional grenades can be added if the wearer desires

Dump Pouch

Dump pouches” have come into vogue in recent years. Many are designed to fold or roll up so they take up little room when not in use. Some are cleverly sized so that they can carry a soldier’s helmet when it is not worn.

Cargo Pocket Liner Pouch

A soft, padded pouch that could fit in the cargo pocket of a soldier’s trousers would be useful for survival items and first aid kits. This should have loops that fit over the pocket buttons to keep it in place

Larger Utility Pouches

Larger pouches may be needed for specialized roles. These could be carried as shoulder bags or mounted on larger packs or webbing.
For example, some Canadian military units issued their personnel an extra buttpack to carry their NBC gear in.
The Canadian 82 pattern butt pack was 30 x 25 x 12 cm, which is approximately 9.8 litres by my calculation
The US army M1961 butt pack was 22 x 21.5 x 14 cm, so about 6.89 litres.
The most useful parameters for a buttpack/shoulder bag need to be determined.
Provision to attach small and medium utility pouches to the exterior needs to be included.

Claymore Bag

The M7 claymore mine bag (“bandoleer”) is another item that soldiers have found to be useful for functions other than its intended role.
Such bags could carry ten 30-round 5.56mm magazines or 27 40mm grenades.
A claymore bag has two pockets with a shared flap and is about 30 cm square. Given their intended contents I would estimate that it is at least 5 cm deep, giving a capacity of about 4.7 litres.
The claymore bag is similar in size to the haversacks used in the American civil war. These were used to carry rations and “table furniture”: a tin plate, cutlery and related items.
The haversack had an easily washed cloth liner designed to protect the bag from the food and vice-versa.
Civilian bags such as this one combine features of both, the larger pocket being useful for laptops

Fasteners and Patterns

I have touched on the topic of fasteners already. Fastex buckles or tab and staple systems are preferable to poppers, buttons, toggles or velcro.
Fastening systems should be operable with one hand and compatible with gloves.
Ideally, we do not want to issue duplicate items in different colour schemes.
It is also worth remembering that disrupting the box shape of a pouch is different to camouflaging a whole person.
The best “off the shelf” pattern for pouches is probably British two-colour desert DPM, although in some examples the darker shade is too orange. A grey-sand and coyote-brown version might be even better.
The high contrast between the sand and brown of desert DPM disrupts both perceived shape and depth. The light sections help counter the body shading that usually can be seen with pouches.
Two-colour desert DPM will be effective in a wide range of environments. In jungle, the pattern helps break up the shape of more verdant patterned garments worn beneath it. In snow, white tape can be added.
Categories
Phillosoph

Soldier's Load: How Much Ammo to Carry

Continuing our look at the soldier’s/survivor’s load, I will return to the subject of ammunition.
Regular readers will know that I am not ashamed to draw inspiration from unusual sources. They will also know I am partial to the occasional video game.
I was playing a western-themed game and came to a point where I was offered a chance to buy some ammunition. I looked at how much ammo I had collected for the weapons I used the most and decided I did not need to buy any.
What was interesting was that I had something like 80+ rounds for the repeater carbine, my primary weapon. Granted that in the game there is a mechanism to make you a deadeye shot and slain enemies generally drop useful ammunition, but if it was in real life 80-100 rounds for a Winchester would seem an ample amount.

Historical Examples

The typical soldier in the American Civil War carried a cartridge box with 40 rounds ready for immediate use.
Yesterday I was reading about World War One trench raiding. Troops did not wear “equipment” (webbing) for these raids but the men carrying a rifle and bayonet carried 50 rounds. Other men carried ten grenades instead. “Marching load” for British soldiers was 90 to 110 rounds.
An account of a World War Two British platoon had each rifleman with 50 rounds and two to four magazines for the Bren gun. How much ammunition was carried in practice may have been more.
German soldiers of the same period are noted for being frugal with their rifle ammunition and letting the machine-guns handle the bulk of the offensive and defensive fire. I’ve encountered 90 rounds as the ammunition allocation for a Mauser rifle. The issue belt pouches only hold 60 rounds as twelve 5-round chargers so the remainder may have been in the pack if 90 rounds were carried.
The Japanese soldier carried 120 rounds. Twelve 5-round chargers were distributed between two frontal belt pouches and a further 60 rounds was in a “reserve” pouch at the back.
The American soldier in World War Two was issued with an ammunition belt with ten pouches, each for an 8-round Garand clip. In his famous study of the soldier’s load, SLA Marshall claims that soldiers generally carry more ammunition than is needed and suggests six clips (48/96 rounds) be carried instead.
If we look a little later in history, the American soldier in Vietnam was instructed to carry 330 rounds for his M16. Other sources say 14 magazines. Bear in mind, a loaded 30-round magazine weighs around a pound each. 880 rounds was allocated for each M60 so the riflemen probably helped carry some of this too.
The British soldier with a 7.62mm SLR was expected to carry five 20-round magazines and a 50 round bandolier or belt for the MG. With the switch to 5.56mm weapons and a rifle capable of automatic fire came a suggested load of 330 rounds: six 30-round magazines and 150 rounds in a bandolier.
In a previous post, I have discussed appropriate and inappropriate use for fully automatic fire with rifles.
If you have a semi-automatic or manual action weapon this is obviously not a concern.
How ammunition is carried may have an influence on the quantity a shooter carries.
Give a soldier two belt pouches that each hold three magazines and he will probably carry at least seven magazines. Three in each pouch and one ready in his rifle.
Give him a single pouch that holds four magazines and he will probably carry five. Give him a claymore mine bag instead and he may fill one pocket with magazines and use the other for other useful items.

A few posts back we looked at the Viet Cong chest rigs. If a wearer decides to carry six AK magazines, he has around 180 rounds.
An AKM 30-round magazine weighs about 1.8 lbs, so six loaded magazines weighs 10.8 lbs.
The equivalent load for an SKS would be eighteen 10-round chargers. Each of these weighs 0.4 lb loaded, so 180 rounds would weigh only 7.2 lbs.

Chargers

Several of the examples given earlier carried their ammunition in chargers (aka stripper clips, but calling them “strips” reduces confusion). The Garand took ammunition in true clips.
Contrary to what TV shows, video games and some supposedly expert gun writers will tell you, a clip is not a magazine.
A clip is a device that fits inside a magazine.
A charger/stripper-clip/strip remains outside a magazine and unloads its rounds into the magazine
Carrying ammunition in chargers rather than magazines constitutes a considerable saving in weight.
Unfortunately. there are not that many modern semi-automatic rifles that can be loaded directly with chargers. The SKS and M14 are probably the only ones you are ever likely to encounter.
Canadian FALs could have their magazines topped up with chargers while the magazine was in place. When Canada switched to the AR-15, this capability was not continued, probably because of the carrying handle.
Many modern AR-15-type weapons no longer have the carrying handle and a replacement receiver top that can take chargers may be possible.
The SKS has an integral 10-round magazine but this can be replaced with a 20 or 30 round capacity part. Since the chargers hold 10-rounds, it is possible to top-up such a magazine when it is only partially empty.
The capability to use chargers is just one of the advantages an SKS has over a semi-automatic AK-type weapon.
While most semi-automatic rifles cannot be loaded directly with chargers, chargers can be used to quickly reload magazines when they are not fitted to a weapon.
For some designs of magazine, a device to facilitate this may be needed. Carry a couple. It is practical to have just a couple of magazines and carry additional ammo as lighter chargers.

A Realistic Load

So how much ammunition is a realistic load?
We are talking personal load here. If you are mechanized, carry additional ammunition in your vehicle.
If you operate in a given area, establish a number of caches with additional ammunition and other useful items.
As a rough guide, if you are a hunter or outdoorsman, aim for 80-100 rounds and two or three magazines, including the one in your rifle. You can probably find pocket room for two magazines without needing a belt pouch.
There are chest-rigs and pouches that have just three single-magazine compartments. Such a rig could probably fit comfortably under a light jacket.
A pouch for a single magazine on your rifle-stock is not a bad idea, given that ammo is of only limited use if you are separated from your rifle.
If you are in the habit of loading 27 rounds into a 30-round magazine then three magazines still gives you 81 rounds.
Nine-round chargers would be very useful in the above case. Nine-round chargers would be useful for general use. They would allow more opportunity for magazines to be topped-up before they are fully emptied.
81 ready rounds will probably be ample for a semi-automatic weapon. Additional ammo can be carried as chargers.

Six and Six

If you are military, you will probably want to carry more ammunition.
Many soldiers weight themselves down so much that they become waddling targets.
Here it is important to distinguish between what is carried and what is worn.
For the ammunition carried on your webbing, set a sensible upper limit. Do not try to carry everything you have on your webbing.
If you must carry more ammunition than the suggested limit below, carry it in a pack, a claymore bag, pulk, handcart or vehicle. Then, at least, you can occasionally put it down if you need a rest or need to move fast.
How much to carry in your webbing? A sensible limit is what I call “six and six”.
For simplicity, I will only consider riflemen. Rifle-grenades, mortars, grenade launchers and machine-guns I will save for another day.
No more than six rifle-magazines/180 rounds and the equivalent of six (standard-sized) hand grenades (c.3 kg), for example: four frags and two smoke-bombs.
This is the ammunition permanently carried on the body and immediately accessable. With the magazine loaded in the rifle included, you have 210 rounds.
If a handgun(s) is carried, the reloads for these are in addition to the six rifle-magazines. A common recommendation is to carry two reloads for a handgun. If your handgun is your primary weapon, more might be prudent.
The six rifle mags and the grenades can be carried in a chest rig, belly rig, equipment belt or across a combination of these.
Add to this load four shell/first-field dressings. Some of these may be carried around the back over the kidneys.
Categories
Phillosoph

Vietnam Chest Rigs

Version 2.4

Continuing my researches on how to carry equipment.
Last night I read a lengthy paper about the adoption of British PLCE. One of the points that struck me was the mixed reviews of the chest rigs trailed. It is probably safe to say that for most readers mentioning chest rigs will bring to mind the Vietnam war.
During this period Soviets and most countries under their influence used belt pouches for AK magazines. The examples below hold four 30 round magazines, although versions holding just three are also known. The side pouch on one of these examples is for an oil bottle. (The East German example with the splinter pattern shows a nice example of “staple and tag” closure, btw.) The North Vietnamese Army (NVA) did make some use of these pouches but a chest rig seems to be a more common option. Understandably such rigs are often termed as “Vietnam”, “Chicom” or “Viet Cong” chest rig.
Commonwealth forces did use some systems that could be termed chest-rigs. One of the photos below shows additional ammo pouches that could be worn above the belt pouches. Certain variants of the battle jerkin used only a pair of pouches on the chest.
It is more likely that the inspiration for the Vietnam chest rig was from closer to home. There are numerous photos of Chinese soldiers in the 1920s and 30s wearing a sort of “apron” for SMG magazines.
Several types of chest rig were in use by the Viet Cong (VC) and NVA.
The “simplest” was that intended for use with the SKS. This had ten identical pockets. Each pocket could hold two 10 round chargers for the SKS, giving a capacity of up to 200 rounds. In practice, one pocket often held a weapon combination tool and an oiler. The pockets could also accommodate a 20 round M16 magazine so this rig was also used by some GIs or Vietnamese with American weapons. It is probable that some of these pouches were used for other items. They appear to be of a size that can accommodate some designs of grenade.
A similar rig held chargers for a Mosin Nagant rifle.
A variety of SMGs were in use in this conflict so there were also chest rigs designed to accommodate SMG magazines. An example is shown below:
The third type of chest rig was intended for use with the AK-47/AKM/Type 56 and related weapons. Typically it had three central pouches each capable of holding a pair of 30 round magazines. One or two smaller pouches were to either side. These could be used for grenades but might have held other items such as loose ammunition, field dressings, cleaning kits etc. It is worth remembering that these items were often produced at a local level or homemade so show considerable variation in both colour and details. Some items had straps that crossed at the back while others are described as having a loop that passed over the head like an apron.

One of the things to note about these items is that “chest rig” is something of a misnomer. Often you see the pouches worn quite low on the torso. A sort of “combat cumberbund” or “belly rig”! Perhaps this transferred some of the weight to the pelvis? Rigs such as these can be worn either high or low, depending on physique, preference, type of rucksac worn etc. NVA/ VC seem to have kept their actual waist belts relatively uncluttered, often with just a grenade pouch and a canteen. Items not needed in the assault seem to have been carried in the rucksac rather than crammed into belt-mounted butt-packs or kidney pouch equivalents.
The Chicom chest rig has inspired a number of other designs. The Rhodesians often encountered enemies using this equipment and developed their own version with four or five pockets for 20 round FAL magazines.
The South Africans also adopted the chest rig. The 83 pattern shown below has a smoke-grenade pouch on the wearers right and two smaller pouches on the left, possible for a frag-grenade and shell-dressing.
There are small fittings that can carry a pen-flare/pen/pencil, knife or small flashlight.
A rather clever feature is that there is a map/document pocket behind the magazine pouches. On the other hand, the sides seem to have some excess material.

South African Chest Rig Contents

Not surprisingly, the Russians also copied the Vietnam chest rigs. The first-pattern Lifchik is very similar to the Vietnam Type 56, but designed for the AK-74 magazines. It also adds provision for carrying a pair of RSP-30 flares. The second-pattern moves the small pouches so they are vertically aligned. The second-pattern also has the option of attaching a belt holding ten 40mm (VOG-25) grenades. 

1st Pattern Lifchik Chest Rig

Second Pattern Linfhik Chest Rig
Some commercial imitations have possibly tried to incorporate too many “bells and whistles”. Some have ignored that a chest rig can also be a “belly rig”. Another problem is the chest rig is often seen as additional rather than alternate carrying capacity.
The Chicom chest rig is very much a compact assault order carrying ammo and grenades and little else. When you start adding pouches for waterbottles, mess tins and rain-proofs it become something else. The main improvements I would make over the original designs is provision to carry a couple of field dressings. I’d also add provision to carry a small fixed blade knife on either the left pouch or left suspender, a snaplink/ carbineer for empty magazines and a small pouch for a flashlight.
The chest region is often shadowed so a chest rig should have a light base colour to compensate for this .
As mentioned above, VN examples often resembled a sort of combat- cummerbund or “belly rig”. A moment’s thought will confirm that you do not want the openings of your ammo pouches up at nipple level or higher, if you are carrying them vertically. You don’t have much choice with the long AK magazines, admittedly.
The chest area is a major site of heat loss, so a lower slung chest rig may help avoid overheating.
Many (western) chest rigs simply try to carry too much, hence problems with crawling, which is your primary means of not being seen or shot!.
Don’t use frontal pouches that hold more than a pair of magazines each.
There are a great variety of options out there commercially. Some can be mounted horizontally or slanted on the chest. The under-arm or hip positions proposed in a later blog is another option.
Basically, the chest/belly rig should only carry a reasonable amount of ammo.
No more than six magazines/180 rounds and up to six (standard sized) grenades, for example, four frags and two smoke. There is probably not enough room on many designs to carry all of these grenades on the chest/belly rig. One smoke and one or two frags seems more likely, with additional grenades carried elsewhere.
You can mount your “pec’ knife;” on a rig (see Survival Weapons or Crash Combat), a shell-dressing or four, a flashlight and a snap link for spent mags.
Some of the shell-dressings may be carried at the back over the kidneys. They are more likely to be accessed by someone treating the wearer, rather than the wearer so the rear position is not a major problem.
If you have a compact weapon-cleaning kit, such as in a discarded flare container, the belly-rig is a logical place to carry that too.
You will not need the latter in a hurry so it can be stowed on the rig somewhere out of the way.
Provision to add other items temporarily can be included.
Categories
Phillosoph

Horseshoe Rolls, Blankets and Gum-blankets

While researching the “Soldier’s Load” a conflict that was often mentioned was the American Civil War (ACW). Sherman’s “March to the Sea” was a frequent topic. From the Confederate side we have “Stonewall” Jackson’s Shenandoah Campaign where infantry covered 670 miles in about a month and a half.

A distinctive element of these campaigns was the use of the “horseshoe roll”, occasionally called a “croissant”. During the blogs on the WW2 Soviet infantryman I mentioned that what was often described as a blanket roll was in fact a rolled greatcoat, which was also used as bedding. The horseshoe rolls used by ACW soldiers were blankets, but they were not just blankets.
It is a matter of record that many ACW soldiers on both sides discarded their issue knapsacks and carried most of their gear in a blanket roll. There are a number of videos on-line showing you how to construct a horseshoe roll. Key point is that they are rolled LENGHTWISE. A very good article on how the ACW soldier carried his gear can be found here and is worth reading.
The horseshoe roll was generally not just blankets. Spare clothes and other suitable items were carried wrapped within it. Often the blanket itself would be protected from damage and weather by wrapping it either in a shelter half or a gum-blanket.
The shelter half of this conflict was a simple square of cloth. Two could be buttoned together and rigged up in various ways to make a very compact two man shelter. Rifle-muskets or local materials provided support.

The gum-blanket was a relatively new invention. It was a cloth coated on one side with a waterproof coating such as vulcanized rubber. The gum-blanket served as a ground cloth. Materials such as hay, cut long grass, bracken or similar can be piled under the gum-blanket to serve as a mattress. If a shelter cloth had been lost or been discarded a pair of soldiers might sleep on one gum-blanket and rig another up as cover. A single sleeper might wrap himself in his blanket(s) and sleep within a folded gum-blanket. The gum-blanket also served as a rain cape. Rain ponchos were constructed in the same way as gum-blankets but many soldiers used a single gum-blanket for everything. The shelter half might be discarded in favour of just the gum-blanket. (Note that some books clearly confuse gum-blankets with rain-ponchos).

Some comments on sleeping in blankets in the field are relevant here. I cannot do better than quote Horace Kephart:
“To roll up in a blanket in such a way that you will stay snugly wrapped, lie down and draw the blanket over you like a coverlet, lift the legs without bending at the knee, and tuck first one edge smoothly under your legs then the other. Lift your hips and do the same there. Fold the far end under your feet. Then wrap the free edges similarly around your shoulders one under the other. You will learn to do this without bunching, and will find yourself in a sort of cocoon.”
It will be noted that this arrangement tends to place a double thickness of material between the sleeper and the ground, reducing ground chill.
The horseshoe roll was supposed to be carried from the weak-side shoulder, allowing the rifle-musket to be more easily fired from the strong-side. If your activities are less bellicose the roll can be alternated from one side to the other to rest one shoulder. The end parts of the roll needn’t be at the lowest point. Such a configuration apparently hindered access to the cartridge box when worn from the left shoulder so the ends were often shunted back.
After the civil war the American Army issued a set of leather straps designed for constructing a blanket roll. This seems excessive both in weight and complication of maintenance. Use some cordage and a parcel wrap of half-hitches. For some suitable knots see my free book on the subject.

The shoulder roll can be easily discarded if needed. On the negative side it is not a very good way to carry items that you might want while on the move. Accessing the any item within it requires stopping and unrolling the roll and then reconstructing it. It is better used to carry “end of day” items. Using a gum-blanket or rain poncho as the outer cover of the roll has the disadvantage that if it starts raining you will have disassemble and reassemble the entire roll. This article describes several ways to carry a gum-blanket or similar item separately.
Osprey Men-at-Arms 214 US Infantry Equipments 1776-1910 (p.23) adds:
By the Spanish-American War Of 1898 the Army had devised a regulation manner of rolling and wearing the horseshoe roll, as Plc. Charles Johnson Post, a New York infantryman, found:
‘In the business of making a blanket roll, you lay the blanket on the ground, put into it your tent pegs [3 pegs] and your half of the two tent poles—for each man carried but one-half the tent—and then arrange your towel, socks, shirt, and extra underwear and roll up the blanket. Then, turning your attention to your half of the tent, fold it lengthwise. This you lay on top of the blanket roll, fasten it at the ends and the middle, much as if reefing a sail, then bend it until it takes its horse-collar shape, fasten the two ends—and there you are ready to stick your head through and sling it. It is excellent. But—and this we learned on our first march to the transport— the blanket roll must be made sloppy, not neat. A hard, neat horse collar will bear into the shoulder like a steel bar, so roll it loose and floppy for the part that lies over the shoulder and with no baggage inside the center section—just at the two ends. It looks like a clumsy, amateur sausage lying out straight, but it is soft on the shoulder. In Cuba our horse collars made us look like a bunch of hobo blanket- stiffs.’
Rain ponchos and similar items made from modern materials may be too light and fragile to form the outer layer of a horseshoe roll. Using them in this fashion may increase the likelihood of them becoming damaged or punctured. A heavier duty item such as a canvas shelter half or a groundcloth may be more suitable. There are a number of websites that explain how to make your own gum-blanket/ groundcloth by painting one side of a cloth with black latex paint.