Categories
Phillosoph

Coveralls: A Dose of Mono

I was watching an episode of MacGyver where they break into a museum to steal a jade dragon. No gloves, and they go in through a ventilation duct. All high security buildings have spotlessly clean air ducts large enough to accommodate fully grown men, naturally.
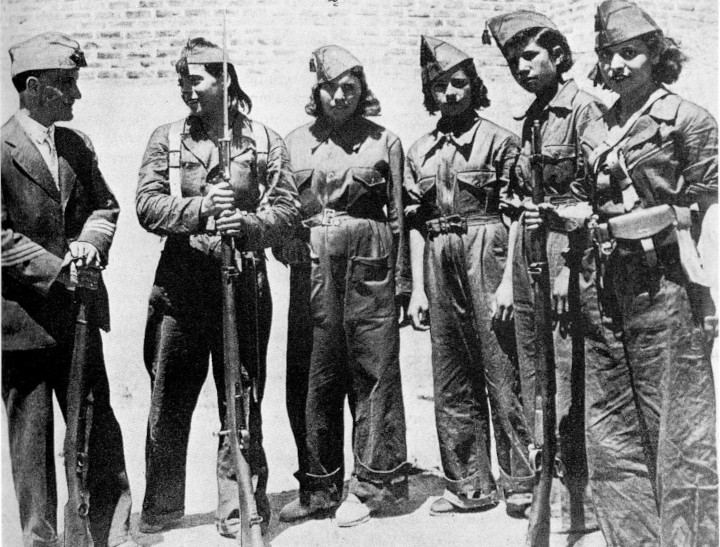
Miliciana wearing monos
In such a situation, I think to myself, drab-colour coveralls would probably a very good idea.
After the heist, the coveralls may be discarded to eliminate forensic evidence and change appearance. Anyone who looks like they have been crawling through dirty air ducts is going to draw attention.
Also, dressed in drab-coloured “boiler suits”, anyone that does see you may assume they are seeing maintenance or cleaners. You are probably less likely to be challenged than someone in wandering around in civies or a black polo neck.
The approach or departure to the target building may involve moving though rural terrain or parkland. A drab-coloured coverall provides a measure of camouflage in such conditions.
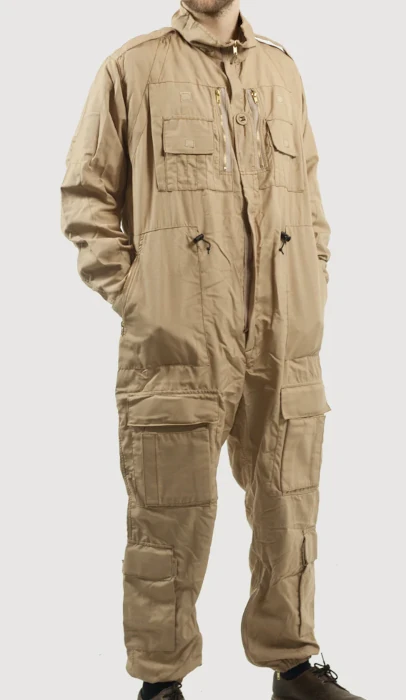
As an aside, I know of an airgunner who used to hunt wearing a pilot's flight suit. It was a single colour, but the loose cut created folds and patches of shade that tended to break up his shape. Fooled the bunnies, anyhow!
Around the same day as I was watching that Macgyver episode, I had been reading one of James White's “Sector General” books.
Implied in the book was that Monitor Corps personnel spend a lot of time wearing coveralls. Since most of the Monitor Corps in the books are spaceship crews or perform maintenance on the hospital station, and changing into environmental suits is fairly common, this makes good sense.
If I was designing a military-style organization from scratch, a range of coveralls for general and working wear seems a good start. Like the Spanish nearly a century ago, it may be found they are useful for field wear too.
That night, a Ghostbusters movie comes on. Dark tan coveralls are their uniform.
Before was an episode of Knight Rider, and it looks like the henchmen are wearing dark blue coveralls with a beret and police belt.
I also watched the Indian movie “Fighter”, where everyone is wearing flight suits, even if they are just cadets marching around the academy grounds.
At least two or three Bond films have the henchman spear-carriers in coveralls.
Synchronicity, or is the universe telling me to write about coveralls?

Coveralls, Overalls, Boiler Suits and Jump Suits

In British English, coverall and overall are essentially interchangeable. Americans reserve “overall” for the bib-and-brace type garment that paradoxically leaves the arms and shoulders uncovered. Brits usually call the latter “dungarees”, not to be confused with the USMC garments of the same name! Mia Goth demonstrates American overalls don't cover all below:
Mia Goth in dungarees/overalls
“Boiler suit” is another term for a coverall, unless aircrew are wearing them, when they become flight suits. Jumpsuits tend to be a snugger cut, particularly if used for free-fall jumps.
Honourable mention goes to the siren suits that helped many Brits through the Blitz.

Raider Wear

Another episode of MacGyver features Treasury men raiding a nightclub. This provides the bizarre spectacle of men in suits and ties lugging around a battering ram.
You would think that a “non-uniform” law enforcement organization would have a few “riot coveralls” or “squad suits” for such occasions.
As well as the obvious protective benefits, having a few people in such garb would at least provide some uniformed presence and prevent an operation being mistaken for a mafia outing.
An old Shomer‑Tec catalogue I have describes the Topps Squad Suit as “a rugged, low‑cost, professional‑looking garment that can be worn over, or in place of, a uniform during demanding operations.” and suggests keeping one in a patrol vehicle.
The coverall would need some form of distinction. “Law Enforcement” on a back panel would encompass the needs of most potential users. Velcro patches on sleeves and breast for more specific identification.
Elsewhere I have discussed the influence of police uniform colour on both the wearers and those they interact with. The Topps Squad Suit and many similar items come in black or very dark blue. This would be very uncomfortable in sunny locations, and looks very fascist, which may be counter productive. Dark colours also really show up any dirt.
In many parts of the world many civilians dress dark, so there is a potential for misidentification.
A coverall in police blue-green would be useful, and be an economical way to introduce and experiment with the concept.
Possibly the best single choice is “wolf grey”, as is used already by some police tactical units. As a neutral colour, it offers some concealment in many rural or urban environments and low‑light conditions for when this is needed.

Monos

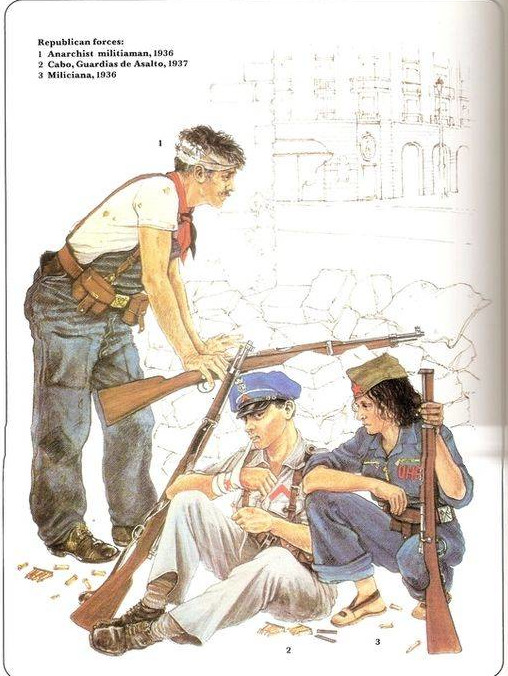
During the Spanish Civil War, many of the militias were formed from factory workers. Many fought in their work overalls and coveralls, known as “monos”. Monos were found in greys, browns and khakis, but many of those of industrial origin were dark blue. One anti-fascist publication even called itself “El Mono Azul”.
Republican fighters wearing overalls and coveralls (monos)
The Soviet Union, Nazi Germany and Italy (among others) supplied the combatants with tanks, aircraft and advisors. Included in the military aid supplied were coveralls for tank crews, air crews and maintenance staff.
Monos became popular, not just for crewmen and technicians, but for front-line use, and not just with the ex-factory workers.
Many Spanish police formations had elaborate duty uniforms that were not suited to hard wear and combat. Police units that traditionally wore blue often selected dark blue monos.
Browns or khaki monos were more common with more conventional military units.
While the fashion of using monos as combat wear probably began with the Republican (left-wing) factory workers, troops on both sides used them.
“Osprey Men-At-Arms 074: The Spanish Civil War 1936‑39” has a number of photos and images of Nationalist (right-wing) troops wearing monos. Osprey Men-At-Arms 498: The Spanish Civil War 1936‑39 (2) Republican Forces” notes that monos were appreciated for their pocket capacity. An International Brigade veteran recalled his comrades buying new ones before the battle of the Ebro in 1938 (MAA 498 p.44).
The Spanish CIvil War had a number of influences on military fashion, but oddly, the mono was not one.
The US Army did experiment with a one-piece jungle-fighting outfit during World War Two. Dysentery was quite common in such campaigns, so the one-piece was found to be “less than ideal” in such situations!

The Bottom Line

That brings me to a “fundamental” issue when selecting a coverall. Does it have a “bomb‑chute” or not? A number of outdoorsmen who have experimented with one‑piece outfits have failed to consider this feature!
Another common error seems to be attempting to use the pocket capacity for dense items such as water bottles and ammunition. Since coveralls are loose in cut, this often proves uncomfortable.
It occurred to me that a coverall or two might be a useful thing for an individual outdoorsman to have available, too.
Coveralls seem warm for their mass and bulk. This may be because you are trapping a single body of air that can freely circulate, rather than separate masses for the lower and upper body. Clothing riding up on your lower back is less of a problem. Coveralls can also be combined with other warm clothing, either over or under.
I suggest that for general use you buy uninsulated coveralls. It is easier to add more insulation under or over than sweat it out in milder conditions. There should be enough room to wear your coveralls over other garments.
With just a shirt and shorts beneath, a coverall should be comfortable in warmer weather.

Bug‑Out Outfits

In previous posts we have talked about the need to have a bug‑out outfit as well as a bug‑out bag. Something that you can don quickly and easily that will provide some protection from the elements and possibly help conceal you from hostile observation.
Many coveralls meet these criteria and will fit over whatever you might happen to be wearing at the time.
A good coverall usually costs less than a combat jacket. Some police riot coveralls include Goretex as well as being fire‑resistant.
If a coverall is a full‑time addition to your bug‑out kit, you can pack the pockets with useful low density gear: hats, gloves, fire kit, cordage, space blanket, compass, plastic mirror, whistle, earplugs, sun glasses and so forth.
If you are going hiking or hunting, a coverall can ride rolled up in your pack until the terrain gets rough or you are away from civilization.
Coveralls that lack a bomb‑hatch tend to be very reasonable in price, being mass produced by the thousands for painters and mechanics.
The main challenge may be finding a set in a suitable tactical colour. Army surplus outlets often have a selection, some of them being intended for tank, AFV and aircraft crewmen. Most examples are single colour, camouflage patterns in such garments being rarer.
Choice of coveralls “with bomb‑hatch” is narrower. Most of the examples I have seen have been tank- or AFV-coveralls.

My First Coverall

I am not a great fan of MTP, since it tends to blob‑out to a khaki‑drab monotone shape. On the other hand, at closer distances the pattern may make dirt or stains less obvious. I was also a little concerned the sand/beige‑coloured monotone AFV‑coveralls might be a little light for general use. I don't intend this garment as my primary camouflage, but khaki‑drab is probably the ideal monotone for British countryside.
What swung it was the MTP coveralls I was offered were cheaper than most alternatives, and were in flame-retardment material!
MTP Flame-retardent Coveralls
When the coverall arrived, I was pleasantly surprised that it was lighter in mass than I expected. I am used to military gear being on the heavy side! The cloth was actually quite soft and comfortable. I would swear it was a good quality poly/cotton, but the label says it is all aramids and other flame‑resistant stuff.
What did puzzle me was the lack of pockets. This example had only two pockets, located on the upper thighs. The examples I had been looking at definitely had chest pockets, among others.
From what I can make out, the British Army currently uses two types of AFV‑coverall.
One type (NSN 8415-99-226-0794) is currently for training only, made from poly/cotton, and of the same design as earlier monotone AFV-coveralls (NSN 8415-99-212-5330), with about a dozen pockets. The exact NATO stock number (NSN) will vary with garment size
The other type, COMBAT FR, MTP for CR2 (NSN: 8415-99-313-5415) is for combat use, made of flame‑retardant materials and of a newer design that has only two pockets!
Because of the camouflage pattern, seeing pocket details can be difficult in on-line photos. The combat coverall has no flaps on the thigh pockets. The training version does, and additional pockets on the chest, hips and lower leg. The older design has a waist drawcord (missing on my example), while the newer uses Velcro waist adjustment.
Pocket detail of the older design is easier to see on photos of the sand/beige‑coloured version.
Sand/Beige AFV-Coveralls showing pocket arrangements

Adding More Pockets

Now, I would rather have pockets and not need them than need them and not have them.
Luckily, I came across a reasonably priced damaged MTP training coverall. The coverall is too small for me, but was designed for someone of my height, so the pockets were be of the right size. Chest size was too small to fit me, but I could salvage the pockets and fit them to my flameproof coverall.
This makes my coverall slightly less flameproof, but I don't drive a tank or an F1 car, and will make an effort to avoid catching fire.
And so I spent a couple of weekends unpicking stitches and sewing pockets onto the newer coverall.
Buy the older pattern poly/cotton “training”coveralls and you can save yourself some sewing.
My coverall now has 15 pockets!
• I added a small internal pocket inside one hip pocket to hold my debit card. Also inside this pocket is a D‑ring I can hang my keys from. (The keys are mounted on a carabineer)
• Added to the left breast pocket is a loop of webbing a snap‑link can be mounted on. This folds away beneath the pen pocket flap when not needed.
The damaged and now pocketless training coverall provides me with a lot of cloth and a couple of zips and Velcro patches for other projects. I may use some of this cloth to reinforce the elbows and knee areas of my coverall. I plan to use some to add some sleeve pockets when the 12 cm zips I have ordered arrive. Armpit vent zips are another option I am considering.
Admittedly, I have not yet put the coverall to particularly challenging uses yet. I jump into it if I want to fetch something from the local shop, hence the debit card pocket and key‑hanger. I don't even need to take my dressing gown off!
It has been quite cold recently but the coverall has been comfortable with just a light hoodie thrown on over it.
Inevitably, when I get back from the shops I often lounge about in the coveralls, and have been quite comfortable without needing the heating on.

Pockets Galore

The modified coverall now has the following pocket arrangement, in addition to those already mentioned:
• Two large chest pockets, with “napoleon” zip-fastened access. Mounted on the outside of each of these is a Velcro-flapped pocket designed to hold four pen or pencil‑like objects.
• Two roomy patch hip pockets, with slanted zip-closure. Zipped pocket closures are a feature many expensive combat and outdoor trousers often lack!
• Two Velcro‑flapped thigh cargo pockets. On the outside of each is a pocket designed to hold and allow the use of a notepad when seated. These are rather like those found on flight suits, but have a sideways opening panel to hide the notepad when not in use. The notepad inserts from one side.
Notepad holder of AFV coveralls
I sewed the thigh pockets to the upper surface of the existing thigh-top pockets the coverall had. These latter pockets are roomy, bellowed and have a side‑zip, allowing them to be accessed when seated.
• There are also two roomy calf‑level cargo pockets. These are probably best used for low density items such as cordage, emergency toilet paper in a ziplock, and a space‑blanket. If I have to use bowyangs with my coverall, I may experiment with passing them under the flap of the calf pockets. Calf pockets are a logical place to store bowyangs.
Adding pockets to a coverall proved to be a relatively simple task. Despite the different material, mine were a near perfect match. It doesn't really matter if the cloth you are using is not an exact match. Variations in hue and shade will add to the disruptive effect.

Zips and Handles

The main zip of the coverall is two-way, opening at each end. This zips up all the way to the points of the collar, rather like a Norwegian Army shirt. The left side is thoughtfully provided with a flap of material that prevents the zip teeth contacting your neck or cheek when the collar is worn open. The older version lacks this flap, but it is easily added.
Decades past, I read a book or comedy skit where a character claims fly zippers were mounted the wrong way, and should pull up to open. The coverall zipper does pull up to open, and that character is actually right! It is much easier to operate such a zipper one‑handed!
And a few days ago I came across some rain pants I brought in British Columbia (where they know about rain!). The zips on the side pockets pull up to open! Something to think about if modifying gear.
A two‑way zip is handy for situations other than a call of nature. You can open the lower end more to access garments and pouches worn under the coveralls.
If you keep your trousers up with a rigger's belt, opening the zip from the bottom allows you to use this, combined with your carabineer keyring.
On the subject of calls of nature, both the training and the combat coverall have a J‑shaped zip at the rear, covered by a Velcro flap.
AFV-coveralls bomb hatch
What appear to be shoulder straps are in fact grab handles. On the newer coverall, these are held down with Velcro so they are less likely to catch on projections within a vehicle or out in the field. A one‑piece garment and such handles allow a wounded or stunned man to be pulled up out of a damaged vehicle.
These handles could be used like shoulder straps to display rank, but would need a wrap‑around rank insignia rather than a slip‑over. Poppers are probably the best way to achieve this, although buttons, Velcro or hook and eye fastening are other options.
Both MTP coveralls have side vents that allow you to access the hip pockets of garments worn underneath. On both coveralls, the left is secured by Velcro and the right by a zipper. I have no idea why!
The right vent could be used to increase air circulation to the coverall interior. I suppose the rear zip could be used in this way too.
I have heard it claimed coveralls are often long in the body or short in the leg, but this example is actually a very good fit for me, and I am long‑legged.
Many old soldiers seem obsessed by the topic of blousing trouser legs. Doesn't matter that young soldiers have inadequate camouflage practice and their vehicles have no armour, rant about those trouser bottoms!
Many coveralls have elasticated ankles, so “problem” solved! If blousing is so essential, why don't combat trousers have the same? (Not really an issue with me, and I am an advocate of gaiters when available).
Many coveralls also have calf zips that allow you to put them on or remove them without removing boots. It also lets you roll up the legs, should there be a need.

Cons

Other than less than the expected number of pockets, my major complaint about the coverall is that the fly (flap of fabric over the main zip) and the baffle (draft excluder flap behind the zip) seem to be made the minimum width necessary. Someone doubtless worked out this would save so much cloth and so many pence per hundred coveralls made.
It would have been nice if the fly had been wide enough to allow popper fastening as an alternative in hot weather to using the main zip. I could always open the lower end of the zip, I suppose, provided there are no objections to me having my flies open!
The main zip and that of the right side vent have a tendency to catch on the fly or the baffle if you are not careful when zipping up. This may be due to the zips themselves, which have quite small teeth. The zips on the training coverall seem better in this respect, although the main zip on mine was the major incidence of damage.
The Velcro on many of the pockets is a potential source of noise, which means you may not wish to access those pockets in certain situations.
The Velcro pile on the sleeve cuff sometimes catches on a square of hook Velcro on the chest pocket, resulting in unintentional noise. Admittedly, this mainly occurs if the cuff has not been fully closed, so is more likely in hot weather. The square of hook holds the pen pocket flap open, so could be removed or covered by various means. Or construct a tape‑like strip of cloth that covers the exposed section of pile on the cuff.

Update

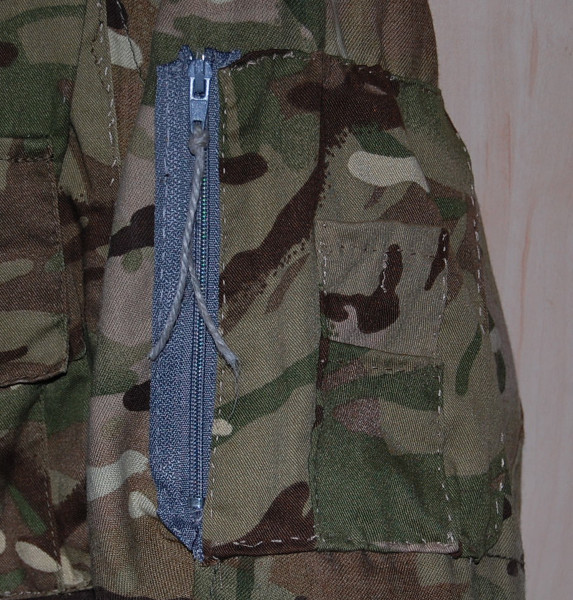
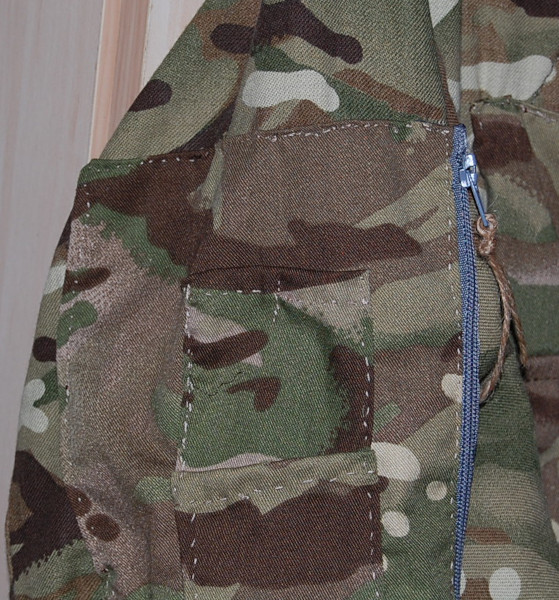
Zips arrived. I based the sleeve pockets on those often seen on many bomber jackets, with a vertical side zip. A five inch zip is a little small for this, even with my small hands, so I would suggest using six-inch.
The armpit zips have an opening less than five inches, but using a smaller zip might have been too fiddly. It is easier to shorten a longer zip.
Reasonably happy on how the sleeve pockets and armpit vent zips have turned out.
The grey zips are much less obvious than the flash photography makes them appear.
Left Sleeve Pocket Added to Coveralls Right Sleeve Pocket added to Coveralls
Coveralls are easily modified or customized. Some of the features described on this page may provide you with inspiration. If anyone is interested, I can provide details and measurements of the pockets I used.
Does a coverall have a place in your outdoor wardrobe? If you are not sure, it is within most of our means to experiment with one of the lower priced examples. It will probably prove useful for something, even if it is just doing the gardening or clearing out the garage.
Just please don't rob any museums.
Categories
Phillosoph

Poncho-Liner Improvement: Pops and Zip

In my blog on foundation survival equipment, two of the items were a rain poncho and a blanket. Given how expensive good blankets are these days, many of you will have opted for a poncho-liner (aka “woobie”) instead.
Why a blanket/poncho-liner rather than a sleeping bag? A good sleeping bag is well worth having. In warmer conditions, however, a poncho-liner may be a better choice than that bulky five-season expedition bag you just had to buy, “just in case”. In colder conditions, a poncho-liner may be combined with a sleeping bag of more modest (and more practical) capabilities.
In case you have not worked it out, a more practical sleeping bag purchase would have been a two or three-season bag that can be combined with other items in colder weather, including another sleeping bag. Generally, several thinner layers trap more warm air than one very thick one.
The poncho-liner was designed to be part of a warm weather sleeping system. The instructions are that the poncho-liner is to be tied to a GI-issue rain poncho, with the rain poncho outermost. The soldier lies on one half of the combination and folds the other half over themselves. The snaps (poppers) on the rain poncho should not be used to fasten the opening if sleeping in a combat zone.
Tying the liner to the poncho may not be necessary. Threading the tapes through the eyelets may keep things together by friction alone.
Easiest knot is to make a loop at the base of the cord and pass it up through the eyelet. Make a loop higher in the cord and take it over the edge of the pooncho and pass the loop through the first. Hold the free end and pull the other side of the second loop to pull the first loop snug. This is very easy to tie and easy to undo with cold, wet hands. This is “two-thirds of a Highwayman's Hitch”.
Easy knot for attaching poncho to liner
The above method of using rain poncho and liner together has become known as a “ranger roll”, not to be confused with the packing method of the same name. It has been pointed out to me that this system resembles an Australian swag, with the obvious difference a swag uses heavier but breathable canvas,
Ironically, the best way I have found to pack a poncho roll is the other kind of ranger roll.
The poncho and liner (presumably as a ranger-roll configuration) is designated as a sleeping system for temperatures above 50°F (10°C). Put another way, if your breath is fogging, make more elaborate sleeping arrangements.
Rigging your rain poncho as a shelter, such as a ridge tent or lean-to, will trap a layer of air above while you sleep wrapped in your liner. You will be better ventilated and more comfortable than the ranger-roll. Where tactically possible, a fire may be built before a lean-to.
Insulating yourself from ground-chill will also facilitate sleeping at lower temperatures. Place hay, browse, bracken etc between yourself and the ground. Wreckage such as seat cushions may be used. If you have an insulated kip-mat, it may be used instead of or in addition to the previous measures.
If you want to use your poncho as a shelter you will need to carry some cordage, pegs and possibly poles. The two hanks of cord I recommended adding to your EDC will do fine. Since most ponchos or liners do not have a waist cord such cord may be knotted around the waist when wearing a rain-poncho and/or poncho-liner. Bungee cords are an alternative to cordage for shelters, and may also be used around the waist if your brought them long enough.

Pocho Shelters

Some ponchos only have eyelets at the corners, or even lack these. Fit eyelets to each corner and the centre of each edge.
There are alternate options, of course. One of them is a bivi-bag and a pair of poncho-liners.
 
A poncho-liner is a sensible thing to acquire, even if most of the time you just throw it over yourself when watching telly in the colder months.
Useful though the poncho-liner is, there is room for improvement.
Below is a video of “Green-Craft's” poncho-liner improvements:

Personally, I found some of the modifications described hard to fully comprehend. Long, verbal descriptions on a video are not the best means of communicating information. The video could have benefited from some more illustrations and written lists.
I decided not to use many of these suggested modifications.
For one thing, I do not like “hand-warmer” pockets. Move with your hands in your pockets and you cannot defend yourself nor save yourself if you fall. Essentially, hand-warmer pockets are diametrically the opposite of what this blog is about.
I also had concerns that some of these modifications would affect the packability of my poncho-liner.
And I am short on funds, so cannot afford all the bits needed for the modifications even if I did want them.

The Head Hole

Why did the inventors of the poncho-liner not include a head hole so that it could be worn under a rain-poncho?
Perhaps it was something to do with the commitment to the war in Vietnam? Warm clothing was not seen as a high priority?
Modifying your poncho-liner so that it can be worn as a real poncho is probably the most useful modification you can make, and it is relatively simple.
You will need:
• A 40 cm open-ended zip of suitable colour and finish
• About a metre of suitably coloured double-fold bias tape
• Sewing supplies. A needle, suitably coloured thread, pins, chalk, scissors/shears, a tape measure.
You do not want a zipper with shiny nor reflective teeth, so you will probably get a plastic zip. Colour and shades should be one that blends well with the basic appearance of your poncho-liner.
My poncho-liner is in German Tropentarn desert camo (aka “desert flecktarn” or “fleckdesert”), which is actually quite a good general-purpose pattern. Thus I brought a zipper described as beige.
I brought my double bias tape and the colour was described as “stone”.
If you have some scraps of suitably coloured or patterned material you can make your own bias tape by cutting it diagonally. Using different scraps will enhance the disruptive effect.
There are videos on how to make bias tape and how to join the different sections. You will need and iron and possibly a former.

The Cut

Decide which side of your poncho-liner will be the “outer” and which the “inside.” Also decide which part will be “front” and which “back”. My poncho-liner has a label in one corner so I arranged it so that this would be inside and at the back.
As evenly as possible, fold your poncho-liner width-wise. Then fold it lengthwise. The corner of the folds should be the centre of your poncho-liner.
Many blogs ago, I advised you to buy some chalk and add it to your EDC. You probably had several sticks left. Add some to your home sewing kit, it is times such as these it comes in useful.
Measure down from the centre corner 8 cm and mark a spot with your chalk. Make an 8cm cut through both thicknesses of the poncho-liner. Note that the cut you are making is lengthwise, going from back to front.
Unfold the poncho-liner. From the edge of the cut measure 19 cm and mark a point with chalk. I used a set-square here to ensure the line was perpendicular to a width-wise fold. Cut down the front 19 cm.
You now have a poncho-liner with a 35 cm hole in the centre. Check this fits easily over your head. Make it a shade bigger if necessary.

Fitting the Zip and Collar

Unzip your zipper into separate halves.
On the outermost side of the poncho-liner, place your zipper parts on either side of the head-hole.
Position them so that for each the teeth are on the opposite side to the opening.
You should be looking at the “back side” of the zipper and the puller should be on the front-side of the poncho-liner when fully down.
Pin each of the zipper halves so that the toothless edge is flush with the cut edge of the head-hole.
Note that your zipper is longer than the hole you cut. Make sure they are closely aligned. Try closing the zipper while it is still only pinned in position and adjust as necessary.

Fitting the Double Bias Tape

Once you are happy with the position of your zipper, you need to pin the bias tape into position.
I suggest you watch a few videos to familiarize yourself with how this tape is used. We are going to fold it all the way over the edge of the head-hole. If you look at the outer edges of your poncho-liner you will see a similar method has already been used to finish that edge.
Cut two lengths of bias tape about the same length as your zipper. Unfold the tape so that you are looking at its “inside”.
Place the tape, inside uppermost, over your zipper half. Align the inner edge of the tape so that it is flush with the cut-edge of the poncho and the toothless edge of the zipper. Pin in position and repeat for the other side.
You can remove the pins you put in to hold the zipper.
There should be pins securing both tape and zipper to the poncho-liner.
Note that if I was to do this again, I would use short lengths of bias tape to cover the top and bottom of the cut before adding the zipper. What I have done does not look too bad (on the outside!), but it could have been neater.

Sewing

I started off trying to use a “mini-sewing machine”. This was very cheap when I brought it. I notice the price is creeping up now!
After attaching the first zipper half I got sick of repeatably rethreading the thing, and realized I could probably do a neater job hand-sewing. Some sections would need to be hand-sewn anyway.
Sew along the crease of the bias tape that is closer to the hole.
Once this is done, fold the tape so that it completely covers the cut edge of the liner and the other crease touches the inside of the poncho-liner, the far edge of the tape tucked in.
Both creases of the tape are thus folded and both edges of the tape tucked in.
Sew just inside the edge of the tape so your thread passes through all four layers of tape, the zipper and the poncho-liner.

Finishing the Zipper

Close your zipper and tuck each end through the cut to the inner side of the poncho-liner.
Finish the ends of the bias tape so they are sewn to the zipper.
Since the top and bottom of my head-hole was untaped, I put a few stiches through the zipper and through the poncho-liner to close off any opening that remained.
Lastly, add a length of cord or tape to your zipper-puller.
This will stop it rattling. It also lets you easily work the zipper if your hands are cold and numb or wearing thick gloves.
If you can get some bootlace that matches the ties on your poncho-liner, that would be cool. I used a length of “desert-camo” 3mm budget paracord, which does not look out of place.

The Zipper Explained

Why use this configuration for your zipper?
When used as a garment, the teeth of the opened parts of the zipper will not contact your bare neck. You can roll the edges of the opening outward if you wish. This is shown in the photo immediately below.
There are other ways to prevent the teeth rubbing the neck, but the above method is one of the simplest and involves very little sewing.
Poncho-liner with zippered neck opening
The puller of the zipper is at the front when opened so that you can adjust the neck opening to vary ventilation or retain more heat.
The zipper I brought was described as beige but the actual colour was lighter and more yellow than I had hoped. Because very little of the zipper is visible on the outside, I got lucky and it blends very nicely with the rest of the poncho-liner. I think it may work better than the dark green zipper I also considered.
In practice, the zipper will usually be covered by a scarf or shemagh.
The zipper I brought was missing a tooth at the very top. This caused the puller to jam if the zip is fully closed. Fortunately, by tucking the very bottom and top of the zip, the last few centimetres of each end are not used, yet the opening can be fully closed. A combination of luck and improvisation!
Poncho-liner with zipper opening fully open
The bias tape I brought was described as “stone” in colour. I was expecting something with a hint of brown, but it proved to be a light, very neutral-looking grey. Not surprisingly, this colour and shade goes very well with both the zipper and the poncho-liner in general.
The camera flash probably creates a greater contrast than the naked eye sees.

Poppers

Once I had fitted the zipper, I went about installing some plastic poppers (aka “snaps”, “snap-fasteners”). These may need special pliers to fit.
You will need something that can poke a small hole through the poncho-liner. I used a stout sailmaker's needle I have in my home sewing kit. A set of these is worth having. The smaller ones go in you EDC or travel kits, the larger into your home sewing and/or repair kit.
You can chalk the needle to make the holes easier to locate.

Getting the Poppers Right

Lay-out your poncho with the inner side upwards.
Mentally divide it into quarters. We will be installing poppers using the following rules. The reason for this will be explained later:
• Each quarter will have the popper halves all of the same time. A quarter will only contain “male” poppers or “female”.
• If a quarter at the top has male poppers, the quarter immediately below will have female, and vice versa.
• If a quarter on the left has male poppers, that on the immediate right will have female, and vice versa.
• Quarters that are diagonally opposite will contain the same type of popper half.
I started off by installing the corner-most popper halves. Concentrate on getting these right and then it is just a matter of using the same popper type for each quarter.
I installed the corner poppers 40mm in from the side edge of the poncho-liner and 190mm from the top or bottom edge. If you are on the large side, place the poppers closer to the edge.
Next, fold your poncho-liner width-wise. Use the top and bottom poppers you have just added if you wish.
From the width-wise fold, measure down 240 to 250mm and install a popper 40mm in from the side. Make sure each quarter of the poncho-liner has the same type popper-half.
When you are wearing the poncho-liner, using this popper forms a sort of sleeve. The opening is generous enough to allow for bulky cold weather clothing. You can also slip your hand in and use it as a hand-warmer, “Fu Manchu”-style.
You will want to add a few more poppers down the side between the “sleeve” popper. I chose to add three more to each side.
With your poncho-liner still folded width-wise, fasten the sleeve and corner poppers. Make another width-wise fold so the corner popper touches the sleeve popper. Mark where the fold is and install a popper. As always, make sure each quarter of the poncho-liner has the same type popper-half.
Install additional poppers between the sleeve and corner poppers and the middle popper you just fitted.

Finishing the Poppers

The poppers I had purchased were supposedly “beige”. They turned out to be way lighter than expected, and had a gloss finish! When installed on the poncho-liner they appeared like they were white.
Luckily, I have some enamel model paints, several in colours close to that of the poncho-liner. I used these to paint the outer sides of the popper halves. I did not bother to paint the inners. I suspect the paint on the inners will either wear off too quickly or affect functionality, but try it if you wish.
Painted poncho-liner poppers.
For the record, the colours I used were Humbrol no.84 Stone and Revell no.83 Leather Brown. None of the poppers passed through green areas of the camouflage, so I did not use any of my green paints. These are not exact colour matches for the poncho-liner, but if someone is close enough to see the difference camouflage is no longer an option!
Like most painting, a second coat will improve it. You can stipple the surface to produce a more matt-effect, or even sprinkle a little sand on the first coat. However, given that the surface of the poncho-liner is quite smooth, the practical value of this is moot.
While you are at it, see if the poppers on your rain-poncho could use some paint. 
Again, the flash on my camera probably shows them up more than the naked eye can discern them.
Below is a shot taken without flash.
Modified poncho-liner photographed without flash
You may not be able to avoid painting your poppers, but start off with some that are matt, medium shade and a natural or neutral colour if you can.

The Poppers Explained

Why did I insist such attention be paid to which popper half went in which quarter?
If you want to sleep in your poncho-liner, fold it lengthwise and tuck under the foot-end. You will find you can use the poppers to fasten the free long edges. Much more compact and less bulk than fitting a long zip on this edge!
Personally, I find sleeping like this a little restrictive and am more likely to use the liner like a conventional blanket. Part of the appeal of the liner as a warm weather sleeping system is that it does not confine you like a sleeping bag. Best way to turn the poncho-liner into a cold weather system is use it with a sleeping bag!
Obviously, if the poppers of the rain poncho on a ranger-roll should not be fastened in a threat environment, the same goes for the poppers you fitted to your liner when sleeping.
Wearing your poncho-liner? Two sets of poppers line up to create a sleeve-type opening. Those below can be used to close up the sides.
These simple modifications will take you less than a day, even if you have to hand-sew.
Categories
Phillosoph

If You Must Wear a Tie…

“It's Christmas in heaven
The snow falls from the sky
But it's nice and warm, and everyone
Looks smart and wears a tie”
The previous blog on neutral and natural colours touched on the topic of capsule wardrobes.
Not all of your clothing can be tactically orientated. You will need some clothes for formal occasions and other instances where you have to “dress-up”.
As a change from the norm, and to compliment my other articles, I would like to offer some personal opinions, specifically on the topic of neck-ties.
It has been many decades since I have had to wear a tie for work. Tee-shirt and cargo trousers is a more usual look for me.
When I do have to smarten up, people are often surprised at how well I “scrub-up”.
I will admit part of this is probably shock, since they are used to me dressing otherwise. Being tall and with long legs also helps. I would like to think part of my successful transformation is attention to detail.
Half a dozen years of wearing school uniform taught me that wearing a tie does not automatically make you smart or presentable. Even if you are James Bond!
James Bond in pink tie
Let us start with a bad example. A still of Sean Connery as James Bond in “Diamonds Are Forever”.
• The one thing about this tie that I do not have a problem with is the colour.
Wearing a tie stylishly is about contrast. How well does your tie compliment or clash with the other garments you are wearing? In later scenes, Bond adds a cream-coloured jacket to this outfit and the pink looks really good with this.
In previous centuries pink was regarded as a strongly masculine colour. A confident man can wear pink and make it work for him. I imagine any woman that comments on Bond's tie colour opens herself to the full Bond charm and wit!
• The obvious flaw with this particular tie is that is looks too short and too wide. Bond looks like an infant dressed up for a wedding.
The Bondsuits website explains this look was deliberate, this being a fashion or trend of the time. This reminds us that style is something distinct from trends and fashion. Just because something is claimed to be fashionable or trendy does not mean it should be followed blindly. Have the confidence to reject what you dislike or what feels wrong.
• Ties work best if worn with a jacket, waistcoat or jumper. Bond is seen here without his jacket and the tie seems to just hang there, not sure what it is doing. Literally, “at a loose end!” If you really must wear a tie with just a shirt, try wearing it GI-tuck style.
• Notice how the tie is irregularly creased where it enters the knot? I recently learnt this is called a “dimple”. Much to my amazement, some people put this in deliberately! Ludicrously, it is even claimed to be elegant and stylish. In my opinion, it is not. The dimple makes the wearer look inexperienced and that they have poor attention to detail. It looks sloppy and slovenly. We may also add “affected” and “pretentious”.
If you cannot tie your tie without a dimple, try a different knot or different tie. Dimples are for bums and mugs.
Fashion follows blindly. Style selects and rejects what is stupid, looks bad or is impractical.
Stacy from TJ Hooker
Another bad example. This time, the uniforms in the series “T. J. Hooker”. Not even a young Heather Locklear could swing this look.
• Primarily, the duty uniform of a police officer should not include a tie. Ties should only be worn for funerals, formal occasions and parades. To avoid a choking hazard most cops wear clip-on ties. Clip-on ties are the antithesis of style. All the arguments for wearing a clip-on are better arguments for not wearing a tie with the daily uniform.
• The tie is worn without a jacket or other outer garment. This looks sloppy and the bottom will dangle into wounds when giving first aid.
• Remember I told you the secret to a stylish tie is contrast? Virtually no contrast for a tie the same colour as the shirt.
• I am undecided on the pros and cons of women wearing ties. The tie tends to draw attention to the bust, which for a female police officer is probably not a good look.

The GI-Tuck

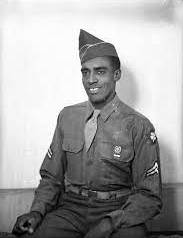
US Army regulations in the 1930s and 40s were that the second button of the shirt was to be undone and the tie tucked into the space between the first and third shirt-buttons.
GI with tucked tie Another GI with tucked tie
Civilians can experiment with tucking it lower.
The required knot specified in regulations was a four-in-hand. This is a slightly asymmetrical knot, so a tucked tie may sit differently depending on which side the fat part of the tie was when the knot was tied.
Another thing to experiment with! Or use a symmetrical knot such as the full-Windsor.
A bit of trivia: The four-in-hand knot is actually a buntline hitch. This, in turn, is a variant of a clove hitch. Remember this any time you need a reminder of how to tie a four-in-hand.

The Placket Stripe

Some police departments evidently think the centre of a shirt needs to be made more interesting. Officers in shirtsleeves are made to wear untucked ties.
Space Precinct
A more practical alternative to a tie was used on the TV show “Space Precinct”.
As can be seen, the placket of the shirt has been made as a stripe of a contrasting colour.
It is rather surprising that the fashion, law enforcement and military world has not made greater use of this idea!
If you want to be minimalist, you probably only need two ties:

Black

As I grow older, my list of friends decreases. Black ties are the ones that I have worn the most often in the past few decades.
You will be wearing your black tie for funerals, so it should be suitably sombre and conservative.
On an additional minimalist note. If you own only one suit, have it a dark colour such as charcoal or black. This will be suitable for funerals. With a different tie and accessories it can be used at weddings and most other occasions.
When wearing a suit, avoid putting you hands in the trouser pockets. This ruins the look you should be aiming for.

Burgundy

The burgundy tie is my go-to tie when I want to look good. Burgundy is a rich, dignified colour that goes well with a wide range of other colours.
Burgundy Tie
A useful style rule of thumb: If your burgundy tie does not go with your shirt, change the shirt!
Given how useful and versatile a burgundy tie is, it is worth spending a little extra and getting one that you think looks really good.

Other Colours

If you wear a tie regularly, you may wish to add a few others to your wardrobe.
A dark blue or navy tie is a good solid choice, if not as snazzy as the burgundy.
Bond and Q in grey ties
Being neutral colours, grey and silver ties will go well with many other garments. A colleague of mine had a grey tie with needle-thin diagonal stripes of silver. It appeared to glitter in pubs with low lighting. I wish I had brought one back then.
A grey-blue, such as RAF-blue, is another useful neutral shade for a tie.
With bright or primary colours, exercise a bit of caution. Some politicians feel obligated to wear ties in their orange or red party colours. This often looks harsh.
While sand-colour is a useful neutral, most brown shades should be avoided for ties.

Patterns and Combinations

There are just too many ties in different patterns and colour combinations to deal with in any depth.
When in doubt, remember that subtle and understated is often the safer path.
Personally, I would to avoid horizontal lines and checks.
If you often appear on camera or video conference, bear in mind that some patterns will cause interference on the image.
Attitude Problem Tie
Sadly, in many workplaces the tie is still the symbolic corporate dog-leash. Boldly coloured and jokey ties are often a token gesture of defiance while in actuality rigorously conforming.
Like a baseball cap worn backwards, the joke tie or similar is often a sartorial warning sign that the wearer is trying a little too hard.
If you have to wear a tie, make it work for you so that it actually does make you look smarter.

Other Details

I have three white pocket squares. One has dark blue trim, one has black trim and one has burgundy.
I have one shirt that needs cufflinks. I have one pair of cufflinks, which match my best burgundy tie.
If you use a tie-clip, ensure that it is as wide as the tie at the level where it is worn. A paper-clip on the narrow end of the tie has a similar effect to a tie-clip.

Categories
Phillosoph

Camouflage: Light, Dark, Neutral and Natural

Camouflage is about “not being seen”, which is one of the most fundamental of survival strategies. If you cannot become “invisible”, you may be able to appear insignificant, uninteresting or become easily “lost in a crowd”.
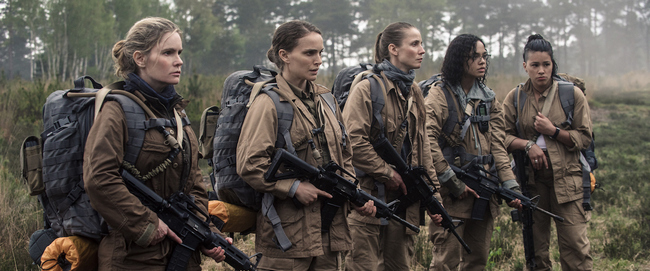
Good use of monotone neutrals. In some shots the actresses blend into the terrain.
You may have spent good money on the latest designer camouflage, but it is of no use to you hanging up at home. The most likely source of threat is other human-beings, and you are most at risk when other people are around.
Miyamoto Musashi tells us in the “Book of Five Rings”:
“In all forms of strategy, it is necessary to maintain the combat stance in everyday life and to make your everyday stance your combat stance. You must research this well.”
In clothing terms, what Musashi tells us means your everyday wear should be selected with a mind to decreasing your “visibility”.
Camouflage-patterned clothing does have a place in a prepper's wardrobe. There are, however, times when using camouflage-patterned clothing may be counter-productive. In cosmopolitan cities, clothing in camouflage or camouflage-like patterns may attract little attention. In other parts of the world, its use may attract unwelcome attention, or get you wrongly identified as military, paramilitary or a poacher.
Even if restricted to unpatterned clothing, there are strategies that we can adopt that will still decrease our visibility.
In previous blogs, I have touched upon a concept that might be called “camouflage without camouflage”. One can make oneself less observable by using a mix of non-camo-pattern clothing.
By using a variety of shades and hues, the basic identifiable human-shape can be broken up and become harder to distinguish. I have advised that you select clothing items in neutral and natural shades and colours.
While this remains good advice, a little more thought needs to be given to the system and some additional explanation may be warranted.

What is a Neutral Colour?

“Neutral colors are muted shades that appear to lack color but often have underlying hues that change with different lighting. Examples of neutral colors include beige, taupe, gray, cream, brown, black, and white. While neutral colors are not on the color wheel, they complement primary and secondary colors.”
On this blog I have stressed “neutral and natural”. Not all colours classed as neutrals are suitable for concealment.

Black

Regular readers should already know that “black is NOT a camouflage colour”.
In the movies, the bad guys, and often the hero will be dressed in black. It looks great on screen, and makes the actors stand out. This is exactly the opposite of the effect we want our clothes to have!
Even at night, black is to be avoided. In many partially lit conditions, black can be too dark, and stand out. Seldom is it dark enough for black clothing.
The special forces in Vietnam who dyed their gear black knew the colour would soon fade to a more useful dark grey.
Pure black clothing also tends to show the dirt, so you might like to rethink its usefulness as general wear.
If you want a dark suit for weddings and funeral, buy charcoal-grey rather than true black.

White

White is another colour that stands out and should be avoided. Like black, white really shows up any dirt.
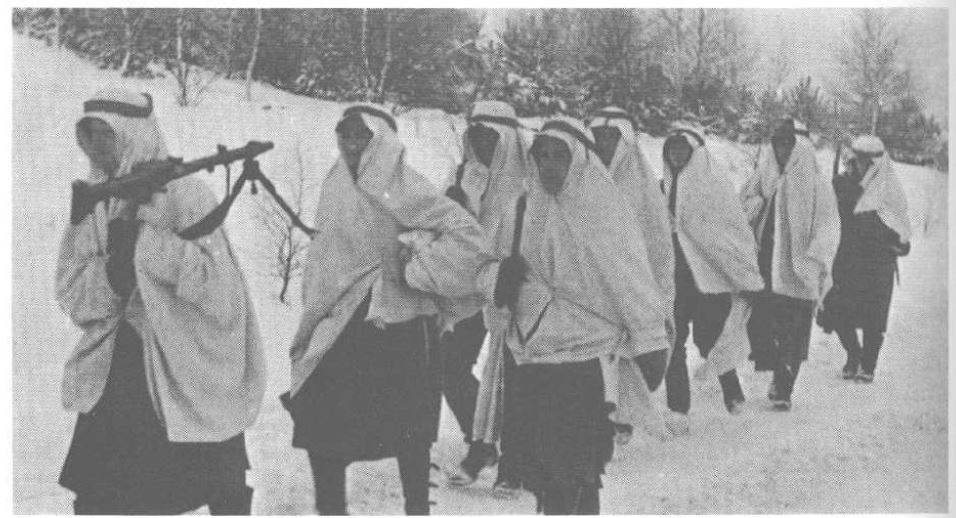
The only time to wear white is when there is snow on the ground.
White garments used as snow camouflage should be uninsulated. If they are warm, you will be tempted to wear them all the time, they will quickly become dirty and will no longer be effective as snow camouflage.
Improvised Snow Camo
Obviously snow-camo should be unlined and of a material that is easily laundered.
Avoid white underwear if you can. Outer clothing can get damaged, and being exposed may expose you. Select underwear in neutral and natural tones.
If you have to wear a white shirt at a formal occasion, you may need a white undershirt to avoid the colour of the undergarment showing through.
If you have to wear a white shirt for work, carry a neutral colour scarf  or keffiyah you can cover it with when outdoors.

Blue

Not all shades of blue are neutral. Some that are neutral are not that natural. Neutral shades of blue or blue-grey can work in a winter or urban environment.
Light blue is generally a “cold” colour and can be used in the snow. Some snow-camouflage patterns use light blue and white to break up the shape.
Watch some nature footage of polar bears in the snow and ice and note how much the terrain appears blue, grey or blue-grey. Interestingly, the bears often appear yellow-white.
In an urban environment, light blue is often encountered as faded or mid-blue denim. Light blue is a good colour for a button-up shirt.
Darker blues are probably less useful for concealment. A blue blazer is supposedly an essential in a gentleman's wardrobe (I don't have one!). If you want one, select a neutral shade of navy. If nothing else, it will at least go better with whatever other colours you may wear with it.

Undershadow

Many animals have lighter colouration on their undersides. This makes the shadow that their bodies cast less distinctive and is an example of counter-shading. The animal appears less three-dimensional and blends in better with the surface that it is upon. Behaviours such as crouching low further reduce the shadow, and the animal will often remain immobile while it thinks it is observed.
Interestingly, many aquatic or amphibious animals show an abrupt change from light underside to darker upper. When swimming near the surface the dark upper makes the animal very difficult to spot. A predator looking up from beneath will find the light underside difficult to see against the sky seen through the water surface.
A light underbelly, or clothing to simulate it, is of little use to a human, since we spend a significant portion of our time upright and bipedal.
Keeping close to the ground and remaining still is good tactics, however. If you are concerned with being observed you should never be reluctant to crawl if necessary.
An interesting example of trying to apply counter-shading can be found in the book “Second World War British Military Camouflage”, p.27-8 by Isla Forsyth.
Solomon J. Solomon was one of the early pioneers of modern camouflage. During the First World War he proposed “alterations to [British] soldiers’ uniforms to reduce their visibility, such as the darkening of the soldier’s cap and the lightening of his trousers.”
Upper surfaces catch more light, and correspondingly, need to be darker. Body areas that are commonly thrown into shadow need to be lighter.
Watch some videos of soldiers in action, and you will see they often appear as man-shaped blobs, darker than their surroundings. Modern combat gear often uses exactly the same pattern for headgear, torso and legs. The chest area is often shaded by the position of the arms, yet often the equipment worn here is actually darker! Even in desert environments, soldiers wearing black or woodland-pattern body armour or load-bearing gear are still seen.

Illumination

When considering camouflage, a lot of attention is paid to colours and patterns. More attention should be paid to shade, light and contrast.
I have advised you to select items in natural and neutral shades, but how dark should they be?
If you have to hide in a dense wood, particularly at night, a mix of clothing items in medium or dark shades of natural and neutral colours may serve you. There will be lots of shadows, so use them. Camouflage is about behaviour as well as colouration.
Suppose you leave the wood to move across a neighbouring field. How well will your dark and medium-coloured clothes serve you then?
Even at night, the surfaces you move over may be relatively light. Grass and hay may reflect any available light, even that from the moon and stars. If you go prone, you may appear as a dark blob that attracts investigation. During the day you may be even more conspicuous.
Most of us spend a significant proportion of our time in urban areas. Even at night, this is an environment with many light or medium-shaded surfaces, and many areas are illuminated by artificial lighting. Dark outfits may make you stand out.
Discussions of camouflage often mention shade and shadow. Level of illumination in the surroundings is often not given that much attention. Clearly, if you are in a shadow, you are illuminated less, but it should be clear by now that light level has a much wider significance to camouflage and concealment.
In really deep shadow, what you wear probably matters little. There is no light, or more correctly, there is none escaping. Not all shadows or unlit areas will be this dark, however.
Stronger light can have interesting effects on concealment. Suppose someone is wearing a sand-colour outfit and lays down in a grass field on a sunny day.
You might think that someone in yellow would be easy to spot in a green field. One thing that would prevent this is that shade is more significant than hue. If the sand-coloured clothing appears a similar shade to the grass at the viewing distance, the figure can be over-looked. Another factor is that light materials reflect. Sunlight hitting the grass causes them to reflect green light. This green light may in turn be reflected from the light-coloured cloth, causing it to appear to have a green tint.
Effectively, your world should be viewed one of light and shadows.
Some areas are “shadow-dominant”. These include deep forests and jungles, and poorly-lit building interiors.
“Illuminated” areas include desert, open fields and many urban exterior areas.
This status may be changed by time of day, weather or season. At night, a wood may become even more shadow-dominant, yet in winter it may become better illuminated.
In shadow-dominant areas, clothing of medium-shade, with some dark items may be most effective. In better lit areas, lighter clothing may be less conspicuous.
Your movements may take you from light to dark areas or the reverse, so what should you wear? Having to deal with both light-dominant and shadow-dominant areas may explain why most attempts at a universal camouflage pattern have only ever proved partially effective.
In the early days of camouflage experimentation, a number of double-sided items were fielded or tested. Some had a spring-summer pattern on one side and a autumn/snow pattern on the other. Jungle/desert and green-dominant/brown-dominant were also tried.
The needs for the different patterns were thus either separated by season or by geography. As far as I know, no double-sided garments based on patterns for differing illumination levels have been tried, which is a shame.

Camouflage Patterns

For camouflage patterns for illuminated areas there are a number of options. Some of the patterns designed for desert use may prove useful in a wider range of environments. Make sure the pattern has sufficient element-size and contrast to disrupt shape and outline. Off the shelf, “tropentarn” seems to work well, although I would wish for a grey rather than green in the pattern.
Tropentarn Camouflage
Some urban patterns are good, although some use too much white or are too greyscale and could use some browns and tans.
Some newer patterns such as multicam use lots of colours and small elements, resulting in garments that appear a single colour beyond a few metres. This very much depends on the material and print. I have seen some camouflaged gaiters in these patterns that look like they might work. Polycotton trousers and shirts in the same pattern tend to blob-out at a relatively short distance. Generally I would avoid these patterns. They may be no more effective than cheaper single-colour items. Many of these patterns are also too green-dominant for a multi-terrain pattern.
For shadow-dominant terrain, you should probably consider “older” patterns such as US m81 woodland, flecktarn and British DPM. Canadian Cadpat is presumably intended for deep woods, although the green looks a little bright in some examples I have seen. Unfortunately, these patterns vary considerably. Browns can range from natural-looking shades to chocolate. Greens also vary and the lightest shade may be either light-green or a more useful tan. Contrast between elements and overall darkness may also vary.
Many of these patterns have too much green. While green is good for summer woodland and lush jungle, a pattern with more browns and greys would be better for other dark environments and seasons.
You may also encounter fashion/police patterns consisting of blacks and dark greys. These are too dark and lack sufficient contrast between the shades to disrupt the shape.
Ways to improve camouflage
Personal Camo-min

Camouflage without Camouflage

As was stated earlier, you cannot always wear a camouflage pattern. You may not have a garment such as camouflage parka (see below) with you.
How can you become less distinct wearing monotone clothing or “civvies gear”?
The first step is to mix it up! Different items should be different colours or shades. Obviously, what you select should be in neutral and natural colours suitable for your surroundings. Select medium and light shades unless the illumination level requires different.
Whilst you may not be able to wear a camouflage pattern, other patterns may have a disruptive effect, providing they do not use bright or primary colours. Some garments have pockets, collars or panels in contrasting colours, which may break up the shape.
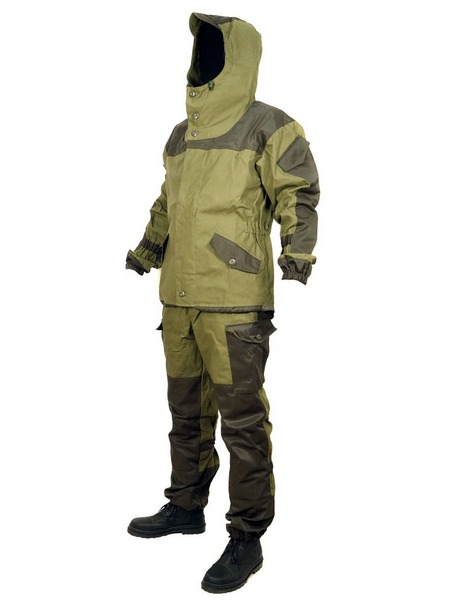
Below is an example of the Russian Gorka wind-proof outfit. Some of these use camouflage, but they are also used in unpatterned cloth. Note how the two different shades and hues of neutral coloured panels break up the basic human shape.
Gorka two-tone suit
You probably know that several thin layers of clothing will keep you warmer than a single thick garment. You can also regulate your insulation more easily by removing layers. What many people do not appreciate is that a layered clothing system can be used to change your appearance and for camouflage.
For example, on the street you may be wearing a light-tan hoodie over a dark-grey bomber jacket. If you move into a darker area, you may move the bomber jacket to being your outer layer.
More layers often means more pockets. Thus you can carry a spare scarf or more than one hat, letting you further change your appearance.
Some hoodies or jackets are reversible. Generally I think you are better off with several thin non-reversible garments. They will cost you less and offer you more options.
If your garment is lined, ensure the lining is a neutral and natural colour too.
There is another advantage of having a wardrobe that is mainly neutral colours. Neutral colours go with just about anything. Most suggestions for a capsule wardrobe are based on having a versatile selection of garments in neutral colours.

Face and Hands

When James Bond wants to skulk around at night, he wears a black polo-neck. He never bothers to cover his face nor hands. He must leave a lot of fingerprints!
There is little point using camouflage if you do not cover your face and hands. Irrespective of your skin-shade, human skin can reflect. Hidden troops are often detected from the air since someone always has to look up at the spotter aircraft. Even at several thousand feet, an uncovered human face pops out and cries “Here we are!”.
Skin can be darkened and matted down by various means. Do not overlook local resources such as dirt, soot and soil. These do nothing to conceal your hair. Face-paint or dirt are also difficult to remove easily if you want to later appear innocuous.
You should carry suitable head and face coverings. A full-face balaclava/ski mask in a medium to dark shade of grey or brown would seem a good choice. However, some cops have been know to label these “ninja masks” and treat their possession as intent if they feel inclined.
Various face and head coverings can be constructed by combinations of suitably coloured and patterned bandannas, neck gaiters, scarves and knit-caps.
Gloves will be needed, and of a suitable shade and colour. Olive meraklon glove liners are a good start. Fingerless leather gloves (aka “recondo gloves”) are worth considering in milder climates. They provide some protection to the hands when climbing or crawling, so you may be more inclined to “go low” when needed. They can be found in tan-brown, or you can cut down old gloves that are surplus to requirements.

The Lower Body

There is no reason why your lower body has to wear a camouflage pattern that matches that of the upper body. The legs are a different shape to the torso and larger than the arms, so may need a different pattern to disrupt their identifiable shape. Using a different pattern for the legs may help break-up your overall recognisable human shape.
How well the concept of countershading can be applied to the human form probably warrants further investigation. Having your trousers lighter than your upper body is worth considering.
Desert patterns are suitable for trousers. UCP/ACU might also be worth trying for leg camouflage.
If we are considering monotone garments, our choices are probably various neutral tones of light-blues, greens, tans and greys.
Many style guides for capsule wardrobes recommend trousers that are lighter than the jacket.
Personally, I am wary of light-blue outside urban or winter environments. I actually don't own any jeans, wearing cargo trousers instead. Much of my EDC is in the pockets,
Greens are good for many rural settings, but may stand-out a little more than some other colours in urban areas. Some shades of green will stand-out in rural areas. Even neutral shades of green are less common in certain rural areas or seasons that one might expect.
Tans and greys are your most versatile choices for monotones. Tans and browns have the advantage that mud does not show up so much on them. On the other hand, the contrast of mud on grey trousers probably has a disruptive effect that breaks up the leg's shape.
Gaiters should be of a suitable camouflage pattern or neutral and natural colour. Since these are seldom worn in town, bows of textilage can be added to break up the shape. Ensure any materials used for textilage will not soak-up water.
Langdon-Davis had a lot to say about the distinctive appearance of black army boots. Footwear should be natural and neutral colours and matt finish when possible.
Black socks are supposed to make your legs look longer. I am not sure that works without black shoes and dark trousers. I generally wear boots so the socks are not visible.
Update: Recently I attended a funeral and noticed my boot tops were visible when seated, at least when wearing my suit trousers. Own at least one long pair of black socks for formal occasions. 
In town I often wear white cotton sport socks since they are cheaply available in quantity. In the field, spare socks may be used as extra carrying pouches tied to the outside of a pack. These should be neutral and natural colours.

Camouflaging Gear

The institutional military mind likes uniform, regular and symmetrical.
This may be part of the reason why personal camouflage has waxed and waned as a priority for soldiers.
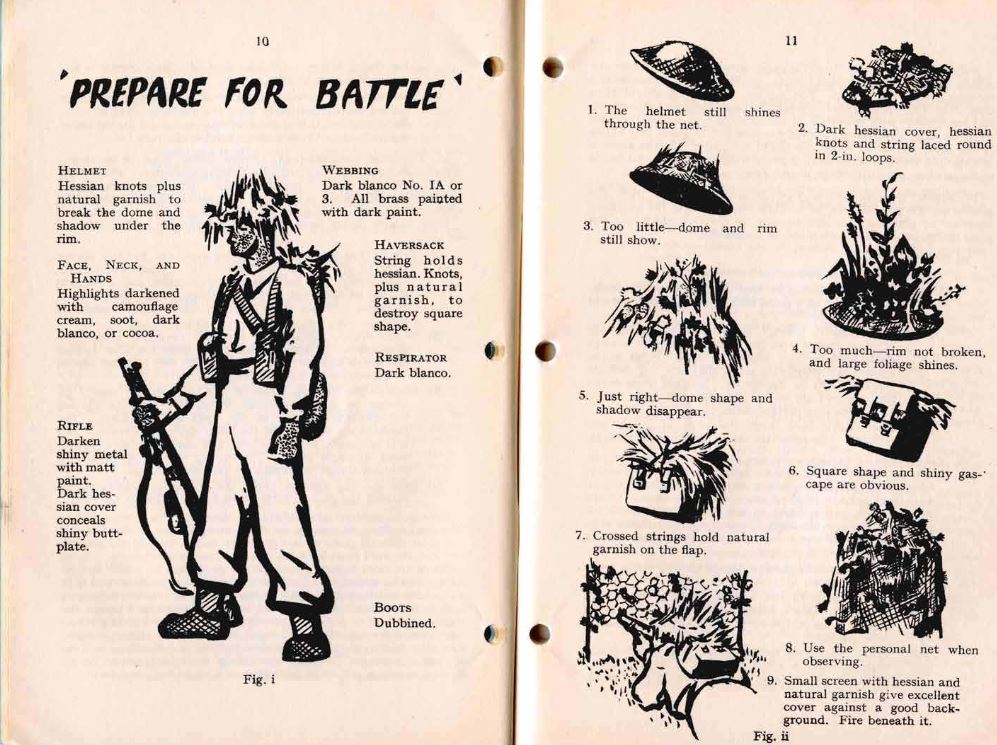
Improving the camouflage of an item becomes unpopular when the additions must be stripped off for every parade or inspection. If you are outside of the military, then such restrictions will not limit you.
Previous blogs have discussed methods to improve the camouflage of your backpack. Similar methods can be applied to a chest-rig, contributing to the camouflage of your torso. Base colour for a chest-rig should be light or a desert pattern, since this area will often be shaded.

Camouflage Smock

A useful technique is to have a “camo-smock”. You put it on when you need a camouflage pattern. Roll it up and carry it when you want to appear non-military. You can carry more than one, and wear the most appropriate for the conditions.
Your bug-out outfit should include an item that can be used as a camo-smock.
My main camouflage item is a German Tropentarn desert-parka. Get this as big as possible so that it can form a camouflaged outermost layer over anything you may be wearing. There is a nice liner for it that makes it into a nice cold weather coat.
Without the liner, it is unlined so can be worn for camouflage in relatively hot weather. There are vent zips under the arms.
Being a parka, it comes down to mid-thigh so will fit over anything I might wear under it and partially conceals my legs and body shape.
Sleeves are long enough to conceal my hands and keep the wind and rain off them.
If this is a “field only” item, add some bows of textilage to the sleeves and shoulders.
How to add camoflage bows of textilage
The pockets of the smock/parka include items that can be used camouflage my hands, neck, face and head. Little point in camouflaging yourself without covering your extremities!
For darker conditions, I have a several metres of camouflaged scrimm that can be worn over the parka like a poncho. Bows of suitably covered material or scraps of camouflage cloth have been tied to the scrimm.
Categories
Phillosoph

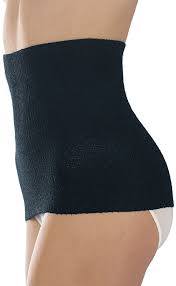
Kidney Warmers and Bellybands

Decades ago, when I first saw “Fists of Fury”, the scene above puzzled me. How did Bruce Lee’s character conclude the chef was Japanese just from seeing his undergarment?
The answer is that the Japanese are known for being fond of haramaki or “bellybands”.
Kidney Warmer/ Bellyband
The Germans are also fond of a similar garment. I have read of the Afrika Korps being issued “kidney-warmers”. The “Armed Forces of World War Two” by Andrew Molo clarifies:
“With the rapid drop in temperature at night, personnel wore a knitted woollen waist protector next to their skin, and a woollen greatcoat over their other clothing.”
I used to work with a colleague who had a German wife. I was apparently “mother’s wisdom” that you should wear a kidney warmer to keep your feet warm. Similarly, running around without socks could cause kidney and bladder problems.
Kidney warmer
It is interesting that diverse cultures in different parts of the world maintain that there is a link between kidneys and feet!
In a previous blog I mentioned that some American Civil War soldiers wore a flannel belt next to the skin.
Bellyband side view
“So what?” you may be asking. Many readers will own at least one set of long underwear. And sometimes the undershirt rides up and exposes the small of your back. A kidney warmer would have prevented this and also proved extra insulation.
Or perhaps, you are wearing a loose tee-shirt and find things can get a little drafty when the wind picks up.
Suppose you have to improvise cold weather clothing due to an unexpected change in the weather. Wrapping a spare scarf, keffiyeh or strip of material around your midriff could make all the difference.
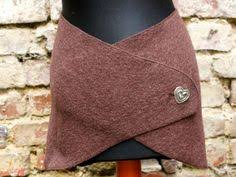
Button around bellyband
There are a variety of styles of bellyband available. Some are elasticated tubes you either step into or pull over. Others are wrap-around and utilize velcro or other means.
If you have a snug-fitting tee-shirt or jumper that has seen better days, it should be easy to make your own kidney warmer to try the idea out.
Categories
Phillosoph

Dressing for Bug-Out

When you reach for your bug-out bag (BOB), there are two questions that you should be asking yourself.
The first is: “Do I really need to go?” Escaping to safety is a meme that Hollywood has drummed into us. It makes for great movies, but in reality, “stay put” is usually a more prudent survival strategy than “bug-out”.
That said, if the answer was genuinely “yes”, your second question should be: “What is the weather like?”

Clothes Maketh the Survivor

Your chances are going to be much better if you are dressed for the conditions that you are likely to encounter.
With your bug-out bag should be a selection of clothing items that you may possibly need.
Let us work on the assumption that the survivor must fend for themselves for 72 hours.
Sadly, there is no single outfit of clothing that can handle all possible conditions, hence the selection.

Underwear: Unmentionables for the Unthinkable

Let us start at the foundation, the underwear:

Hot Weather Undies

Shorts

If the weather or climate is hot, your underwear can simply be shorts and t-shirt.
Swimming shorts are a good choice. Those made from synthetics dry very fast, simplifying laundry.
I like the ones with a mesh-lining that keeps things in place and under control.
If it is really hot, the shorts also function as outerwear. Wearing them is also handy if you have to ford a stream.
A useful tip for underwear of all sorts is to have each set a different colour. This helps you keep track of which has been worn and which is clean. White tends to show the dirt, however.
Two pairs are sufficient for 72 hours. A wear and a spare. A third pair is handy in case things go more than a couple of days.

Tee-Shirts

For the tee-shirts, it is worth acquiring them in coolmax, since it is fast-drying. Again, get two or three, and have them in different colours.
For a 72 hour scenario, laundry is not a high priority. Plain cotton or polycotton tee-shirts can be found at reasonable prices in multiple packs. These are a good source of undershirts for short trips or your bug-out bag.
A pair of t-shirts in string-vest material are useful additions. In hot weather, they stop cloth pasting to your sweating flesh. In cold weather, they add an extra layer of warmth for very little additional load. 
String-vests will be most effective worn next to the skin.
A couple of string tee-shirts may prove to be one of your most cost-effective investments towards your comfort. Shop around and you will find them in useful colours such as “army green” (olive/khaki-drab).
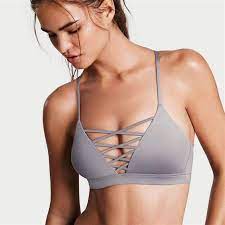
Sports Bra
A bra will be needed for them that needs them. I would imagine a sports bra would be a good choice for a bug-out situation. I have no experience wearing bras, so will offer no further advice.

Temperate Climate Underwear

For temperate conditions, we will need more underwear. We need to keep comfortable at night and on the rainy days, so will need something more substantial than what we usually wear at home or working indoors.

Long-Johns

You will need two pairs of long-johns. Polycotton are probably fine for mild weather. You do not want underwear that is too hot in temperate conditions. Polycotton is relatively easy to launder in long-term scenarios.
Polycotton Long-Johns

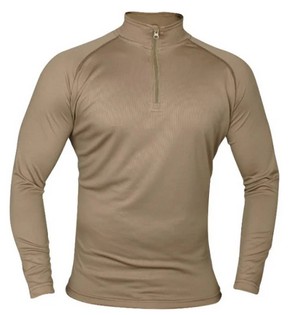
Long-Sleeve Undershirts

You will need a pair of undershirts, preferably long-sleeved.
Since your torso sweats more than your legs, have these in coolmax if you can. If you cannot get these, the same place that sold you the long-johns probably has long-sleeved tops in polycotton. Have each set of your long underwear a different colour.
A string-shirt may be worn under these.
Coolmax Long Sleeve
You can wear your temperate underwear with, or instead of, your hot weather items.
If it gets colder than expected, wear both sets of long undies.

Underwear for Cold Conditions

If the mercury has dropped, you will need “proper” thermal underwear.
In previous eras this meant wool. This is not so easy to find these days and may be beyond your budget.
Modern synthetics are much easier to wash. My personal choice is a set of Brynje long-johns and a matching long-sleeve top. These have a mesh construction, and seem more tolerant of extended (multi-day) wear than my merkalon set of more conventional construction.
If you are on a budget, you may be able to get along with a single set of thermals. If you live where winters can be expected to be cold, two sets are a good investment. On the other hand, if you live near the equator, thermal long-johns may be low on your list of priorities.
Your thermals can be combined with one or more sets of your temperate and hot-weather underwear.
Not strictly “underwear”, a wool or fleece shirt or a thin jumper may be worn over the underwear.
During the Second World War and Korean War, American soldiers would wear their woollen uniform trousers under their cotton field trousers.
The modern equivalent are quilted trouser liners. A variety of these can be found on army surplus sites.

Organizing Your Undies

The underwear items suggested above are fairly low bulk, so a set of each of the hot and temperate kit should be packed in your bag. Bagged up, this probably makes a comfortable pillow at night.
The set(s) of thermals, and the second set of hot and temperate underwear should be stored close to your BOB rucksac. Put on what is suitable for the day. Decide if you want to take the rest or leave some behind.
Trouser-liners are bulky, so only pack or wear them if you think they are really needed.

Outerwear

Ok, now you are in your undies. What else to put on?
This will depend on whether you expect the weather to be hot, temperate or cold.

Hot Weather Outerwear

For hot weather, your outer layer should be something like a medium-weight shirt. Lighter shades handle strong sunlight better.
The shirt should be of a generous cut, for air circulation. This also allows warmer clothing to be worn beneath it.
It should be of a tight weave to resist mosquitoes and the wind.
It should have long-sleeves that can be rolled down for protection from insects.
Cotton or poly-cotton are acceptable for hot weather. Some of the newish synthetic microfibres may be sufficiently comfortable too.
A combat jacket can be worn instead of a shirt, but you do not want something that is too heavy or too hot. Probably best to avoid lined garments.
Have a spare shirt in your bag. The two may be worn together, as described previously.
For the legs, cargo trousers are good. They should be roomy enough to fit over trouser-liners and long underwear. Cargo pockets take your skin-level EDC kit.
If these trousers are always with your BOB, your SHTF survival knife/knives may already be threaded onto the belt.
Whether to pack spare trousers for hot-weather is up to you. If the trousers you are wearing get damaged, there are not many other garments that can substitute for them.
If you have a pair of cargo trousers that are past their prime, I suggest your ranger-roll them and retire them to your BOB as a permanent back-up pair.
If the weather is likely to be variable, it may be prudent to pack a thin jumper and possibly a light jacket or field coat.

Temperate Outerwear

For temperate conditions, outerwear is the same as for hot weather with the addition that something like a field jacket is more likely to be being worn.
The jacket should be large enough to fit over a fleece jacket and any additional layers of insulation you might don.
Field jackets such as the M65 can be fitted with a detachable liner, which is worth having.
A spare pair of trousers lets you double up if it is unexpectedly cold.
Fleeces are often seen worn as the outermost layer. They work much better if they are under something more windproof, such as a field jacket, waterproof or even just under a shirt.
Items such as tracksuit tops, hoodies and bomber jackets may be worn under or instead of the field jacket. The order of these may be varied to vary your appearance, which may be useful in certain conditions.
Several thin layers of insulation are more versatile than a lesser number of thick ones.

Cold Weather Outerwear

If it is cold out, ensure that you have the liner for your field jacket. If a bomber jacket or similar has a liner too, so much the better.
If it is cold, your field jacket will probably not be your outermost layer. Have a parka, and buy it big so that it will fit over your field jacket and anything else likely to be under it.

Insulation

I have talked about insulation. A common mistake is to use too much.
A good rule of thumb is that what you are wearing should leave you feeling slightly chilly when you are stationary. You will warm up once you are under way.
The suggestions above constitute a layer system. A layer system is a useful way to customize your insulation level before you set out.
Adding or removing items when under way may not be as practical as some writers make out. Try it halfway up an Icelandic mountain in a 60mph wind! (Been there, done that!)
When on the move, frequently vent your clothing to remove humid air.
When you stop, you can put on additional clothing or wrap yourself in a blanket, sleeping bag or poncho-liner.

Colours and Camouflage

In general, your bug-out clothing should be in natural or neutral shades.
Camouflage-patterned gear may attract unwelcome attention in some parts of the world. Choose greys, browns, tans and dull greens.
Do not buy underwear items in white. Darker or more natural or neutral shades tend to show the dirt less. Why worry about underwear colour? Torn clothing may expose it to view, compromising your camouflage. Easily seen colours of underwear (or other garments) hung out to dry may attract unwelcome attention.
Avoid black items for outerwear, it tends to stand-out and gets hot in the sun.
Of course, in an emergency you may want to attract attention.
Your BOB should include a hi-viz tabard or jerkin, preferably the type with reflectors. One of your shemaghs, and possibly one of your warm hats, should be brightly coloured.
On the subject of reflectors, a reflective device that can be fitted to the back of your rucksac is useful if you find yourself hiking down a dark road. Bicycle stores are a good place to look for suitable items.
German Desert Parka
If I do need camouflage, I have a German desert parka. Being designed for desert use, it is comfortable in fairly hot weather. It is uninsulated and has ventilation zips under the arms.
I brought the biggest I could find so there is room for both air circulation and insulation. It is in Tropentarn, which is one of the better modern off-the-shelf camouflage patterns.
The garment is long enough to cover most things I might wear under it.
IThe parka is also a valid alternative to a field jacket. Jackets like the M65 can be too warm for milder conditions. (Officially the M65 was a “Cold Weather Field Coat”)
The desert parka can use the same liner as the German flectarn cold-weather parka, so the garment serves as camouflage cover, field jacket and/or CW parka.
German Parka Liner
I can wear the desert parka when I need camouflage. It is easily exchanged for another jacket and stowed in a pack when I do not.

And When It Rains

That covers hot, cold and temperate. What about wet?
Every bug-out-bag should include a rain parka.
These have numerous uses. They are reasonably priced and will often keep both you and your pack dry. They are easily vented. They are quick to put on, although this can become interesting if there is a bit of a wind!
A rain-poncho can also be used to construct a shelter for sleeping.
If your rain-ponch came in a little stuff sack for carrying, add two three-metre lengths of cord to this. The cord may be used for shelter construction or as a belt to stop the parka flapping in a strong wind.
There are some situations where a raincoat is preferable. A raincoat is in addition to the poncho, rather than an alternative.
A good raincoat packs up small when not in use, yet is large enough to cover and keep dry all the clothing that is serving as insulation. For me, this means it should be large enough to fit over my desert parka in winter mode with its liner fitted.
In a tactical scenario, a raincoat would fit under the camouflage layer but over the insulation. This is quieter, and also protects the rainproof from damage.
On the subject of insulation, remember a rainproof garment traps air so acts as both a windproof and an insulator.
If you put a rainproof on you may have to take something else off if you are to avoid overheating.
It is a good idea to periodocally vent clothing, even if using breathable waterproofs.
Simple, small-packing waterproofs became difficult to find for a while. Outdoor shops much preferred to sell more substantial and expensive breathable items. “Pac-a-macs” seem to be making a comeback on the internet, although many are in garish colours!
I have never had a problem with non-breathable waterproofs, since I understood about venting.
I also discovered that even expensive breathable fabrics have a finite life. The way you discover that is up is you get wet!

Boots

It is possible you own more than one pair of walking boots.
The pair you have with your bug-out bag should be suited to all-weathers and all-seasons.
You may have to traverse rubble and debris. Save the lightweight walkers for summer trips.
Boots for bugging out should be already broken in.
Personally, I like gaiters if I will be going cross-country.

Socks

You will need at least two pairs of socks, with three pairs or more preferable. Your feet are important. It is worth investing in good quality woollen socks for your BOB.
In certain conditions you may need to change socks several times during a day.
Sew a loop of ribbon to each so you can hang them on the outside of your bag to dry.
Choose sock in neutral and natural colours. You could use different coloured loops for each pair, although your nose will often tell you which set needs washing.
Spare socks can be used as mittens or carrying pouches.

Gloves

You will want several pairs of gloves.
Fingerless leather gloves provide protection with reduced loss of dexterity when in the brush or scrambling over rubble. These can be used with merkalon or silk glove liners.
On a hike in Iceland, an unexpected strongly gusting wind combines with relatively mild sub-sero conditions to create a -30 to -40 windchill. The hand holding my hiking pole was particularly exposed. Wearing fingerless leather gloves over glove liners avoided possibly serious injury.
Knitted gloves, woollen or acrylic, are not very stylish, but work well at keeping your hands warm and preserve some dexterity.
Good colours for gloves are mid-grey, khaki-drab and olive-drab.
Unlined leather work gloves can provide additional protection or another layer of insulation.
Leather work gloves may be used to protect you from thorns and rope burns. They may also be used as an oven glove to handle hot billy handles. They should be sized so they may be worn over woollen gloves and/or glove liners.
If desired, cuff-ribbing may be added to work gloves, or the top of old socks repurposed as such.
In cold weather, better insulated gloves and/or mittens may be required.
Add ribbon or cord loops to each glove so you can stash them on your snaplink when you remove them.
In bad weather, run a cord down your sleeves and tie the ends to your gloves. You may feel like a toddler, but this is better than a gust of wind taking a glove and the risk of frostbite!
The pockets of my outdoor jackets usually carry at least one pair of gloves. Keep your other gloves where they can be easily accessed, such as in an external pocket of your pack. It is not a bad idea to have all of these gloves in their own “glove bag”.

Hats and Scarves

You will need a hat to keep the sun off. I like a boonie hat, myself.
When the weather demands you wear your hood up, a suitably coloured baseball hat will be convenient.
Whatever your personal choice, add a cord so the wind does not steal it from you.
For cold weather, I tend to favour a watch-cap or folded headover. It is worth carrying more than one of these. If it is really cold, you can double up on hats. A headover or watch-cap may be combined with a boonie or ball-caps, as needed.
A tennis-headband may be useful in hot weather. A bandanna worn across the forehead is a possible substitute.
“You are not fully dressed without a scarf!” Bandannas, shemagh, neck-gaiters and a long woollen scarf also have a place in your BOB or coat pockets.

Protection

A bug-out bag is there for emergencies and disasters.
A dust mask may prove useful, as may goggles. As well as dust and sandstorms, explosions and collapsing building produce lots of dust. This can have immediate and long-term health effects. Sunglasses also protect against snowglare.
Kneepads should fit under the trousers. This is better for camouflage and air circulation.
A headnet against biting insects is well worth the (negligible) weight. It may be uses as an improvised fishing net or carrier bag.
In certain situations, head protection may be prudent. Volcanic activity may make it literally rain rocks. High winds turn roof tiles and other everyfay objects into deadly missiles.  Head protection may be a lightweight hockey or skateboard helmet, or a construction hard-hat.

Checklist

Have a checklist. When you are under stress or in a hurry you are unlikely to remember everything you need.
Some of the items for your bug-out outfit will be permanently packed in your bug-out bag. Items you intend to wear while carrying the bag may be stored near the bag.
For many of us, however, it is not practical to have a full, dedicated bug-out bag and outfit. Some items we need will be in general use. Other items may have been fished out of the BOB for a camping trip or for use during a cold-spell.
Hence, have a checklist of the items you want in your bug-out outfit so you can grab those that may not be there.  
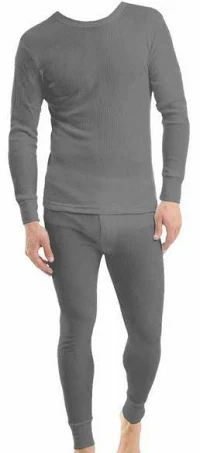
Categories
Phillosoph

Musketeer Cloak for Survival

Another night where the only good stuff on TV I have seen before. I remembered that the BBC series “The Musketeers” had been added to box sets. I think I had missed the early episodes when they were first shown, so I downloaded episode one and started watching.
As it turned out, I remembered quite a bit of the first episode, so must have started watching part way through the first one. Good fun, however.
According to some sources, a cloak with arm-vents is called a “mandelion”. This is often also defined as being waist-length. The cloaks in the series appear to be around knee length.
The costumes of the musketeers in this series is interesting. It features a pauldron on the right shoulder and is mainly leather. Think “Mad Max” meets Dumas! No idea as to the historical accuracy, but looks good. I wonder how uncomfortable it was in the sunnier scenes.
What did grab my attention this watch through was the design of the cloaks worn by the musketeers. According to some web-sources there were at least two different cloaks used. A lighter weight, light blue cloak was used in “parade” scenes, a heavier, darker blue in other scenes. In some scenes the cloaks appear to be hooded. In the episode set in the “Court of Miracles” Portos wears a brown cloak sharing some design features with the musketeer cloak. Cloaks with similar features appear worn by other characters in later episodes.
The distinctive feature of the cloak is that it has two long arm vents so the cloak resembles a long tabard. These are usually shown open, but the long line of buttons suggest they can be closed so the cloak can be worn in a more conventional fashion. Presumably these slits can be partially unbuttoned too. Unlike the tabard, the cloak has a full length opening down the front. This too has a long line of buttons, and the fold-over of cloth suggests when closed it may share some of the features of a double-breasted greatcoat. While it is hard to make out, the rear part of the cloak may have a waist-height buttoned vent for use when riding. As one might expect, the collar of the cloak is substantial and can be turned up to protect the neck. In warmer conditions the cloak is shown worn on the left shoulder, with a cord passing under the right armpit.
Some patterns. I suggest the rear side of the side pieces be sewn to the back part. The wearing of a rapier seemed to necessitate a second side vent. A cloak could be constructed by joining a semi-circular back piece to a rectangular front section. In such an instance it may be prudent to continue the top of the front section back to create a vented yoke, rather like a trench coat.
The merits and possibilities of a cloak for survival have been discussed on previous posts. One advantage is that it is sufficiently roomy that any of your other cold weather items can fit beneath it. For a modern version two-way zips might be utilized. For the arm vents I would suggest poppers be used, allowing a closed vent to be more easily opened. Seventeenth century clothing often featured closely spaded buttons, so a modern cloak may need less poppers than the buttons used on the costume items.
Categories
Phillosoph

Bush Shirts.

You may have an emergency kit or bug-out bag ready packed, but what clothing do you have stored with it? Your emergency kit should include an outfit of clothes suitable for travelling. This must include underwear, outerwear, footwear, headgear and insulation suited to any season. There are many possible choices, some better than others. What are our best options, particularly if on a budget?
For most of the nineteeth century the US Army wore a dark blue woollen uniform. This was considered suitable for all climates, regions and seasons within the US. In practice the material and colour were uncomfortable and impractical for the hotter months and latitudes. Durability was also an issue. Troops often returned from campaign with uniforms in a very poor state. The blue woollen uniform was also poorly suited for the various menial tasks a soldier might be called on to perform.
Troops on campaign were, however, allowed considerable latitude when it came to clothing. During the Geronimo campaign some infantry in Mexico and Arizona are known to have marched wearing only their army underwear of undershirts and cotton drawers. (Uniforms, Arms, and Equipment: Headgear, Clothing, and Footwear by Douglas C. McChristian) Historical accounts mention soldiers on campaign wearing their “overalls” as an alternative or replacement for uniforms. The overalls in question were a two-piece alternative to the stable frocks mounted troops were issued. Mounted troops were required to conduct stable duties twice a day. Horse hair and dust would have rapidly fouled the blue wool uniforms so troops on stable duty wore either frocks or overalls of white cotton duck garments over their blue uniforms. These overalls and smocks saw use as campaign wear or unofficial uniforms. The white colour was less than ideal, but a few weeks of campaign often turned them another shade.
Officially, the US Army remained resistant to issuing a summer uniform. When regulations were relaxed to permit the wearing of a white summer uniform, the soldier was expected to pay for the garments out of his own pocket at whatever prices sutlers asked. It was not until the 1880s that a summer uniform was issued. Quartermaster General Holabird ordered surplus shelter tents to be made into coats and trousers. Experiments with dying the canvas brown also proved successful. The uniform was clearly intended to serve as a summer uniform and campaign wear. The jacket was of blouse or sack-coat style, rather than a stable frock coverall. I have seen it suggested that the canvas uniform was designated a fatigue item so troops would not have to pay for them from their clothing allowance.
Jump forward about half a century and things come full circle. World War Two saw fatigue-duty clothing being used as hot weather combat wear. By the Korean War this had become common practice and “fatigues” became synonymous with hot-weather combat dress.
When selecting outdoor gear it may seem logical to copy what the army uses. After all, the army spends millions developing and testing gear, and surely wants our troops to have the best possible. Sadly, no! If this hypothesis was true, why do different armies produce different solutions to the same problem? Why is gear changed and replaced with such frequency?
If you study the history of, say, US combat/ field jackets, you observe a repeating cycle. Something practical is designed. After a few years in service it is noted the practical item is not that smart looking. A new, smarter replacement is adopted. Troops complain the smarter item is not that practical, so a replacement is designed, and so on. This cycle dates back well into the blue woollen uniform era. The army wants practical field and work wear that still looks soldierly. (This trend can be seen in a number of books on the history of US Army uniforms. Several of the “U.S. Army Uniforms of…” series by Shelby L Stanton are a good starting point) The US Army currently seems to be in a “non-practical” phase. Trousers are cut too narrow to fit over knee-pads or to allow good air circulation. Shirts intended to be worn under body armour have no camouflage on the torso, with tight-fitting sleeves that do nothing for shape disruption and air circulation. Camouflage that does little to hide the wearer.
As preppers, survivalists or outdoors-people, looking neat and soldierly is low on our list of priorities. We want versatile, practical gear that hopefully will not break the bank.
As I have mentioned in the previous post, for many conditions, jackets are too warm, particularly if lined. This holds true for many designs of combat jacket. As might be expected from the introductory passages, an unlined fatigue jacket is a possible option, if you can find such a thing at a reasonable price. More readily available are medium or heavyweight shirts, which we will designate “bush shirts”. A pair of cargo trousers and a bush shirt over suitable underwear is the start of a very practical clothing system. Notable is that the upper garment of US Army fatigues was originally designated a jacket, but troops were usually required to tuck it into their trousers. Eventually it was re-designated a “utility shirt” and redesigned with shirt-type cuffs.
If you now jump to googling “camouflage shirt” you will discover most of your hits are tee-shirts, which are not what we are looking for. Those that are not tee-shirts tend to be pricey!
Forget about camouflage patterns for a while. Smocks and other camouflage measures will be dealt with in other posts. For the moment we will be satisfied if our bush shirt(s) is a low-signature “neutral or natural” colour. Google “khaki shirt” and you should discover a wide variety of choices and colour shades. The true green coloured are best reserved for summer or jungle use. Similarly, very light khaki shades may be best kept for bright environments such as desert. This still leaves us a wide choice ranging from light tans to olive-brown. Mid to light greys and possibly pale olive are also acceptable shades.
Whatever shirt you opt for, buy it larger than you would usually wear. In cold weather that space allows you to wear more insulation under the shirt. In hot weather that space allows air to more freely circulate. Your shirt should also be long-sleeved, for when insects bite and thorns come scratching. Here is a good place to repeat a piece of advice from the Victorian explorer Francis Galton: “When you have occasion to tuck up your shirt­sleeves, recollect that the way of doing so is, not to begin by turning the cuffs inside out, but outside in-the sleeves must be rolled up inwards, towards the arm, and not the reverse way. In the one case, the sleeves will remain tucked up for hours without being touched; in the other, they become loose every five minutes.” Try it! He is right!
Most of the potential bush shirts you will encounter will be cotton or poly-cotton.  Microfibre shirts are becoming more widely available and often with a similar price tag to cotton. These are breathable synthetics, so should be quicker drying.
Other features are up to the buyer. A pair of practical breast pockets are useful, although your trouser pockets should be where your primary EDC gear is carried. The shirt is also your nightshirt, so overfilled pockets may be uncomfortable. A “traditional” shirt collar can be turned up to further protect the back of the neck, although since your outfit should include a neckerchief, shemagh or scarf this is probably moot.
Your bush shirt(s) can be customized, should you feel so inclined. Reinforcements can be added to the elbows and possibly the shoulder area too. Elbow patches should not hinder the sleeve’s ability to be rolled up or stay up. Breast pockets may be covered by pack straps, so sleeve pockets are a useful addition. These should be long enough to hold a pen or pencil. Poppers may be preferable to buttons. Vent zips or holes under the armpits can be added for increased ventilation. Additional pockets can be added to the lower part of the shirt, although these will not be accessible if the shirt is worn inside the waistband. If the shirt is worn outside the waistband the sides may be vented to allow access to a belt-worn knife or pistol. If desired, a bush shirt can be converted to a pullover style by sewing up the lower half of the front opening. This can reduce drafts around the midriff and keeps biting insects out.
In many conditions your bush shirt will be your outermost garment. When it gets colder it is an additional mid-layer beneath a jacket or coat. It may also be your nightshirt.
While I was planning this article, I came across the following passage in the Boy Scout Handbook (1911) “It is well to carry a spare shirt hanging down the back with the sleeves tied around the neck. Change when the shirt you are wearing becomes too wet with perspiration.”
Tying a jumper around your waist was standard practice when I was a schoolboy. The jumper tied and draped over your shoulders is a familiar 1980s icon. Carrying and using a second shirt this way is something quite different, and potentially very useful. If not worn in this way the spare bush shirt should be kept somewhere easily accessible, such as the outer pocket of a pack. The merits of being able to change out of sweaty gear were addressed in the last post. If the weather turns colder you can wear both shirts. The spare shirt can also serve as an emergency face or head covering or as a scarf. A wet shirt can be hung down the back, or the back of the pack, to dry. This is one of the reasons we choose neutral or natural tones for clothing, even undergarments. Drying laundry can act like a signal flag!
Categories
Phillosoph

The Layer System

I plan to make some posts on clothing.
Before I do so, it is appropriate that I address the commonly encountered concept of “the Layering System”.
Many websites and books pay lip service to the Layering System. The problem is that this is usually oversimplified into a “lie to children” that omits important facets.
The typical version goes something like: “Your clothing needs to be in three layers. The under layer (buy some wicking underwear), the mid-layer (we sell really nice fleeces!) and the outer layer (have you seen our Gore-tex range?)
Not technically false, but also lacking a lot of information you should also know.
The most important concept to grasp is that it is not the clothing that keeps you warm, but the air that the clothing traps.
Several layers of thin garments may keep you much warmer than a single thicker (and possibly heavier) layer. The best insulation is still, dry air. Most materials that we call insulators serve to catch and hold such air.

Underwear

I have addressed the topic of underwear in a number of other posts, so I will be brief here (pun intended!). Underwear is not just for wicking sweat off your skin surface. It is also there to prevent your body soiling the outer layers of clothing. Clean clothing traps air more effectively than that clogged up with oils, salt and other crud. Undergarments should be selected with of washing and quick drying properties in mind. Thin items will dry quicker than thicker. If it is very cold wear multiple thin layers of underwear. Carry a spare set of underwear. Depending on climate this may be simply a tee-shirt/ vest and a pair of underpants. Kephart tells us to change into our cleaner set for sleeping. If your underwear becomes sodden from exhaustion, change into the drier set. Use the dirty set to give your body a rub-down before donning the cleaner. Whenever practical, give the set your are not wearing a rinse or a wash. It may be prudent to change first if the set you are wearing is the dirtier.

Mid-layer

This should actually be “mid-layers!”. A thick fleece jacket or jumper can only be on or off. This may mean a choice of too-cold or too-hot. Many of the mid-layer garments sold in outdoor shops tend toward being overly insulated. If your mid-layer is actually several layers of thin garments you have a more versatile system. This is likely to be warmer and lighter. Individual layers will be easier to wash and quicker to dry. Chances are you have a number of old shirts or thin jumpers that can be combined as very effective mid-layers. Minor damage or marks are not a problem in this role. Shirts may be more comfortable as mid-layers with the collars removed.
Your body may be sweating as well as producing heat. You want to get rid of this water vapour before it can condense, or even freeze. Even if there is metre-thick snow on the ground, vent your clothing occasionally to remove humid air.

Outer Layer

The mid-layer(s) trap a layer of air that your body warms up. The outer layer prevents the wind blowing this warm air away, or the rain soaking into the mid-layers and displacing the air. Fleece jackets are often seen worn as the outermost garment. While this works with some models or under certain conditions, you will also find in other situations the wind will cut right through them.
You actually need a choice of outer layers. A rainproof is great if it is actually raining. In other conditions, even the breathable models may become clammy inside. Regularly venting your mid-layers is an important habit to acquire, even if you have top of the range breathables.
The more you wear rainproofs, the greater the likelihood they will be holed by thorns or other hazards. A few decades back “pac-a-macs” were fairly common. Rainproof garments that folded up into a small pocket or pouch when not required. These now seem hard to find and modern rainproofs tend to be more substantial, bulkier and more expensive. I have to think this may be a step backwards. On the other hand, some of the rain-ponchos on offer seem to be very light, compact and reasonable in price. They can also be used as groundsheets, shelters and so.
If you are not wearing your rainproof, you still need an outer layer that will retain the air your mid-layers are holding. Most cloths of a sufficiently tight weave can serve as a windproof. Most of your likely options are going to be cotton.
Cotton is not ideal as an outdoor material. If wool gets wet it retains most of its heat. Wet cotton is cold, and drains the body of heat trying to dry. While this is relatively well known, outdoor shops are full of cotton items they will try to sell you. Most military surplus items you may consider will be cotton. Cotton is easier to print in camouflage patterns, although the wide use of cotton in certain armies predates their adoption of camouflage. Most civilian, non-specialist items you might use instead of the above are also likely to be cotton.
You probably cannot avoid having some cotton items as your windproof layer. Sensible precautions are keeping a fire kit and rain-poncho on you. A change of clothing, carried in a waterproof bag, is also prudent.
For the lower body, cargo trousers and gaiters are a reasonable choice. The former can be modified as suggested elsewhere.
Combat jackets may seem a logical choice for the upper body. Their main problem is that in many conditions they tend to be too warm. You may be better basing your clothing system around a couple of bush-shirts, much as Kephart did. Field jackets and parkas can be added if the mercury drops.
A good bush-shirt may be cotton, but may also be found in fast-drying microfibres. Bush-shirts are a topic I will discuss in more depth in a future post. Relevant to today’s subject is that any shirt (or jacket) you plan to use as an outermost layer should be selected with room to wear several layers of insulation underneath. It should be at least a size larger than your usually wear. You should be able to comfortably wear it over a fleece jacket or NATO sweater, or their equivalent in thinner layers. In hot weather that space lets more air circulate.
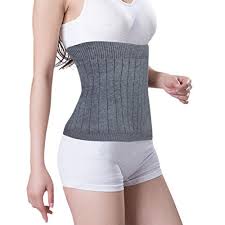
As an aside, wearing a shirt over any insulation is a useful dodge to remember should you become separated from your jacket. A similar idea was to wear a combat jacket or bush-shirt over a waterproof jacket. This protected the waterproof from damage and reduced the noise that such a garment might make. It also might contribute to visual camouflage too. Although the outermost layer of clothing might get soaked, the waterproof kept the inner layers and wearer dry.
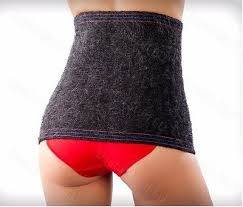
A few final points about the Layer System. The idea is that you can regulate or comfort and temperature by removing or donning garments as needed. Some means to carry unworn items will be needed. Stopping to change may not be practical. The rest of the platoon may not want to stand around while you redress, especially if your garment is under a mass of LBE and body armour! A common error in cold climates is to over-dress/ over-layer. If you are mobile, your level of clothing should ideally feel slightly chilly when standing around. Static roles such as sentry duty or manning foxholes will need more insulation. In any climate, do not neglect ventilation.
Categories
Phillosoph

Battle of Jangsari: Camouflage

Recently I watched the movie “Battle of Jangsari”, set in the Korean War. I enjoyed it, and many of my readers may do so too. So as not to spoil your enjoyment, I will try to avoid any possible spoilers that I can in the following passages.
The photo below shows the North Korean troops that are sent as reinforcements. Notable on their first appearance is the bundles of grass/ straw/ rushes that each infantryman has sprouting from his back.
At first glance I thought this might be an earlier example of the device described as in a previous post as the Vietnamese Camo Ring. Subsequent scenes show the foliage attached directly to their shirt/ blouses. The intention is the same, however. If an enemy aircraft had appeared these infantrymen would disappear.
“Osprey Men-at-Arms 174: The Korean War 1950-53” includes the following passage (p.37) on the North Korean summer field uniform:
“The uniform had reinforcing patches on the elbows, trouser seat and knees, and frequently single or double rows of horizontal ‘zigzag’ stitching around the cap and across the shoulders, chest and upper sleeves, which were used to hold leaf camouflage. ”
For some of the movie the South Korean (ROK) soldiers wear captured North Korean uniforms. They do not use camouflage materials, but the means by which they can be attached are clearly seen in some shots. In these examples the “stitching” appears to be relatively substantial cord.
A side view of foliage attached to a machine-gunner’s back. Some North Korean troops also have foliage attached to their upper arms, although the means of doing this is not clear in the film. Presumably loops might also be sew to the sleeves. Many of the North Korean soldiers are also wearing short capes of what appears to be camouflage net. In the movie this was not clear and appeared as an irregular shape of mossy green-grey on the upper chest. In the stills this is much more clearly seen to be net.
The Russian-style shoulder-boards worn with the North Korean uniforms appear fairly impractical. Men-at-Arms 174 notes that these shoulder-boards tended to fade less than the rest of the uniform, making them stand out as regular shapes and thus detrimental to camouflage.
Also note that none of the actors have camouflaged their helmets, leaving a distinctive, recognizable shape. As I have pointed out in recent posts, shape disruption and texture contribute far more to camouflage than colour. Notable in this movie is that the North Korean uniforms work far better in the terrain shown than the green American fatigues worn by some characters. The Osprey publication states that the North Korean summer field uniforms was “olive khaki shade faded rapidly to a light yellowish hue”. Actual appearance varies in the photos since the soldiers of both sides get realistically dirty.
Minor spoiler follows: In one scene the first sergeant stamps on a mine several times and chides the student soldiers, telling them it is an anti-tank mine and ten of them could run across it without setting it off. This is not strictly true. The mine shown is an American M15 that is claimed to need a force 159 to 340 kg (350 to 750 lb) on pressure plate to set it off. “Taming the Landmine” (p.51) by Peter Stiff describes how repeated passages over an anti-tank mine would “settle” the trigger mechanism of some models until they became sensitive enough to be set off by a pedestrian, donkey cart or bicycle tire.