I recently read a webpage where the author jokingly referred to his “take anywhere, always ready EDC tool kit”.
This was a split ring that rode on his keyring. On that ring was a Photon II LED light, a 58mm Swiss Army knife, and a P51.
I had a quiet chuckle, since I have essentially the same kit on my keyring.
Keyring Tool Kit
My keyring is an unlocked carabiner. Items can easily be added or removed.
It hangs from the ring of the key-hanger over my right front trouser pocket.
The carabiner itself is a useful tool. I recently used it as a handle for an overly filled shopping bag.
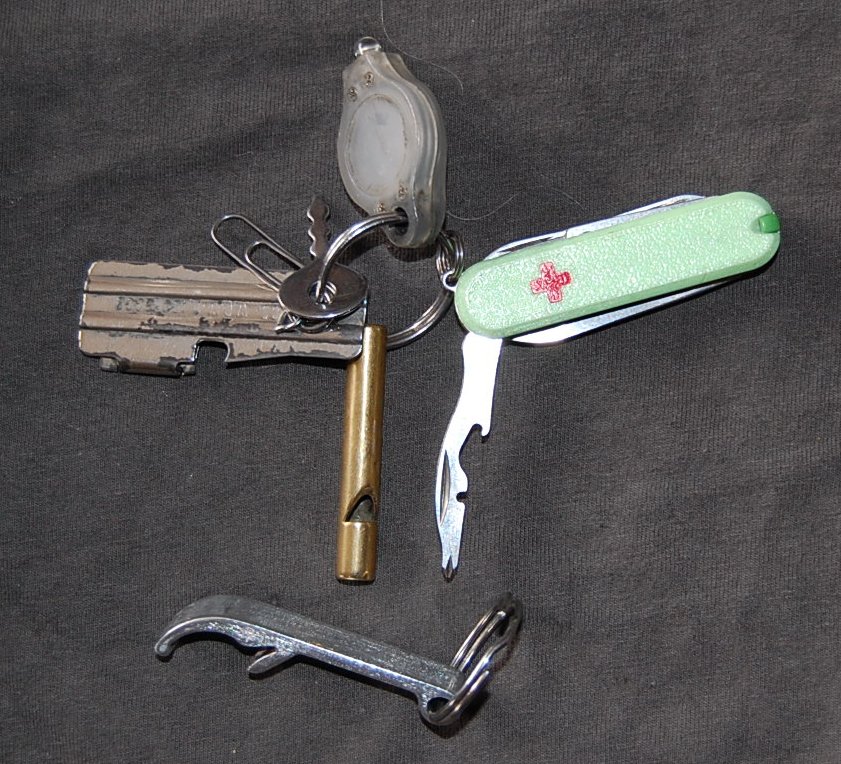
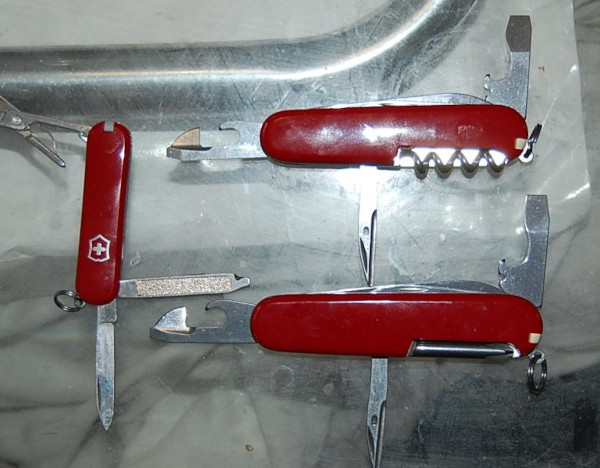
P51, Photon light, SAK Rambler and whistle above the bottle-opener
Whistle
The most obvious difference is that my keyring kit also includes a whistle.
This is a thin brass tube that came with a cheap hollow-handled survival knife my brother had back in the 80s.
Technically speaking, it is better to have a non-metallic whistle for if temperatures drop below zero. Very cold metal sticks to flesh. (I have a number of plastic whistles with other items of gear such as the soft-core pack and German Army parka.)
I stick with the brass whistle on my keyring, since I have not encountered a non-metallic whistle that is as compact. If the inside of my trousers get that cold it may be too late to whistle for help.
If I really needed a keyring whistle for arctic conditions, I could probably make one from wood or scrap plastic.
Light
My Photon light is a knock-off, since I am a cheap bastard and got about a dozen for a fraction of the price of an original.
The remaining lights give enough spares and batteries for mine to last me decades.
That said, my pseudo-photon still lights with its original batteries, and must be at least ten years old.
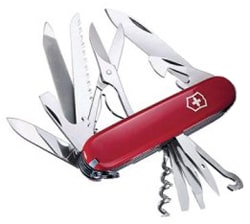
Rambler Swiss Army Knife
My keyring has a 58mm Swiss Army knife, and some readers will know I recently replaced my old Classic SD with the Rambler.
The Classic SDs are great, but I really recommend the Rambler.
The Rambler comes with the 58mm version of a combo-tool. This has a wire-bender/stripper, cap-lifter and magnetic Phillips screwdriver.
Capability to handle Phillips‑head screws is one of the few shortfalls of my SAK Ranger. The 3 mm screwdriver on the can opener can handle some Phillips screws, and the point of the nail-file might work.
My mini-Leatherman has a short, flat pointed tool that is intended for Phillips screws.
However, some screwheads are at the bottom of narrow screw wells.
The Rambler has a 3D Phillips screwdriver that has more reach and is better suited to narrow places than the Ranger and mini-Leatherman tools. The Rambler Phillips works with the tiny screws in the photon light.
The Rambler works with the Ranger in much the same way my Mora and kukri do.
The Rambler is easier to get at than the Ranger, so gets used for most jobs, which generally do not need a larger knife. Using the Rambler instead keeps the Ranger in good condition for when it is really needed, and decreases the chance of the Ranger getting lost.
The Rambler gives me two screwdrivers, scissors, a nail-file, a small blade, a bottle-opener, wire‑stripper/bender, toothpick and tweezers.
If I choose to carry a knife other than the Ranger, the Rambler on my keyring means I still have available to me some of the most useful capabilities of a penknife.
Being on my keyring, the Rambler and the other tools on the ring are readily available and immediately to hand. Thus, they see more use than items in pouches, pockets, or tucked in wallets.
Being with your keys, this is the tool set you are most likely to have with you when you need a tool.
Tools left at home in a cupboard or in your truck are not so useful.
P51 Can-Opener
The final object on that split-ring is a P51 can-opener. You can open a can with a Rambler/Classic SD, but a P51 is easier.
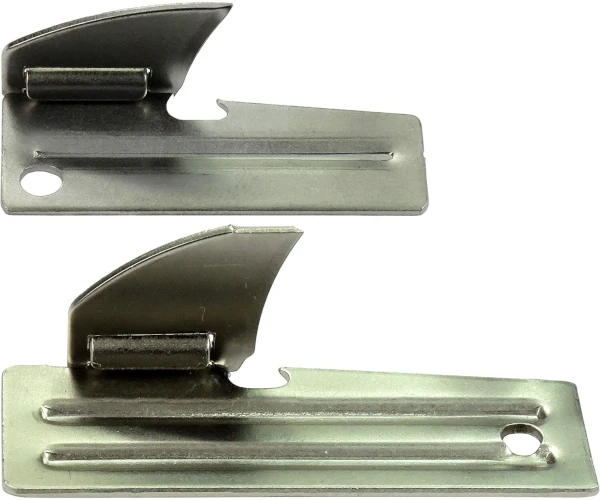
The P38 is about 38 mm/1.5 inches long, and has a hole in one of the “top” corners. The P51 is about 51 mm/2 inches long and has its hole at the bottom end.
P38 and P51 Can-Openers
Of the two types, I recommend the P51, since it has more leverage and is less fiddly, for a barely noticeable increase in size.
If you find the hook blade tends to catch on things, wrap a few centimetres of duct tape around it. The duct tape itself may prove useful.
There are whole webpages describing the various uses a P38/P51 may be put to.
Some of my favourites include:
Pry-bar suitable for opening paint tins and similar
The P51 covers many of the applications that the Rambler does not.
For some jobs it is quicker to bring the P51 into action than to unfold a SAK blade.
Bottle-Opener
On its own ring on the keyring is a bottle‑opener.
The Ranger has a bottle‑opener, the Rambler has a bottle‑opener. The mini‑Leatherman has a bottle‑opener. With a little fiddling, I have opened bottles with the P51. Why do I need yet another bottle‑opener?
A while back I was at a party. Plenty of beer bottles, but bottle‑openers were in short supply.
I lent my Swiss Army knife to some people, but this made me nervous.
Several times have I lent items out and they have proved so useful they were never returned.
I added a “loaner” bottle‑opener to my keyring so in future I would not have to offer more prized tools. It is also quicker to use than the penknives, since nothing needs unfolding.
Other Items
A couple of other minor items may also be found on my keyring.
A paperclip is a useful bit of wire with several possible uses. Push resets of electrical devices. Eject stuck DVDs and computer discs. Can be used to shim or pick handcuffs.
There is a little key from a luggage padlock. This can open many small warded locks.
A tool kit that will nearly always be with you and offers a wide range of useful capabilities.
This is a very good starting point for creating your EDC. Add some cordage and a lighter to your pocket and you have taken a big step in the right direction.
Procuring these items will not break the bank. Adding such a kit to your keyring is within most people’s means.
About a week ago, I posted the second part of “Knives You Need”, discussing Swiss Army Knives.
Since the first version went up, I have added more links and more content.
The pocket clip for my Swiss Army Ranger arrived, so I have posted an additional image of the new scales with the clip installed.
I have also put a few additional modifications on the page.
For today’s chapter of Survival Library, it seems appropriate that I look at two books that look specifically at the use of Swiss Army Knives.
Whittling in the Wild
If you are interested in Swiss Army Knives, you will have encountered videos posted by Felix Immler. Most of the links from my previous blog are to videos by Herr Immler, and for good reason.
There is a lot of rubbish on Youtube, but people like Felix Immler are a welcome breath of fresh air!
Immler has written several books on the Swiss Army Knife, but I have only been able to find a copy of “Whittling in the Wild”. It may be found under variations of this title such as “Victorinox Swiss Army Knife Whittling in the Wild”.
Felix Immler has apparently done a lot of work encouraging young people to experience whittling and create objects for themselves.
Most of the projects in this book are toys, fun‑stuff or curios. This is not the book to teach shelter construction or how to make a better rabbit trap. However, within these projects are many construction techniques that might be put to other uses, so they are worth a browse.
The book is worth reading just for the sections on safely using your Swiss Army Knife and basic handling techniques.
If you have young people you want to teach to use a knife safely and creatively, this is an ideal book. Many of us longer in the tooth and barer in the pate may learn a thing or two too!
Swiss Army Knife Camping & Outdoor Survival Guide
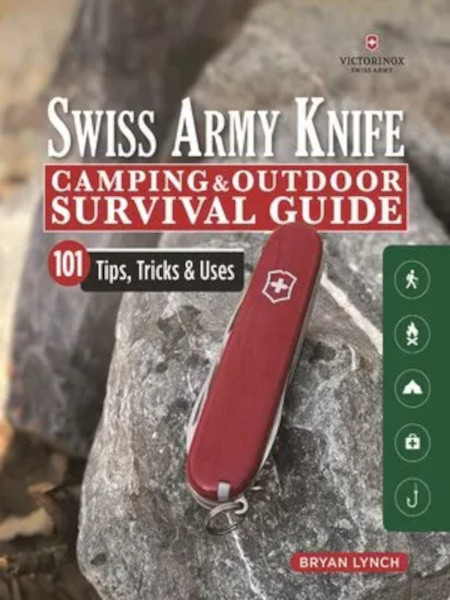
The second book is “Swiss Army Knife Camping & Outdoor Survival Guide, 101 Tips, Tricks & Uses” by Bryan Lynch.
Part One of the book mainly looks at a variety of knife models from Victorinox, ranging from the 58mm Midnight Manager to the SwissChamps and several of the locking blade models.There is a nice chart comparing the models included in the book.
Part Two is a nice section on safely using and maintaining your knife, including sharpening tools such as the wood saw and the chisel.
Part Three is on using your Swiss Army Knife in the wilds.
One oddity of this section is the author states that the distance of an arm‑span, fingertips to fingertips, is “roughly 5 feet (152cm)”.
Generally, the arm‑span is taken to approximate an individual’s height. For me this is bang‑on: distance from the centre of my chest to finger tips is exactly half my height.
The author later mentions that he is “a little on the short side”. The quick measuring scale he illustrates will not apply to the majority of readers. As he himself states “Obviously everybody is different, so premeasure your own limbs”.
Most of this part are presented as “projects” with an estimated time. Most of the projects are survival ideas that will be familiar from other sources.
Many are nicely described, and include the occasional less‑well known idea, such as the fire‑plow. Wilder has a nice story about someone using a fire‑plow, but I have seldom seen mention of this device in other publications, although it is included in some versions of FM 21-76/3.05.70 and the SAS Survival Handbook.
There is a suggestion about carrying wire wool under the corkscrew. I wonder if contact with the corkscrew will encourage the wire wool to rust, which makes it even less useful for firelighting. It is not a particularly good tinder for non‑electric sources of ignition. Some Swiss Army Knives have an LED. Can steel wool be ignited with the batteries for these?
There are far more useful things to carry than steel wool.
When using the back of the saw or some other tool with a ferro‑rod, it is more effective to draw back the ferro‑rod while placing the “steel” on the tinder.
I liked the section on carving wooden fish hooks from branched twigs.
The author talks about “catch and release” sport fishing.
Some mention might have been made that the paracord net described (or any net made with knots) will damage fish and should only be used for emergency or sustenance fishing. Similarly, wooden gorges as hooks are very cruel, often illegal, and should only be used in genuine emergencies.
While fish trapping with a bottle is mentioned, there is no mention of trot‑lines, which are likely to be more efficient than active fishing in an emergency.
There is a useful section on how a Swiss Army Knife may be useful for firearm maintenance and cleaning.
I also liked the tip on making a squirt bottle for cleaning out wounds. Yet another use for the sometimes maligned reamer! A bottle with a drinking nipple can probably be used the same way.
“There is a lot of wasted space in a vehicle, and I urge people to use it.” Good advice, although I would stress having something like a rain poncho, duct tape, vehicle tools and a sleeping bag or poncho‑liner.
Imagine attempting to repair your vehicle in very bad weather. It will help to have a means to keep the rain or snow off what you are working on.
In the “Urban” section, the author describes getting locked in a washroom cubicle. Similar happened to me in the toilets of a very famous museum. Like the author, I used my Swiss Army Knife to dismantle the lock and free myself.
Summary
In summary, I liked both of these books. Each is worth a read. I was lucky in that I was able to read both of them together.
There is a good possibility that when you really need a tool, your EDC Swiss Army Knife may be the only tool available. These books provide a nice reminder that you are better equipped than you might fear.
I had originally planned to make “Knives You Need” a two‑part series.
I have now had second thoughts.
The second part was going to address the topic of field knives. Much of it would have repeated ground already covered in other previous articles.
Instead, I have decided to take a slightly different angle and have decided to break this topic into smaller, bite‑sized pieces.
Many of you reading this may have spent good money getting yourself a survival knife. Good tools are important, you will get no argument from me on this point.
However, unless you spend all of your time in the great outdoors, the odds are that when you really need a tool, that survival knife will be back at home or in your car rather than on your person.
What is more, the tool you actually may need may not actually be a knife.
If you are willing to spend hundreds of dollars on a survival knife, is it not sensible to invest a little in the tools you are most likely to carry with you every day?
It is no secret I am a big Swiss Army Knife (SAK) fan.
Multi-pliers and lock knives will be covered at a later date.
Critics of the Swiss Army Knife point out that the blades lack a locking mechanism and potentially may close on the fingers of the user.
In practice, I have seldom had this happen. Perhaps penknife users are more cautious due to the lack of locking mechanism?
Mechanisms fail, so a lockknife that is mistakenly used like a fixed blade may be a greater potential risk.
There are several websites that give advice on safely handling and using penknives. Many of these are written for scouts, but many older users would probably benefit from putting these ideas into practice.
I recently read of someone who did have a blade close on them. They accidentally hit the back of the blade against a nearby wall.
This might have been avoided if the user had taken the precaution of extending an arm and checking for clearance around themselves before starting at task.
This is a prudent procedure for any tool use.
If using a long tool like an axe, hold it at full extension and check all around you. Do not forget to check for obstructions above and below you too.
The Penknife Grip
When using a folding knife, use what I call “the penknife grip”.
Your four fingertips are pressed against one scale. The opposite scale is held by your thumb and themar eminence. This keeps your precious digits out of the way of the main blades. This is the way to hold your penknife when opening tools.
When you need to close a tool, hold the knife in the same way and place the palm of your other hand on the back of the open tool. Calmly and smoothly fold your hands together to close the tool.
Many actions can be performed with your knife held in the penknife grip, keeping you safe should a tool unexpectedly close.
Some tasks will require a grip with your fingers around the knife body. Ensure a solid object, such as what you are working on, obstructs the tool from closing and that any pressure is applied in the correct direction.
Never use force to compensate for a blunt tool!
Never cut towards a body part, including your own. This simple and sensible precaution is often neglected in Youtube videos!
Right Tool for the Job
The risk of injury may be reduced by using the right tool for a job.
The long knife blade and saw-blades probably have the greatest potential for causing injury.
If you need to cut something, the short blade or the scissors are usually more appropriate.
If you need to bore a hole, use the shorter blade or the reamer.
If you need to pry, use the can- or bottle-openers, or better still use a more appropriate tool that is not your penknife.
In the pouch I carry my penknife in, I also carry an eight centimetre-long flat pocket pry bar. On my keyring, the P38 may be used to pry or open paint tins.
It is handy for trimming my nails or other minor jobs that it is not worth getting the main Swiss Army Knife out for. It actually sees a lot of use since it is the first tool I usually reach for.
The Classic was donated by the lost property box. It originally had green cracked scales and was missing its tweezers.
A few years back, I treated myself to a new toothpick and tweezers, which had recently become available in green.
Recently, it occurred to me how shabby the cracked scales looked. I would need something that matched the green of the toothpick and tweezers.
I found a set of replacements at a tolerable price. What was more, the new scales were in luminous green.
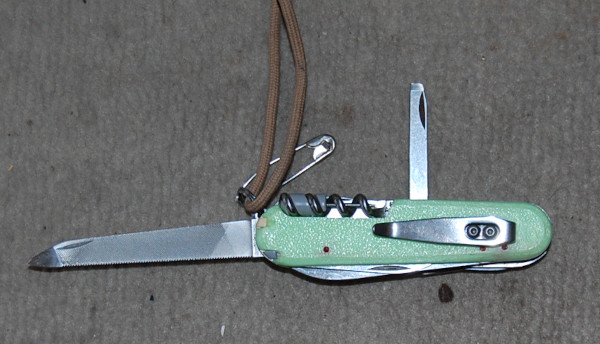
Classic SD with luminous scales. Note whistle, P51 baby can-opener and Photon-light also on keyring. The safety pin is attached directly to the Classic SD. I have now removed the safety pin since it had a tendency to open while the keys were in my pocket.
The Classic is a single-layer SAK with a small blade, a pair of scissors and a nail file. The tip of the nail file of the SD model is designed to act as a screwdriver. Some users grind the end to create a wider slot screwdriver. Some reviewers complain that the file no longer ends in a pointed nail cleaner. The screwdriver tip is still good for cleaning nails.
The Classic SD is one of Victorinox's most popular best sellers.
A friend showed me the 58mm Rambler, which is a two-layer SAK with all the blades of the Classic SD plus an interesting combination tool with a cap‑lifter, magnetic #00/#0 Phillips screwdriver and wire‑stripper/bender as well. I will likely buy a Rambler if I ever need to replace my Classic SD.
(Update: I have no willpower! I brought a Rambler and transferred the luminous scales on to it. This now rides on my keyring.)
The Manager is apparently a Rambler that replaces the toothpick with a retractable pen. The Midnight Manager is a Manager that replaces the tweezers with an LED. I have heard this light is not waterproof.
There are other 58mm models, but I feel the Classic SD or the Rambler are most useful.
I do not see much point in a 58mm model without scissors.
One oddity in the 58mm models are the bladeless Jetsetters. Supposedly airliner “cabin-safe”, this ignores that the scissors are probably a more practical weapon than the blades of 58mm models. The wirestripper on the combo-tool will not work without a blade.
If you intend to have a 58mm as your primary EDC knife, the MiniChamp may appeal. The extra tool that most appeals to me is the cut and picker.
Some may find the MiniChamp may be a bit bulky or heavy for keyring carry. A friend of mine has an alox version and considers it a little heavy for his keyring. Pocket clips for 58mm models may be found, but I do not use one myself.
Incidentally, SAK with Alox scales generally do not have tweezers and toothpick slots. I would recommend only considering models that have these useful tools.
For those looking for a light, low bulk EDC knife, some of these are worth looking at.
58mm, 84mm and 91mm Swiss Army Knives (Classic SD, Sportsman, Tinker)
Unfortunately, the models that include scissors have been discontinued. This may not be a problem if you also carry a Rambler or Classic SD.
91mm Swiss Army Knife Models
When it comes to “full-sized” (91mm) Swiss Army Knives, Victorinox currently offers 28 different models.
For general use, survival, emergencies or EDC (Everyday Carry), I would suggest one of the following models:
Spartan
As one might expect from the name, the Spartan is the most basic model of the 91mm Swiss Army Knives. Apparently it remains one of their best sellers.
It is a two‑layer knife, so you get a large and small knife blade, plus the can‑opener and the bottle‑opener. On the back is the reamer and the corkscrew.
Knife blades are quoted as 58 mm and 36 mm in length, with a hardness of RC 56. My own measurement gives a cutting edge of around 60 mm, with the distance from tip to knife body being greater. A 91mm Swiss Army Knife complies with the 3 inch/76 mm blade length restrictions some areas impose. This figure was probably chosen so that SAKs were exempt!
While on the topic of smaller knives, this video suggests a 74mm Executive for EDC, but they have been discontinued.
The applications for the knife blades are fairly obvious. Quite large pieces of wood may be split or removed by using techniques such as batoning.
The knife blades are sharpened at an angle of 20 degrees.
The X-notch is an alternative to the square or log-cabin notch. It may be created by saw cuts or batoning a knife blade
The bottle-opener and can-opener are collectively referred to as the “opening layer”. Both the can-opener and the bottle-opener have applications that may not be immediately obvious.
The 58mm Rambler has a tool with a magnetic Phillips screwdriver. Oddly, the screwdrivers on 91mm knives are not magnetised. My bottle opener is weakly magnetic and the can opener more magnetic, but that may be due to the magnet I keep in them.
Bottle‑Opener
The notch on the bottle‑opener/cap‑lifter works together with the cutting blade to serve as a wire-stripper. The notch may also be used as a wire‑bender or nail‑puller. It may be used as a striker for small diameter ferro-rods.
Various other parts of the bottle‑ and can‑opener or the keyring eyelet may be utilized bending wires or similar materials.
The tip of the bottle‑opener is a large (6 mm) slot screwdriver. This will fit in a socket heads adapter should you need another type of screw head. The screwdriver tip may also be used as a light prying tool.
Can‑Opener
The tip of the can‑opener is a small (3 mm) slot screwdriver. What is not often appreciated is that this part is also intended to work with Phillips screws too. The tip may also be used for light prying, such as opening stubborn pistachio nuts.
I sometimes use the screwdriver tips as measuring gauges to estimate if something is 3 or 6 mm .
The hook part of the can opener may also be used to cut tape on boxes. Felix Immler has a video on how to turn this part into a more efficient hooked cutting tool. Some alternate examples of sharpened the unsharpened edge to improve string and box-cutting capability.
This can-opener may also be used as an orange peeler or a billy lifter.
One of my favourite uses for this tool is that it can be used to carry a 5.7 mm magnet. The magnet is useful for picking up or holding secure small screws, or magnetizing a pin, tweezers, safety pin or needle for navigation.
The can-opener on its own is now magnetic. Interestingly, the bottle-opener on the same layer is also weakly magnetic.
I have taken to alternating storing the magnet between the bottle-opener and can-opener to increase the effect. The main blade and scissors are now also magnetic, and the hook weakly magnetic.
Check to see if the pin in your penknife scales is actually magnetic.
Corkscrew
My main use for the corkscrew is to carry the 1.5 mm mini‑screwdriver.
The mini‑screwdriver is an essential for anyone who wears spectacles or even sunglasses. Not all SAK come with the mini‑screwdriver. I very much recommend acquiring one.
Not surprisingly, all the SAKs I recommend for EDC have corkscrews so you can carry a mini‑screwdriver.
The mini‑screwdriver may be used as a tiny prying tool to pop the back off a watch and to remove the battery. It may be used to drive out small pins, and may be used this way when replacing the spring of the SAK scissors..
Cotton wool may be wrapped around the corkscrew to serve as a source of tinder, or it may be used to carry a supply of fishing line.
There are other alternate tools designed to fit in the corkscrew, including the Fireant, a tiny ferro‑rod. Larger diameter ferro‑rods may be cut down to fit within the corkscrew.
Alox handled variants may lack the corkscrew and other back-tools.
I have glasses, so carry the mini‑screwdriver.
Note that the Spartan, Climber, Camper and Huntsman have an equivalent that replaces the corkscrew with a #2 Phillips screwdriver. These the Tinker, Super Tinker, Hiker and Fieldmaster.
Trivia: MacGyver did not drink, and many of the penknife models he used in the series lacked a corkscrew.
Reamer
The reamer is another very versatile tool. It acts as an awl, a scraper, a punch, a seam‑ripper, wire‑stripper, wire‑bender and a threading tool.
The reamer is very useful for creating pilot holes for a drill bit or gimlet. It may be used to clean up or bevel a hole you have bored.
A bit of trivia: when your reamer needs resharpening, it should be sharpened at 48 degrees.
84mm and 91mm Swiss Army knives share the same component for their reamer.
Scale Tools
Scale tools usually refers to the tweezers and toothpick. Some models have additional items such as the ballpoint pen or pin.
Some tools you will not use often, but will be very pleased you have them when you really need them. This may include the tweezers or toothpick.
Some models, such as those with Alox handles, lack the tweezers and toothpick. The tweezers in particular are worth having, and the toothpick has also proved useful to myself.
Even if you do not own a Swiss Army Knife, the tweezers are a useful thing to have in your medical or emergency kit. They are hard to beat for compactness and functionality.
Trivia: Tweezers for the 58mm and 91mm models are of similar size, but differ in the shape of the head.
A friend of mine likes his Compact Swiss Army Knife. Unlike many Swiss Army Knives with only a few layers, the Compact includes the pen and mini‑screwdriver.
The Compact is a two‑layer knife like the Spartan but replaces the small blade with the scissors, and the reamer with the multi‑purpose hook. Instead of the cap‑lifter and can‑opener, there is a single “combo‑tool” that serves as a 6 mm screwdriver, can‑opener, cap‑lifter, wire‑stripper, emergency Phillips screwdriver and wire‑bender.
Personally, I think the reamer is a “must‑have”.
The Compact apparently evolved from the 84mm Golfer. An 84mm version of the Compact would be nice, especially if they replaced the long nail file of the Golfer with a reamer.
The Companion is a three-layer SAK that replaces the can opener with a box-opener. Oddly, the box-opener was not paired with the combo-tool to keep can-opening capability. Lots of other SAK tools serve as box-openers, including the small blade, scissors, reamer and can opener.
The Climber is a three‑layer version of the Spartan, adding the hook and scissors and retaining the reamer and small blade. The same tool selection was available in an 84mm Climber Small model/Alumnus, but it is sadly no longer in production.
The 74mm Executive is comparable to the 84mm Climber, but also out of production.
For a minimal bulk, “city carry” EDC knife, the Climber is a good choice and very good value for the tools and capability it offers.
The Camper is a Climber replacing the scissors and hook with a wood saw.
If I had to make a choice, I would choose the scissors over the wood saw.
The Explorer is a Climber that adds a magnifying glass and in-line #1/#2 Phillips screwdriver. If you now find it difficult to read labels in the shops, the Explorer may be a good alternative to the Climber.
Scissors
Keeping your toenails trimmed is an important part of looking after your feet (and socks). The Swiss Army scissors are excellent for such applications. Better than many purpose‑designed items!
The SAK scissors are widely regarded as being the best available on any multi-tool. You probably own dedicated scissors that are not as good.
The scissors are also surprisingly robust, being quite capable of cutting through soda cans and tin can walls to construct various items.
The scissors are probably the Swiss Army tool I have used the most, and I suspect I am not alone in that.
I regard the scissors as a must‑have feature on a Swiss Army Knife.
Multi‑Purpose Hook
If I recall correctly, the multi‑purpose hook was once called the “parcel hook”, being intended to hook though the string of a heavy parcel or bundle of firewood and let you use your penknife as a handle.
The hook is rated for 90 kilos/200 lbs of load!
The hook is often underappreciated, since there are many other applications for this item. These include being used to untie a stubborn knot, twisting materials to make natural cordage or an eyelet in wire, lifting hot billies or their lids, pulling stuck zippers, as a pen holder, retrieving tent pegs, and tightening lacings.
Some hooks have a nail-filing surface on the back.
Check out some of the videos on‑line for more applications.
There is even a modification to turn the hook into a groove carving tool. Worth considering if your penknife is a dedicated whittling tool. Putting a cutting edge on your hook may make it less effective at some of its other applications.
Trivia: The hook and scissors will be mounted on the same layer. If your 91mm knife has one tool, it will have the other too.
Huntsman
The Huntsman is another of Victorinox’s best sellers.
Effectively, it is the Climber with a woodsaw blade to create a four‑layer model.
A Huntsman will cost approximately twice what you might pay for a Spartan. Prices vary a lot, however, so shop around!
For “bushcraft” and “woodcraft” use, the Huntsman is a really good choice, having both the scissors and a wood saw. A saw is a handy thing in the garden too!
Wood Saw
Many traps and other items you may wish to construct may require accurately cut parts.
The wood saw is also useful for scraping bark off, creating sawdust or shavings for tinder, descaling fish, and may be used as a striker for a ferro‑rod.
Take a look at this video on using the wood saw and a tip on waxing it.
Trivia: The wood saw is one of the few commonly used SAK tools that lacks a nail‑nick
Oddly, the original scales of my Ranger have “Camping” and a tent logo. Several models of SAK other than the Camper have this decoration.
The Ranger is the Huntsman with the addition of the metal saw/file. It also has a chisel blade and a 2.5 mm fine screwdriver on the back, so three additional tools than the Hunstman. Unlike some larger Swiss Army knives, there is a back layer tool on every layer.
I have found the metal saw useful, so will choose a Ranger over a Huntsman.
The chisel is useful when forming notches in wood, and may be used as a plane/scraper.
A Ranger will cost approximately two and a half times what you might pay for a Spartan. As I have already said, prices vary a lot, so shop around!
I once had to cut down the bolts on a rucksack frame since they were digging into my back and damaging my shirt. Not surprisingly, I like having the metal saw/file available.
The metal saw is better than the wood saw for cutting some plastics and for some wood‑cutting tasks.
It is also a good striker for a ferro-rod. Keep the saw still and pull the rod across the back.
The file may be used sharpening improvised fishing hooks.
The tip of the metal saw may be used as a Phillips screwdriver or nail-cleaner. It may also be used with a socket.
Trivia: 91mm Swiss Army knives with the metal file will also have the chisel.
Since the seven‑layer Champion was discontinued, the Ranger is as big a Swiss Army Knife as I care to consider carrying. I don't really want something over three centimetres thick!
A sewing needle, wrapped in invisible thread, has been placed under the metal saw.
The tweezers have been modified to be pointed. The tweezers with my Classic SD/Rambler are unmodified, so between the two knives I have both a pointed and a standard configuration set of tweezers.
A small hole has been melted in the toothpick so that it may serve as a blunt needle to thread cordage such as dental floss.
Using the small blade of the Ranger, I made a tick removal tool by cutting a slit in the end of the toothpick. I am most likely to use the toothpick in my keyring SAK if something is stuck in my teeth.
Both the toothpick and the pointed tweezers with the Ranger may be used against ticks.
A second hole was drilled in the new scales to hold an unthreaded additional sewing needle. The pin proved to be poorly magnetic, so I replaced it with a bead-headed pin that was more magnetic and easier to remove.
Old Ranger with new luminous scales. Note magnet carried in can-opener.
New Scales!
I liked the new scales on my Classic SD so much, I went ahead and brought a matching set for my Ranger. I kid myself this will make it less likely to lose in Autumn.
Check out the video on how to use warm water to remove the old scales without damage.
Generally, I like my kit “low-key”. The SAK is an exception, since it is not really a tactical nor defensive item. It is, however, valuable in both replacement cost and in utility as a resource. Thus I like that the new scales make it easier to see and hopefully less likely to lose.
Check out this modification, however, since it may be applicable to other knives and tools. So might this idea!
The new scales are “plus” scales, so have additional carrying places for a pin and an SAK pen. I drilled another well for a second pin. I later discovered the pins I have are not magnetic, so I replaced the first pin with a small, unthreaded needle that is magnetic.
As well as being luminous, the scales have some nice texturing for improved grip.
The larger 91mm scales were a bit harder to fit snugly compared to the 58mm for the Classic SD/Rambler. I had to use a vice.
Do not forget to pad the jaws of the vice so you do not damage your new scales!
Slots for the scale tools were very snug for both sizes of scale, making the tools difficult to remove. I used a circular needle file to create a small scallop underneath which solved the problem. Overdid it a little on the toothpick for the Ranger , but adding some “White Tack” to the slot solved that problem.
The Ranger has been fitted with a loop of beige bootlace about 14 cm long. So too has my mini‑Leatherman Squirt P4.
Both tools ride in a mobile phone belt case with cut‑out bottom corners.
The loop of cord is passed down through a corner and then the tool passes through the loop to form a lark’s head knot. Even if the top of the pouch pops open, the two tools cannot be lost.
The loop is also large enough to pass around my wrist or hook my thumb through for added security when using the tool. The safety pin may be used as a pin or clip to secure the tool to clothing or D‑rings.
I have also to fitted a pocket clip to the Ranger, giving me another option when I need my hands free.
The pouch mentioned above is on my trouser belt. If I am wearing trousers, I have my Swiss Army Knife and mini‑Leatherman with me. I will also have my keys, so will have my Classic SD/Rambler available too.
The belt pouch also holds the aforementioned pocket pry bar and a diamond‑impregnated metal sharpening card.
The few jobs the Ranger is not suited for, the mini‑Leatherman or pry bar can usually handle.
If this collection of tools cannot handle a job, they may often be capable of making something that can.
The tools form a component of the EDC kit I have distributed across my keyring, trouser pockets and compact pouches on my trouser belt.
Summary
For EDC, I prefer a Swiss Army Knife to include scissors, a reamer and corkscrew/mini-screwdriver.
My personal choice is the Ranger and Rambler. I carry my Ranger in a belt pouch. Previous knives have worn through a few pockets over the years.
If you want something more pocket-friendly and more compact, there is the Compact, Companion and Climber. All have similar capabilities, with the Climber possibly being best value.
For an even lighter option, Sportsman, Waiter or Bantam.
The Swiss Army Knife is the tool you are most likely to have with you when you need a tool. It is worth spending a bit of money to get one you are happy with.
That said, the web currently lists the Victorinox Ranger as $75, with the lesser bladed models at correspondingly lower prices.
Given the very high quality of Victorinox knives, that is a pretty reasonable price compared to the prices of some other folding and fixed blade knives.
In Part 2 I mentioned grabbing fresh food from the kitchen and adding it to your bag.
Realistically, it is not likely that everything you will want will be ready packed in your bag.
There may be important documents or personal items you will want to take with you.
There may be things you will want to do before you leave, if time permits. Turning the gas and water supply off will reduce the damage to the house that might occur while you are away, for example.
Sit down, and make a checklist of things you will want to do before bugging out. List things you will want to add to your bag, and their location. Then leave your list for a day or so. Other things to add to the checklist are bound to occur to you.
Then reorganize your checklist by location. In the kitchen, you will need to do this, and this, and take this, for example.
Once you are happy with your list, sleep on it, then add anything else that occurred. Print it out in large font.
You may be stressed and hurried if you have to use it. Make it clear and easy to read.
Radio
Many BOB lists suggest having a radio receiver so that you may listen to weather reports and other emergency broadcasts.
For obvious reasons, such a radio should not be too heavy or bulky.
Examples that use a hand crank power source and/or solar charging are available. Many of these also act as flashlights and phone chargers.
If the device has solar charging, you may want to come up with a way to carry it where it gets its required dose of sunlight, but is protected from damage.
Make sure that any design you buy can receive the emergency broadcasts for the region and country that you will be operating it in.
Flashlight
You may have brought a 1000 candlepower “special forces” tactical flashlight that can survive a nuclear blast and immersion in the Marianas trench.
It won’t be much use if the battery is flat.
At least one of your light sources with your bug out bag should be hand cranked.
Fire
Have a fire kit in your pack. This will supplement the fire kit you carry on your person, some of which will be part of your EDC.
Hexamine blocks have a very long shelf life, so having a pack in your bag as firelighters or as an alternative fuel is a good idea.
The alcohol gel for your stove may also be used for fire-lighting.
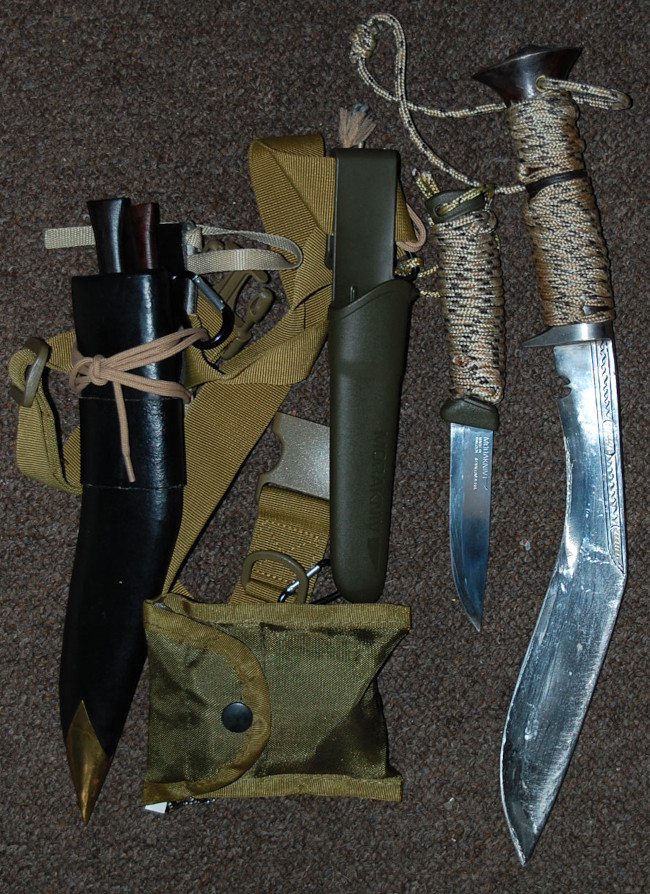
Tools
Your survival knife(s), penknife etc should be carried on your person. The small pouch in the photo above contains a sharpening stone and a fire kit.
The pack carries tools that are less often needed. Unless you are in the jungle, your machete will likely ride in or on your pack until needed.
If you live in the colder, wooded latitudes, an axe may be more useful than a machete. A three-quarter or Hudson Bay model is often suggested as a good compromise between utility and portability.
Digging tools are carried in the pack and only transferred to one's person when use is expected.
A crowbar is useful in urban areas, and makes a passable digging stick.
As advised in Part 2 of this series, carrying some lengths of cordage of various types and sizes is prudent.
Wash Kit
Since we are talking about a 72 hour scenario, our wash kit should be very basic.
Toothbrush, small tube of toothpaste, half a bar of soap, one razor, perhaps a small plastic mirror and a microfibre flannel.
That is all you really need in a 72 hour emergency scenario.
All this will fit in a small drawcord mesh bag.
Fit the wash bag in a small sandwich box and you may use the box as a wash bowl.
A tenugui or microfibre towel rides elsewhere in the pack so that it can dry.
We are trying to keep our load light, so consider a children’s toothbrush, a cut down adult brush or one of the travel toothbrushes. Some of the latter come with a really tiny tube of toothpaste!
No shaving foam, you can use the soap. It is debatable if you actually need the razor in a 72 hour emergency scenario. You probably won’t be attending any job interviews!
You can survive 72 hours without shampoo (or use the soap!)
A stick of deodorant, however, may be appreciated if you share your shelter!
A supply of feminine hygiene items may need to be included in your BOB. These have alternate uses such as fire lighting or as wound dressings.
First Aid
Suggestions for first aid kits for bug out bags often go over the top.
I have seen recommendations that a bug out bag include a full stainless steel surgical kit, a couple of reference books on medicine and surgery (680 pages between them!), diethyl ether, saline solution, a thermometer and so on.
Your first aid kit is mainly there for cuts, grazes, sprained ankles and such.
My own travel kit, which I have used for trips of more than three weeks (504 hours!) is shown here. The lice comb may not be necessary for a 72 hour kit. I hope to never need it!
Some disposable gloves in a Zio‑lock bag and a CPR face shield might be useful additions.
Robert dePugh stated that the basis of a good first aid kit was water purification tablets, aspirin, soap and a toothbrush.
In addition to pain relief, aspirin can treat fevers, inflammation and cold and flu symptoms.
Soap is in your wash kit. It is a far better antiseptic than hand‐sanitizer or most other things you are likely to have available.
The toothbrush is probably also with your wash kit.
Some water purification tablets should be carried on your person, others with one of your water containers.
To that list I would recommend adding some plasters, alcohol wipes and a roller bandage.
A twisted or sprained ankle is no fun when you have a backpack, hence the roller bandage. In addition to conventional plasters, have a few feet of elasticated plaster tape that is useful for the minor cuts to the fingers that accompany careless knife use.
A little tin of Vaseline is also useful for chaps and chaffing.
Both the Vaseline and alcohol wipes may assist in fire lighting.
A snake bite kit should be carried where venomous snakes are a likely hazard. Have a bee-sting kit if anyone in your party is allergic.
If you expect combat, you should have shell dressings, a CAT tourniquet and an CI-IFAK kit, but these items are more useful carried on your person, not in your pack.
I am of the opinion that any activity that involves knives and hand tools should have some plasters readily available.
Likewise, any activity where guns or bows are involved should have some shell dressings and similar nearby.
If you take any personal medications, place them on your list and add them to your bag or clothing pockets when you bug out.
Your “internal medical kit” should be “fully stocked”. Ensure all relevant vaccinations are up to date.
Paperwork
Have a roll or two of toilet paper.
Put each in a Zip‑lock bag to keep them dry and carry a tube of hand‑sanitizer with one.
Your hand‑sanitizer should be 60 to 95% alcohol, both for its antiseptic properties and to ensure it is flammable. Sanitizer and toilet paper are both possible aids to fire lighting.
In addition to the items in the bug out bag, have a Zip‑lock bag with a number of paper napkins or sheets of toilet paper on your person. I have this in the right cargo pocket of my trousers.
Books
Whether to take any books in your BOB is up to you. Most books claimed to be “ideal for your bug-out bag” are nothing of the kind.
A book on identifying edible plants in your area might be considered.
Repairs and Spares
Repairs and Spares were described in the article on rucksack packing.
You do not need the bulky “housewives” offered by some merchants.
You just need a couple of needles, already threaded with a metre or so of invisible thread. A couple of safety pins. A couple of rucksack buckles. A few metres of electrical and duct tape. Perhaps a couple of buttons, a neutral-coloured cloth patch and a tube of super glue. All these fit in a little Zip‑lock bag.
No need for folding scissors. I have a penknife with scissors on my belt and another on my keyring.
For heavier repairs I use dental floss. I have a reel of this in my EDC and also some in my wash kit. Ensure one of your needles has an eye large enough to take dental floss and thicker materials you might improvise.
Back when I was much younger than I am now, I worked in many temporary jobs to support myself during higher education. Warehouses, bakeries, kitchens and hospitals, to name a few of the places that I worked.
I am above average height, so I soon became aware that many of the fixtures or tools I was expected to use were too small for me. Even in this day and age, items such as vacuum cleaners, mops and sinks are designed with the assumption that they will be used by average-sized women rather than persons of my size.
In many of the places where I worked it was not uncommon to see broom-handles extended with a length of pipe. Sadly many other tools were not so easily adapted.
A Little Off the End
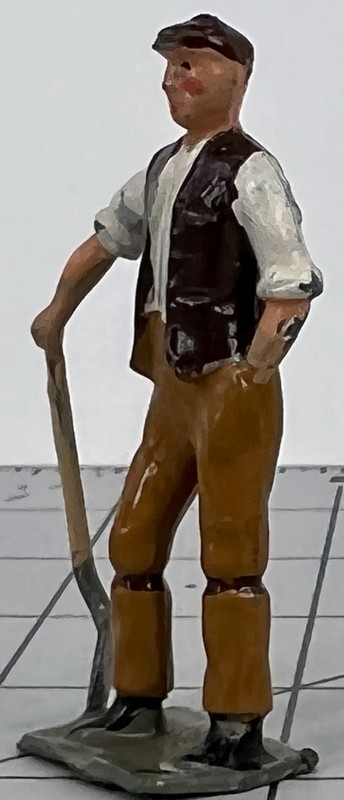
Recently, someone was describing to me their early working life as a labourer on building sites.
“One of the first things you would do is shorten your shovel by an inch.”
Given my own early working background, it may not be surprising that I could not resist asking: “Which end?”
It turned out, it was not uncommon to shorten the shovel [spade] blade and resharpen the new edge.
Resharpening the edge made the tool more efficient and negated any neglect that a previous user might have inflicted.
It also lightened the shovel a few grams, and if you were expected to use a shovel all day, this weight saving was considered to be significant and worth having.
Of a similar ilk, cleaning the tool at the end of the day was considered important. A few millimetres of concrete drying on the shovel would add weight and make the shovel harder to use the next day.
This rather reminded me of the old adage about an ounce on the feet being like a pound on the back. A slight decrease in shovel weight may significantly decrease fatigue.
Less is More?
Logically, a shorter shovel/spade blade results in a smaller volume of material that is moved by each shovelful. Less volume means less mass, so each shovelful/spadesful took less effort to move. Thus a small decrease in blade-size might mean a significant reduction in energy needed to move each spadesful, since each spadesful would be lighter.
Of course, to move a given volume would take more actions with a smaller blade, but that may be more practical than moving it as a smaller number of much heavier loads. Are half-a-dozen light loads easier to move than three that are twice as heavy?
The following diagram may not be familiar unless you work in safety, or injury liability. It shows the recommended maximal loads that should be attempted by an average male or female.
Maximum safe lifting is with the load close to the pelvis. The further the load is from this point, the less that can be safely lifted.
About 37% of work-related injuries are due to poor manual-handling practices, with a surprising number occurring in office and “white-collar” environments.
Based on the above, a shovel/spade-load and the tool being used to lift it should be around no more than 5 to 10 kilos in total mass.
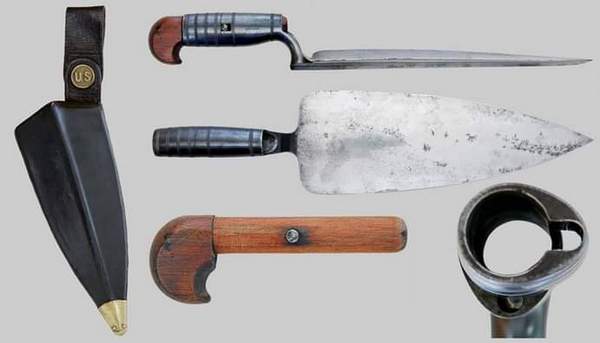
In my blog on “Easier Entrenchment”, we encountered accounts of 19th century soldiers throwing up useful earthworks using trowel-sized bayonets. A narrower blade should penetrate packed earth better. Specially designed trenching shovels tend to have long heads than may be only four inches/100 mm wide. Very different from the modern, issued entrenching tool!
Can a smaller, more efficient shape make that much difference?
All this suggests the basis for a really useful time-and-motion or ergonomics study.
What is the most effective way to throw up an earthwork with manual tools?
If the work is easier made in smaller rather than larger bites, what is the optimum size and shape of shovel blade?
I notice that some of the titanium tools on offer on the internet are not just lighter, but use blades of 200 x 90mm dimensions on a 64 cm haft.
What is the best configuration and length of handle for a typical male?
Recently I blogged on the topic of dish-washing. Today, I want you to imagine that you are somewhere far from civilized plumbing. You may want to wash your cookware, clothing or you may want to wash yourself. What do you do?
Some of you, I suspect, may suggest that you head for the nearest body of water and wash there. We will assume you have been prudent and lucky enough to have placed your camp within an easy travel distance of water. Not too close, to limit hassles from insects.
Washing yourself or your dishes in a body of water is not ideal. Even in parts of the world where that water is not inhabited by crocodiles, alligators, mosquitoes, schistosomiasis or similar.
The problem is that your activity generates what is known as “greywater” or “sullage”. Dirty water, soap or detergent, and also suspended fats, grease and food particles.
Even if you use biodegradable products, biodegradation takes time! While this process is on-going, your greywater may have various effects on the body of water, including changes in pH, viscosity and changes in oxygen level.
A much better approach is to cast your greywater on to the soil, some distance from the nearest body of water. The creatures of the soil can deal with greywater much better than those of the water, and any effects are more localized. Choose ground that is absorbent, and do not use the same place on consecutive days.
OK, so you have seen the wisdom of washing some distance from the water source. Just how do you get the water to wash with to the desired location?
Your water bottle or bladder probably only holds a litre or three. You have probably treated the contents to make them safe for drinking, so using this for washing is a little wasteful.
Your canteen cup probably only holds half a litre or so.
You could fabricate a water carrier from local materials. Kephart has a whole chapter on making utensils from bark. Such crafts take time, and suitable materials will not be available in every environment or season.
Would it not have been useful if you had brought a plastic bucket with you?
Buckets for Preppers
I recall being in a bar decades ago. I had just rented a new place, actually my first real flat with multiple rooms I did not have to share with anyone. I was chatting to a young woman and told her: “I have brought a plastic bucket and bowl, so I am all set!” Many years and many locations later, that same bucket and bowl are still with me. Used the bowl just a few weeks back to soak the grill of my halogen oven.
Some will scoff! “I'm a backpacker! I go ultra-light! There is no room for a bucket!”.
Empty buckets weight very little. Being mass-produced, they cost very little too! Shop around!
If you pack the bucket full of foodstuffs and other stores, it will take up very little room in your pack. It actually provides them with some protection. Oddly, some larger capacity buckets pack better than their smaller cousins. More on capacity later.
What Use Is a Bucket?
What uses can we put a bucket to? We have already mentioned carrying water for washing, dish-washing and laundry.
• A friend of mine gave me a folding camping sink that holds about ten litres. Not a priority for the bug-out bag, but he thought it might be useful for more recreational camping trips. I now look at this item and wonder just how I was supposed to fill it. Ten litres of water is around 22 pounds! A filled, folding sink is not something you want to carry from a standpipe. I would have needed a bulk-water carrier, or a bucket.
If you have tried the techniques in my dish-washing article, you will know that you do not need a large capacity vessel to wash most items.
You can use a small bowl or bucket of water to wash a large diameter item such as a plate, frying pan or yourself!
Use a cup, or your hand, as a water ladle to wet and rinse. The dirty water does not go back into the vessel, so it is cleaner and more efficient.
I doubt that folding sink will ever see use. I will find a bucket that fits into my pack. A bucket will probably be more durable than a sink/bowl designed to fold.
• Read through a survival manual or book on woodcraft, and you will probably come across references to soaking things to make them more pliable or more edible. You cannot fit much in a mess-tin!
So many wilderness guides mention uses for containers, yet so many kit lists don't actually include any!
• Cannot reach the water source? Bucket on a rope may solve that problem.
• Let the water come to you! Place your bucket to collect rainwater.
• Successful day fishing or squirrel shooting? Carry your windfall back to camp in a bucket.
• Find a patch of berries? Your bucket will hold as much as you can carry.
As a quick aside: In one of Ray Mears shows one of his local hosts had an interesting berry-picking technique. She simply swiped the bush with her basket. Enough berries apparently detached and ended up in the basket for this to be a considerable labour-saving. Something to experiment with in berry season!
• An empty bucket can be used as a drum to guide companions back to camp, or just let them know dinner is nearly ready.
• A bucket can be used to dig through soft snow or sand.
• A up-turned bucket makes a useful stool and (if sturdy enough) can be used as a step.
• If you have trouble squatting when attending to “calls of nature” an up-turned bucket can be a useful support while you hang your nether-regions over a “cat-hole”.
• And if it is really nasty outside the shelter, as a vase de nuit.
Any party of more than a couple of individuals should include a bucket in their equipment.
Smaller parties and solo travellers should give them serious consideration.
Any vehicle, be it boat, SUV or APC, should find room for a bucket. The interior of the bucket can be used to store other useful items. In an emergency, grab the bucket and be instantly equipped with useful assets.
Some companies even offer 72-hour kits packed in buckets.
Choosing a Bucket
For backpackers, cyclists and lightweight travellers, the bucket chosen needs some consideration.
Obviously, we want a bucket that will fit easily into our pack, with little wasted space.
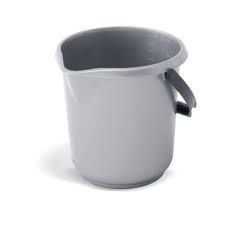
There is little point in my recommending a bucket of a certain capacity. In my kitchen I have two buckets, not counting one for floor-washing. The five litre bucket is too narrow at the bottom. It will fit in a daysack, but it is space-inefficient. The three (Imperial) gallon bucket is about twice the capacity (13.6 litres) but is too wide at the top for even my largest rucksacks.
It is not a good idea to try and carry more than ten litres in a bucket or container.
The interior dimensions of your pack will be more significant than bucket capacity. Taking your pack down to the hardware store and trying some buckets for size is not that bad an idea. Remember the bucket will be riding above your softer pack items, so perhaps put a sleeping bag and a realistic load of clothing in the pack before you hit the hardware store.
Depending on intended role, you may want bright colours or natural and neutral. The outside of a bucket can easily be spray-painted.
Cylindrical buckets, with the bottom of similar diameter to the top, may be a better choice than more conventional tapered designs. Between five and ten litre size may be a good option for these.
If you decide to buy a bucket on-line, bear in mind that perfectly suitable items may be available under various other names, such as “paint kettle” or “storage tub”. There will be bowls and various other containers that can be made into buckets with just the simple addition of a handle.
In my book, “Survival Weapons”, I devote an entire chapter to the topic of sharpening. That chapter remains a useful guide to a topic that can sometimes seem cryptic.
At this point I should explain that one of my “virtues” is that I am lazy. According to admiring colleagues, I can be usually be expected to find the simplest, most stress-free method of getting a job done. Over the last week or so have I noticed that how I sharpen some tools now varies somewhat from the techniques described in the book.
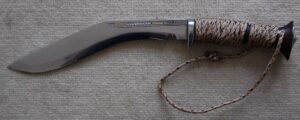
Regular readers will know I own a number of kukris, as well as other large blades. There was this period of ill-health where I spent my holiday budget on swords instead! Probably safe to say I have more large blades than the average prepper. Some of these have concave or convex edges, or in the case of kukris, both. Some of the techniques for sharpening you will see on some websites are not ideal for such tools.
I have, over the decades, acquired a large number of sharpening systems. The one I have found myself using the most recently is shown above.
I inherited this stone from a deceased colleague. It is most likely an Arkansas stone. The stone itself is about three inches long and a little under an inch wide. It is firmly mounted (glued?) to a wood tray about four and a half inches long by an inch and a half wide. This provides a very nice handle when using the stone. Beneath the base is the matching wooden lid.
The stone has just been cleaned. I used a little washing-up liquid and some water to remove most of the grime. A little bathroom cream cleaner took of the remaining residue.
The Angle-er
The device below the stone in the photo I call an “angle-er”.
Having this nearby helps you visualize the correct angle while sharpening. This particular example has angles of 22.5, 15 and 30 degrees, which are pretty good choices for general usage. Some may prefer 17 or 20 degree and 35 degree angles. 20 degrees is the recommended edge angle for Swiss Army Knife blades, for example. I later recut the 30 degree corner to 20.
Once you have your tool close to the correct angle it is easy to vary it a couple of degrees if desired.
The beauty of this Arkansas stone is that I can move it instead of the blade. Unlike a larger flat stone this one is narrow enough that it can follow a curved edge, rather than attempting to grind it straight.
The method I use is essentially the same as was described for sharpening a machete, only instead of using a file I use a suitably sized stone.
Sharpening Styles
There are a number of ways that a stone or file can engage a blade.
In the movies you often see a stone being dragged down a sword edge. Looks good but I have my doubts as to how useful this would be in the real world.
Usually we want the sharpener to pass down the edge with some movement across the edge too.
The sharpening technique most often seen in “how to” guides is what may be called “push-sharpening”. If you were using a large, flat stone, you would move the blade as though you were attempting to shave the surface of the blade.
You will also see “push and pull” sharpening where the blade moves back and forth across the stone. I personally don’t use this method much and would not recommend it for the novice.
Keeping the angle constant over the different strokes requires skill and it is easy to over-do things. If you can maintain an angle it is useful for quickly establishing a secondary edge.
Pull Sharpening
These days I tend to use drag- or pull-sharpening techniques.
As you might expect, the blade moves in the opposite direction to push-sharpening.
One of the advantages of pull-sharpening is that it is easier to move the sharpener across the blade edge, rather than moving the blade. This is useful when working on large or awkward blades but can be applied to small blades too. One does not need a workbench or similar for pull-sharpening. I usually sit on the sofa, watching the telly and using the advert breaks constructively.
Pull-sharpening is a good technique to use with small triangular-section sharpening stones. It is also suited to the oval stones sold for sharpening tools such as scythes.
When you use a leather strop you are using an action like pull-sharpening. If you did not you would cut the leather!
If you are sharpening a tool using a high-speed device you should be using a pull-sharpening technique. This is so that if the high-speed wheel or belt snags the blade it will throw it away from you rather than at you!
One reason I like pull-sharpening is it is easier to view the angle of contact that sharpener and blade make. It is also easier to give both sides of the blade similar treatment without trying to use your non-dominant hand or run around the table.
Lubrication
Generally, I do not use lubricants such as oil, water or spit, for sharpening. An article I read, written by a professional sharpener, claimed that his experiments had concluded dry sharpening produced superior results. Much to my surprise, this article can still be found on-line! Generally I only apply water if a stone or sharpening system is particularly crumbly or high friction.
Pull/Drag Sharpening Technique
For example, hold your blade with the edge to the left.
Place your sharpener at the desired angle, and push your sharpener right to left, moving it away from the blade spine or centre.
A “pass” starts at the heel of the blade and moves towards the tip. A pass may take several strokes, depending on blade length and sharpener size.
Make three to five passes on a side, then change.
For the other side, you have two choices. You can flip your blade over so the edge is to the right and stroke the edge left to right; or you can turn the blade upside down and stroke the other edge right to left.
Use whichever technique you prefer and better suits the tool being sharpened.
Keep changing every three to five passes, reducing the number of passes as your tool approaches the desired sharpness.
Do not push downward. The weight of the blade or stone produces sufficient pressure.
Pull sharpening is a good technique if you are not that confident about your sharpening skills. It is easy to check and maintain the desired angle. It is also not a particularly aggressive technique, so you are unlikely to damage your edge.
In fact, I recommend you try a very light touch as you make you strokes and passes. Let your stone trace the curves of the blade rather than trying to remove them.
You will find that as the edge geometry takes shape, you will be able to feel when the stone or file is at the correct angle. Light pressure also lets your feel where sections of the edge have irregularities and need more work.
So far, the only problem I have had with pull-sharpening was with a particular multi-tool where the blade was unlocked and rather loose in the open position. Pull-sharpening tended to pull the blade closed. This would only have been a danger if I had wrapped my fingers around the grip while sharpening, rather than holding the back of the blade.
One caution. With folding blades that lack a lock, be careful when pull-sharpening or stropping. Hold the sides of the grip so your fingers are not in the way should the blade unexpectedly close.
Pull-sharpening is a useful technique to add to your repertoire.
The knives in my kitchen are kept sharp mainly by a butcher’s steel and a set of crock-sticks I have in a cupboard there.
I maintain my assertion that crock-sticks (ceramic rods) are a very good way to teach yourself the fundamentals of sharpening. Crock-sticks are a form of push-sharpening, but pull-sharpening has improved my technique in using these too.
Rather than just slicing down, I now use a lighter touch and let the stick surface trace alone the curve of the edge, keeping contact to the very tip and engaging the edge at a better angle throughout its length.
I think one of the most important things I have learnt in decades of sharpening is that it is another of those skills where less is more. You will get much better results maintaining a light contact with the sharpener rather than pressing down.
Suppose that you are separated from your bag or rucksack. Your webbing gear, if you wore any, has become damaged or lost. All you have is the clothes you stand up in and whatever is in your pockets. This is your “skin-level” survival kit.
Part of your skin-level kit is the clothes that you are wearing. Hopefully you were dressed appropriately for the climate. If you were chilling by the pool when everything went pear-shaped, one of your first priorities is going to be to acquire some new threads.
Today I am mainly going to concentrate on what you have in your pockets, or carried on your trouser belt. This is what many people would call “EDC” or “everyday carry”, although the exact use of this term varies.
Some people would include the contents of their daysac or handbag in their EDC. This article will assume that such items are not immediately available. Reaching them may be one of your objectives.
Some people use the term “EDC” for all the paraphernalia they have on their person, while in other contexts it is specific for defensive weapons. This article intends to examine EDC for survival.
Look on the internet and you will find EDC lists that suggest you should always carry a solar still, fishing kit, gold coins, eating utensils and so on. This is not very practical.
The heavier and bulkier your EDC kit becomes the more likely you are to not carry it all the time and omit parts you may need.
A good EDC survival kit is designed to have two tiers of readiness.
“Lower level” is what you carry all the time. Many of these items are carried because they can be useful in daily life.
“Higher level” are items that you add when you step up to a higher level of readiness.
Your lower-level kit would be on you when you go down to the store.
You would add the higher-level items if you were leaving town to hike in the woods.
For example, in my lower-level kit, I have a lighter, which can be used for fire-making or illumination. The expansion to higher-level is a little pouch that adds a container of tinder, some candles and a spare lighter.
I have little need for a fishing and snaring kit in town, so these items are higher-level.
Many ingenious individuals have had fun creating survival vests, survival jackets, survival walking sticks, survival pens, survival necklaces or survival hats.
These are not the best way of carrying your EDC. Jacket pockets are better used for items such as gloves, scarves and hats.
Your survival EDC should be based around your trousers. Everything should fit in your pockets, or on your trouser belt.
Since you (hopefully) wash your trousers, items should be easy to transfer to a new pair, or to a pair of shorts if the weather permits.
What you carry should not add so much weight that you have trouble keeping your trousers up. Nothing should be so bulky or hard-edged that it digs into you if you have to sleep clothed, bangs against you when walking or might injure you if you fall on it.
Personally, I am seldom not wearing cargo trousers or cargo shorts. If you have to dress more formally, there are companies that sell suitable garments with extra, hidden pockets.
Let us have a look at what I am carrying, and how I might expand it to a higher-level. Your up-level items should be stored together in a small bag such as a pencil case. Keep this with your knife-belt (qv).
Fire: The lighter in my left pocket is my primary source of fire. I have added a couple of birthday candles to my pocket pouch.
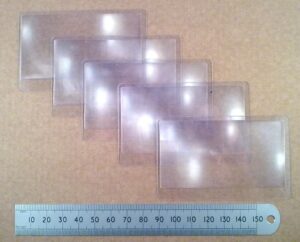
• To up-level, I will use a small fire kit that would be carried in my right cargo pocket. As described on other pages, this would have a spare lighter, a container of tinder, Fresnel lens (above), some candles and possibly some matches.
Note that the spare lighter is in a different pocket to the primary.
Food: I don't carry any food on me, so this category is more about means to procure food. At low readiness that is money and a credit card.
My current location and lifestyle mean that it is exceptionally unlikely that I would find myself needing to feed myself by fishing or trapping. In theory, the dental floss I have in my left pocket pack could be used for snaring or fishing, the safety pins serving as hooks.
Prudence dictates, however, that I should have at least some fishing and snaring capability within my baseline EDC.
With this in mind, I have added a six span length of braided fishing line to my pocket pouch. This may also be used to construct snares and for various other purposes. This line is actually far more likely to see more use than the hooks. It supplements the dental floss and the various lengths of cord and string in my pocket.
Fishing hooks weigh virtually nothing, cost very little and take up very little room, so it would be foolish not to have some for “just in case”. You should have more than your typical survival tin contains.
I have two packs of ten hooks. No.12s and No.10s. (actually, it is a dozen No.12s. I had a pair of hooks from a previous project, so I added these too)
You can buy these hooks already tied to nylon leaders. When you are cold, wet and hungry it is no time to fiddle with tiny hook eyes and near invisible line. If you buy hooks that are untied, add line when you are safe and warm at home.
• If I am knowingly straying far from “civilization”, I would add a kit of additional items. For higher-level, I have a container of line, hooks, wire and other fishing items.
Useful additions would be ten or more metres of snare wire, and several additional lengths of braided line, already fitted with swivels.
For use with the latter, I would have some compact lures, additional hooks and some wire leaders.
A frog/fish gig and a net would be useful, and there are some that might fiti in a trouser's cargo pocket. In general, a gig is more likely to be pack items than skin-level.
If you are diabetic, you may want to add a small supply of glucose tablets, hard-candy etc.
You could carry a tightly rolled sheet of cooking foil, but I personally don't currently do this.
Signalling: I usually carry a phone. As well as being able to call for help, many modern phones have useful applications such as a notepad, compass or GPS capability. Phones are useful but also delicate, so should not be the sole thing you rely on.
The photon light on my keyring could be used to signal. The keyring also has a whistle.
My pocket kit includes a pencil and chalk, and I carry a pen (a retractable Zebra pen, since my belt pouch is rather small. I actually found this pen! Non-retractable, all-steel Zebras are suggested as a good alternative to more expensive “tactical” pens). A permanent marker such as a Sharpie may also prove useful.
• Up-levelling would probably add a larger, but compact, pocket torch.
A lightweight signaling mirror is another useful item. These are a good addition for tactical scenarios since they can be used to peek around cover.
You may already have an item that can be used as a signalling mirror. Many compasses have a mirror and some phones or music players have mirrored backs.
A mini-flare kit could be accommodated with the other items in the right cargo pocket, but I have never actually owned one of these.
A larger whistle, on a lanyard, might prove useful. There are cord necklaces that include a ferro-rod and steel. If you can find them at reasonable price add a whistle, photon light and a snap-link.
Shelter: Most actual shelter items are too bulky for skin-level EDC. The exception is a space blanket. One permanently rides in my pocket kit.
You may want to carry additional space blankets. Not only can they be used for warmth, but also as protection from the rain and for signalling.
Penny for penny and pound for pound, space blankets are among the best survival gear you can carry. Do not leave home without at least one.
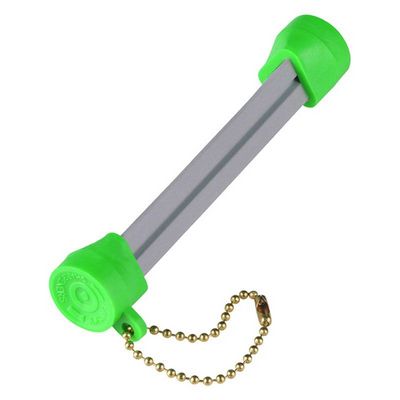
Cordage: The dental floss in my pocket kit has already been mentioned. Either carry a couple of spare bootlaces or an arm-span of paracord. This can easily be carried in the bottom of a pocket and has numerous applications. I also carry a tubular retention cord that can be fitted to my glasses if needed.
• If up-levelling, a larger hank of paracord can be carried on your person if you have room. Braided fishing line also has many uses.
Tools: My keyring includes a bottle-opener, mini-Swiss army knife, a P38 can-opener and a little tool for removing SIM cards and opening CD drives. That last tool possibly does not have a survival application. (It broke, so has been replaced with a paper-clip that can be readily adapted should the need arise),
The keyring itself is a carabiner. Several of my items can open bottles. The bottle-opener is just a convenience, particularly in social settings.
A second pouch has my Swiss army knife, mini-Leatherman, pocket prybar and a sharpening card. I find small-print challenging now, so I have added a tiny pocket-magnifier to this pouch.
The Swiss army knife includes a screwdriver that can repair glasses.
A small bag in my pocket kit contains a few safety pins, hair pins and paper clips. These can be put to various uses.
A length of electrical tape is wrapped around my pencil. I may add a needle with a metre of invisible thread. I don't regard a sewing kit as an EDC-level requirement, but the weight is negligible and a sharp point potentially useful. I have now added a couple of threaded needles, wrapping them around the pencil.
• If up-levelling my main additions would be a larger knife and compass. More of that later.
Water: There are water bottles that can fit in a cargo pocket or on a trouser belt.
The bulk and weight of water means that you are unlikely to carry water at skin level unless the weather is very hot.
A few sheets of water purification tablets can be included in your pocket medical kit.
• If up-levelling the water category, I might add a “survival straw”, ideally one that fits in a cargo pocket. A condom could be used as a water carrier, but I don't carry them, no longer being single.
My pocket pouch is carried within a large Zip-lock bag, which could be used to carry water..
Medical: Your EDC medical kit is mainly for minor injuries. Have a better kit in your bag.
My pocket medical kit rides in my left cargo pocket. In addition to the items already mentioned it has alcohol wipes, plasters and pain-killers.
There is some medication I have to take with meals, so I carry a few days supply of this in my right cargo pocket.
If you need to take medication regularly then you should carry a few days supply with you, and make sure it remains in-date.
• If up-levelling, a small container of insect repellent and/or sun-cream might be a prudent addition. This need only be a small volume, your main supply being in your bag or base. Chapstick or Vaseline in winter, if you think you will need it.
Other items: If you are out in the wilds, a few metres of toilet roll or paper tissues in a ziplock bag should be added to one of your cargo pockets. Make that a permanent part of your kit if you wish.
I have a small bag with a few paper napkins for “about town” and a larger bag I add for “rural”.
A bandanna has numerous uses and is easily carried in a side pocket. Since I lack some hair, I have used mine for head protection when caught out without a hat.
I wear photochromic glasses so don't carry sunglasses. These protect the eyes from both excessive light levels and more physical threats.
Non-survival items carried are a USB drive, travel card and music player, although the back of the latter is a mirror.
So far we have talked about pockets and belt pouches.
In years past most of my EDC was in a compact bumbag. I have learnt to make more use of my cargo pockets and have replaced the bumbag with a couple of pouches attached directly to my trouser belt. One is a repurposed pouch for a mobile phone.
You should not add so many pouches to your trouser belt that it interferes with carrying a rucksack, or sitting in a vehicle.
There are belts that are made of paracord, but if you unravel them to use the cord you have nothing to hold up your trousers, nor hang your pouches from!
There are trouser-belts with hidden storage compartments, and various ingenious buckles. The original boy scout belt had a buckle that served as a bottle opener.
Earlier on I mentioned adding a larger knife and compass to the skin-level kit.
My favorite kukri weighs just under a pound, but hanging it on the trouser-belt is a bit much. What you need is a second belt. This is effectively an intermediate level between skin-level and webbing. When at a higher level of readiness you should attempt to keep it upon your person.
Your knife belt rides below the trouser-belt, like a cowboy's gun-belt. It should be adjustable, so that it can be worn over thick clothing when desired.
Add a compass pouch to one side of the belt, and attach the compass lanyard to the belt. Add a carabiner or snap-link to the front of the belt.
I carry my kukri on one side of the belt and a Mora puukko-type knife on the other. Not surprisingly, this belt could also be used to carry a handgun.
If I need to carry a hatchet or entrenching tool, I can slip it between belt and body.
A folded rain-jacket, poncho or unfolded space blanket can be draped over the back of the belt.
Many police officers experience medical problems from the weight of their duty belts. Detaching the duty belt from the trouser-belt and wearing it lower like a gun-belt might improve matters.
The knife belt can be used to carry a litre or two of water. The best way to carry water is in bladders since this is lighter than conventional bottles. Rather than placing the weight on the knife belt, my proposed “camelbum”concept would give more options.
I have mentioned carabiners and snap-links a couple of times. Use one as your keyring, add one to your whistle lanyard and knife belt. Also have them on your rucksac strap and/or webbing.
When you need a hand free, or there is a risk you might drop a tool, attach the tool to the nearest snap-link.
This is an extension of the idea to collect empty magazines described in my book “Survival Weapons”. Make sure your tools have loops or rings.