Over the years, this blog has visited the topic of Soldier’s Load several times, and published a number of equipment lists.
What to carry, and what not to, is of interest to any backpacker, outdoorsperson, prepper or survivalist. Although a list may have been written for a military context, understanding the reasons for any differences is often productive.
The following list is something of a “classic”, being taken from SLA Marshall’s book “The Soldier’s Load and the Mobility of a Nation” (1949). It seems to be obligatory to mention this work when writing about Soldier’s Load. How much notice is actually taken of its suggestions is beyond the scope of today’s blog.
Marshall, and many other sources, had concluded that the optimum marching load for the average man is not more than one-third of body weight. Marshall also maintained that troops would carry more food, more munitions, more everything into combat than there was any reason to believe they would use.
On this basis, Marshall proposed an optimum working combat of around 40 pounds (80% of optimum carried load).

SLA Marshall: “We can do it, as is shown by the following table of weights. Though we had many variations of combat dress in World War II, according to the climate, the present field uniform strikes a good general average insofar as weight is concerned.”
WEIGHT OF CLOTHING
Undershirt, drawers, socks…………..0.62
Shirt, flannel …………..1.13
Trousers, wool…………..1.69
Jacket, wool…………..3.02
Cap, field ………….. 0.25
Boots, combat…………..4.13
Belt, waist…………..0.19
○ Total for the field uniform…………… 11.03 [lbs]
Belt, cartridge 2/48 Rds M-1 ammunition………….. 2.29
Canteen w/cover and cup…………..2.69
First-aid packet…………..0.40
Helmet w/liner…………..2.82
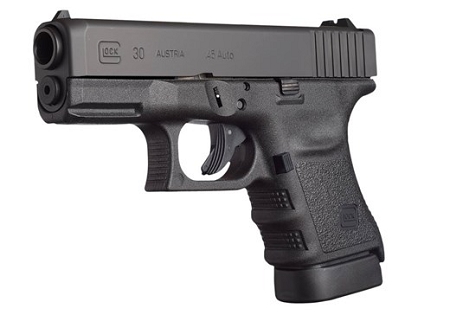
Rifle M-1 w/o bayonet, w/sling…………..10.30
Two (2) Grenades (Fragmentation)…………..2.62
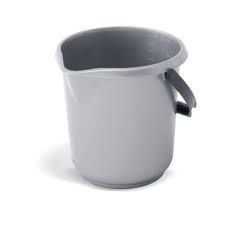
○ Light pack w/one (1) K Ration and mess gear………….. 7.79
Includes:
Haversack and carrier…………..2.46
Toilet articles…………..0.92
Change of underwear…………..0.43
Two (2) pairs of socks…………..0.38
One (1) K Ration…………..2.31
Mess gear…………..1.29
○ Total, field uniform and battle equipment…………..39.94 [lbs]
Undershirt, drawers, socks…………..0.62
Shirt, flannel …………..1.13
Trousers, wool…………..1.69
Jacket, wool…………..3.02
Cap, field ………….. 0.25
Boots, combat…………..4.13
Belt, waist…………..0.19
○ Total for the field uniform…………… 11.03 [lbs]
Belt, cartridge 2/48 Rds M-1 ammunition………….. 2.29
Canteen w/cover and cup…………..2.69
First-aid packet…………..0.40
Helmet w/liner…………..2.82
Rifle M-1 w/o bayonet, w/sling…………..10.30
Two (2) Grenades (Fragmentation)…………..2.62
○ Light pack w/one (1) K Ration and mess gear………….. 7.79
Includes:
Haversack and carrier…………..2.46
Toilet articles…………..0.92
Change of underwear…………..0.43
Two (2) pairs of socks…………..0.38
One (1) K Ration…………..2.31
Mess gear…………..1.29
○ Total, field uniform and battle equipment…………..39.94 [lbs]
“On that figure, I am prepared to stand. One blanket, woolen, OD, would add another four pounds; one raincoat, another three pounds. During initial combat in hot weather, it is better to take a chance without them than to put that much extra weight on men just as they are about to undergo fire for the first time.”
Commentary
Unlike many later analysts, Marshall included the weight of the clothing in his estimate. This is often disregarded if the wearers are accustomed to wearing the items.
• Undershirt and drawers of this period are likely to be cotton tee-shirt and boxer shorts. Socks are presumably wool, rather than the cotton socks worn with service dress. Underwear can, of course, be varied with season and climate. “Drawers” may mean long underwear.
• “Flannel” is a somewhat ambiguous term these days. A M1937 wool shirt was in service at the time and this is probably that suggested. Woollen clothing is preferable if you are going to get rained on.
Incidentally, the prototype M43 combat dress had featured a “high-neck sweater” to be worn under the field coat or as outerwear in hot weather.
The fatigue/utility shirt (M42 HBT/OG-107) would become the preferred hot-weather wear.
A friend of mine likened soldiering to an extreme sport, which did make we wonder if field gear should be made to more closely resemble sports and active gear.
Something modelled on a tracksuit top or hoodie may be a better intermediate layer than a conventional shirt.
Pocket configuration of hoodies/tracksuit tops is not ideal. Handwarmer pockets are a bad idea, since your hands should be out of them helping and defending you. Extra sleeve pockets and Napoleon chest-pockets are useful, as it a kidney-area pocket for soft items such as hats and scarves.
I prefer hoods that can be stowed away inside a collar. It is easy to snag a hood on a branch when moving through the woods.
Poppers to supplement any zip would allow for more versatility in ventilation.
I am undecided as to whether a fully opening or pullover configuration works best as field wear.
• Wool trousers (M1937) are suggested above. Cotton cargo trousers had seen widespread introduction with the new 1943 field gear. Cargo trousers are a good modern substitution, since the pockets are ideal for carrying much of your skin-level EDC emergency items.
• “Jacket, Wool”, could be one of several garments.
It may be the M1939 wool field coat, or the ETO “Ike” Jacket. The latter had been based on British battledress and had been intended for both field and service wear. In practice, they had been in short supply so usually only officers had them and kept them for non-combat use.
By the time of Marshall’s writing, the M1939 had been widely replaced by the cotton and wool M41 “Parsons” field jacket and the cotton M43.

My experience with my desert parka makes me suspect that such an item is far more practical than a conventional half-length field jacket.
Being uninsulated and lightweight, it can be worn comfortably across a broad range of weather.
It appears to be a single layer, although the inside appears to have a closely bonded thin lining.
Vent zips and a roomy interior allows for good air circulation in hot weather and cooling via bellows-effect.
A loose cut allows room for the liner or other insulation when cold.
Its larger size covers more of the distinctive human body-shape.
Buy your parka on the big side. Mine is thigh-length with the hem just above the top of the thigh pockets of cargo trousers.
I have modified the hood of mine so that it rolls into a collar secured by poppers when not in use.
The only other modification I might wish for is more and larger pockets.
The desert parka is a reasonably priced item, so is an easy way to modify a soldier’s appearance.
A parka intended for field use would be camouflaged and provided with textilage and attachment points for foliage.
Such a field parka can easily be replaced by another more suited in colour and cut for non-combat, service or parade wear. The latter may appear something like the frock coat/greatcoat look that is used in some Japanese anime.
The idea of using a “long” coat as basic combat dress has obvious echoes of the French practice of usually fighting wearing their greatcoats.
• A woollen watchcap, beanie or headover may be a more useful and versatile item than a field-cap. A hat with a brim does keep the rain off my glasses, however.
At least one type of gloves, and something to act as a scarf such as a keffiyah or scrim should also be part of a basic outfit.
• The belt listed is probably the item intended to hold up the trousers, rather than an equipment belt.
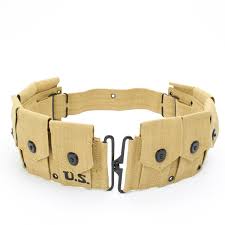
• “Belt, cartridge 2/48 Rds M-1 ammunition… 2.29” did give me pause.
The cartridge belt for use with the Garand M1 rifle has ten pockets, each holding an eight-round clip.
With the rifle loaded, the soldier’s basic ammo load was 88 rounds.
Marshall advocated soldiers carry less ammo, but only filling six pockets of the belt for 48 rounds seemed odd. And what did “2/” signify? Was it a transcription error in my PDF copy of the book?

Eventually, I learnt Garand ammo was issued in a throwaway cloth bandolier. This bandolier had six pockets, each holding one eight-round clip, for 48 rounds total!
Soldiers would often carry a pair of bandoliers in addition to a fully loaded cartridge belt, for 23 clips/184 rounds.
It seemed logical that Marshall was suggesting that a soldier just carry a pair of bandoliers instead of a ten-pocket cartridge belt. This would still give the soldier 104 rounds (2 bandoliers of 48 + 8 loaded).
The quoted weight of “2.29 lbs” is still a mystery.
A loaded Garand bandolier weighed 3.5 lbs, and a loaded M1923 cartridge belt even more, so the figure might be expected to be either 3.5 or 7 if a pair of bandoliers was intended.
This use of such bandoliers is a practical system for the Garand.
I would not, however, recommend the Garand for modern shooters.
There are lighter weapons with equivalent performance, and the need to have ammo in clips for the mechanism to fully function is an obvious potential problem.
The bandoliers used for the Garand were also used for the Springfield M1903, each pocket holding a pair of five-round strippers, for total of 60 rounds per bandolier.
Thus something similar might be used for a bolt-action rifle or for the loose ammo for a shotgun.
The bandolier was also apparently repurposed to hold six 15-round M1 Carbine magazines.
Few modern self-loading rifles can be loaded by strippers, so another arrangement for carrying their ammo must be used.
The above does, however, give a useful idea of the number of ready rounds carried that may be practical.
Substantially reducing the weight carried on the waist belt and eliminating the need for tight webbing suspenders would improve both air and blood circulation. This would be very welcome in hot or very cold climates.
• A canteen/water-bottle is a reasonable item to carry on your person. Since a cartridge/equipment belt is not listed, it is not clear how Marshall’s soldier carried it.
In a modern context, a flexible water-bladder may be preferred to a rigid bottle. Many modern examples have a sip-tube so you can drink without unpacking your water container.
The canteen cup should probably be carried in the pack rather than on the belt.
• The first aid package is probably one area where greater quantities are prudent. Bullets often make exit holes as well as entries. Optimising the CI_IFAK/Trauma kit carried is an entire topic in itself!
• Marshall suggest a pair of fragmentation grenades, rather than the five to eight some units encouraged soldiers to carry. Modern fragmentation grenades are a little lighter than their 1949-era equivalents.
While a civilian would not carry fragmentation grenades, legal smoke bombs have practical applications for defence and signalling.
It is not explained how Marshall’s soldier was to carry his pair of grenades.
The 1943 combat gear had introduced jacket and trouser pockets designed to take several grenades.
In the thigh pockets, grenades were difficult to reach and the weight was uncomfortable. Enough weight and the trousers would not stay up without suspenders.
The lower jacket pockets were difficult to access if wearing belt-gear and cast-iron weights swinging around your genitals was objectionable!
The above items constitute what some authors call a “fighting load”.
The “combat load” is considered to include a fighting load and an approach march load.
The “approach march load” is usually in a small pack that is dropped or cached before closing with the enemy.
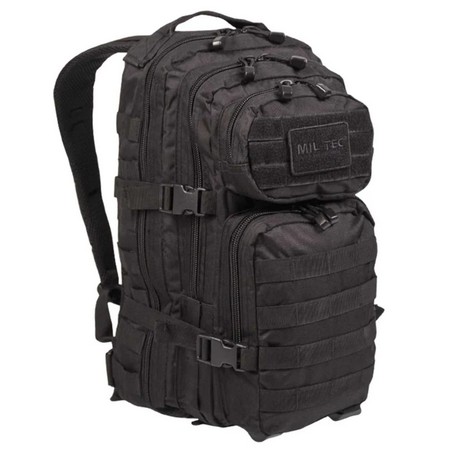
The haversack Marshall describes is the approach march load.
• The suggested haversack contents are reasonable. Two pairs of spare socks and a spare set of underwear sounds about right.
On other pages, I have described effective wash-kits much lighter than those many soldiers carry. This should include a roll of toilet paper.
The K-ration can be replaced by modern equivalents. Marshall is telling us the combat load needs food for a day or so, not a week or more!
Rations such as MREs may include heating pouches, reducing the need for a stove and fuel.
The mess-kit can probably be replaced by a metal canteen cup and an emergency stove, such as the British Crusader or US Natick. The contents of a K-ration could all be eaten without recourse to a mess-kit. Only a metal canteen cup is needed for drinking and heating the beverages.


Pack the interior of the cup with packets of instant noodles and other useful items.
The only other eating item needed is a spork.
A plastic sandwich box makes a useful eating bowl. When not used as such, fill the interior with a brew-kit, spork and packet-soup and OXO cubes.
• The poncho-liner can substitute for the wool field blanket suggested.
A set of goggles and a flashlight are worth adding to the pack contents.
• The issue US army raincoat would be replaced by the more versatile and lighter rain-poncho.
Incidentally, another advantage of the desert parka is that it can be worn over a lightweight plastic raincoat, providing protection and camouflage while the waterproof stops water reaching the warm layers below.