Categories
Phillosoph

SERE Pin and EDC Bypass Knife

I have been promising to write about the SERE pin for some time.
SERE Pin and EDC Bypass Knife

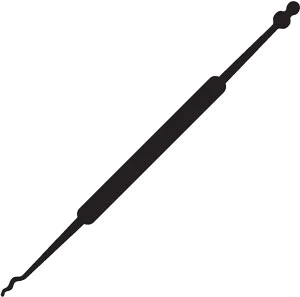
SERE Pin

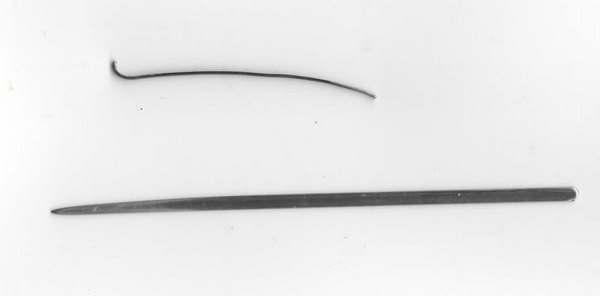
The SERE Pin is an implement for escape and evasion applications. It is very easily concealed. You can push the shaft down the seam of a garment, for example.
The SERE Pin has four applications:
• It acts like a key to lift the pawl of handcuffs.
• It can disengage the double lock mechanism of handcuffs.
• It can serve as a shank to separate the teeth of a ratchet mechanism of handcuffs.
• It can be used to shim or lift the pawl of a zip/cable tie.Handcuff Internal Mechanism

For an explanation of these terms I will direct you to my older posts on double-locking and shimming.
To disengage the double-lock or handcuffs, use the long, curved end of the tool. In the illustration, one would introduce it at around the 4:30 position on the keyhole and use it to push the double-locking mechanism (the red part in the image) upward.
Once the double lock is disengaged, the pawl can be shimmed or lifted.
To lift the pawl, insert the short hooked end of the SERE pin at around the 11 o'clock position and use it to lift the lock bar (green component) inward.
To shim, insert the long part of the tool between the teeth. You may need to tighten the bracelet a little to achieve this. If the shim becomes caught you may have to straighten it a little.
SERE pins are easily fabricated from bobby pins. Do not make the short hook too long. I recommend rounding off the corners and bevelling the tips.

EDC Bypass Knife

The second item on today’s “show and tell” is a work in progress.
After I wrote yesterday’s blog, I set about creating a bypass knife that was compatible with my EDC kit.
Basic design requirement is that it should fit within the pouch that carries part of my EDC. Whether this is where I will carry it, I have yet to decide.
EDC Pouch Contents
As a lock picker, I acquire any windscreen-wiper inserts whenever I come across them. For this project I selected a narrow one that already ended in a partial point at one end. Width is about 3 mm.
The point was tapered further with a hand-file and a Dremel tool. One side was left reasonably straight, the other tapered more so the point is offset.
Once the point was formed, the end of the insert was cut 10 cm from its end. The butt end was rounded and smoothed.
The point was smoothed and polished with several grades of glass-paper.
It is possible that the point needs to be made more acute. The only bypass knife I have is a cheap Chinese one. My tool is already better finished than that! Also, I lack any bypass-knife-vulnerable locks to try it out on.
How often will I encounter a vulnerable lock I might need to use the tool on? I don’t know. This did get me thinking about other functions it may have. (Using it as a nail-cleaner probably shouldn’t count!)
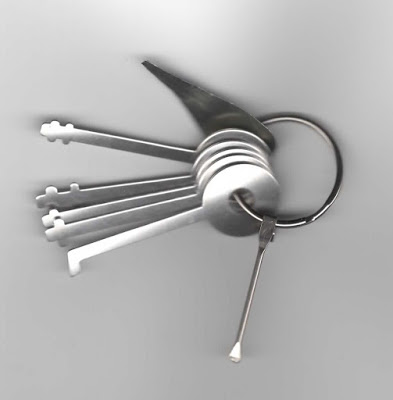
The butt end may serve as a skeleton key. The width is virtually the same as the shanks of my bunch of skeleton keys. It has already opened a small warded luggage lock I have.
The pointed end could be used on the pawl of a zip-tie.
I can also confirm that the tool makes an effective handcuff shim. Worked better than I expected, if I am honest. It might be prudent to polish and smooth the rest of the shaft for such applications.
Categories
Phillosoph

EDC Lock Picking and Bypass Kits

As regular readers will know, the lock picking contingent of my EDC is rather small:
— A pair of Bogotas.
— A small snake rake.
— A double-ended turning tool.
Bogota Lock Picks
Other items, such as the three-inch pocket prybar, may have applications in bypassing locks. When the barrel of my doorlock came out with my key, it was the long file on my Swiss Army Knife that was needed to open the door.
Today I will bring you two interesting videos on lock picking and bypass tools for EDC. Credit to Dean for directing me to the first one.
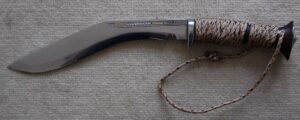
While I have done a bit of lock picking, I don’t have as much experience with bypass techniques as I might wish. When the zombies come, I will be grabbing my kukri, crowbar and brick hammer. Those will bypass a few obstacles!
Some thoughts on the suggestions:
— The plastic shim seems like a very prudent choice.
— I have never used them, but padlock shims might be worth having. I seem to recall padlock shims can be cut from soda or beer can material. The edges of these will probably be surprisingly sharp, so take care.
— I have a number of bobby pins in my general EDC pouch. These are in a bag with some paper clips and about a dozen safety pins. A few weeks back some of these safety pins were used to repair my girlfriend’s jeans.
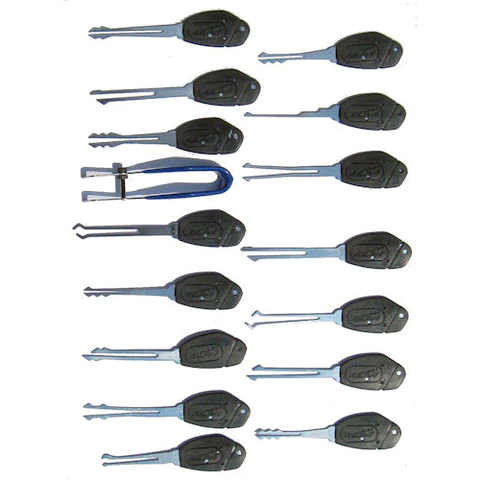
— I have some comb-picks, but have not been able to open any locks with them. The same can be said of my set of jiggler keys, although I suspect the latter are intended for car doors since they are too large for all my locks. Most keyways I encounter have kinks in them, so the straight combs and jigglers would be difficult to insert or move within them. I think my Bogottas and snake are a more effective and versatile option.
— Similarly, my set of skeleton keys stays at home since large warded locks seem to be relatively uncommon. If long enough, a bypass knife may serve instead. The small warded locks often used on luggage can be popped by a variety of implements, including sturdy picks like the Bogotas.
Bunch of Skeleton Keys and Decoder
— My bunch of skeleton keys includes a decoder I made from a cut-out shape of soda can (top). I do not think I have tried it out, since I seldom encounter combination locks. There are ways to crack combination padlocks without a decoder tool, and I have used these at least once.
— A bypass knife seems worth having. My Serenity Plus kit includes one that came with a set of my Chinese picks. I cannot recall if I have ever opened anything with it. Most of my padlocks are not vulnerable to this technique. I plan to try making a bypass knife that will fit in my EDC.
Mini-Slim-Jim Dimensions
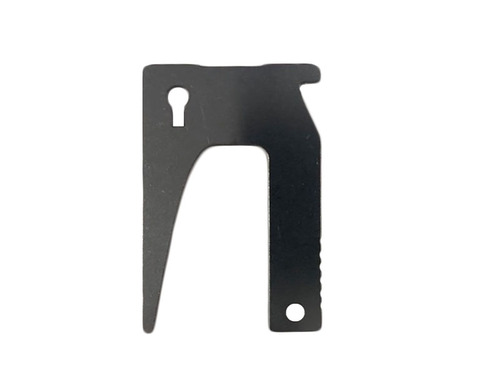
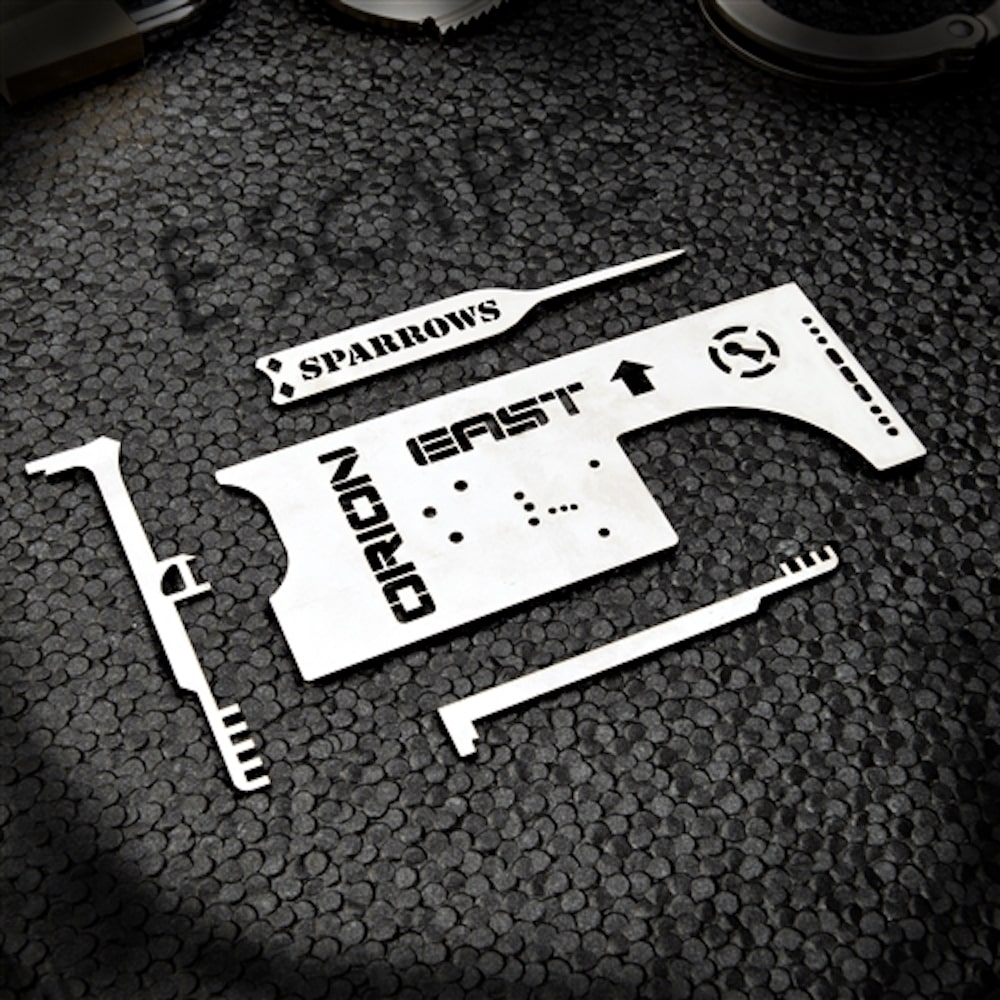
— The mini-slim-jim is interesting. Obviously this is too short to be used to open car doors. That is probably not a drawback given the number of vehicle vulnerable to slim-jims is probably decreasing every year. The mini-slim-jim is actually intended to bypass the latches of doors. The large notch on the tool is probably a legacy of its ancestry. Sparrows makes several sizes of slim-jim. They also make the “Hall Pass”, which is a credit-card-shaped tool in either metal or plastic. Southern Specialities offers their own design of tool for latches, the “Multipass”.
Sparrow's Hall Pass Southern Specialities Multipass Sparrow's Orion Hall Pass
I have tried making something similar out of an old plastic card. I didn’t have any success opening a door, but at the time I had yet to locate the correct dimensions. I am also now more familiar with the manual technique needed, so it might work better in future.
I have, however, managed to pop a latch using a TOK turning tool. This experiment seemed to indicate that a traveller hook may be a better way to attack a latch than a slim-jim. Being able to rotate the tool would have advantages. This is what the bent piece of music wire in the first video is intended for.
Sparrow's Traveller Hooks
I may try to fabricate a traveller hook that can fit in my EDC. Sparrows sell two sizes of traveller hook (also called traveller’s, travellers, shrum tool or travelling hooks). Auto-stores sell something similar as “O-ring pullers”. Skewers, ejector pins and music/piano wire can be used to fabricate traveller hooks. For reference, the Sparrow hooks use shanks 2.6mm (0.1 inch) thick.
Latches can sometimes be opened by threading a cord or wire behind them.
Categories
Phillosoph

Adding a Pin to a Swiss Army Knife

The tools on a Swiss Army Knife sometimes end up performing tasks you never imagined!
A few months back I went to unlock my front door, only to have the entire barrel of the lock detach and come away with the key! The metal file/saw proved to be ideal for reaching to the back of the lock and turning the bolt.
My girlfriend’s son had asked me why I always carry my SAK. Exactly for times like the above!

The Early Years

For the first few years of my early adulthood I carried a Chinese-made version of a Swiss Army Knife. I vaguely recall there were actually two, although I do not recall why I had to replace the first. To be fair, these were quite nice knives, with a good assortment of tools. The only problem I actually recall is a time when the corkscrew straightened out as I attempted to open a bottle of wine.
Back in those days, they were all I could afford, and they served well.
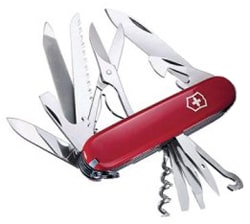
Once I had some money, I invested in a genuine Victorinox Swiss Army Knife (aka SAK).

Victorinox Champion

The model I selected was called the “Champion”, not to be confused with the “SwissChamp” that had become available a few years previously.
The longer named Champion was less bulky than the Champ, lacking the pliers.
Swiss Army Champion
The seven-layer Champion was about the ideal maximum size for a SAK, and had a really useful selection of tools.
Sadly, my Champion was lost in an unfortunate chain of events that do not need to be told here. Even worse, the Champion had been discontinued, so I could not buy a replacement.
There was no ebay back then, so little chance of locating a second-hand one.
All the features of a Champion

Rise of the Ranger

As a replacement of the Champion, I selected a Ranger model. The most obvious difference between the two was the Ranger lacked a magnifying glass, fish scaler and Phillips screwdriver:
Swiss Army Ranger
• The Phillips screwdriver had proved useful at times.
• I don’t recall ever using the fish scaler/hook disgorger, at least not for its intended purpose.
• I didn’t make much used of the magnifier either, although now that I am older and more decrepit, I suspect it might prove more useful.
As an aside, the magnifying glass on the Champion was very cleverly thought out. Its focal length was the same as the magnifying glasses’ height. In other words, if you placed your knife on a map, the detail under the magnifying glass would be in focus. This may have been the case for other models that had the magnifying glass.
I wonder if the same applies to the newer pattern of magnifier?
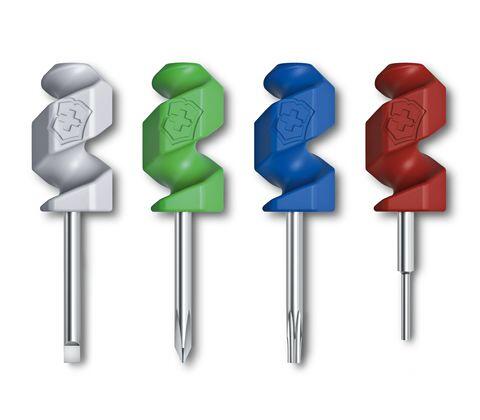
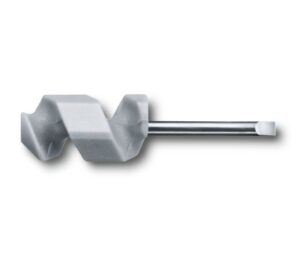
Since I wear glasses, an early addition I made to both the Champion and the later Ranger was to add the mini-screwdriver that fits into the corkscrew.
Originally this tool was only included with the SwissChamp. They were sold as spares, however, so I acquired one.
This has proved very useful over the years, often coming to the rescue of companions rather than myself. Half a lifetime ago I repaired the glasses of a grateful Swedish beauty in old Jerusalem.
Corkscrew Mini-tools
Victorinox now offer three alternate tools, each with a different coloured end.
I have carried the Ranger for many decades now.
The lack of Phillips screwdriver is compensated for by the Leatherman Squirt mini-tool I also carry. If you are in the market for a medium-size (91mm) model SAK, the Ranger must be one of the best options.
The Huntsman model is a good choice, but I have often found uses for the file/metal saw of the Ranger.

Swiss Army Knife Wiki

Recently I came across the Swiss Army Knife Wiki. This site is worth a look around.
Some interesting information on how to use the various tools, and some applications for them you may not have known.
My Ranger had a Phillips screwdriver all along and I never knew! I discovered that the tip of the can-opener is actually intended for use with Phillips screws as well as slot.
The tip of the file/metal saw can also be used on some Phillips or Pozidriv screws.

Adding a Pin to a SAK

The original reason I have been thinking about Swiss Army Knives recently is that I came across a blog post discussing the pin carried in the handle scales.
Below is a video on possible uses for “needles” [sic pins]. The channel has many other videos on various features of Swiss Army Knives.


Even before I watched the above video, I was thinking about adding a pin to my Ranger.
I own a number of very fine drill bits, so creating a channel for a pin would not be too difficult. I could probably add a pair.
I have lots of cheap pins. I decided to try and find the pins actually used, since they were probably better quality and the head looked a little wider.
A number of ebay vendors offered replacement pins for Swiss Army Knives.
The one I chose got my money since they offered another idea. Included with the five pins was a small magnet.
This magnet was sized to fit in the can-opener. With such a magnet, a pin could be magnetized as a compass needle.
The bits arrived this morning.

Fitting the Magnet and Pin

The 5.8mm magnet was a perfect fit for the can-opener.
The vendor included the advice that the tool next to the can-opener usually needs to be opened before closing the can-opener with the magnet stored in it.
If this is not so, the magnet tends to pull out of position, attracted by the neighboring steel.
Although stainless steel, the blades of a Swiss Army Knife are magnetic.
Magnet in Can-Opener
Finding a drill bit small enough for the pin was not a problem. Problem was most were too short to drill a channel as long as the pin.
The other problem was my Ranger has solid scales. It lacks the air-spaces found on some newer and alternate scales.
Drilling a channel deep enough and straight enough proved problematic, and inevitably the very fine drill curved and the channel exited on the inner side of scale. This actually proved to be fortuitous, allowing me to file a notch on the inner side for end of the pin to rest in.
I settled for adding just one pin for now.
Most of the alternate positions for a pin are obstructed by the rivets the scales snap on to.
Ranger Knife Modified
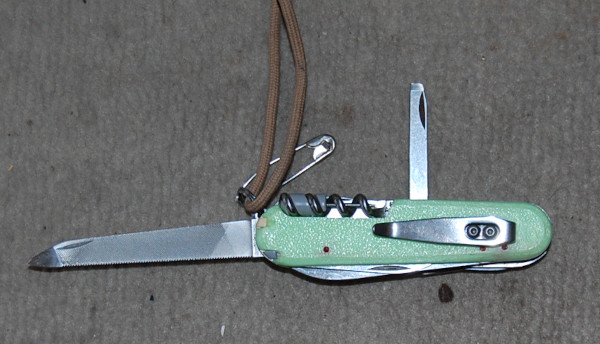
My Ranger with pin added (blue arrow) and notches on scale (green arrows). If the balloon goes up, I am ready!

Other Modifications

Incidentally, the back scale of my Ranger has two additional non-standard features.
One is a chip, where an idiot friend used my knife as a bottle-opener without using the bottle-opener!
I could fix this damage, but it is a useful reminder to be more cautious of whom I trust.
More useful are a series of three notches. The second is five millimetres from the first, the third 57 mm for the first.
The first and third notch are used to draw a circle of 57 mm radius. The first and second are used to mark the circumference in five millimetre increments. Each millimetre of the circumference closely approximates one degree. Such a compass face can be used with various improvised modes of navigation.
Another addition I have made is to add a needle and thread.
Take about a metre of invisible thread and pass one end through the eye of a needle. Tie the ends together and then wrap the thread around the needle.
Push the threade-wrapped needle down beneath the saw blade. It should be snug enough that it will not drop out if you invert the knife with the saw open.
I used the metal saw rather than the woodsaw, since this is likely to see less use.
While you are at it, wax your woodsaw.
Categories
Phillosoph

The Soft-Core Bag

Today I am going to introduce what I call my “soft-core bag”. This is not a “bug-out bag”, although it could be included in the contents of one.
I have a number of bags and rucksacs, and there are certain items that I would invariably want in one if I was carrying it.
Stocking each pack with necessary items is not economically practical, however.
Perhaps, I thought, I should have a box containing the necessary items and potential alternatives. This was part of the solution, but I quickly realized many items could be packed together so they could easily be grabbed in one go.

I drew on the lists given in the previous post to select the current loadout.

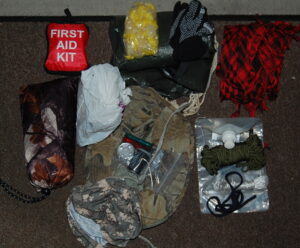
  • Top left: A small first aid kit. This supplements the items I carry in my skin-level EDC.
  • Directly below the first aid kit in a dark brown camouflage bag is a rain poncho. Inside the stuff-sack are two three-metre lengths of paracord. These may be used to help create a shelter or as a belt for the poncho and a poncho-liner when windy or very cold.
  • The white plastic bag beside the poncho contains a toilet roll. This has subsequently been replaced with a clear ziploc bag. A refilable 100 ml bottle of alchohol hand sanitizer has been added to this bag. Both toilet paper and sanitizer may aid in fire-lighting.
  • Middle top can be seen a bag of boiled sweets and a pair of warm gloves. These are sitting on top of a dark green all-weather (AW) blanket. You can see some of the shoelaces that are tied to the grommets of this. I intend to add a pair of silver space blankets too.
  • Top right, a red and black shemagh. This is a spare/additional shemagh, since I am often wearing one these days.
  • Bottom centre is my Advantage-camouflaged boonie hat.
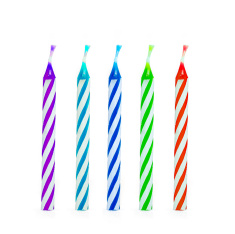
  • Sitting on the boonie hat is a plastic bag carrying a small fire kit. This has two butane lighters, two nightlights, four birthday candles, a 35mm film container filled with Vaseline-soaked cotton wool, and a Fresnel lens.
  • Below the fire kit and to the left is an ACU-patterned headover which can serve various roles, including as warm headgear.
  • Bottom right is a one-litre Playtpus waterbottle. Sitting on it are a shoelace, hank of general purpose string, hank of green paracord and some braided fishing line wrapped around a piece of plastic (yoghurt carton) or a small tube.
  • Not shown: two supermarket carrier bags. I wear photochromic spectacles. If you do not, a pair of cheap sunglasses may be a prudent addition.

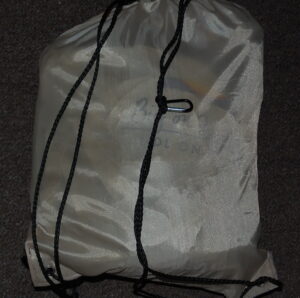
The whole collection packs into a draw-cord bag, as shown. Note snap-link added to one carrying cord.
This bag is lined with another plastic bag to provide better water resistance. Everything except the AW blanket, space blankets, shopping bags, poncho and water-bottle fit inside the waterproof liner bag.
The headover is folded into a pouch and used to contain some of the smaller items. This pouch, in turn, is placed inside the boonie hat. The folded shemagh is place with this.
Most of the pack contents are soft and crushable so no great genius at packing is really needed. Put the blanket in first and add the plastic bag of other contents. Put your water-bottle away from your back and ensure your poncho rides near the top of your bag.
Packed, but without water, the soft-core bag weighs about 1.3 kg. The volume of water I will carry and which water-bottle I will carry will vary with climate and anticipated conditions.
The soft-core pack is easily stuffed into a larger bag, immediately adding a collection of very useful items. On its own, it is a good bag to have for trips where you do not want to be bothered by a bag. It is light and low-density, and makes a pretty good pillow.
A quick glance inside the first aid kit. Items in this kit are consumed in preference to those in the skin-level EDC. Vaseline is good for chapped lips and other ailments.
The soft-core bag probably has more cordage than it needs, but I had some hanks already made up. This is a nice example of paracord carried using hojo-jitsu configuration.
Categories
Phillosoph

In Praise of Shemagh and Keffiyeh

Previously, I wrote about the fallacy that most face masks would protect you from infection. Inevitably, most of humanity has ignored the facts and taken comfort in superstition. Somewhere along the way members of our kleptocracies have realized just how much money can be made selling ineffective protective measures to the gullible.
Wearing face covering has become a requirement on public transport and in certain buildings. The stated purpose is to prevent carriers infecting other people, which admittedly has some merit. My objection here is in the lack of enforcement. As a microbiologist and a scientist I believe any safety equipment should be used properly. Masks serve no purpose if they do not cover the nostrils or are worn on your chin! I also, unreasonably, believe that laws and rules should apply to everyone. Being overweight and being unable to stop stuffiing your face on the bus is not a legitimate reason to go unmasked.
I have taken to wearing a shemagh/ keffiyeh when I travel on public transport. Looking like a pissed-off Palestinian shows my contempt for the farcical handling of the situation. Does it look intimidating? Probably, but I don’t really want people getting close anyway. Perhaps I should carry a rucksac too; I might get the whole carriage to my self!
On a more practical note, I have discovered a new respect for the shemagh. I had been thinking of it as a large banana, (or possibly a tea-towel!). The weave of my shemaghs is very loose, allowing the easy passage of breath or perspiration. On one particularly sunny day I kept my shemagh on when back on the street. It successfully kept the sun off my bald dome, and I was not bothered by perspiration running down into my eyes. It also helped keep my earphones in. Being cotton, dunking the shemagh in water may be a good way to keep cool in hot weather.
I have discussed the need for facial camouflage on other pages. I believe I have also mentioned one of the purposes of the ninja ensemble is to muffle the sound of breathing. The shemagh can meet these needs. In cold weather the shemagh may help prevent your condensed breath revealing your position. Something to experiment once it gets colder.
A brightly coloured shemagh might be used for signalling. One of mine is red and black, although in honesty this a bit dull in colour for signalling or location. Might be good in snow. Most shemaghs are white and have little virtue as camouflage save in snow. Dying them more tactical colours may be possible. Most “tactical” shemaghs are green/ olive drab, but except in jungle this is not as versatile and useful a practical colour as brown. I have one of brown and black, but ideally brown and sand or brown and grey would be most useful.

Tying the Shemagh

You will find a number of videos on how to tie a shemagh on-line. My usual method is to take the short, right end up near my left temple. Take the long end round the front, round the back and tie the ends together. I have been using a reef knot, but may experiment with a simpler overhand (half a reef!). This may be easier to untie when necessary. Tied correctly, the shemagh forms a hood and face-covering that can easily be lowered or raised. Down, it makes a useful neck gaiter. Position the part over your head so it does not expose a large area of forehead.
Another simple tying method can be used if you just need to cover your lower face, such as in the event of a dust storm. Fold your shemagh diagonally and place the widest/ tallest part over your mouth and nose. Take the ends behind your head and bring them around the front and tie them together under your chin. This gives your lower face area an irregular texture that contributes to shape disruption.
You should always have a bandanna or two on your person. A shemagh is a very worthy addition to a coat pocket or rucksac.
I am prone to migraine attacks, and one of the remedies is to breath in carbon dioxide-rich air. Carbon dioxide is a vasodilator so this increased blood flow to the brain. Note that this is not the same as re-breathing from a paper bag. You need to take in fresh oxygen as well as an increased CO2 level. One way to achieve this is to cover your mouth and nose with your hands. This is a little inconvenient, and my fingers get in the way of my glasses. Last night I grabbed my shemagh and knotted it around by lower face. As the migraine attack eased off, I was amused to note that I was wearing the two garments that pretty much summed up my lockdown: a dressing gown and a shemagh.
Categories
Phillosoph

My Left Pocket

A common piece of advice is to re-lace your boots with paracord. The more thoughtful of you may have wondered about the wisdom of being in a survival situation with unlaced boots!
What is usually omitted is that in an emergency you are supposed to take the cores out of the cord, then re-lace your boots with the empty outer or some of the core cords. This assumes you did not buy the budget cord that doesn’t have particularly good cores!
Re-lacing your boots with paracord isn’t a bad idea. It cannot hurt. One day you may find yourself cold, tired and wet, your numb hands trying to unlace your boots, gut the paracord and then re-lace your boots. That sounds like something you may want to avoid if possible!
In my post on an EDC shopping list, I suggested that you add about two metres/a fathom/an armspan of paracord to your everyday carry (EDC). Or a pair of long, strong bootlaces, whichever you can acquire more easily.
The utility of this was expanded on in one of the links from my 4-4-4-4 article. In the event you missed it:

I had a quick look in the left front pocket of my trousers. The contents were:
  • One bandanna, various uses.
  • Disposable lighter, for emergencies.
  • Two hanks of paracord, roughly two metres. An arm-span and a bit.
  • A actual length of shoelace. I tend to pick up potentially useful bits of cordage! Useful for stuff that does not require the paracord. There was another shoelace but I used it to make an iPod carrier.
  • A tubular spectacle safety cord. My habit of acquiring cordage paid off here. What I thought was a bit of shoelace turned out to be something very useful to me. If the situation requires, I can retrieve this from my pocket and add it to my glasses.
  • A couple of metres of cotton string. Saves the paracord for important jobs. Potentially could be used as tinder. 
Categories
Phillosoph

EDC Shopping List

The other day I had cause to look in one of my boxes of outdoor gear. Various containers that I thought might prove useful. Items brought out of curiosity or sometimes just for their novelty. Gifts from friends. Some are milestones from my path of understanding.
Most of it I will never use. Either I have acquired better alternatives or my requirements have changed. So much money spent over the years that I could very much use now. Sadly most of this stuff has very little resale value.
If I knew then what I knew now” I could have saved myself so much time and money. This inspired me to think about the idea of a prepper/survival shopping list. If you have just come into the field, what should you be looking to buy first?
Hopefully my article on “Foundation survival kits” has proved a good start. A fire kit, bottle for carrying water and bag of toilet paper will have been easy to acquire. A poncho and liner or blanket will have cost a bit more but probably did not break the bank. You may be saving up for a good survival knife, but have hopefully bought a machete or hatchet to serve in the meantime. 
Most of the items suggested for the foundation are relatively bulky, however. They are “bag” items rather than things you can keep on your person all the time.
If you have a good “skin-level survival EDC” what you can find in your environment or in your pack is a bonus.
The good news is that you can build up a good EDC without a great outlay of cash. My article on skin-level gear mainly listed my personal items.
I have been asked for a more general list, so this might as well be a shopping list. As before, I will concentrate on the items you carry and save a discussion of clothing for another day.
Pocket Knife: This will probably be the most expensive item on this list.
In an emergency, this may be the only knife you have available, so it makes sense to get a good one. That said, as a cash-strapped youth I carried a Chinese-made penknife. It had a really good assortment of tools and the only trouble it ever gave me was a corkscrew straightening out.
With my first full-time pay-cheque, I brought a genuine Swiss Army Knife. In my personal list you will note I also have a mini-Swiss Army Knife (SAK), a Leatherman Squirt and a number of other tools. Some redundancy and backup is always wise.
My preference is a Swiss Army Knife, but many of you will be tempted by full-size multi-pliers/multi-tools. My SAK and Squirt together weigh several ounces less than many full-size multi-pliers, but the choice is yours.
Put a loop of cord on your knife so you can secure it to belts or snap-links when necessary.
If you wear glasses and opt for an SAK, buy the mini-screwdriver that fits in the corkscrew.
Optional is a small sharpening implement. Mine is a small metal card with diamond dust on one side. Small whetstones and other devices are alternatives.
Knives are not designed for prying, especially folding ones. A pocket prybar is a good addition to your EDC.
Lighter: The most basic fire kit is to carry a lighter. Get the type with a wheel. Even if empty, it can still be used to create sparks. Multiple disposable lighters can be brought in budget stores for about a buck.
Optional: Wrap the outside of your lighter with a few inches of duct-tape. Duct-tape is flammable and a small piece may be lit with the lighter and used to get a fire going.
Bandana: Bandanas can also be found for a modest price. Multiple uses. Have one in your trouser pocket.
Space Blanket: These can be found for very reasonable prices, which is good since they are one of the most important survival items that you can carry.
Bulk-buy and place one in your EDC, and one in each bag or outdoor coat you have.
Flashlight: Flashlights can get really expensive, so it may be sometime before you save up for the one you want, especially if you want a tactical, waterproof kubotan that will survive a nuclear attack.
In the meantime, small LED lights such as copies of the Photon II can be found on ebay. Carry one on your keyring. If you wear dog-tags, add one here too.
Whistle: A whistle is another useful addition to your keyring. Budget stores and ebay have these.
If you live or travel where temperatures often drop below zero make sure your whistle is non-metallic. Another useful addition to your dog-tags.
Cordage: Cordage can be put to many uses, but how much for EDC? About two metres/a fathom/an armspan of paracord is probably a good start. Or you can carry a spare pair of long bootlaces.
Buying a hank or roll of paracord is probably prudent. You will need it for some of the other items.
Dental floss: For lighter cordage I carry a compact container of dental floss. This fits in my pocket pouch of medical items. A hank of braided fishing line or kite-string is an alternative.
Pencil with tape: Another “non-medical” addition to my pocket pouch is a short pencil, wrapped in a length of electrical tape. A detachable eraser protects the point.
Chalk: Chalk is useful for marking trails or leaving messages. Half a stick of white or light-coloured, half a stick of dark. Bag the different colours separately.
Safety Pins: Useful for failed zippers and other wardrobe malfunctions. May be used to drain blisters or possibly as improvised fish-hooks. Mine ride in a little plastic bag with a couple of hair pins and paper clips.
Needle and Thread: At skin-level, this is a single needle, already threaded with about a metre of “invisible” thread.
Experiment with magnetizing the needle. You will need to select a method for protecting you from the point. Mine used to ride in a “sheath” made from a drinking straw. Now I have taped it to the side of the pencil.
Compass: If starting out, avoid tiny button “survival” compasses. They like to hide in the corners of pockets and pouches. I have to keep my larger clipper compass in a container to avoid this.
For about a buck or two you can find budget baseplate compasses on ebay. These are good entry-level items and you can use them to teach yourself some mapwork. They weigh about an ounce and you should be able to find room for one in your EDC. Add a lanyard so you can secure it to your person.
A whistle is a good addition to a compass lanyard. I prefer to use non-metallic whistles on compass lanyards.
Condoms: Condoms have a number of survival uses. Keep them away from your needle!
First Aid Kit: Your skin-level medical kit is for immediate treatment of minor injuries, i.e. actual “first-aid”.
For longer duration problems, have a more extensive kit in your bag. When you have the option, use the items in your bag before your EDC.
Budget stores and ebay sell little first-aid pouches that will fit in a trouser cargo pocket. Often they come with some medical items included. The contents may need a little tweaking but you can create a very useful pocket first aid kit for very little outlay.
Many of the items listed above can be fitted in the pouch. I even got my space blanket into mine.
Personal Medication: This will vary with the individual. In some environments this would include a supply of anti-malarials.
Tissues or Toilet Paper: A ziplock bag with a few metres of toilet paper.
Obviously, have a larger supply in your pack and use that in preference to your “emergency” EDC supply.
If you have a cold or nosebleed, the tissue paper saves your bandana.
Paper can be used as tinder and the plastic bag used to carry water.
The entire package can be useful padding for other items in a cargo pocket.
If, like me, you seem to accumulate lots of paper napkins from takeaways, use these instead.
A very useful addition to your kit that costs virtually nothing.
For low-level use I carry a small bag with just a few paper napkins. I add a larger bag should I plan to stray from civilization. 
Carabiner: A carabiner makes a very practical keyring and has a number of uses.
Several of the items listed above can be conveniently carried on your keyring.
If your gear has loops or rings it can be temporarily attached to the carabiner when you need your hands free. I sometimes use mine to carry shopping bags.
That concludes our basic list. A number of items but many of them can be acquired at very reasonable prices from sources such as ebay. Many of the items you may already have around the home.
In my previous article, I suggest several EDC items that “up-level” your readiness. Where practical these should be stored together in the same small pouch which can easily be added to your pocket contents. Another of the budget first aid pouches can be repurposed for this.
Up-Level Pouch contents include:
  • Fire Kit: Additional lighter, tinder in container, one or more candles. Fresel lens if you have one.
  • Fishing Kit with Snares
  • Optional: About two thirds of a metre of cooking foil, ideally the heavier duty “turkey” foil. Carefully folded and rolled.
  • Optional: Additional space blanket.
  • Optional: Larger compass, with spare whistle. Using a firesteel necklace as the lanyard is an option to consider. Add a small snap-link and Photon light.
  • Optional: Elasticated bandage. This came with one of my medical pouches. I don't include it in my daily EDC, but it is a useful addition to the higher readiness inventory.
  • Optional: Not really survival or vital items, I have added a few things that may be convenient. Ingredients and instructions on packaging seems to be getting printed even smaller, and my eyes no younger. To this end, I have added a small folding magnifying glass (actually a 10x loupe) to my money pouch where I carry my Suunto Clipper. This could be used to start a fire. In the same place, I have added a set of earplugs. Earplugs have proved so useful on some of my travels it seems only prudent to have a set on my person as well as that with my travel bag. The earplugs may not get used as often as, say, my Swiss Army Knife, but when I do need them I will probably really need them!
Categories
Phillosoph

Skin-Level Survival EDC

Suppose that you are separated from your bag or rucksack. Your webbing gear, if you wore any, has become damaged or lost. All you have is the clothes you stand up in and whatever is in your pockets. This is your “skin-level” survival kit. 
Part of your skin-level kit is the clothes that you are wearing. Hopefully you were dressed appropriately for the climate. If you were chilling by the pool when everything went pear-shaped, one of your first priorities is going to be to acquire some new threads.

Today I am mainly going to concentrate on what you have in your pockets, or carried on your trouser belt. This is what many people would call “EDC” or “everyday carry”, although the exact use of this term varies.
Some people would include the contents of their daysac or handbag in their EDC. This article will assume that such items are not immediately available. Reaching them may be one of your objectives.
Some people use the term “EDC” for all the paraphernalia they have on their person, while in other contexts it is specific for defensive weapons. This article intends to examine EDC for survival.
Look on the internet and you will find EDC lists that suggest you should always carry a solar still, fishing kit, gold coins, eating utensils and so on. This is not very practical.
The heavier and bulkier your EDC kit becomes the more likely you are to not carry it all the time and omit parts you may need.
A good EDC survival kit is designed to have two tiers of readiness.
“Lower level” is what you carry all the time. Many of these items are carried because they can be useful in daily life.
“Higher level” are items that you add when you step up to a higher level of readiness.
Your lower-level kit would be on you when you go down to the store. You would add the higher-level items if you were leaving town to hike in the woods.
For example, in my lower-level kit, I have a lighter, which can be used for fire-making or illumination. The expansion to higher-level is a little pouch that adds a container of tinder, some candles and a spare lighter. I have little need for a fishing and snaring kit in town, so these items are higher-level.
Many ingenious individuals have had fun creating survival vests, survival jackets, survival walking sticks, survival pens, survival necklaces or survival hats.
These are not the best way of carrying your EDC. Jacket pockets are better used for items such as gloves, scarves and hats.
Your survival EDC should be based around your trousers. Everything should fit in your pockets, or on your trouser belt.
Since you (hopefully) wash your trousers, items should be easy to transfer to a new pair, or to a pair of shorts if the weather permits.
What you carry should not add so much weight that you have trouble keeping your trousers up. Nothing should be so bulky or hard-edged that it digs into you if you have to sleep clothed, bangs against you when walking or might injure you if you fall on it.
Personally, I am seldom not wearing cargo trousers or cargo shorts. If you have to dress more formally, there are companies that sell suitable garments with extra, hidden pockets. 
Let us have a look at what I am carrying, and how I might expand it to a higher-level. Your up-level items should be stored together in a small bag such as a pencil case. Keep this with your knife-belt (qv).
Fire: The lighter in my left pocket is my primary source of fire.
• To up-level, I will use a small fire kit that would be carried in my right cargo pocket. As described on other pages, this would have a spare lighter, a container of tinder, Fresnel lens (above), some candles and possibly some matches.
Note that the spare lighter is in a different pocket to the primary.
Food: I don't carry any food on me, so this category is more about means to procure food. At low readiness that is money and a credit card.
• For higher-level I have a container of line, hooks, wire and other fishing items. The dental floss I have in my left pocket pack could be used for snaring or fishing, the safety pins serving as hooks.
If you are diabetic, you may want to add a small supply of glucose tablets, hard-candy etc. 
You could carry a tightly rolled sheet of cooking foil, but I personally don't currently do this.
Signalling: I usually carry a phone. As well as being able to call for help, many modern phones have useful applications such as a notepad, compass or GPS capability. Phones are useful but also delicate, so should not be the sole thing you rely on.
The photon light on my keyring could be used to signal. The keyring also has a whistle.
My pocket kit includes a pencil and chalk, and I carry a pen (a retractable Zebra pen, since my belt pouch is rather small. I actually found this pen! Non-retractable, all-steel Zebras are suggested as a good alternative to more expensive “tactical” pens). A permanent marker such as a Sharpie may also prove useful.
I also have a compact flashlight.
• Up-levelling would probably add a larger, but compact, pocket torch.
A lightweight signaling mirror is another useful item. These are a good addition for tactical scenarios since they can be used to peek around cover.
You may already have an item that can be used as a signalling mirror. Many compasses have a mirror and some phones or music players have mirrored backs.
A mini-flare kit could be accommodated with the other items in the right cargo pocket, but I have never actually owned one of these.
A larger whistle, on a lanyard, might prove useful. There are cord necklaces that include a ferro-rod and steel. If you can find them at reasonable price add a whistle, photon light and a snap-link.
Shelter: Most actual shelter items are too bulky for skin-level EDC. The exception is a space blanket. One permanently rides in my pocket kit.
You may want to carry additional space blankets. Not only can they be used for warmth, but also as protection from the rain and for signalling. Penny for penny and pound for pound, space blankets are among the best survival gear you can carry. Do not leave home without at least one.
Cordage: The dental floss in my pocket kit has already been mentioned. Either carry a couple of spare bootlaces or an arm-span of paracord. This can easily be carried in the bottom of a pocket and has numerous applications. I also carry a tubular retention cord that can be fitted to my glasses if needed.
• If up-levelling, a larger hank of paracord can be carried on your person if you have room. Braided fishing line also has many uses.
Tools: My keyring includes a bottle-opener, mini-Swiss army knife, a P38 can-opener and a little tool for removing SIM cards and opening CD drives. That last tool possibly does not have a survival application. (It broke, so has been replaced with a paper-clip that can be readily adapted should the need arise),
The keyring itself is a carabiner. Several of my items can open bottles. The bottle-opener is just a convenience, particularly in social settings. 
A small pouch on my belt carries by clipper-compass, a pen, a trio of lock-picks (two Bogotas and a snake), money, credit cards and a USB drive.
A second pouch has my Swiss army knife, mini-Leatherman, pocket prybar and a sharpening card. I find small-print challenging now, so I have added a tiny pocket-magnifier to this pouch.
The Swiss army knife includes a screwdriver that can repair glasses. 
A small bag in my pocket kit contains a few safety pins, hair pins and paper clips. These can be put to various uses.
A length of electrical tape is wrapped around my pencil. I may add a needle with a metre of invisible thread. I don't regard a sewing kit as an EDC-level requirement, but the weight is negligible and a sharp point potentially useful. I have now added a couple of threaded needles, wrapping them around the pencil.
• If up-levelling my main additions would be a larger knife and compass. More of that later.
Water: There are water bottles that can fit in a cargo pocket or on a trouser belt.
The bulk and weight of water means that you are unlikely to carry water at skin level unless the weather is very hot.
A few sheets of water purification tablets can be included in your pocket medical kit.
• If up-levelling the water category, I might add a “survival straw”, ideally one that fits in a cargo pocket. A condom could be used as a water carrier, but I don't carry them, no longer being single.
Medical: Your EDC medical kit is mainly for minor injuries. Have a better kit in your bag.
My pocket medical kit rides in my left cargo pocket. In addition to the items already mentioned it has alcohol wipes, plasters and pain-killers.
There is some medication I have to take with meals, so I carry a few days supply of this in my right cargo pocket. If you need to take medication regularly then you should carry a few days supply with you, and make sure it remains in-date.
• If up-levelling, a small container of insect repellent and/or sun-cream might be a prudent addition. This need only be a small volume, your main supply being in your bag or base. Chapstick or Vaseline in winter, if you think you will need it.
Other items: If you are out in the wilds, a few metres of toilet roll or paper tissues in a ziplock bag should be added to one of your cargo pockets. Make that a permanent part of your kit if you wish.
I have a small bag with a few paper napkins for about town” and a larger bag I add for rural”.
A bandanna has numerous uses and is easily carried in a side pocket. Since I lack some hair, I have used mine for head protection when caught out without a hat.
I wear photochromic glasses so don't carry sunglasses. These protect the eyes from both excessive light levels and more physical threats.
Non-survival items carried are a USB drive, travel card and music player, although the back of the latter is a mirror.
So far we have talked about pockets and belt pouches. In years past most of my EDC was in a compact bumbag. I have learnt to make more use of my cargo pockets and have replaced the bumbag with a couple of pouches attached directly to my trouser belt. One is a repurposed pouch for a mobile phone.
You should not add so many pouches to your trouser belt that it interferes with carrying a rucksack, or sitting in a vehicle.
There are belts that are made of paracord, but if you unravel them to use the cord you have nothing to hold up your trousers, nor hang your pouches from!
There are trouser-belts with hidden storage compartments, and various ingenious buckles. The original boy scout belt had a buckle that served as a bottle opener.
Earlier on I mentioned adding a larger knife and compass to the skin-level kit.
My favorite kukri weighs just under a pound, but hanging it on the trouser-belt is a bit much. What you need is a second belt. This is effectively an intermediate level between skin-level and webbing. When at a higher level of readiness you should attempt to keep it upon your person.
Your knife belt rides below the trouser-belt, like a cowboy's gun-belt. It should be adjustable, so that it can be worn over thick clothing when desired.
Add a compass pouch to one side of the belt, and attach the compass lanyard to the belt. Add a carabiner or snap-link to the front of the belt.
I carry my kukri on one side of the belt and a Mora puukko-type knife on the other. Not surprisingly, this belt could also be used to carry a handgun. 
If I need to carry a hatchet or entrenching tool, I can slip it between belt and body.
A folded rain-jacket, poncho or unfolded space blanket can be draped over the back of the belt.
Many police officers experience medical problems from the weight of their duty belts. Detaching the duty belt from the trouser-belt and wearing it lower like a gun-belt might improve matters.
The knife belt can be used to carry a litre or two of water. The best way to carry water is in bladders since this is lighter than conventional bottles. Rather than placing the weight on the knife belt, my proposed “camelbum”concept would give more options.
I have mentioned carabiners and snap-links a couple of times. Use one as your keyring, add one to your whistle lanyard and knife belt. Also have them on your rucksac strap and/or webbing.
When you need a hand free, or there is a risk you might drop a tool, attach the tool to the nearest snap-link.
This is an extension of the idea to collect empty magazines described in my book “Survival Weapons”. Make sure your tools have loops or rings.
Categories
Phillosoph

Seven Tools of EDC

Today, as I was coming into work, I was thinking about “magic number seven”.
In short, this is an observation that the average number of related “data chunks” a person can recall is seven, plus or minus two.
This is usually specified as for short term memory, but may be relevant to longer term memorization of lists too.
A friend of mine is working on a language-related project. It seemed to me that if you must have lists of categories or affixes, then breaking them up into groupings of seven or less might be a good approach.
As it is wont to do, my mind drifted and I began to think about the ninja “six tools of travelling”.
I know six is not seven, but bear with me a moment.
I remember this list by recalling that three things on it are “flexible”: hat, rope, “towel”; and that three are not: medicine, writing kit and fire tube.
As I point out in my earlier article, this list does not include a knife, since telling a ninja or any other sensible person of that era to carry one was probably redundant. If we add knife/tool to the list it becomes seven.
OK, I thought, does what I have on me right now meet the criteria of the six/seven tools of travelling/everyday carry (EDC)?
  • Firstly, I have a hat. It’s cold out and my head has little remaining natural insulation. If it was sunny out and I was planning to spend any time outside I would probably have a hat of a different design.
  • Rope, or cordage at least. I have a spare shoelace tucked into the bottom of a pocket. I also have the dental floss in my pocket kit which can be used for a variety of purposes.
  • “Towel”. The item the ninja regarded as a towel was a relatively thin, multipurpose item. I have a bandanna in my pocket which can serve similar purposes, including as an emergency hat.
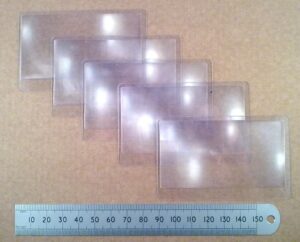
  • Medicine. My pocket kit contains plasters, painkillers and disinfectant wipes.
  • Writing kit. I have a pencil. I can also write things down on my phone.
  • Fire. No ninja tube of smouldering charcloth, but I do carry a source of fire. A lighter rides in the same pocket as the bandana and shoelace.
  • Knife. I carry a Swiss Army knife and a mini-Leatherman squirt and have a Swiss Army classic mini-knife on my key ring.
These seven tools do not just represent concrete objects.
They also represent broader, more generic categories.
For example, the hat also represents shelter, so includes a coat suited to the weather, scarf and gloves should they be needed and the survival blanket I carry.
The writing kit also represents communication, so includes my phone and the USB drive I carry. Communication can include signalling, which includes my phone and the whistle and photon light on my keychain. Illumination can be taken as a subset of signalling.
The knife also represents tools in the narrower sense, so includes my mini-prybar, diamond sharpening card and the P38-style can opener on the keychain. The knife also represents the requirement for self-defence, where such is permitted.
As can be seen, the “seven tools of EDC” are a good starting point for planning an EDC or larger kit.
There are other categories, of course.
Money is always useful and documentation may be needed.
I carry tape, pins and other items that might be used for repairs. These might be considered a subset of the knife/tools category. I may add a magnetized needle and a few feet of invisible thread to my little bag of pins and paperclips.
None of the seven categories really covers navigation, but I do carry a Suunto clipper compass which has proved to be surprisingly useful in town.
On the next level up, food and water, or the means to procure and prepare them should be addressed. At the EDC level this is addressed by the money and credit card.
If you live in a very hot, dry environment carrying a supply of water on your person is prudent.
Categories
Phillosoph

Bogota Lock Pick and Rake Review

I suspect that the readers of my posts on lock-picking fall into two broad camps. The first are those interested in lock sport, and that, like me, are relatively new to the field. The second are those who are not particularly interested in lock sport as a hobby but wish to add a new capability to their repertoire of survival, self-reliance and preparedness skills.
To both groups, I give the same initial advice: If you only ever buy or carry one set of lock picks, it should be the Bogotas!
Euro-twist Bogota lock picks
Euro-twist Bogotas
standard-twist Bogota lock picks
Standard-twist Bogota lock picks
As I have mentioned elsewhere, the Bogotas are the invention of a lock sportsman called “Raimondo”. You may see similar picks under other names, which is often an indication that the maker is trying to avoid copyright and IP.
There are number of options when it comes to Bogotas.
In addition to stainless steel, they can also be found in non-magnetic titanium. Interestingly, some of my steel Bogatas are strongly magnetic, others much less so. More of that later.
“Mini-Bogatas” have a shorter handle. The actual pick part is the same, don’t think these are better suited for smaller locks. Mini-Bogatas can be found in either stainless steel or titanium.
Two-hump and four-hump versions of Bogotas can also be found. I have no personal experience of these, so this article will be about the more commonly found triple and single hump set
Another option you will encounter is “standard” or “euro-twist”. This reflects that in the US cylinder locks are usually mounted with the pins uppermost, while in Europe they can be encountered with the pins down or up. A “euro-twist” Bogata has the humps pointing in the same direction as the handle curves. Even if you are in the USA, I suggest you buy “euro-twist” if you can get them. If you are using the other pick as a turning tool, this lets them curve away from each other, giving you a bit more room. There are also flat “no-twist” Bogotas.
Most paired sets of Bogota picks have handles designed to act as a turning tool for the other. And they work very well for this too! I often reach for them before other turning tools when using other picks. It is possible these handles might serve as shims. Regrettably I do not have any handcuffs to experiment with.
The single hump version can serve as a half-diamond or probably as a hook too. This form is sometimes called a “knuckle” or “p-nuckle”. I’ve not made much use of the single-hump as a hook, but have SPP picked locks using it as a half-diamond. The single hump is also good as a skeleton key for small warded locks and can be used to pick dimple locks.
I have seldom actually needed to use the single hump for SPP, since the triple hump rake is the most consistently performing pick I have used. With the right action, some locks pop in seconds. I have some rakes that open certain locks faster than the Bogotas, but if these do not work the Bogotas usually do the job. I use my Bogota rake more than any other pick I have. My other rakes are mainly for locks that are too small for the Bogota or that I know open faster with another design.
The inventor of the Bogota recommends that the rake be used with a jittery action, “like you have had too much coffee”. The Bogota rake actually lends itself to a variety of techniques. I generally start with a see-saw rocking action that becomes a scrubbing action if the lock does not yield. I guess that might qualify as a jiggling or jittery action. You can also use the Bogota with a zipping action. I have even opened some locks with the rake inverted so that the bumps rather than the peaks contact the pins.
I now have a couple of variants of Bogotas. In addition to my original Dangerfield pair, I have a more conventionally handled version from the Dangerfield Serenity set. I also have some pairs from Mad Bob. The Dangerfields have taken up residence in my lock sport kit, while the Mad Bobs I intend to place in an emergency kit.
The Dangerfield pair are not as flexible as some picks out there, which is a good thing since when you are starting out you may get some locks to open with a lateral jiggle. These Bogatas seem unlikely to bend or break with such applications, although as your finesse develops you tend to drop this technique.
The flat-handled Bogota from the Serenity kit seems more flexible than the other Dangerfields. According to UK Bump Keys, all three are 0.022" (0.558mm). Initially, I found the Serenity Bogata easier to use in the narrow twisty keyway of an SKS lock. This has been cured with practice and I now have no trouble using the stiffer Dangerfields in this lock. I actually prefer these Bogotas over the others I currently have.
The Mad Bob Bogotas are offered in both “standard” and “euro-twist” configurations and in both 0.6mm and 0.8mm thicknesss. Mine are 0.6mm euro-twist. They seem a little more flexible than the paired Dangerfield. That is not a bad thing for narrow keyways once you have learnt to be gentle with your picks. Interestingly, the steel used on the Mad Bobs does not seem to be magnetic, while that on the Dangerfields is. I’d not try taking them through a metal detector, but this might be significant if you plan to magnetize your picks to make an emergency compass.
I have seen it said that Mad Bob picks need additional sanding. The picks I have have no detectable rough spots and the finish seems adequate.
The Mad Bobs are somewhat cheaper than the Dangefields, although this is somewhat offset by the shipping and handling charge the former has. Mad Bob also failed to notify me when the picks were back in stock.
I discovered something interesting while trying out my newly arrived Mad Bobs. My stubborn little Abus padlock refused to open. Usually it opens with a Bogota, although the Octo-rake is quicker. The problem seemed to be with which turning tool I used. Using another Mad Bob Bogata pick as a turner seemed to leave insufficient room inside the small keyway for the rake to rock. When using the Dangerfield and Serenity Bogotas stored in my lock sport kit, I must have used the “L” tool in the kit.
My attempted solution was to cut the handle down to about half an inch (12-13mm). I achieved this by cutting a grove with the cut-off disc of a Dremel, then bending it until it sheared. Use something like the stone of a Dremel to re-shape the end then finish with a needle file and abrasive paper. This increases the pick’s capability as a turning tool but makes it more compact, intermediate between the unmodified pick and the often much more expensive 2" mini-Bogota. Bending the handle to a right angle decreases the overall length further and may make them easier to carry in certain locations. On the other hand, the 60 degree bend of the original may be better at reaching recessed locks, and I am not convinced that shortening the handle has that significant an effect on stowage. If your lock pick kits do not contain a Bogota bent as shown, it is worth making a turning tool with a 60 degree bend.
A Variety of Bogota Lock Picks
Despite these efforts, the Abus won’t open unless certain turning tools are used on it. Specifically, the Dangerfield Bogotas and Sohos or the Serenity L-tool. The Mad Bobs are either thinner or more flexible. They work fine on other locks I have tried, but the Abus remains a baffling exception. I later hit upon a simple solution.
Dangerfield Bogota and batarang lock picks
This image shows some “batarang” rakes (aka w-rakes) that at first glance may appear to be Bogotas. These are from one of my Chinese pick kits, which seem to have been “inspired” by an American brand called “Majestic”. Note that some of them lack the undercutting of some peaks: a feature that strengthens the Bogotas. Also note that the “wavelength” of the peaks is less. They do work, I have opened locks with them, but they are not as good as Bogotas. Incidentally, these particular examples have a number of burrs that could be sanded off, but this is likely to remove the nasty black finish that shows up the brass. I have not experience of genuine Majestic picks but expect they are better finished.
The mirror finish of other picks helps them move around inside a lock and does not show up brass marks like some other pick finishes.
Bogota-like rake made from steel rule
An honourable mention goes to this rake, which is effectively a Bogota without the innovation of the undercuts. The original Bogotas were made from the steel blades from a streetsweeper, illustrating that these are a relatively simple construction project for those with hand tools, material and patience.
Carry options for Bogotas
A pair of Bogotas constitutes a compact but very capable lock-picking capability. In other posts I have shown how a pair can be carried using the spring from a cheap pen. The safety pin lets the pair be carried where they are concealed or most convenient. An alternate method uses a few inches of gutted paracord. A safety pin may be added with a needle and thread.
If you are new to lock-picking, the Bogotas are great for building your confidence and teaching you finesse.
Given their performance, quality and versatility, a pair of Bogotas are great value for money and worth adding to you tool kit, survival kit etc. Newbie or veteran, you should give them a try!