Disclaimer: “As an Amazon Associate I may earn from qualifying purchases.” Adsense and Infolinks were no help at all.

If you have enjoyed this article or it has been helpful to you please feel free to show your appreciation. Thank you.

Read The Third Wave by Alvin Toffler!
Categories
Phillosoph

Camouflage: Light, Dark, Neutral and Natural

Camouflage is about “not being seen”, which is one of the most fundamental of survival strategies.
If you cannot become “invisible”, you may be able to appear insignificant, uninteresting or become easily “lost in a crowd”.
Good use of monotone neutrals. In some shots the actresses blend into the terrain.
You may have spent good money on the latest designer camouflage, but it is of no use to you hanging up at home.
The most likely source of threat is other human-beings, and you are most at risk when other people are around.
Miyamoto Musashi tells us in the “Book of Five Rings”:
“In all forms of strategy, it is necessary to maintain the combat stance in everyday life and to make your everyday stance your combat stance. You must research this well.”
In clothing terms, what Musashi tells us means your everyday wear should be selected with a mind to decreasing your “visibility”.
Camouflage-patterned clothing does have a place in a prepper's wardrobe.
There are, however, times when using camouflage-patterned clothing may be counter-productive.
In cosmopolitan cities, clothing in camouflage or camouflage-like patterns may attract little attention. In other parts of the world, its use may attract unwelcome attention, or get you wrongly identified as military, paramilitary or a poacher.
Even if restricted to unpatterned clothing, there are strategies that we can adopt that will still decrease our visibility.
In previous blogs, I have touched upon a concept that might be called “camouflage without camouflage”. One can make oneself less observable by using a mix of non-camo-pattern clothing.
By using a variety of shades and hues, the basic identifiable human-shape can be broken up and become harder to distinguish. I have advised that you select clothing items in neutral and natural shades and colours.
While this remains good advice, a little more thought needs to be given to the system and some additional explanation may be warranted.

What is a Neutral Colour?

“Neutral colors are muted shades that appear to lack color but often have underlying hues that change with different lighting. Examples of neutral colors include beige, taupe, gray, cream, brown, black, and white. While neutral colors are not on the color wheel, they complement primary and secondary colors.”
On this blog I have stressed “neutral and natural”. Not all colours classed as neutrals are suitable for concealment.

Black

Regular readers should already know that “black is NOT a camouflage colour”.
In the movies, the bad guys, and often the hero will be dressed in black. It looks great on screen, and makes the actors stand out. This is exactly the opposite of the effect we want our clothes to have!
Even at night, black is to be avoided. In many partially lit conditions, black can be too dark, and stand out. Seldom is it dark enough for black clothing.
The special forces in Vietnam who dyed their gear black knew the colour would soon fade to a more useful dark grey.
Pure black clothing also tends to show the dirt, so you might like to rethink its usefulness as general wear.
If you want a dark suit for weddings and funerals, buy charcoal-grey rather than true black.

White

White is another colour that stands out and should be avoided. Like black, white really shows up any dirt.
The only time to wear white is when there is snow on the ground.
White garments used as snow camouflage should be uninsulated. If they are warm, you will be tempted to wear them all the time, they will quickly become dirty and will no longer be effective as snow camouflage.
Improvised Snow Camo
Obviously snow-camo should be unlined and of a material that is easily laundered.
Avoid white underwear if you can. Outer clothing can get damaged, and being exposed may expose you. Select underwear in neutral and natural tones.
If you have to wear a white shirt at a formal occasion, you may need a white undershirt to avoid the colour of the undergarment showing through.
If you have to wear a white shirt for work, carry a neutral colour scarf  or keffiyah you can cover it with when outdoors.

Blue

Not all shades of blue are neutral. Some that are neutral are not that natural. Neutral shades of blue or blue-grey can work in a winter or urban environment.
Light blue is generally a “cold” colour and can be used in the snow. Some snow-camouflage patterns use light blue and white to break up the shape.
Watch some nature footage of polar bears in the snow and ice and note how much the terrain appears blue, grey or blue-grey. Interestingly, the bears often appear yellow-white.
In an urban environment, light blue is often encountered as faded or mid-blue denim. Light blue is a good colour for a button-up shirt.
Darker blues are probably less useful for concealment.
A blue blazer is supposedly an essential in a gentleman's wardrobe (I don't have one!). If you want one, select a neutral shade of navy. If nothing else, it will at least go better with whatever other colours you may wear with it.

Undershadow

Many animals have lighter colouration on their undersides. This makes the shadow that their bodies cast less distinctive and is an example of counter-shading. The animal appears less three-dimensional and blends in better with the surface that it is upon. Behaviours such as crouching low further reduce the shadow, and the animal will often remain immobile while it thinks it is observed.
Interestingly, many aquatic or amphibious animals show an abrupt change from light underside to darker upper. When swimming near the surface the dark upper makes the animal very difficult to spot. A predator looking up from beneath will find the light underside difficult to see against the sky seen through the water surface.
A light underbelly, or clothing to simulate it, is of little use to a human, since we spend a significant portion of our time upright and bipedal.
Keeping close to the ground and remaining still is good tactics, however. If you are concerned with being observed you should never be reluctant to crawl if necessary.
An interesting example of trying to apply counter-shading can be found in the book “Second World War British Military Camouflage”, p.27-8 by Isla Forsyth.
Solomon J. Solomon was one of the early pioneers of modern camouflage. During the First World War he proposed “alterations to [British] soldiers’ uniforms to reduce their visibility, such as the darkening of the soldier’s cap and the lightening of his trousers.”
Upper surfaces catch more light, and correspondingly, need to be darker. Body areas that are commonly thrown into shadow need to be lighter.
Watch some videos of soldiers in action, and you will see they often appear as man-shaped blobs, darker than their surroundings.
Modern combat gear often uses exactly the same pattern for headgear, torso and legs. The chest area is often shaded by the position of the arms, yet often the equipment worn here is actually darker! Even in desert environments, soldiers wearing black or woodland-pattern body armour or load-bearing gear are still seen.

Illumination

When considering camouflage, a lot of attention is paid to colours and patterns. More attention should be paid to shade, light and contrast.
I have advised you to select items in natural and neutral shades, but how dark should they be?
If you have to hide in a dense wood, particularly at night, a mix of clothing items in medium or dark shades of natural and neutral colours may serve you. There will be lots of shadows, so use them. Camouflage is about behaviour as well as colouration.
Suppose you leave the wood to move across a neighbouring field. How well will your dark and medium-coloured clothes serve you then?
Even at night, the surfaces you move over may be relatively light. Grass and hay may reflect any available light, even that from the moon and stars. If you go prone, you may appear as a dark blob that attracts investigation. During the day you may be even more conspicuous.
Most of us spend a significant proportion of our time in urban areas. Even at night, this is an environment with many light or medium-shaded surfaces, and many areas are illuminated by artificial lighting. Dark outfits may make you stand out.
Discussions of camouflage often mention shade and shadow. Level of illumination in the surroundings is often not given that much attention. Clearly, if you are in a shadow, you are illuminated less, but it should be clear by now that light level has a much wider significance to camouflage and concealment.
In really deep shadow, what you wear probably matters little. There is no light, or more correctly, there is none escaping. Not all shadows or unlit areas will be this dark, however.
Stronger light can have interesting effects on concealment. Suppose someone is wearing a sand-colour outfit and lays down in a grass field on a sunny day.
You might think that someone in yellow would be easy to spot in a green field. One thing that would prevent this is that shade is more significant than hue. If the sand-coloured clothing appears a similar shade to the grass at the viewing distance, the figure can be over-looked. Another factor is that light materials reflect. Sunlight hitting the grass causes them to reflect green light. This green light may in turn be reflected from the light-coloured cloth, causing it to appear to have a green tint.
Effectively, your world should be viewed one of light and shadows.
Some areas are “shadow-dominant”. These include deep forests and jungles, and poorly-lit building interiors.
“Illuminated” areas include desert, open fields and many urban exterior areas.
This status may be changed by time of day, weather or season. At night, a wood may become even more shadow-dominant, yet in winter it may become better illuminated.
In shadow-dominant areas, clothing of medium-shade, with some dark items may be most effective. In better lit areas, lighter clothing may be less conspicuous.
Your movements may take you from light to dark areas or the reverse, so what should you wear? Having to deal with both light-dominant and shadow-dominant areas may explain why most attempts at a universal camouflage pattern have only ever proved partially effective.
In the early days of camouflage experimentation, a number of double-sided items were fielded or tested. Some had a spring-summer pattern on one side and a autumn/snow pattern on the other. Jungle/desert and green-dominant/brown-dominant were also tried.
The needs for the different patterns were thus either separated by season or by geography. As far as I know, no double-sided garments based on patterns for differing illumination levels have been tried, which is a shame.

Camouflage Patterns

For camouflage patterns for illuminated areas there are a number of options. Some of the patterns designed for desert use may prove useful in a wider range of environments. Make sure the pattern has sufficient element-size and contrast to disrupt shape and outline. Off the shelf, “tropentarn” seems to work well, although I would wish for a grey rather than green in the pattern.
Tropentarn Camouflage
Some urban patterns are good, although some use too much white or are too greyscale and could use some browns and tans.
Some newer patterns such as multicam use lots of colours and small elements, resulting in garments that appear a single colour beyond a few metres. This very much depends on the material and print. I have seen some camouflaged gaiters in these patterns that look like they might work. Polycotton trousers and shirts in the same pattern tend to blob-out at a relatively short distance. Generally I would avoid these patterns. They may be no more effective than cheaper single-colour items. Many of these patterns are also too green-dominant for a multi-terrain pattern.
For shadow-dominant terrain, you should probably consider “older” patterns such as US m81 woodland, flecktarn and British DPM. Canadian Cadpat is presumably intended for deep woods, although the green looks a little bright in some examples I have seen. Unfortunately, these patterns vary considerably. Browns can range from natural-looking shades to chocolate. Greens also vary and the lightest shade may be either light-green or a more useful tan. Contrast between elements and overall darkness may also vary.
Many of these patterns have too much green. While green is good for summer woodland and lush jungle, a pattern with more browns and greys would be better for other dark environments and seasons.
You may also encounter fashion/police patterns consisting of blacks and dark greys. These are too dark and lack sufficient contrast between the shades to disrupt the shape.
Ways to improve camouflage
Personal Camo-min

Camouflage without Camouflage

As was stated earlier, you cannot always wear a camouflage pattern. You may not have a garment such as camouflage parka (see below) with you.
How can you become less distinct wearing monotone clothing or “civvies gear”?
The first step is to mix it up! Different items should be different colours or shades. Obviously, what you select should be in neutral and natural colours suitable for your surroundings. Select medium and light shades unless the illumination level requires different.
Whilst you may not be able to wear a camouflage pattern, other patterns may have a disruptive effect, providing they do not use bright or primary colours. Some garments have pockets, collars or panels in contrasting colours, which may break up the shape.
Below is an example of the Russian Gorka wind-proof outfit. Some of these use camouflage, but they are also used in unpatterned cloth. Note how the two different shades and hues of neutral coloured panels break up the basic human shape.
Gorka two-tone suit
You probably know that several thin layers of clothing will keep you warmer than a single thick garment. You can also regulate your insulation more easily by removing layers. What many people do not appreciate is that a layered clothing system can be used to change your appearance and for camouflage.
For example, on the street you may be wearing a light-tan hoodie over a dark-grey bomber jacket. If you move into a darker area, you may move the bomber jacket to being your outer layer.
More layers often means more pockets. Thus you can carry a spare scarf or more than one hat, letting you further change your appearance.
Some hoodies or jackets are reversible. Generally I think you are better off with several thin non-reversible garments. They will cost you less and offer you more options.
If your garment is lined, ensure the lining is a neutral and natural colour too.
There is another advantage of having a wardrobe that is mainly neutral colours. Neutral colours go with just about anything. Most suggestions for a capsule wardrobe are based on having a versatile selection of garments in neutral colours.

Face and Hands

When James Bond wants to skulk around at night, he wears a black polo-neck. He never bothers to cover his face nor hands. He must leave a lot of fingerprints!
There is little point using camouflage if you do not cover your face and hands. Irrespective of your skin-shade, human skin can reflect. Hidden troops are often detected from the air since someone always has to look up at the spotter aircraft. Even at several thousand feet, an uncovered human face pops out and cries “Here we are!”.
Skin can be darkened and matted down by various means. Do not overlook local resources such as dirt, soot and soil. These do nothing to conceal your hair. Face-paint or dirt are also difficult to remove easily if you want to later appear innocuous.
You should carry suitable head and face coverings. A full-face balaclava/ski mask in a medium to dark shade of grey or brown would seem a good choice. However, some cops have been know to label these “ninja masks” and treat their possession as intent if they feel inclined.
Various face and head coverings can be constructed by combinations of suitably coloured and patterned bandannas, neck gaiters, scarves and knit-caps.
Gloves will be needed, and of a suitable shade and colour. Olive meraklon glove liners are a good start. Fingerless leather gloves (aka “recondo gloves”) are worth considering in milder climates. They provide some protection to the hands when climbing or crawling, so you may be more inclined to “go low” when needed. They can be found in tan-brown, or you can cut down old gloves that are surplus to requirements.

The Lower Body

There is no reason why your lower body has to wear a camouflage pattern that matches that of the upper body. The legs are a different shape to the torso and larger than the arms, so may need a different pattern to disrupt their identifiable shape. Using a different pattern for the legs may help break-up your overall recognisable human shape.
How well the concept of countershading can be applied to the human form probably warrants further investigation. Having your trousers lighter than your upper body is worth considering.
Desert patterns are suitable for trousers. UCP/ACU might also be worth trying for leg camouflage.
If we are considering monotone garments, our choices are probably various neutral tones of light-blues, greens, tans and greys.
Many style guides for capsule wardrobes recommend trousers that are lighter than the jacket.
Personally, I am wary of light-blue outside urban or winter environments. I actually don't own any jeans, wearing cargo trousers instead. Much of my EDC is in the pockets,
Greens are good for many rural settings, but may stand-out a little more than some other colours in urban areas. Some shades of green will stand-out in rural areas. Even neutral shades of green are less common in certain rural areas or seasons that one might expect.
Tans and greys are your most versatile choices for monotones. Tans and browns have the advantage that mud does not show up so much on them. On the other hand, the contrast of mud on grey trousers probably has a disruptive effect that breaks up the leg's shape.
Gaiters should be of a suitable camouflage pattern or neutral and natural colour. Since these are seldom worn in town, bows of textilage can be added to break up the shape. Ensure any materials used for textilage will not soak-up water.
Langdon-Davis had a lot to say about the distinctive appearance of black army boots. Footwear should be natural and neutral colours and matt finish when possible.
Black socks are supposed to make your legs look longer. I am not sure that works without black shoes and dark trousers. I generally wear boots so the socks are not visible.
Update: Recently I attended a funeral and noticed my boot tops were visible when seated, at least when wearing my suit trousers. Own at least one long pair of black socks for formal occasions. 
In town I often wear white cotton sport socks since they are cheaply available in quantity. In the field, spare socks may be used as extra carrying pouches tied to the outside of a pack. These should be neutral and natural colours.

Camouflaging Gear

The institutional military mind likes uniform, regular and symmetrical.
This may be part of the reason why personal camouflage has waxed and waned as a priority for soldiers.
Improving the camouflage of an item becomes unpopular when the additions must be stripped off for every parade or inspection. If you are outside of the military, then such restrictions will not limit you.
Previous blogs have discussed methods to improve the camouflage of your backpack. Similar methods can be applied to a chest-rig, contributing to the camouflage of your torso. Base colour for a chest-rig should be light or a desert pattern, since this area will often be shaded.

Camouflage Smock

A useful technique is to have a “camo-smock”. You put it on when you need a camouflage pattern. Roll it up and carry it when you want to appear non-military. You can carry more than one, and wear the most appropriate for the conditions.
Your bug-out outfit should include an item that can be used as a camo-smock.
My main camouflage item is a German Tropentarn desert-parka. Get this as big as possible so that it can form a camouflaged outermost layer over anything you may be wearing. There is a nice liner for it that makes it into a nice cold weather coat.
Without the liner, it is unlined so can be worn for camouflage in relatively hot weather. There are vent zips under the arms.
Being a parka, it comes down to mid-thigh so will fit over anything I might wear under it and partially conceals my legs and body shape.
Sleeves are long enough to conceal my hands and keep the wind and rain off them.
If this is a “field only” item, add some bows of textilage to the sleeves and shoulders.
How to add camoflage bows of textilage
The pockets of the smock/parka include items that can be used camouflage my hands, neck, face and head. Little point in camouflaging yourself without covering your extremities!
For darker conditions, I have a several metres of camouflaged scrimm that can be worn over the parka like a poncho. Bows of suitably covered material or scraps of camouflage cloth have been tied to the scrimm.
Categories
Phillosoph

Kidney Warmers and Bellybands

Decades ago, when I first saw “Fists of Fury”, the scene above puzzled me. How did Bruce Lee’s character conclude the chef was Japanese just from seeing his undergarment?
The answer is that the Japanese are known for being fond of haramaki or “bellybands”.
Kidney Warmer/ Bellyband
The Germans are also fond of a similar garment. I have read of the Afrika Korps being issued “kidney-warmers”. The “Armed Forces of World War Two” by Andrew Molo clarifies:
“With the rapid drop in temperature at night, personnel wore a knitted woollen waist protector next to their skin, and a woollen greatcoat over their other clothing.”
I used to work with a colleague who had a German wife. I was apparently “mother’s wisdom” that you should wear a kidney warmer to keep your feet warm. Similarly, running around without socks could cause kidney and bladder problems.
Kidney warmer
It is interesting that diverse cultures in different parts of the world maintain that there is a link between kidneys and feet!
In a previous blog I mentioned that some American Civil War soldiers wore a flannel belt next to the skin.
Bellyband side view
“So what?” you may be asking. Many readers will own at least one set of long underwear. And sometimes the undershirt rides up and exposes the small of your back. A kidney warmer would have prevented this and also proved extra insulation.
Or perhaps, you are wearing a loose tee-shirt and find things can get a little drafty when the wind picks up.
Suppose you have to improvise cold weather clothing due to an unexpected change in the weather. Wrapping a spare scarf, keffiyeh or strip of material around your midriff could make all the difference.
Button around bellyband
There are a variety of styles of bellyband available. Some are elasticated tubes you either step into or pull over. Others are wrap-around and utilize velcro or other means.
If you have a snug-fitting tee-shirt or jumper that has seen better days, it should be easy to make your own kidney warmer to try the idea out.
Categories
Phillosoph

Dressing for Bug-Out

When you reach for your bug-out bag (BOB), there are two questions that you should be asking yourself.
The first is: “Do I really need to go?” Escaping to safety is a meme that Hollywood has drummed into us. It makes for great movies, but in reality, “stay put” is usually a more prudent survival strategy than “bug-out”.
That said, if the answer was genuinely “yes”, your second question should be: “What is the weather like?”

Clothes Maketh the Survivor

Your chances are going to be much better if you are dressed for the conditions that you are likely to encounter.
With your bug-out bag should be a selection of clothing items that you may possibly need.
Let us work on the assumption that the survivor must fend for themselves for 72 hours.
Sadly, there is no single outfit of clothing that can handle all possible conditions, hence the selection.

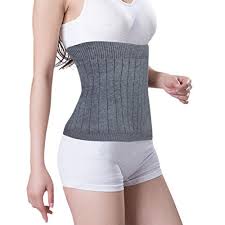
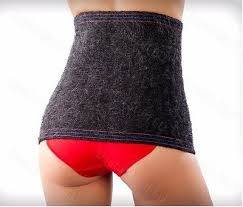
Underwear: Unmentionables for the Unthinkable

Let us start at the foundation, the underwear:

Hot Weather Undies

Shorts

If the weather or climate is hot, your underwear can simply be shorts and t-shirt.
Swimming shorts are a good choice. Those made from synthetics dry very fast, simplifying laundry.
I like the ones with a mesh-lining that keeps things in place and under control.
If it is really hot, the shorts also function as outerwear. Wearing them is also handy if you have to ford a stream.
A useful tip for underwear of all sorts is to have each set a different colour. This helps you keep track of which has been worn and which is clean. White tends to show the dirt, however. Neutral and natural shades are probably the best for underwear. Among other benefits, they are less likely to give your location away when hung up to dry.
Not a bug-out consideration, but have one set of white undergarments for when you wear something that the colour of your underwear will show through.
Two pairs of shorts are sufficient for 72 hours. A wear and a spare. A third pair is handy in case things go more than a couple of days.

Tee-Shirts

For the tee-shirts, it is worth acquiring them in coolmax, since it is fast-drying. Again, get two or three, and have them in different neutral or natural colours.
For a 72 hour scenario, laundry is not a high priority. Plain cotton or polycotton tee-shirts can be found at reasonable prices in multiple packs. These are a good source of undershirts for short trips or your bug-out bag.
A pair of t-shirts in string-vest material are useful additions. In hot weather, they stop cloth pasting to your sweating flesh. In cold weather, they add an extra layer of warmth for very little additional load. 
String-vests will be most effective worn next to the skin.
A couple of string tee-shirts may prove to be one of your most cost-effective investments towards your comfort. Shop around and you will find them in useful colours such as “army green” (olive/khaki-drab).
Sports Bra
A bra will be needed for them that needs them. I would imagine a sports bra would be a good choice for a bug-out situation. I have no experience wearing bras, so will offer no further advice.

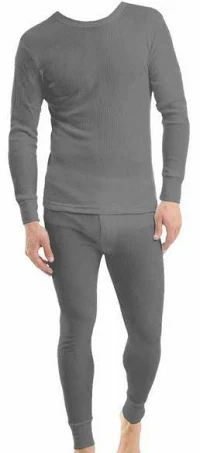
Temperate Climate Underwear

For temperate conditions, we will need more underwear. We need to keep comfortable at night and on the rainy days, so will need something more substantial than what we usually wear at home or working indoors.

Long-Johns

You will need two pairs of long-johns. Polycotton are probably fine for mild weather. You do not want underwear that is too hot in temperate conditions.
Polycotton is relatively easy to launder in long-term scenarios.
Polycotton Long-Johns

Long-Sleeve Undershirts

You will need a pair of undershirts, preferably long-sleeved.
Since your torso sweats more than your legs, have these in coolmax if you can. If you cannot get these, the same place that sold you the long-johns probably has long-sleeved tops in polycotton.
Have each set of your long underwear a different natural or neutral colour.
A string-shirt may be worn under these.
Coolmax Long Sleeve
You can wear your temperate underwear with, or instead of, your hot weather items.
If it gets colder than expected, wear both sets of long undies.

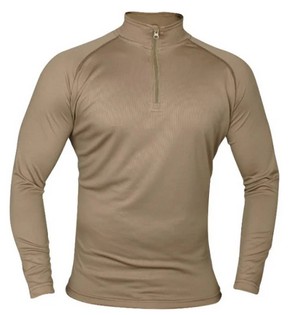
Underwear for Cold Conditions

If the mercury has dropped, you will need “proper” thermal underwear.
In previous eras this meant wool. This is not so easy to find these days and may be beyond your budget.
Modern synthetics are much easier to wash.
My personal choice is a set of Brynje long-johns and a matching long-sleeve top. These have a mesh construction, and seem more tolerant of extended (multi-day) wear than my merkalon set of more conventional construction.
If you are on a budget, you may be able to get along with a single set of thermals.
If you live where winters can be expected to be cold, two sets are a good investment.
On the other hand, if you live near the equator, thermal long-johns may be low on your list of priorities.
Your thermals can be combined with one or more sets of your temperate and hot-weather underwear.
Not strictly “underwear”, a wool or fleece shirt or a thin jumper may be worn over the underwear.
During the Second World War and Korean War, American soldiers would wear their woollen uniform trousers under their cotton field trousers.
The modern equivalent are quilted trouser liners. A variety of these can be found on army surplus sites.

Organizing Your Undies

The underwear items suggested above are fairly low bulk, so a set of each of the hot and temperate kit should be packed in your bag. Bagged up, this probably makes a comfortable pillow at night.
The set(s) of thermals, and the second set of hot and temperate underwear should be stored close to your BOB rucksac. Put on what is suitable for the day. Decide if you want to take the rest or leave some behind.
Trouser-liners are bulky, so only pack or wear them if you think they are really needed.

Outerwear

Ok, now you are in your undies. What else to put on?
This will depend on whether you expect the weather to be hot, temperate or cold.
Expect an unexpected dunking or downpour. Have a drier change of clothing you can change into while your other dries.
Wear one set of clothes during the day, then change into the other set for sleeping, letting the day set dry..

Hot Weather Outerwear

For hot weather, your outer layer should be something like a medium-weight shirt. Lighter shades handle strong sunlight better.
The shirt should be of a generous cut, for air circulation. This also allows warmer clothing to be worn beneath it.
It should be of a tight weave to resist mosquitoes and the wind.
It should have long-sleeves that can be rolled down for protection from insects.
Cotton or poly-cotton are acceptable for hot weather. Some of the newish synthetic microfibres may be sufficiently comfortable too.
A combat jacket can be worn instead of a shirt, but you do not want something that is too heavy or too hot. Probably best to avoid lined garments.
Have a spare shirt in your bag. The two may be worn together, as described previously.
For the legs, cargo trousers are good. They should be roomy enough to fit over trouser-liners and long underwear. Cargo pockets take your skin-level EDC kit.
If these trousers are always with your BOB, your SHTF survival knife/knives may already be threaded onto the belt.
Whether to pack spare trousers for hot-weather is up to you. If the trousers you are wearing get damaged, there are not many other garments that can substitute for them.
If you have a pair of cargo trousers that are past their prime, I suggest your ranger-roll them and retire them to your BOB as a permanent back-up pair.
If the weather is likely to be variable, it may be prudent to pack a thin jumper and possibly a light jacket or field coat.

Temperate Outerwear

For temperate conditions, outerwear is the same as for hot weather with the addition that something like a field jacket is more likely to be being worn.
The jacket should be large enough to fit over a fleece jacket and any additional layers of insulation you might don.
Field jackets such as the M65 can be fitted with a detachable liner, which is worth having.
A spare pair of trousers lets you double up if it is unexpectedly cold.
Fleeces are often seen worn as the outermost layer. They work much better if they are under something more windproof, such as a field jacket, waterproof or even just under a shirt.
Items such as tracksuit tops, hoodies and bomber jackets may be worn under or instead of the field jacket. The order of these may be varied to vary your appearance, which may be useful in certain conditions.
Several thin layers of insulation are more versatile than a lesser number of thick ones.

Cold Weather Outerwear

If it is cold out, ensure that you have the liner for your field jacket. If a bomber jacket or similar has a liner too, so much the better.
If it is cold, your field jacket will probably not be your outermost layer. Have a parka, and buy it big so that it will fit over your field jacket and anything else likely to be under it.

Insulation

I have talked about insulation. A common mistake is to use too much.
A good rule of thumb is that what you are wearing should leave you feeling slightly chilly when you are stationary. You will warm up once you are under way.
The suggestions above constitute a layer system. A layer system is a useful way to customize your insulation level before you set out.
Adding or removing items when under way may not be as practical as some writers make out. Try it halfway up an Icelandic mountain in a 60mph wind! (Been there, done that!)
When on the move, frequently vent your clothing to remove humid air.
When you stop, you can put on additional clothing or wrap yourself in a blanket, sleeping bag or poncho-liner.

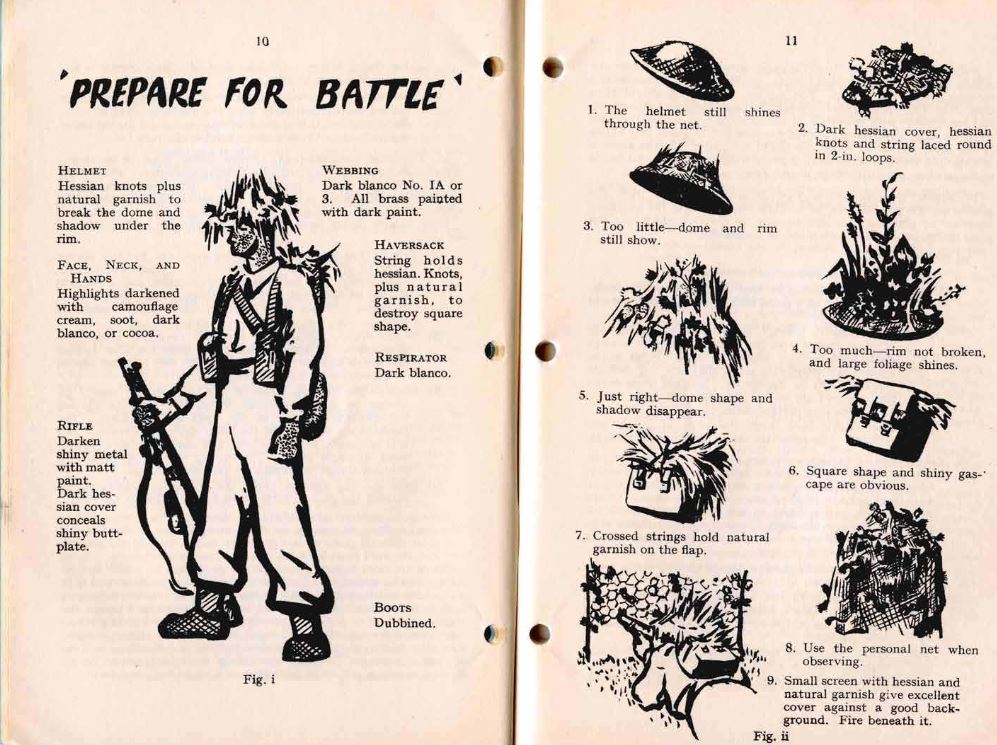
Colours and Camouflage

In general, your bug-out clothing should be in natural or neutral shades.
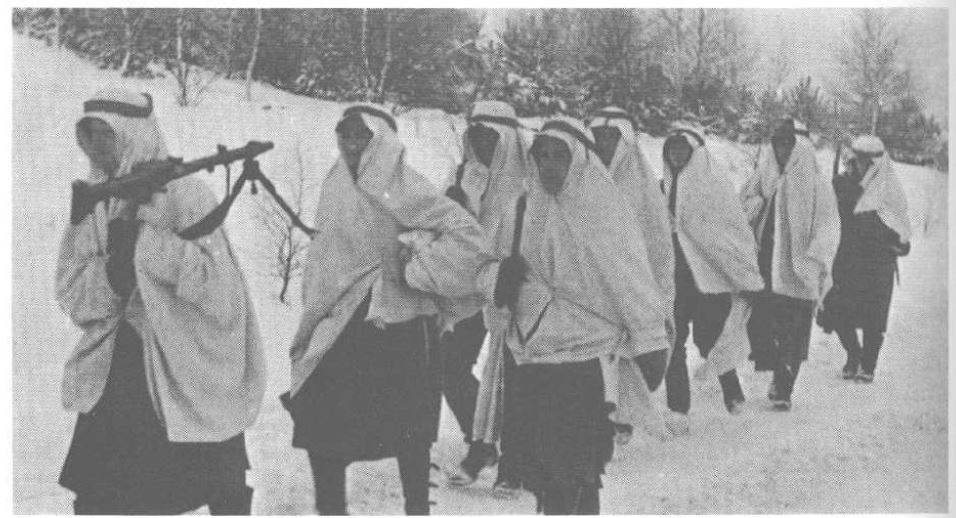
Camouflage-patterned gear may attract unwelcome attention in some parts of the world. Choose greys, browns, tans and dull greens.
Do not buy underwear items in white. Darker or more natural or neutral shades tend to show the dirt less. Why worry about underwear colour? Torn clothing may expose it to view, compromising your camouflage. Easily seen colours of underwear (or other garments) hung out to dry may attract unwelcome attention.
Avoid black items for outerwear, it tends to stand-out and gets hot in the sun.
Of course, in an emergency you may want to attract attention.
Your BOB should include a hi-viz tabard or jerkin, preferably the type with reflectors. One of your shemaghs, and possibly one of your warm hats, should be brightly coloured.
On the subject of reflectors, a reflective device that can be fitted to the back of your rucksac is useful if you find yourself hiking down a dark road. Bicycle stores are a good place to look for suitable items.
German Desert Parka
If I do need camouflage, I have a German desert parka. Being designed for desert use, it is comfortable in fairly hot weather. It is uninsulated and has ventilation zips under the arms.
I brought the biggest I could find so there is room for both air circulation and insulation. It is in Tropentarn, which is one of the better modern off-the-shelf camouflage patterns.
The garment is long enough to cover most things I might wear under it.
IThe parka is also a valid alternative to a field jacket. Jackets like the M65 can be too warm for milder conditions. (Officially the M65 was a “Cold Weather Field Coat”)
The desert parka can use the same liner as the German flectarn cold-weather parka, so the garment serves as camouflage cover, field jacket and/or CW parka.
German Parka Liner
I can wear the desert parka when I need camouflage. It is easily exchanged for another jacket and stowed in a pack when I do not.

And When It Rains

That covers hot, cold and temperate. What about wet?
Every bug-out-bag should include a rain poncho.
These have numerous uses. They are reasonably priced and will often keep both you and your pack dry. They are easily vented. They are quick to put on, although this can become interesting if there is a bit of a wind!
A rain-poncho can also be used to construct a shelter for sleeping.
If your rain-ponch came in a little stuff sack for carrying, add two three-metre lengths of cord to this. The cord may be used for shelter construction or as a belt to stop the parka flapping in a strong wind.
There are some situations where a raincoat is preferable. A raincoat is in addition to the poncho, rather than an alternative.
A good raincoat packs up small when not in use, yet is large enough to cover and keep dry all the clothing that is serving as insulation. For me, this means it should be large enough to fit over my desert parka in winter mode with its liner fitted.
I would strongly advise against a waterproof that is also a warm coat. You will be tempted to wear it all the time. It is more likely to get damaged, and it won't be waterproof anymore..
In a tactical scenario, a raincoat would fit under the camouflage layer but over the insulation. This is quieter, and also protects the rainproof from damage.
On the subject of insulation, remember a rainproof garment traps air so acts as both a windproof and an insulator.
If you put a rainproof on you may have to take something else off if you are to avoid overheating.
It is a good idea to periodically vent clothing, even if using breathable waterproofs.
Simple, small-packing waterproofs became difficult to find for a while. Outdoor shops much preferred to sell more substantial and expensive breathable items. “Pac-a-macs” seem to be making a comeback on the internet, although many are in garish colours!
I have never had a problem with non-breathable waterproofs, since I understood about venting.
I also discovered that even expensive breathable fabrics have a finite life. The way you discover that is up is you get wet!
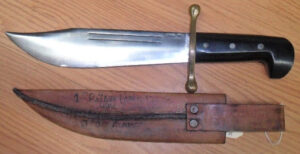
Boots

It is possible you own more than one pair of walking boots.
The pair you have with your bug-out bag should be suited to all-weathers and all-seasons.
You may have to traverse rubble and debris. Save the lightweight walkers for summer trips.
Boots for bugging out should be already broken in.
Personally, I like gaiters if I will be going cross-country.

Socks

You will need at least two pairs of socks, with three pairs or more preferable.  Your feet are important. It is worth investing in good quality woollen socks for your BOB. Four pairs of quality woollen socks let you alternate between pairs and double-up if it is really cold.
In certain conditions you may need to change socks several times during a day.
Sew a loop of ribbon to each so you can hang them on the outside of your bag to dry.
Choose socks in neutral and natural colours. You could use different coloured loops for each pair, although your nose will often tell you which set needs washing.
Spare socks can be used as mittens or carrying pouches.

Gloves

You will want several pairs of gloves.
You will need gloves for warmth, and gloves for protection.
Fingerless leather gloves provide protection with reduced loss of dexterity when in the brush or scrambling over rubble. These can be used with merkalon or silk glove liners.
On a hike in Iceland, an unexpected strongly gusting wind combines with relatively mild sub-sero conditions to create a -30 to -40 windchill. The hand holding my hiking pole was particularly exposed. Wearing fingerless leather gloves over glove liners avoided possibly serious injury.
Knitted gloves, woollen or acrylic, are not very stylish, but work well at keeping your hands warm and preserve some dexterity.
Good colours for gloves are mid-grey, khaki-drab and olive-drab.
Unlined leather work gloves can provide additional protection or another layer of insulation.
Leather work gloves may be used to protect you from thorns and rope burns. They may also be used as an oven glove to handle hot billy handles. They should be sized so they may be worn over woollen gloves and/or glove liners.
If desired, cuff-ribbing may be added to work gloves, or the top of old socks repurposed as such.
In cold weather, better insulated gloves and/or mittens may be required.
Add ribbon or cord loops to each glove so you can stash them on your snaplink when you remove them.
In bad weather, run a cord down your sleeves and tie the ends to your gloves. You may feel like a toddler, but this is better than a gust of wind taking a glove and the risk of frostbite!
The pockets of my outdoor jackets usually carry at least one pair of gloves. Keep your other gloves where they can be easily accessed, such as in an external pocket of your pack. It is not a bad idea to have all of these gloves in their own “glove bag”.

Hats and Scarves

You will need a hat to keep the sun off. I like a boonie hat, myself.
When the weather demands you wear your hood up, a suitably coloured baseball hat will be convenient.
Whatever your personal choice, add a cord so the wind does not steal it from you.
For cold weather, I tend to favour a watch-cap or folded headover. It is worth carrying more than one of these. If it is really cold, you can double up on hats. A headover or watch-cap may be combined with a boonie or ball-caps, as needed.
A tennis-headband may be useful in hot weather. A bandanna worn across the forehead is a possible substitute.
“You are not fully dressed without a scarf!” Bandannas, shemagh, neck-gaiters and a long woollen scarf also have a place in your BOB or coat pockets.

Protection

A bug-out bag is there for emergencies and disasters.
A dust mask may prove useful, as may goggles. As well as dust and sandstorms, explosions and collapsing building produce lots of dust. This can have immediate and long-term health effects. Sunglasses also protect against snowglare.
Kneepads should fit under the trousers. This is better for camouflage and air circulation.
A headnet against biting insects is well worth the (negligible) weight. It may be uses as an improvised fishing net or carrier bag.
In certain situations, head protection may be prudent. Volcanic activity may make it literally rain rocks. High winds turn roof tiles and other everyfay objects into deadly missiles.  Head protection may be a lightweight hockey or skateboard helmet, or a construction hard-hat.

Checklist

Have a checklist. When you are under stress or in a hurry you are unlikely to remember everything you need.
Some of the items for your bug-out outfit will be permanently packed in your bug-out bag. Items you intend to wear while carrying the bag may be stored near the bag.
For many of us, however, it is not practical to have a full, dedicated bug-out bag and outfit. Some items we need will be in general use. Other items may have been fished out of the BOB for a camping trip or for use during a cold-spell.
Hence, have a checklist of the items you want in your bug-out outfit so you can grab those that may not be there.  
Categories
Phillosoph

Adding a Pin to a Swiss Army Knife

The tools on a Swiss Army Knife sometimes end up performing tasks you never imagined!
A few months back I went to unlock my front door, only to have the entire barrel of the lock detach and come away with the key! The metal file/saw proved to be ideal for reaching to the back of the lock and turning the bolt.
My girlfriend’s son had asked me why I always carry my SAK. Exactly for times like the above!

The Early Years

For the first few years of my early adulthood I carried a Chinese-made version of a Swiss Army Knife. I vaguely recall there were actually two, although I do not recall why I had to replace the first. To be fair, these were quite nice knives, with a good assortment of tools. The only problem I actually recall is a time when the corkscrew straightened out as I attempted to open a bottle of wine.
Back in those days, they were all I could afford, and they served well.
Once I had some money, I invested in a genuine Victorinox Swiss Army Knife (aka SAK).

Victorinox Champion

The model I selected was called the “Champion”, not to be confused with the “SwissChamp” that had become available a few years previously.
The longer named Champion was less bulky than the Champ, lacking the pliers.
Swiss Army Champion
The seven-layer Champion was about the ideal maximum size for a SAK, and had a really useful selection of tools.
Sadly, my Champion was lost in an unfortunate chain of events that do not need to be told here. Even worse, the Champion had been discontinued, so I could not buy a replacement.
There was no ebay back then, so little chance of locating a second-hand one.
All the features of a Champion

Rise of the Ranger

As a replacement of the Champion, I selected a Ranger model. The most obvious difference between the two was the Ranger lacked a magnifying glass, fish scaler and Phillips screwdriver:
Swiss Army Ranger
• The Phillips screwdriver had proved useful at times.
• I don’t recall ever using the fish scaler/hook disgorger, at least not for its intended purpose.
• I didn’t make much used of the magnifier either, although now that I am older and more decrepit, I suspect it might prove more useful.
As an aside, the magnifying glass on the Champion was very cleverly thought out. Its focal length was the same as the magnifying glasses’ height. In other words, if you placed your knife on a map, the detail under the magnifying glass would be in focus. This may have been the case for other models that had the magnifying glass.
I wonder if the same applies to the newer pattern of magnifier?
Since I wear glasses, an early addition I made to both the Champion and the later Ranger was to add the mini-screwdriver that fits into the corkscrew.
Originally this tool was only included with the SwissChamp. They were sold as spares, however, so I acquired one.
This has proved very useful over the years, often coming to the rescue of companions rather than myself. Half a lifetime ago I repaired the glasses of a grateful Swedish beauty in old Jerusalem.
Corkscrew Mini-tools
Victorinox now offer three alternate tools, each with a different coloured end.
I have carried the Ranger for many decades now.
The lack of Phillips screwdriver is compensated for by the Leatherman Squirt mini-tool I also carry. If you are in the market for a medium-size (91mm) model SAK, the Ranger must be one of the best options.
The Huntsman model is a good choice, but I have often found uses for the file/metal saw of the Ranger.

Swiss Army Knife Wiki

Recently I came across the Swiss Army Knife Wiki. This site is worth a look around.
Some interesting information on how to use the various tools, and some applications for them you may not have known.
My Ranger had a Phillips screwdriver all along and I never knew! I discovered that the tip of the can-opener is actually intended for use with Phillips screws as well as slot.
The tip of the file/metal saw can also be used on some Phillips or Pozidriv screws.

Adding a Pin to a SAK

The original reason I have been thinking about Swiss Army Knives recently is that I came across a blog post discussing the pin carried in the handle scales.
Below is a video on possible uses for “needles” [sic pins]. The channel has many other videos on various features of Swiss Army Knives.


Even before I watched the above video, I was thinking about adding a pin to my Ranger.
I own a number of very fine drill bits, so creating a channel for a pin would not be too difficult. I could probably add a pair.
I have lots of cheap pins. I decided to try and find the pins actually used, since they were probably better quality and the head looked a little wider.
A number of ebay vendors offered replacement pins for Swiss Army Knives.
The one I chose got my money since they offered another idea. Included with the five pins was a small magnet.
This magnet was sized to fit in the can-opener. With such a magnet, a pin could be magnetized as a compass needle.
The bits arrived this morning.

Fitting the Magnet and Pin

The 5.8mm magnet was a perfect fit for the can-opener.
The vendor included the advice that the tool next to the can-opener usually needs to be opened before closing the can-opener with the magnet stored in it.
If this is not so, the magnet tends to pull out of position, attracted by the neighboring steel.
Although stainless steel, the blades of a Swiss Army Knife are magnetic.
Magnet in Can-Opener
Finding a drill bit small enough for the pin was not a problem. Problem was most were too short to drill a channel as long as the pin.
The other problem was my Ranger has solid scales. It lacks the air-spaces found on some newer and alternate scales.
Drilling a channel deep enough and straight enough proved problematic, and inevitably the very fine drill curved and the channel exited on the inner side of scale. This actually proved to be fortuitous, allowing me to file a notch on the inner side for end of the pin to rest in.
I settled for adding just one pin for now.
Most of the alternate positions for a pin are obstructed by the rivets the scales snap on to.
Ranger Knife Modified
My Ranger with pin added (blue arrow) and notches on scale (green arrows). If the balloon goes up, I am ready!

Other Modifications

Incidentally, the back scale of my Ranger has two additional non-standard features.
One is a chip, where an idiot friend used my knife as a bottle-opener without using the bottle-opener!
I could fix this damage, but it is a useful reminder to be more cautious of whom I trust.
More useful are a series of three notches. The second is five millimetres from the first, the third 57 mm for the first.
The first and third notch are used to draw a circle of 57 mm radius. The first and second are used to mark the circumference in five millimetre increments. Each millimetre of the circumference closely approximates one degree. Such a compass face can be used with various improvised modes of navigation.
Another addition I have made is to add a needle and thread.
Take about a metre of invisible thread and pass one end through the eye of a needle. Tie the ends together and then wrap the thread around the needle.
Push the threade-wrapped needle down beneath the saw blade. It should be snug enough that it will not drop out if you invert the knife with the saw open.
I used the metal saw rather than the woodsaw, since this is likely to see less use.
While you are at it, wax your woodsaw.
Categories
Phillosoph

Handcarts: AfriCart

Today I am going to talk a little more on handcarts.
Researching something quite different, I found myself on a page on USMC TOEs and once again encountered the following illustration.
Each machine gun section was provided with a MC-1942 handcart. Each 81mm mortar section was provided with two. The 60mm mortar sections, however, had no handcarts!
Looking for more information on the MC-1942 I instead found myself on this page on US Army handcarts. Notable was the information that such handcarts were intended for motorized troops. A pair of loaded carts fit between the seats of a 212 ton truck. When the truck could go not further, the infantry advanced with their handcarts.

US Army handcart with cover. Note detachably hauling ropes with handles.
Given the bulk and mass of some modern weapons and their ammunition, handcarts could still prove useful.

AfriCart

The marine and army carts use a T-shaped handle. Is this the best configuration? I wondered.
A quick look at rickshaws and similar devices suggested that a rectangular arrangement might be better. That, in turn, led me to the following interesting blog:
Note how the bicycle wheels are supported on both sides. Also note the easily adjustable handle and the folding stand legs.
The cart bed is 24 x 32" area, exactly the same as used in the US Army cart.
I am sure many of my readers could construct similar carts for their own use.
Don’t forget attachment holes for lashings or bungees and drainage holes.
A wire-mesh base is a possible option if you can source a suitably sized piece.
Non-pneumatic tires may be a sensible investment.
Categories
Phillosoph

Selecting a Handgun

A defensive handgun should be the first firearm you acquire. 
* Other humans are a far more likely threat than animal attacks or hunger.
* A handgun will defend your person, but may also be used to defend your home.
* A handgun may be carried at times and in places where it is not possible to carry a shotgun or rifle.
* In an emergency, the handgun is a means of defence against most animals.
* A defensive handgun is a more effective hunting weapon than most shooters realise (see later). (Incidentally, your second purchase should be a .22 hunting rifle.)
* A handgun is a useful backup to a shotgun or rifle.
When choosing a handgun it is easy to be swamped in opinion.
If you wish to be logical about your choice, there are several strategies that you can adopt.
Any gun is only as good as the rounds it fires. This is why much of the “movie wisdom” is so farcical. For example, contrary to the advice of at least one movie, a Cz.75 and a SIG P226 fire the same round, and are both excellent weapons for their calibre.

Three Rules for Expanding Bullets

A soft-point or hollow-point load should meet three criteria:
1. The round should be capable of reliably feeding through the mechanism of the weapon using it.
For a revolver or derringer, this may simply be a requirement for the round to fit in the chamber and stay there until fired. Recoil should not case the casing to ride back and foul the gun’s mechanism, for example.
For a round that must feed from a magazine and through a self-loading or other mechanism, the requirements may be more stringent. The bullet must not be deformed or misshapen by loading or firing.
2. The round must have a high chance of reliably expanding at the velocities it is being used at by the gun/ammunition system.
If the round is unlikely to expand, you may be better off shooting solid rounds such as FMJ or semi-wadcutter.
3. Both expansion and penetration is required.
If a round does expand, it should still have sufficient penetration to reach vital organs.
If your hollow-point or soft-point loads give inadequate penetration, you should consider other loads, and be open to the idea that you may need to use non-expanding ammunition.

Choice of Model

Hollywood, video games and even some writers often tell us one model of pistol has a superior performance to another, despite that in real life the two may use the same ammunition!
The chambering of your handgun is probably the first aspect that you should consider.
Once this decision is made, you can select a model based on size, mass, capacity, budget and other factors.
Ideally, you want an automatic pistol of about 7"/180 mm overall length.
As a primary weapon for concealed carry, you want a weapon of small bulk.
As a secondary weapon for overt carry, a weapon of low weight is desirable, since you probably have a rifle or shotgun and enough other things to carry.
What is required is a weapon that is concealable, capable and convenient, both as a primary weapon and as a back-up to a long-arm.
Hence the recommended handgun is of compact/sub-compact size.

Performance

If you are shooting someone in defence of your life, you want to make a big, deep hole in them.
Yup, size does matter!
The optimal pistol round for this is the .45 ACP.
The .45 ACP is compatible with a semi-automatic action, allowing for easy and fast reloading.
There was a time when it was hard to find a .45 that was not a large, single-action weapon with a single-figure magazine capacity.
Now we have a variety of compact and sub-compact double-action weapons, with useful magazine capacities.
In “Shooting” (1930), J, Henry Fitzgerald notes that at most ranges game is taken, a handgun is as accurate as a rifle, and more accurate than many hunters can shoot. With reasonable shot placement, a 230gr .45 will do the job a 180gr .30 rifle bullet can. Fitzgerald doesn't bother with specialised hunting guns. He was happy to use his 2" barrelled .45 FitzSpecials. This makes me wonder if a .45 Glock 30 with a 3.8" barrel might be way more versatile than most shooters expect!
Thanks to US military aid, .45 ACP ammunition is reasonably easy to find in many parts of the world.
The standard load of the .45 is subsonic, making it a good choice for general military applications that may include the requirement for weapons to be suppressed.
The Textbook of Small Arms, 1929 notes:
“Rapidity of fire is an essential in pistol shooting, and though the double action of a revolver may well be ignored when it is considered as a target arm, it is of the highest importance when the pistol is considered from the active service point of view as a weapon…
“The value of the calibre of self-loading pistols and revolvers has been much obscured by theory, but practice of recent years has amply proved that small calibre plus high velocity, although developing many foot-pounds of energy, yet lacks stopping or shocking value. There have been many attempts to substitute a high-velocity cartridge of ·38 calibre, as a Service equivalent to the traditional ·455. In practice it has been found that the small calibre sometimes fails to stop its man and that the large-diameter leaden plug of the ·455, moving even 300 or 400 feet a second slower than the high-velocity, small-calibre projectile, is yet far more effective. Recent experiment has, however, developed a new experimental ·38 cartridge [.38/200 of 200 gr] whose efficiency is, so far as ballistic tests can ascertain, not less than that of the ·455.
A hit with a ·455 anywhere literally [sic] knocks an adversary over. This quality of efficiency depends to some extent on the massive soft-lead bullet and the relatively low velocity rather than on any inherent magic in the calibre, for the ·455 or ·45 self-loading pistol firing a lighter nickel-covered bullet at a higher velocity cannot be depended on to produce equal shock effect.
The efficiency of the ·455 revolver cartridge is due to combination of the large calibre with the soft material, the mass, and the relatively low velocity of the projectile. These combine in such a way that the adversary experiences in his body the maximum development of shocking as distinct from penetrative effect. This is just what is wanted in an active service revolver. ”
It is interesting that nearly a hundred years later, this passage remains a good account of the issue, superior to many things written since.
I am well aware some readers will get distracted by the semantics of some of the terminology used.
Perhaps the most significant change since this was written has been the creation of jacketed hollow-point (JHP) ammunition that will feed reliably through an automatic. This has narrowed the gap in terminal effect between large-bore revolvers and large-bore self-loaders.
A .45 round that fails to mushroom will often make a wider wound channel than many 9mm and other medium-calibre rounds that do mushroom. .45s that do mushroom make very big wound channels.
Advances in bullet design intended to improve the performance of light, medium calibre, high-velocity bullets are even better applied to heavy, large-calibre rounds.

Logistics

You may regard logistic considerations over effectiveness.
The most common combat pistol round is the 9mm Luger, also known as the 9 x 19mm or 9mm Parabellum.
The 9mm Luger is the NATO standard pistol round, but its military and civilian use dates back to the 1900s. It was the round of the German, and other armies, for two world wars.
The majority of sub-machine guns are chambered for this round.
There are very few countries in the world where 9mm Luger cannot be found.
The medium-calibre 9 x 19mm is not as effective as the large bore .45, although many try to convince themselves it is.
Mel Tappan considered the 9x19mm round as good for hunting game in the 100-125 lb range (in the absence of a long-arm). Thus, your 9mm backup can be used to forage for small to medium game. Anything wolf-size or smaller.
If you have very small hands, a 9mm model may offer a slimmer grip without compromising magazine size.
Although not the optimum choice for defence, a 9mm handgun is a prudent addition to your survival battery.
Guns like the Berretta M9/92 are too big for roles other than as a primary overt weapon.
As for 45s, a compact or sub-compact model is preferable.
In nations that have received Soviet or Chinese military aid, the 9mm Makarov round, aka 9 x 18mm, may be more readily found than the 9mm Luger.
The 9mm Makarov is designed to be the most potent load that can be accommodated by a light, blowback-action pistol. Velocity and bullet weights are lower than the more powerful 9mm Luger.
The 7.62 x 25mm round may also be common in countries that use Soviet or Chinese weapons.
Most Soviet sub-machine guns, and their Chinese copies, are chambered in this round.
In handguns, it is usually found in the TT33 Tokarev/Type 51/Type 54 and a few other Warsaw Pact designs, such as the Czech vz.52. Some of these weapons are still in use in certain parts of the world.
The round is effectively identical to the 7.63mm Mauser round, so may be encountered in countries where the C96 Mauser “Broomhandle” was popular.
The 7.63mm Mauser/7.62 x 25mm/7.62mm Tokarev is a high-velocity round noted for its high penetration and flat trajectory. The small calibre creates a narrower wound channel than many other combat pistol rounds.
W.E. Fairbairn was familiar with the round from his time with the Shanghai Police. He suggested that the round was more effectively used if aimed at shoulder level, where the high-velocity round was most likely to shatter bones and create secondary missiles.
This is fairly good advice for using any pistol round.

Convenience

Automatics

The gun you have with you will always been more effective than the one you left at home because the latter was inconvenient to carry.
There are some lightweight, low volume automatics in 9mm Luger. The 9mm Luger round requires a locked breech.
Many smaller automatic pistols are simple, blowback weapons and therefore use cartridges other than the 9mm Luger.
If you opt for a pocket automatic, the best choice is a weapon in either .380 ACP or 9mm Makarov.
Pocket pistols in 9mm Makarov are fairly rare, but many duty weapons, like the Makarov PM/Type 59, may be compact enough.
A wider choice will be found in .380 ACP, also known as 9 x 17mm, 9mm Short or 9mm Kurtz.
The .380 is slightly weaker than the 9 x 18mm. Like the Makarov round, it is well suited to small, blowback pistols and is a better choice than smaller calibre options such as the 7.65mm/.32 ACP and 6.35mm/.25 ACP.
Having less energy and momentum than a 9mm Luger or .45 ACP, the mushrooming of hollow-point ammunition in .380 or 9 x 18mm may be less reliable. You may be better off saving your money and loading FMJ that is more likely to have sufficient penetration to reach vital organs.

Revolvers

Many small-frame models of revolver such as the Smith & Wesson J-frames and Colt Detective weigh under a pound, but only have five or six shots.
Small medium-calibre revolvers in .38 Special, .357 Magnum and 9mm Luger are preferable to smaller-calibre weapons in .32 or .22. .32 S&W Short and .32 S&W Long may be used for economical plinking, practise and small-game hunting.
That said, an argument may be made in favour of the .32 H&R magnum or the .327 Fed. magnum in a pocket revolver.
The same size cylinder holds six .32 rounds rather than five .38/.357/9mm. Recoil is reduced and the weapon is easier to control, which may help put rounds where they are wanted. Such chamberings, therefore, may be preferred for those that find 9mm/.38 too much in a lightweight weapon.
Some .32 H&R magnum hollow-point loads seem to have issues with expansion. In absence of more specific information about particular loads, semi-wadcutter or wadcutter loads may be the prudent choice to ensure adequate penetration.
With velocities exceeding 1,400 fps, some .327 Fed. magnum loads may display adequate expansion and penetration.
Weapons chambered for 327 Fed. magnum will also fire 32 H&R magnum, and weapons chambered for either round will also fire .32 S&W Short and .32 S&W Long.
The 9mm Luger in a revolver has the edge over the .38 in velocity, but the merit of revolver rounds is that they can use rounds that would not reliably feed through an automatic.
The .38 and .357 cases can be loaded with wide-mouthed, soft, malleable, hollow-points, ideally of 200 gr or more, that are likely to be more effective than any medium-calibre round an automatic can fire.
If fired in an emergency from within a pocket, a pocket revolver has no slide to catch in the pocket lining. For similar reasons, models with concealed or internal hammers are preferable.

Special Purpose

.25 ACP, .32 ACP, .380 ACP, 9 x 18mm and .45 ACP are all subsonic in standard loadings. The smaller rounds are sometimes preferred since they allow the use of a smaller weapon and suppressor.
Most .22 rounds are subsonic when fired from pistols, so are also suited to suppressed applications.
.22 weapons are also useful for target practice or for foraging.
.22 revolvers often offer the option of switching between .22LR and .22 magnum by exchanging cylinders.
Some .22 revolvers can chamber more than six rounds.

Non-Runners

Other than the exceptions already suggested, revolvers are not recommended.
After more than a century of military service, it is finally being accepted that claims that revolvers are more reliable than automatics are more theoretical than practical.
Possibly, only in the instance of a misfire, does a revolver offer an advantage.
This is offset by the greater ease in reloading and the usually larger ammunition capacities of automatics.
For a given calibre, an automatic tends to be lighter and more compact than the equivalent revolver.
You may be adept at quick wheel-gun reloads on the range, but under the stress of real combat it is better to keep dexterous actions as simple as possible.
Rounds such as the much hyped .40 S&W, .375 SIG and 10mm Auto are not recommended.
These are all medium-calibre rounds, most loads trying to emulate the performance of the .357/125 gr. Essentially just faster 9mm Luger.
Unsurprisingly, performance is inferior to the .45.
Logistically, ammunition in these chamberings may be difficult to find outside the US.
If a big deep hole is better, why the .45 ACP and not rounds such as the .44 magnum or .50 AE you may ask?
The answer is that we need control as well as power.
For many shooters. a quick follow-up shot with a .44 magnum or similar may be difficult.
No round can be guaranteed to always neutralize a threat first hit, or to always hit, for that matter.
Another reason for using the .45 ACP is that most of the loads that exceed the .45 ACP in power are primarily revolver loads.
For many reasons, not least its mass and bulk, the Desert Eagle is not recommended as a defence gun.
The .45 Long Colt and .44 Special are more manageable, but usually found in revolvers, so the .45 ACP remains the best choice.
Both “Attack, Avoid, Survive” and “Survival Weapons” have advice on the use of firearms.
Categories
Phillosoph

Rakovalkea

Recently I read about the Winter War between Finland and the Soviet Union.
Finland could muster around 300,000 soldiers, while the Red Army was to commit more than a million men.
The initial assault of roughly 120,000 infantry supported by 1,500 artillery pieces, 1,400 tanks and roughly 1,000 aeroplanes was faced by Finnish forces amounting to 26,000 infantry with a mere 71 artillery pieces and 29 anti-tank guns.
Finland had 32 tanks and 114 aircraft, which like their artillery were mainly aging and obsolete.
Some of the Soviet equipment was equal to any in the world.
The Red Army expected operations to last ten to twelve days.
The Finns had other ideas.
As one Finnish soldier astutely summarised the situation on the eve of the war: “We are so few and they are so many. Where will we find the room to bury them all?” (Finland in the Winter War 1939-1940 by Nenye, Munter and Wirtanen p.64)
The following may interest readers:
The caption reads: “A Finnish patrol resting in Viena (White Sea) Karelia. The men have built a traditional rakovalkea. This kind of fire is made from two long, deadwood trunks, which are placed on top of each other. The fire is then kindled in between the two logs. This helps to keep the fire off the ground, and provides intense, near smokeless heat for hours with no need to add more fuel. (SA-kuva)”
Categories
Phillosoph

Pec-Knives and the Gerber Strongarm

Pec-Knives

The pectoral position is a very useful position to carry a knife. It is accessible with either hand, and if the wearer is seated or prone. It can be readily utilized to cut a jammed seat harness, or when rolling on the floor with an aggressor.
This topic came up in one of my discussions on soldier’s load. Modern servicemen have a lot of gear to carry, and many do not believe carrying multiple knives is warranted.
If you are going to carry a single fixed blade knife, then the weak-side pectoral position is a good place to place it.
This carrying position influences the form of the “pec-knife”.
Pec-knives are discussed in “Survival Weapons”, and their use in “Crash Combat”.
The more general discussion of knife use for defence in “Attack, Avoid, Survive” are also relevant.
You sometimes see quite large knives carried in this position, but for most of us an overall length of less than eleven inches is more practical.
There is a wide choice of fixed blade knives in this size range. Harder is finding a knife of sufficient thickness and robustness. If this is going to be a soldier’s primary blade then it must stand up to some rough treatment.

Gerber Strongarm

A few weeks back I encountered the Gerber Strongarm.
This just seemed to shout “I will be a great pec-knife!” 
Just before Christmas, I got an email telling me the variant I wanted was back in stock. Money was short, but I had had a rotten day and a few minutes before midnight I gave into temptation and ordered a Strongarm. It helped that the price listed was about 30% less than most other stockists!
Would you believe it? I looked the next day and the price had jumped a big chunk. I had ordered just in time!
A few days later the Gerber Strongarm arrived. I wish I had had the money for another, but as it is, I may run out before the end of January. Buy books please, people!

The Sheath and Extras

An important component of a potential pec-knife is the sheath.
This mode of carry is most convenient with the knife inverted and the pommel downwards. Obviously it is necessary that the knife is fully secure in this position, but still capable of being easily drawn when needed in a hurry.
The sheath of the Stongarm has a large clip that engages a depression on the hilt. Note that this releases with an audible click, which may affect your tactics in some scenarios.
In addition to the clip, the smaller-width hanging strap has a retention strap with a popper.
The latter feature is one of the few I have issue with. This is a little tight, the slight increase in grip width my lanyard has added making it sometimes fiddly to close.
The length of strap past the popper is also on the short side, and may be difficult to pull on if wearing some gloves. It may be necessary to sew an extension onto this part.
An important feature of this sheath is that it is ambidextrous, so the knife can be inserted securely with the edge either to the left or right. This is useful for a pec-knife, it being considered to be prudent to carry your knife with the main edge outwards, away from your throat.
A couple of accessories are included in the box.
I have already mentioned that the smaller-width belt hanger has the retention strap. This affixes to the sheath by a strap and popper.
A larger width belt hanger can be attached to the smaller by poppers. Both belt hanging loops have poppers, making the easy to detach or attach without rethreading a belt.
A device that allows the sheath to be mounted horizontally is included, as is a device allowing easy attachment of the sheath to MOLLE/ RALS systems.

The Knife

The knife itself comes with either a semi-serrated or plain edge, and is available in either black or a more practical coyote brown shade.
The blade is 4.8 inches long, and 3/16th thick. Overall length is 9.8 inches and weight is given as 7.9 oz.
Blade material is 420HC stainless steel with a dark grey coating.
Grip is a rubber coating over glass-reinforced nylon.
There is a resemblance to Gerber’s LMF II knife. The LMF II is heavier (c.12 oz) and costs more. I have not handled a LMF II, but the Strongarm seems a better choice for the pec-knife role.
The butt of the Strongarm ends in a blunt triangular point that might serve for applications such as window breaking. This feature is thoughtfully provided with a lanyard hole. I know I have said this before (yesterday actually!) but it really is surprising how many expensive knives are not provided with provision for a lanyard or other features to reduce the chances of loss.

Making a Chest Rig

There are plenty of good reviews of the Strongarm out there, so I will concentrate on specifics of rigging it as a pec-knife. This is actually very simple.
Obviously, you can mount the sheath directly on your webbing, but what if you are not wearing such?
The Strongarm is potentially a very useful knife, and you may want it when you are not in full tactical gear.
I have seen the Strongarm described as a cross-over” knife, good for urban and wilderness.

Take about two metres of paracord. I know frugality is a virtue, but it is prudent to have a little too much rather than start again.
The Strongarm sheath has a number of “screwholes” down each side. Pass one end of your paracord through a hole near the sheath mouth, and the other through a hole on the opposite side, second from the end.
This should be made clear from the photos.
Experiment with what arrangement suits you personally.
Pull both ends of paracord so the middle makes a snug length across the front of the sheath. Now take both lengths, hold them together and tie a single knot in both. This can be an overhand knot but a figure-eight may be more comfortable when worn.
You should have created a large loop with the knife sheath threaded on it. This loop should be large enough to pass your weak-side arm through, the knot sitting somewhere between your shoulder-blades. Take the long, free ends and form them into a second loop using the knot I call a “slip-bend” in my free book on knots.
Place your other arm through this loop and tighten it by sliding the two parts of the slip-bend apart.
The Strongarm sheath should be hanging just before your weak-side armpit. If you have the small-width belt hanger still attached, this may be used to anchor the sheath to a belt, if you wish.
Note the snap-link, added by a magnus-hitch. The lanyard can be attached to this when greater security is wanted. It also proves useful for holding other items. I later relocated the snap-link to below the sheath, where it helps keep it in position.
A chest-rig for a knife can cost tens or hundreds of dollars.
This one is simple, lightweight, comfortable and costs just a couple of metres of paracord.
If you like this, throw some of the money you have saved this way!
Categories
Phillosoph

A True Survival Bowie?

Sometimes a diversification can let us view a topic from another direction, casting new light on it.

Size Matters

The last blog made it clear to me that the many medium-sized (6 to 8") general-purpose knives that I have do not really have a role. That includes my beloved Buck 119 and the various five to eight inch kukris that I have acquired.
If SHTF or TEOTWAWKI occurs, I will be reaching for one of my larger blades and complementing it with one of my puukkot (plural of “puukko”).
I have my favourite ten-inch sirupate kukri ready to go on a belt alongside a Mora Companion. A small pouch on the belt contains a fire kit and Lansky multi-sharpener.
Nearby is my barong-handled machete and a crowbar, ready to be added to the rucksac.
Already on my person I have my Swiss Army knife and mini-Leatherman, along with other items.
If you are planning to spend good money on survival knives, the sound advice is to “go big” and “go-small”.
Buy yourself a good chopper that can produce a fire and shelter with minimum effort when they are most needed.
Get a good fixed blade small knife that can handle more intricate duties. Puukkot are hard to beat for value and quality. Get what folders you want for EDC.
Another topic I touched on was that most of the original Bowie knife designs were designed to be primarily weapons. This can be seen in the shape of their point profiles, which are often combined with a long false edge.

The Bowie/Machete

With the above in mind, I will share a passage I came across in “Gun Digest Book of Knives, 4th Edition”, p.111-113:
“Another category of knife is the hybrid Bowie…The Bowie/Machete is made by Collins Machete, Case Knife, Western Knife and Legendary Arms.
Bowie/Machete came about when a South American customer went to Collins and wanted a machete made like a Bowie knife.
The result was a wonderful knife. It is one of the finest large skinning and butcher knives ever made. It is one of the few knives that can hold its own with a commercial slaughterhouse curved skinner and large butcher knife. These purely single-purpose knives are hard to beat at their specialities, but the shape and curvature of the Collins design is a most useful compromise of their features in a large knife.
The oversize butcher knife shape with the Bowie clip blade has a deep enough belly and enough sweep at the point to approximate the sweep of the professional skinning knife. In the hands of an expert, it is the best knife for skinning and butchering large game. For use as a small machete, the deep grind employed on these knives allows the same cut a much thinner machete would make. While a little light and short for heavy woodcutting. this is still a practical short machete knife.
For a working knife to carry in South America where it was intended, or anywhere else for that matter, this is a hard one to beat. When used as a fighting knife, it is an excellent chopper, while its broad blade produces more damage on thrust than lesser knives…
It should be noted that the simple tapered grip with the pronounced neb to anchor the hand found on these is an elegant masterpiece of a functional grip in its own right. These knives feel good in the hand where they lock in and go to work naturally. The hand is positioned for proper leverage with a heavy double guard to bear against at the front and a neb at the rear similar to the grip taken with an Indian Talwar sword. It is most effective for a working knife and far better than gimmick grips on some custom knives. Remember. everything possible with knives has been tried. This is an old, standard, elegant solution to the grip. Like the rest of the knife. it is conservative and effective all the way through.”
This sounds interesting!
No image of the “Bowie/Machete” is in the book. There is a photo of a Legendary Arms Bowie that it might be, but unhelpfully the blade is in its sheath!
Websearching on “Bowie/Machete” proves useless.
The Cold Steel design of this name post-dates the book, and it is evident from the shape that the Cold Steel offering does not have the features described.
Cold Steel Bowie Machete

The Bowie/Machete Identified?

Eventually, I pieced together enough clues to suspect that the model described is the Collins & Co. Machete No.18.
Not actually a machete as most of us understand the term these days, but that was how the company designated it.
In 1942, the 10-inch Collins was adopted for survival kits of air crews operating in the Pacific, including at Guadalcanal Canal.
The marines took notice, and the model was widely used by the 2nd Marine Raider Battalion.
Maj. James Roosevelt, son of the then President, was involved in their procurement, and carried one numbered “30”.
One of my references, (“Fighting Knives. An Illustrated Guide to Fighting Knives and Military Survival Weapons of the World” by Frederick J. Stephens p.67) confirms that wartime production of this model was also undertaken by Case Cutlery, Western Cutlery and an Australian source.
“Knives of War” by Hughes, Jenkins and Buerlein adds a company called Kinfolks Inc to the list.
It is from Case that the frequently used, but incorrect designation “V44” or “V-44” seems likely to have been acquired. (The V42 discussed in the last blog was a Case design.)
Knives of War p.68-70 calls ithe No.18 a “Gung Ho Knife”, “Survival Bowie” and mentions an aviator’s example labelled “9-inch machete”.
Actual dimensions are given in Knives of War as a blade of 978" and 2" at its widest. Total Length is 14½".  I believe the blade was ¼" thick.
Minor variations between manufacturers can be found, variations including grip shape, grip construction and whether the false-edge was sharpened.
Some Collins examples had a grip of green horn, which has a very attractive camouflaged appearance.
Some sheathes had the tip cut-off to improve drainage.
Knives of War p.69: Former Marine Raider Rosenquist reports: “It was a real good, multi-purpose knife. We used it for opening ration cans, coconuts, cutting fire lanes, etc. It was handy as a small hatchet for cutting small trees and coconut-log bunkers and in combat as an effective fighting weapon.”Marine Bowie Horn handled Bowie Horn handled Bowie Black handled Bowie

The No.18 Today?

The No.18 is a Bowie design with a proven record of survival utility, not to mention it might also find its way to certain kitchens or meat-packing plants.
As well as its practicality, it has historical connections.
Many people understand the value of preparedness, and Americans love Bowies, so you might think a number of companies would be offering “Gung Ho/ No.18 Survival Bowies” and that they would be flying off the shelves!
Raider Bowie replica Raider Bowie box
Well, I have not had much luck locating any!
There is a reproduction “V44 Raider Bowie” (above). This is apparently low-quality steel, since it is intended to sit on a shelf rather than be put to use. Note that it is not a particular accurate reproduction, the blade having a single broad fuller rather than the two narrow fullers of the actual No.18.
No.18 Bowie Throwing Bowie
Legendary Arms offers a Bowie and a “Throwing Bowie” that has some resemblance (above), but note both have a short bevel grind rather than the blade section of the originals.
W49 Bowie
Western Cutlery is now Western Knives, with production in Asia. Their W49 (above) is/was not their version of the No.18. Dimensions are slightly smaller and the blade has a short bevel.
Ontario Bowie
Best candidate seems to be the Ontario SP10 “Marine Raider” (above). Despite the name, the blade form is different.
The Ontario SP53 is probably closer to the No.18 in spirit, but is not a Bowie.
Most obvious difference for both of these is the grip. I quite liked the machete-style grip of the original Collins.
As regular readers will appreciate, a flared or hooked grip is a very good feature for a chopping knife.

The Future?

Ideally, someone would bring out a nice No.18 Bowie blade blank that I could fit with a grip.
If anyone has been inspired by this to bring out a modern day No.18 Bowie, I would suggest having a good look at the modified original shown below.
The upper quillon has been removed and the lower bent so that it is out of the way when the strongest part of the blade is used for tasks such as batoning through material.
Horn handled No.18 Bowie
Categories
Phillosoph

Fighting Knives in a Modern Context

The other day, I found myself thinking about the variety of weapons taught by many martial arts.
When these arts were created, most of these weapons were relatively common place.
The battlefield, and the street, have changed since those times.
You are unlikely to fight with a sword, a knife or machete being more probable.
The entrenching tool is more likely to be to hand than an axe or mace.
Your spear or staff will seldom have to deal with a horseman, and is much handier if its length is less than your height.
The stick remains a useful weapon, but nowadays will often be wielded with the intention of not seriously injuring a foe.
Those of you that wisely have invested in a copy of “Crash Combat” will recognize the above as the arsenal of modern weapons included in the course.
The above reflection melded with a question my subconscious had recently posed to me: “Does one need a combat knife?”
Some authors use the term “combat knife” or “tactical knife” to mean a variety of multi-purpose knife.
In this blog, I am talking about specialist designs that have the primary role of use against two-legged predators.
Certainly, it is prudent to have a knife that one can fight with, but what are the merits of spending good money on a knife that is primarily designed as a weapon?
And what form should such a knife take?
There is a baffling variety of supposed combat or fighting knives.

Context

To answer that last point, we must return to the theme noted in the first paragraph.
We cannot really consider a fighting knife without also considering context. The requirements of a fighting knife have changed as the nature of combat has changed.
In the Middle Ages, for example, it was desirable that a blade be stout enough to deal with body armour, yet narrow enough to slip between plates or through a visor.
Jump forward to the age of the rapier, and a dagger might be required to serve as a main gauche.
The Bowie knife provides us with another illustration. The Bowie blade shape is commonly used for survival knives, which tends to make us forget the original Bowie knives were primarily fighting weapons.
The Bowie came into fashion in an era when pistols were generally single-shot. The Bowie was a handy alternative to a sabre or smallsword.
The fighting Bowie was at least eight inches long, with examples longer than twelve inches by no means unusual. A blade might be a quarter of an inch thick and broad enough to look like a pointed cleaver, which essentially was what it was.
A Bowie might be used against other knives, or longer edged weapons.
The usefulness of the Bowie waned with the increasing availability of mass-produced revolvers. Apparently many volunteers in the War Between the States invested in impressive Bowies, only to discard them once the wisdom of a lighter marching load became apparent.
There seems little point nowadays in carrying a large fighting knife such as a Bowie or smatchet.
Many large utility knives, billhooks and machetes can defend our person equally well and prove far more useful for other, more likely tasks.
You probably also own entrenching tools, hatchets and tomahawks that would also be superior weapons.

The Modern Fighting Knife

Let us assume that you want a fighting/combat/tactical knife, on the basis that you may one day perhaps need it.
The fighting knife will be carried in addition to more general-purpose blades, so cannot be too large or heavy.
If a fighting knife has a place in our arsenal, then logically it must be because it can meet a requirement or scenario better than our large survival knives and other tools.
Large knives are not particularly concealable.
While it is possible to thrust effectively with a machete or kukri, it is not the ideal shape for use against thick clothing and a hypothetical “take out the sentry” application.
These criteria narrow down the form that a modern fighting/tactical knife should take, and what we should be looking for when making our selection.
This is best illustrated with some examples.

Fairbairn-Sykes Commando Knife

No discussion of modern fighting knives would be complete without mention of the Fairbairn-Sykes knife, aka “The Commando Knife” or F-S.
If fighting knives are mentioned, this is most likely the image that popped into your head.
At the start of his book “Combat Use of the Double Edged Fighting Knife”, Rex Applegate gives a nice summary of desirable features for a modern fighting knife:
“The heart of the fighting knife is its blade. It should be 5 to 7 inches in length, double-edged, and wide enough to be razor sharp on both sides all the way back to the cross guard. The point must be sharp enough to penetrate and thick and tough enough to withstand side pressure.
The blade should provide slashing, ripping, and thrusting capabilities. Stainless type steel, correctly tempered, with a dull finish is preferable. The blade should be tempered to hold an edge as well as being easily sharpened and, at the same time, not brittle.
The oval-shape handle should fit the palm of the hand and be designed so that the edges of the blade can be immediately, and automatically, located in dark or light conditions. A nonslip surface is another feature that should be incorporated. The handle should not turn in the hand (sweaty palms, etc.) when the blade strikes resistance. The knife should be handle heavy with relation to balance. Nothing in the design should limit its possibilities for use as a weapon from any position or either hand. The overall length should be approximately 10 to 11 inches; anything longer makes it too unwieldy and cumbersome to carry. The weight should be in the 1/2 to 3/4 pound range.”
Applegate’s earlier work, “Kill or Get Kill”, has a similar description, although includes the suggestion that the blade be no more than an inch across at the guard, and that the handle have its largest diameter at the centre and taper towards both the guard as well as the butt.
Contrary to what you may often see claimed, the F-S is not the “Ultimate Fighting Knife” [ignoring that this is not what “ultimate” actually means!].
Comparison to Applegate’s description quickly illustrates why.
The grip of the F-S is round in section, rather oval. Being of cast metal, the grip is difficult to modify or replace.
While the balance point is in the grip, the cast grip possibly contributes some unnecessary weight.
Oddly, my F-S seems heavier than my M3, but is actually half an ounce lighter.
If you own an F-S, you will know that it is very difficult to get a sharp edge on it.
Common advice on the net is to regard the F-S as a thrusting weapon only, and steel the edge at an angle of about 40 degrees. Personally, I think a sharp blade will create more of a wound if uses as described in my books. Steeling the F-S at 20 degrees seems better.
The “razor-sharp commando knife” is, however, a poetic licence of the novelist who has never owned one!
Some of these features seem to have been the result of wartime mass-production, which have persisted.
The F-S gets a lot right too! My step-son, on first holding an F-S declared:
“Woah! I feel like it wants me to do something, but I am not sure what!”
Fairbairn’s writings on how to use the F-S knife include illustrations of cuts and slashes directed to the forearm and inside of the elbow, although how practical this would have been against a woollen greatcoat or tunic is debatable.
Incidentally, the ancestors of the FS were the Shanghai Fighting Knives, which were made from obsolete double-edged Lee Metford 1888 bayonets. In Fairbairn's own words:
In choosing a knife there are two important factors to bear in mind: balance and keenness. The hilt should fit easily in your hand, and the blade should not be so heavy that it tends to drag the hilt from your fingers in a loose grip. It is essential that the blade have a sharp stabbing point and good cutting edges, because an artery torn through (as against a clean cut) tends to contract and stop the bleeding.

Boker Applegate-Fairbairn

Following World War Two, Applegate collaborated with Boker to produce a knife that met his requirements, called the Applegate-Fairbairn.
I have no personal experience of these, and they are likely to always be beyond my price range.

Gerber Mk II

The Gerber Mk II answers many of the complaints that can be made about the F-S.
While it is called the “Mk II Survival”, this is primarily a fighting knife.
Mine has taken a fairly respectable edge.
The bad news is that the Mk II tends to have a higher price tag than one might wish for a knife that will not be your primary survival tool.
It is rather baffling that copies or replicas of the Gerber Mk II are not commonplace!

M3 Trench Knife

Shown with my F-S and Gerber is my M3 Trench Knife.
The M3 was also produced in German as the “NATO Combat Knife”. This blade configuration has also been used for a variety of bayonets.
A nice design feature of the M3 is the asymmetrical guard, allowing the user to find the orientation of the main edge even in the dark.
While the M3 was designed as a utility knife, its configuration makes it a pretty good choice for a fighting knife. It compares very favourably to the Gerber Mk II in general size and features.
Personally, I do not mind that the M3 is not double-edged. The false edge comes already sharpened, and the balance of the knife is about an inch behind the guard, just where you would want it.
If you shop around, you can find reproduction M3s for a reasonable price.
Try websites that cater for WW2 re-enactors. Take a look at German trench knives while you are there.
In “Kill or Get Killed”, Applegate suggests “utility knives” can be reground into fighting knives, and shows a knife so converted. Presumably he means the M3, although he at one point claims that the utility knife has its weight too far forward in the blade.
The M3 as it comes is a pretty good fighting knife, with the option of serving in utility roles in an emergency.
Ideally, a fighting knife should only be used for its intended role, to keep it sharp.
Price of a reproduction M3 makes it a good basis for a custom project.
Blade blanks for M3s or the related bayonet models, may also be found.
As Applegate suggests, the top edge can be extended, and if you have a belt-grinder adding a hollow grind is relatively simple. Tapering the blade may be more challenging. Personally, I would not consider this necessary.
Adding a fuller to the unsharpened section might be considered.
The grip of leather washers is probably simple to reshape or remove. Grip tape may prove useful here.
The large metal butt-plate may be more problematic for a customisation project, A narrow pommel of similar configuration to that of the F-S or Mk II might be preferred.

The V42

The V42 is another wartime design of fighting knife.
The skull-crusher pommel is a nice feature, although probably larger than needed.
The leather padding applied to the upper side of the quillon is a nice feature.
I have seen claims the pommel on the originals had a tendency to catch on and damage equipment. I suspect the versions on replicas such as mine have been made blunter.
My main complaint about this knife is the guard could be narrower and the blade somewhat broader.

Smaller Fighting Knives

As implied above, your fighting knife should be chosen so that it can be carried in situations you cannot carry a larger survival knife.
With this in mind, I will present two smaller examples of what can be considered fighting/tactical knives.
The larger knife is a Smith and Wesson 820.
The false edge is not sharpened, but the main edge has sharpened up to a very sharp edge.
This style resembles the M3. I prefer this configuration since it offers a little more utility, facilitating practices such as batoning.
Very impressive, and a very reasonably priced knife with most of the features you might wish for.
The smaller knife is a CRKT version of the AG Russell Sting (as favoured by a well-known literary figure!).
Small, but very solid and sharp.
Note that both knives have lanyard holes, a feature that would be welcome on the larger knives.
Adding wrist loops is on my to-do list.
Such knives are (hopefully) often carried and seldom used. Comfort and concealability are therefore priorities. A version of 820 with a flatter grip and reduced quillions, or a Sting with the option of a longer and possibly M3-style blade would be welcome.
These are some of your off-the-shelf options, illustrated with examples I have to hand.
Later blogs will cover other options.