Disclaimer: “As an Amazon Associate I may earn from qualifying purchases.” Adsense and Infolinks were no help at all.

If you have enjoyed this article or it has been helpful to you please feel free to show your appreciation. Thank you.

Read The Third Wave by Alvin Toffler!
Categories
Phillosoph

Skin-Level Survival EDC

Suppose that you are separated from your bag or rucksack. Your webbing gear, if you wore any, has become damaged or lost. All you have is the clothes you stand up in and whatever is in your pockets. This is your “skin-level” survival kit.
Part of your skin-level kit is the clothes that you are wearing. Hopefully you were dressed appropriately for the climate. If you were chilling by the pool when everything went pear-shaped, one of your first priorities is going to be to acquire some new threads.
Today I am mainly going to concentrate on what you have in your pockets, or carried on your trouser belt. This is what many people would call “EDC” or “everyday carry”, although the exact use of this term varies.
Some people would include the contents of their daysac or handbag in their EDC. This article will assume that such items are not immediately available. Reaching them may be one of your objectives.
Some people use the term “EDC” for all the paraphernalia they have on their person, while in other contexts it is specific for defensive weapons. This article intends to examine EDC for survival.
Look on the internet and you will find EDC lists that suggest you should always carry a solar still, fishing kit, gold coins, eating utensils and so on. This is not very practical.
The heavier and bulkier your EDC kit becomes the more likely you are to not carry it all the time and omit parts you may need.
A good EDC survival kit is designed to have two tiers of readiness.
“Lower level” is what you carry all the time. Many of these items are carried because they can be useful in daily life.
“Higher level” are items that you add when you step up to a higher level of readiness.
Your lower-level kit would be on you when you go down to the store.
You would add the higher-level items if you were leaving town to hike in the woods.
For example, in my lower-level kit, I have a lighter, which can be used for fire-making or illumination. The expansion to higher-level is a little pouch that adds a container of tinder, some candles and a spare lighter.
I have little need for a fishing and snaring kit in town, so these items are higher-level.
Many ingenious individuals have had fun creating survival vests, survival jackets, survival walking sticks, survival pens, survival necklaces or survival hats.
These are not the best way of carrying your EDC. Jacket pockets are better used for items such as gloves, scarves and hats.
Your survival EDC should be based around your trousers. Everything should fit in your pockets, or on your trouser belt.
Since you (hopefully) wash your trousers, items should be easy to transfer to a new pair, or to a pair of shorts if the weather permits.
What you carry should not add so much weight that you have trouble keeping your trousers up. Nothing should be so bulky or hard-edged that it digs into you if you have to sleep clothed, bangs against you when walking or might injure you if you fall on it.
Personally, I am seldom not wearing cargo trousers or cargo shorts. If you have to dress more formally, there are companies that sell suitable garments with extra, hidden pockets.
Let us have a look at what I am carrying, and how I might expand it to a higher-level. Your up-level items should be stored together in a small bag such as a pencil case. Keep this with your knife-belt (qv).
Fire: The lighter in my left pocket is my primary source of fire. I have added a couple of birthday candles to my pocket pouch.
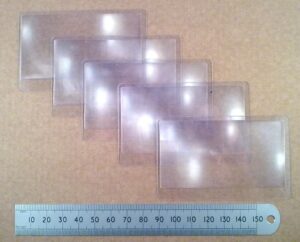
• To up-level, I will use a small fire kit that would be carried in my right cargo pocket. As described on other pages, this would have a spare lighter, a container of tinder, Fresnel lens (above), some candles and possibly some matches.
Note that the spare lighter is in a different pocket to the primary.
Food: I don't carry any food on me, so this category is more about means to procure food. At low readiness that is money and a credit card.
My current location and lifestyle mean that it is exceptionally unlikely that I would find myself needing to feed myself by fishing or trapping. In theory, the dental floss I have in my left pocket pack could be used for snaring or fishing, the safety pins serving as hooks.
Prudence dictates, however,  that I should have at least some fishing and snaring capability within my baseline EDC.
With this in mind, I have added a six span length of braided fishing line to my pocket pouch. This may also be used to construct snares and for various other purposes. This line is actually far more likely to see more use than the hooks. It supplements the dental floss and the various lengths of cord and string in my pocket.
Fishing hooks weigh virtually nothing, cost very little and take up very little room, so it would be foolish not to have some for “just in case”. You should have more  than your typical survival tin contains. 
I have two packs of ten hooks. No.12s and No.10s. (actually, it is a dozen No.12s. I had a pair of hooks from a previous project, so I added these too)
You can buy these hooks already tied to nylon leaders. When you are cold, wet and hungry it is no time to fiddle with tiny hook eyes and near invisible line. If you buy hooks that are untied, add line when you are safe and warm at home.
• If I am knowingly straying far from “civilization”, I would add a kit of additional items. For higher-level, I have a container of line, hooks, wire and other fishing items.
Useful additions would be ten or more metres of snare wire, and several additional lengths of braided line, already fitted with swivels.
For use with the latter, I would have some compact lures, additional hooks and some wire leaders.
A frog/fish gig and a net would be useful, and there are some that might fiti in a trouser's cargo pocket. In general, a gig is more likely to be pack items than skin-level
If you are diabetic, you may want to add a small supply of glucose tablets, hard-candy etc. 
You could carry a tightly rolled sheet of cooking foil, but I personally don't currently do this.
Signalling: I usually carry a phone. As well as being able to call for help, many modern phones have useful applications such as a notepad, compass or GPS capability. Phones are useful but also delicate, so should not be the sole thing you rely on.
The photon light on my keyring could be used to signal. The keyring also has a whistle.
My pocket kit includes a pencil and chalk, and I carry a pen (a retractable Zebra pen, since my belt pouch is rather small. I actually found this pen! Non-retractable, all-steel Zebras are suggested as a good alternative to more expensive “tactical” pens). A permanent marker such as a Sharpie may also prove useful.
I also have a compact flashlight.
• Up-levelling would probably add a larger, but compact, pocket torch.
A lightweight signaling mirror is another useful item. These are a good addition for tactical scenarios since they can be used to peek around cover.
You may already have an item that can be used as a signalling mirror. Many compasses have a mirror and some phones or music players have mirrored backs.
A mini-flare kit could be accommodated with the other items in the right cargo pocket, but I have never actually owned one of these.
A larger whistle, on a lanyard, might prove useful. There are cord necklaces that include a ferro-rod and steel. If you can find them at reasonable price add a whistle, photon light and a snap-link.
Shelter: Most actual shelter items are too bulky for skin-level EDC. The exception is a space blanket. One permanently rides in my pocket kit.
You may want to carry additional space blankets. Not only can they be used for warmth, but also as protection from the rain and for signalling.
Penny for penny and pound for pound, space blankets are among the best survival gear you can carry. Do not leave home without at least one.
Cordage: The dental floss in my pocket kit has already been mentioned. Either carry a couple of spare bootlaces or an arm-span of paracord. This can easily be carried in the bottom of a pocket and has numerous applications. I also carry a tubular retention cord that can be fitted to my glasses if needed.
• If up-levelling, a larger hank of paracord can be carried on your person if you have room. Braided fishing line also has many uses.
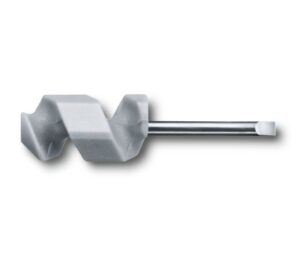
Tools: My keyring includes a bottle-opener, mini-Swiss army knife, a P38 can-opener and a little tool for removing SIM cards and opening CD drives. That last tool possibly does not have a survival application. (It broke, so has been replaced with a paper-clip that can be readily adapted should the need arise),
The keyring itself is a carabiner. Several of my items can open bottles. The bottle-opener is just a convenience, particularly in social settings. 
A small pouch on my belt carries by clipper-compass, a pen, a trio of lock-picks (two Bogotas and a snake), money, credit cards and a USB drive.
A second pouch has my Swiss army knife, mini-Leatherman, pocket prybar and a sharpening card. I find small-print challenging now, so I have added a tiny pocket-magnifier to this pouch.
The Swiss army knife includes a screwdriver that can repair glasses.
A small bag in my pocket kit contains a few safety pins, hair pins and paper clips. These can be put to various uses.
A length of electrical tape is wrapped around my pencil. I may add a needle with a metre of invisible thread. I don't regard a sewing kit as an EDC-level requirement, but the weight is negligible and a sharp point potentially useful. I have now added a couple of threaded needles, wrapping them around the pencil.
• If up-levelling my main additions would be a larger knife and compass. More of that later.
Water: There are water bottles that can fit in a cargo pocket or on a trouser belt.
The bulk and weight of water means that you are unlikely to carry water at skin level unless the weather is very hot.
A few sheets of water purification tablets can be included in your pocket medical kit.
• If up-levelling the water category, I might add a “survival straw”, ideally one that fits in a cargo pocket. A condom could be used as a water carrier, but I don't carry them, no longer being single.
My pocket pouch is carried within a large Zip-lock bag, which could be used to carry water..
Medical: Your EDC medical kit is mainly for minor injuries. Have a better kit in your bag.
My pocket medical kit rides in my left cargo pocket. In addition to the items already mentioned it has alcohol wipes, plasters and pain-killers.
There is some medication I have to take with meals, so I carry a few days supply of this in my right cargo pocket.
If you need to take medication regularly then you should carry a few days supply with you, and make sure it remains in-date.
• If up-levelling, a small container of insect repellent and/or sun-cream might be a prudent addition. This need only be a small volume, your main supply being in your bag or base. Chapstick or Vaseline in winter, if you think you will need it.
Other items: If you are out in the wilds, a few metres of toilet roll or paper tissues in a ziplock bag should be added to one of your cargo pockets. Make that a permanent part of your kit if you wish.
I have a small bag with a few paper napkins for “about town” and a larger bag I add for “rural”.
A bandanna has numerous uses and is easily carried in a side pocket. Since I lack some hair, I have used mine for head protection when caught out without a hat.
I wear photochromic glasses so don't carry sunglasses. These protect the eyes from both excessive light levels and more physical threats.
Non-survival items carried are a USB drive, travel card and music player, although the back of the latter is a mirror.
So far we have talked about pockets and belt pouches.
In years past most of my EDC was in a compact bumbag. I have learnt to make more use of my cargo pockets and have replaced the bumbag with a couple of pouches attached directly to my trouser belt. One is a repurposed pouch for a mobile phone.
You should not add so many pouches to your trouser belt that it interferes with carrying a rucksack, or sitting in a vehicle.
There are belts that are made of paracord, but if you unravel them to use the cord you have nothing to hold up your trousers, nor hang your pouches from!
There are trouser-belts with hidden storage compartments, and various ingenious buckles. The original boy scout belt had a buckle that served as a bottle opener.
Earlier on I mentioned adding a larger knife and compass to the skin-level kit.
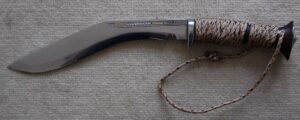
My favorite kukri weighs just under a pound, but hanging it on the trouser-belt is a bit much. What you need is a second belt. This is effectively an intermediate level between skin-level and webbing. When at a higher level of readiness you should attempt to keep it upon your person.
Your knife belt rides below the trouser-belt, like a cowboy's gun-belt. It should be adjustable, so that it can be worn over thick clothing when desired.
Add a compass pouch to one side of the belt, and attach the compass lanyard to the belt. Add a carabiner or snap-link to the front of the belt.
I carry my kukri on one side of the belt and a Mora puukko-type knife on the other. Not surprisingly, this belt could also be used to carry a handgun.
If I need to carry a hatchet or entrenching tool, I can slip it between belt and body.
A folded rain-jacket, poncho or unfolded space blanket can be draped over the back of the belt.
Many police officers experience medical problems from the weight of their duty belts. Detaching the duty belt from the trouser-belt and wearing it lower like a gun-belt might improve matters.
The knife belt can be used to carry a litre or two of water. The best way to carry water is in bladders since this is lighter than conventional bottles. Rather than placing the weight on the knife belt, my proposed “camelbum”concept would give more options.
I have mentioned carabiners and snap-links a couple of times. Use one as your keyring, add one to your whistle lanyard and knife belt. Also have them on your rucksac strap and/or webbing.
When you need a hand free, or there is a risk you might drop a tool, attach the tool to the nearest snap-link.
This is an extension of the idea to collect empty magazines described in my book “Survival Weapons”. Make sure your tools have loops or rings.
Categories
Phillosoph

Charcloth and Charpaper

I am not sure where or when was the first time I encountered the idea of charcloth.
Over the decades I have lived in a variety of locations, none of which had a garden, so certain experiments could not be conducted. The making and testing of charcloth was one of these.
Today’s blog will mainly pass on some links and impressions.
To make charcloth, you need some form of vessel. This needs to be nearly airtight, only requiring a small hole for pressure equalization and to allow the escape of smoke.
The internet shows a number of different vessels used. One of the most practical uses a soda can. Sadly, these can often be found in wilderness areas. The vessel is made by cutting the can in half and slitting the walls of the lower part so the upper can fit snuggly over it. The tab is pushed back up so only a small vent hole remains.

The bottom of the can is packed with torn-up pieces of old cloth. These can be cotton, linen or any other vegetable derived cloth. You can use some of the cotton wool you got for the fire kit!
No synthetics or mixes of synthetic and vegetable.
The upper half of the can is fitted and the can placed on a heat source. The heat source can be a campfire, barbeque or camp stove but it should be outside since the charring cloth will produce a lot of smoke.


Continue to heat your vessel while the smoke is produced.
Once the smoke production begins to die off, carefully remove the can from the heat and put it to one side to cool.
Give this plenty of time.
If you try to open the can while the contents are still hot you will probably burn your fingers and the inrush of oxygen will cause the charcloth to catch fire.
Once cool, you should have some charcloth, suitable for tinder.
Charcloth is sometimes called charpaper.
Charcloth is made from vegetable materials, so an obvious question is can you make charpaper from paper? We seem to spend much of our lives surrounded by excess paper, so why not turn them into something more useful?
This video shows an interesting method for making charpaper from a paper tissue. It might work with other layered pages too.
Can you char paper in a vessel in the same way you process cloth?
From what research that I have been able to do, the result resembles burnt newspaper. It may take a spark but has little structural strength, making it less than practical. Waste cardboard, on the other hand, may be more practical.
I have encountered suggestions that newspaper should first be mixed with water to form a sort of papier-mâché, allowed to dry into a solid mass and then charred in a vessel. This seems a bit involved, and I wonder if the lengthy drying phase can be done away with given that you will be heating the mass anyway.
Both cardboard and wet paper are materials worth experimenting with for charpaper production. Alas, I will have to leave that to those who have better access to the open air than myself.
Categories
Phillosoph

Simple Survival Fire Kit

My recent article on the simplicity of the Soviet soldier’s kit made me think about some of the items that are not included in the equipment list.
Specifically, I thought about fire kits.
An idle moment on the internet turned up commercial fire kits with nearly a dozen different types of tinder. They also came with a big price tag!
We all know fire is important for survival, but what do you actually need in your fire kit?
One of the most useful items you can carry are disposable lighters.
Zippo lighters are touted as “the professional’s choice” but in my experience they seem to need frequent refilling.
Interestingly, “Detachment B-52 (Project Delta) Reconnaissance Tips of the Trade” has the advice: “Do not take cigarette lighters as they make too much noise when opening and closing.” This is clearly in reference to zippo-type lighters.
For the same price as a Zippo, you can have dozens of disposable lighters that keep their fuel until it is used.
Take a look around your local pound store and you’ll see them being sold in multiple packs. Invest in a few of these.
Bright colours reduce the chance of losing them in the woods.
Place at least one lighter in each emergency kit that you have.
Put one in each outdoor coat that you own.
Throw a couple in the glove compartment of your car.
A disposable lighter will give your many more ignitions than the equivalent weight of matches. Some disposable-type lighters may be refilled.
Optional: wrap the outside of your lighter with a few inches of duct-tape. Duct-tape is flammable and a small piece may be lit with the lighter and used to get a fire going. It may be used like a candle, as described later. The duct tape is also handy for repairs and other duties.

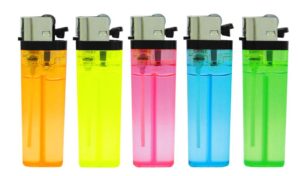
Transparent disposable type lighters with striking wheel.

The only real objection to disposable lighters is that there can be a fairly broad quality margin. Some disposable lighters seem to last for ages, others do not.
Allow for this by having a pair in your main fire kit.
A butane lighter that has run out of fuel can still provide a useful spark, and can be operated one-handed, unlike a traditional flint and steel. For this reason, the disposable lighters that have a striking wheel are preferable to other ignition systems.
Even when the lighter “flint” is exhausted, the wheel may still be used to strike sparks from a ferro-rod. This saves your knife blade, and is handy if your knife blade is of a steel that does not readily throw sparks..
Twice I have managed to accidentally run a butane lighter through the washing machine.
The first lighter changed colour from green to turquoise, but continues to work fine.
The second, a flint and wheel type, I found on the floor while unloading the laundry. I picked it up and tried it, and it lit immediately!
Disposable lighters seem to be more tolerant of water than you might think!
Water resistant cases for disposable lighters are now available. These are worth considering for your EDC lighter. Add a few inches of duct-tape to the outside. Ironically, the cases I ordered both came in stout zip lock bags that themselves would waterproof a lighter.
Some lighter cases allow you to attach a neck loop or lanyard. One option is to use jute string, which may be frayed to create tinder.
I have come across claims that butane gas lighters will leak in low pressure environments. This may or may not be an actual problem if you are a mountaineer. For the rest of us, lighters are a very practical source of fire.
Butane lighters may be difficult to light when the temperature drops to zero or below. In such situations, carry at least one in your trouser hip pocket or an inner pocket where your body heat will keep it warm.

35mm Film Containers

The second thing your fire kit should contain is tinder and something to carry tinder in. Ideally your tinder container should be waterproof.
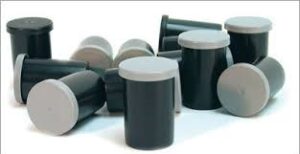
A 35 mm film container is close to ideal. Ideally the lid should be attached to the container body so it cannot be lost. A strip of cord or plastic and some superglue solves this.
While film containers are not as common (or cheap) as they once were, they can still be found from on-line sources. They are sometimes marketed as “geocache” containers.
While researching this I was stunned by a site asking £123 for 15 35 mm containers!

Lifeboat match containers

Alternate Containers: One reader of this blog informs me he can scrounge pill bottles from local pharmacies. Another suggests that the little tins that the glucose test strips for diabetics come in can be used.
I have access to 50 ml screw-capped centrifuge tubes but to my mind these are a little too big.
At least one brand of storm matches comes with a container that might be suitable. Buying the container alone is nearly twice the cost of buying it filled with storm matches! Not sure if the cheaper examples have a screw-thread cap, however.

Tube of VaselineCotton wool

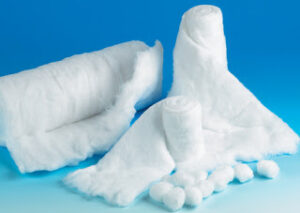
Pack your container with cotton wool.
Melt some Vaseline in an old spoon over a gentle heat. You will probably find Vaseline in the same store you brought the cotton wool from.
Pour the Vaseline on the cotton wool.
Pack that down, put fresh cotton wool on top and melt more Vaseline.
Keep repeating until your container is full of Vaseline-impregnated cotton wool.
Cotton wool is an excellent tinder. The Vaseline helps repel water and extends the burning time. You will only need a little, which can be teased out before ignition.
Wrap a little piece of Vaselined cotton wool around a stick before igniting, and then use this like a match/candle. You may also split the end of a stick to hold the cotton wool, or handle it with twig “chopsticks”.
As you use up the Vaselined cotton wool, you replace it in the container with “found tinder”.
“Found tinder” is anything that you find in the field that can be used as tinder.
It includes thistle or dandelion down, clothing fibres, scrap paper, woodworm dust, sawdust, shredded spent matchsticks, bird down, belly button fluff and many other materials.
Some outdoorsmen prefer to have a second container for found tinder.
You want to keep your found tinder dry. Dry it near a campfire or in the sunlight when opportunity presents itself.

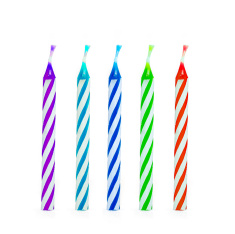
Birthday candles

Candles are a useful addition to a fire kit.
A small bundle of birthday cake candles is nicely compact.
Whenever you strike a match, use it to light a candle. If your fire won’t light with the first attempt with a lighter, use the lighter to light a candle, and use the candle for a sustained source of ignition.
If your tinder will not light after five seconds of exposure to a lighter flame, try something else.
Candles therefore conserve your supplies of matches or lighter fuel.

Fresnel lenses

The final item I would include in the fire kit is a magnifying lens.
This can be used for fire-starting on sunny days. “The only fire-starter on Earth that isn’t!”
Your compass probably has a magnifying lens on its baseplate but it is worth including an additional one in the fire kit.
I recently picked up five Fresnel lenses for £1.99, less than the price some companies charge for one, so shop around.
I confess I have not started any fires with these yet since as soon as they arrived the sun disappeared!
Using a magnifier works best with black/dark-coloured tinders.
The suggestions below is a fairly basic but capable fire kit:
•A pair of lighters.
• One or two tinder containers.
• Vaseline-soaked cotton wool.
• Bundle of birthday candles.
• Fresnel lens.
Store your fire kit in a sealable waterproof plastic bag. Double-bagging is a good precaution.
Some of you will note that this kit does not contain some of the more traditional survival fire-starting items.
There are no matches or storm matches because I believe the lighters are more space efficient. A single disposable lighter is estimated to be equivalent to a hundred books of matches, so it is obvious which is preferable. If you have matches, however, by all means use them!
Conventional matches may be made more water-resistant by pouring molten candle wax over them. You may dip them individually but it is easier create a block of wax with the matches encased. The alternative idea of painting the matchheads in clear nail varnish may also be encountered, but will be more time consuming than the wax method. You will need to scrape the wax or varnish from the head before attempting to light them.
Matches may be packed into any wide-mouthed, suitably sized plastic bottle, so long as it is watertight. Do not forget to include the striking surface!
There is no ferro-rod and steel in this kit because the lighters can do the same job and are more effective.
Lighting fires with a ferro-rod is fun, and you should know how to do it. But when things get serious, have a couple of lighters handy.
If you already have a ferro-rod, carry it. Always prudent to have a backup.
I have a waterproof match container that came with a ferro-rod glued to the side. Unfortunately the container is a little too narrow to make a good tinder carrier.
If you do not have a ferro-rod and striker, invest in some lighters and the other items first.
Shop around for a ferro-rod and steel if you want one. Prices vary considerably and some will cost you the same as a score of lighters!
Categories
Phillosoph

Four Tricks for Cleaning Water

Today’s blog will be a short one, but it will cover a couple of useful and interrelated ideas, all to do with water.
If you find a source of water, the chances are that it will not be too clean.
All sorts of mud, dirt and grit may be floating in it and the organic components will affect the efficiency of chemical purification methods you may employ.

Filter Tripod

One solution is to use a cloth bag to filter the water through.
I have even seen it suggested to use a spare pair of trousers. Tuck one leg into the other to form a double layer and then tie a knot in end of the leg(s).
Hang this up and pour water through so that it drips into a container.
In a long term camp, the filter can be packed with sand and straw etc.
Note that the water produced will be clearer, but cannot be considered to be safe until it has been boiled or chemically treated.
Wick Method of Filtration
A variation of the above is the wick method. Fill a container with your crude, suspect water and place an empty container lower down. Connect the two with a strip of cloth such as a bandanna and allow capillary action to do its thing. This may work with other materials such as paper or string. Experiment.
This method is a lot more economical on materials. When your wick becomes too dirty wash it or discard it.
Note that while the water produced will appear clearer it cannot be considered to be safe until it has been boiled or chemically treated.

Indian Well 

A third method I was taught to call an Indian Well. It is also called a seepage well.
We have all seen the movies when the protagonists get to a water hole and it is all muddy. “Oh no!” they cry.
What they should do is start digging a hole near the shore of the waterhole or river.
If the ground is too hard for your hands find an object you can use as a digging stick. A tent peg, tire iron, even a stick!
The hole should be about half a metre across and deep.
Since you have dug down into damp ground the hole will begin to fill with water.
Poke a few holes in the side of the hole and it will fill even quicker.
The water will probably look muddy and still something you do not want to drink.
Using your hands, a bark scoop, tin can or anything else you have handy, bail out the water and cast it onto the ground nearby.
Eventually the water coming through should become clearer. Leave it a while and more material will settle out.
The water will still need to be filtered further and boiled or treated.
This is not the fastest method of getting cleaner water but does have the advantage that you can use it when not near an obvious water source. Just dig down into damp ground.
The water first revealed by digging a hole just above the high-tide mark should be fit for drinking. Further digging only produces water which is too salty..
Obviously, digging at a low point will be more productive than a hilltop.Dig between dunes or the lowest point on the outside bend of a dry water course.
The Boy Scout Handbook (1911) tells us that an Indian Well should be several feet from the water source, twelve inches across and six inches below the water level.
Empty by bailing at least three times before considering using the water.

Solar Distillation with Bottles

Our fourth method is useful for sunnier locations such as the desert, but may work elsewhere.
Take two bottles, glass or plastic. Clear is good but if both are opaque use the darker coloured one for the “crude” water.
Partially fill one bottle with untreated water and tape the necks of the two bottles together.
Since we are in the desert we will assume you have a vehicle nearby (working or not) and it has some tape in the tool kit. (don’t go to places like the desert without a tool kit and other essentials in your vehicle!).
If you have a suitable tube, use this to connect the two bottles rather than taping them neck to neck.
Find a slope or pile of sand, Select the side that will get the most exposure to the sun (the south in the northern hemisphere).
If the bottles were taped directly together, lay the two bottles on their sides and bury the empty one in the side of the slope, leaving the one with water exposed to the sun.
Let nature take its course.
The water in the outside bottle will be heated and evaporate. Being in a closed system it will pass into the interior of the buried bottle and the drop in temperature will cause it to condense.
After a while, the buried bottle will contain drinkable water which can be collected if you take the apparatus to pieces carefully.
If you had a suitable tube, you could have run this into the collection bottle when you constructed the device.
If you paid attention in school, you will recognise this method as distillation without the need for Bunsens and heatproof glassware.
The source water you used could have been urine and the produced water would still be safe to drink.

Categories
Phillosoph

Bows in North America and Pellucidar

Reading through my file collection the other day I came across an old (1930’s?) article on how the North American Indians made their bows. I have some knowledge of English and Asian bows but this was a field I was less familiar with. One of the reasons that this article so interested me was that I am currently reading Edgar Rice Burroughs’s Pellucidar series. Many of the characters in these books use bows and there are frequent references to them constructing new weapons after escaping from capture. The Indians tended to favour flatbow designs and I have heard it suggested that such a bow is easier to construct under field conditions than the D-section English Longbow.
I will not bother to reproduce the entire article since there are some excellent websites on the topic available on the internet. Some interesting points from the original article were:
    • The best time to cut wood to make bows was February since the sap had not yet risen into the wood. This was defined in the article as “when the geese return”.
    • The wood of choice was Osage Orange. Where this was not available a number of other woods were used including ash, hickory and yew.
    • Like the English Longbow, the bowstave needed a considerable period of seasoning before any carving could be done. Bowstaves were hung high up in the tepee above the fire to gently season in the heat. Arrowshafts and other items were seasoned in the same way. The bark side of the stave was used for the "back" of the bow: the part that faces away from you.
    • Bow length varied with tribe, intended use and probably the individual. Bows of six foot or longer were known, as were bows of only a few feet. A suggested measure for a bow was the distance from the left hip to the right hand when the hand was held out horizontally to the side. This is about four feet. Some readers will recognize this as illustrated in Lofty Wiseman’s “The SAS Survival Guide” and doubtless this book and the article drew from a similar source. The bow illustrated in that publication is a flatbow.
    • Arrows were often marked with three lightning bolt carvings. Practical purpose of these may have been to reduce the tendency of the arrow to warp. It was also suggested in the article that the grooves might have encouraged blood loss.
    • Arrowheads were bound into the end of the arrowshaft. Some war arrowheads were constructed so that impact with the target would cut the bindings, leaving the head in the target even if the shaft was pulled out.
    • Hard sinew (from the neck of a buffalo) was sometimes used as an arrowhead. The stated advantage of this was that such heads had a tendency to deflect from the ribs of an animal and slip between them while flint or iron heads would stick, shatter or bend.
ERB does not give us any description of the type of bows his characters use, although David Innes in “Land of Terror” does tell us:
“A species of the genus Taxus is more or less widely distributed throughout Pellucidar; and I had discovered that its wood made the best bows. For arrows I used a straight, hollow reed that becomes very hard when dry. The tips which I inserted in the end of the reeds were of wood, fire-hardened.
A modern archer of the civilized outer world would doubtless laugh at the crude bow I made then at the edge of the Valley of the Jukans. If he uses a yew bow, the wood for it was allowed to season for three years before it was made into a bow, and then the bow was probably not used for two more years; but I could not wait five years before eating; and so I hacked the limb I had selected from the tree with my stone knife and took the bark from it and tapered it crudely from the center toward each end. I prefer a six foot, eighty pound bow for a three-foot arrow, because of the great size and formidability of some of the beasts one meets here; but of course my bow did not attain this strength immediately. Every time we had a fire, I would dry it out a little more, so that it gradually attained its full efficiency. The strings for my bows I can make from several long-fibered plants; but even the best of them do not last long, and I am constantly having to renew them.”

In “Return to Pellucidar” in the anthology book “Savage Pellucidar”:
“Fruit and nuts grew in abundance on the trees and shrubs of the little canyon; but fighting men require meat; and one must have weapons to have meat. These two had not even a stone knife between them, but the first men had no weapons originally. They had to make them.
Innes and Hodon went into the little stream and hunted around until they found a large mussel. They pried it open with a sharp stone, and each took a half shell. With these they cut two pieces of bamboo-like arborescent grass to form the hafts of two spears. Searching again they collected a number of stones: soft stones, hard stones, flat stones, stones with sharp edges; and with some of these they chipped and scraped at others until they had fashioned two spear heads and a couple of crude knives. While Hodon was finding the toughest fibers with which to bind the spear heads to the hafts, Innes made a bow and some arrows, for this was one of his favorite weapons.”
Since Pellucidar was constantly under an unmoving noon-day sun it presumably had no seasons and the trees would have always been filled with sap. Perhaps that was why the bow was so rare on Pellucidar!
The Boy Scout Handbook (1911) has a nice section on archery.